How to Restore a Rusty Heavy Duty Bench Vise (DIY Tutorial)
I have spent the last 15 years in a small-scale manufacturing environment where the difference between a profitable week and a loss often comes down to the reliability of the tools on the floor. In my shop, every piece of equipment has a dedicated maintenance log. I track runtime hours, the cost of consumables, and the exact moment a component fails. This data-driven approach has taught me that the shiny paint on a new tool in a glossy catalog rarely tells the whole story. I have seen “industrial grade” equipment fail within months, while older, neglected cast-iron staples can be brought back to a state that outperforms modern mid-range offerings.
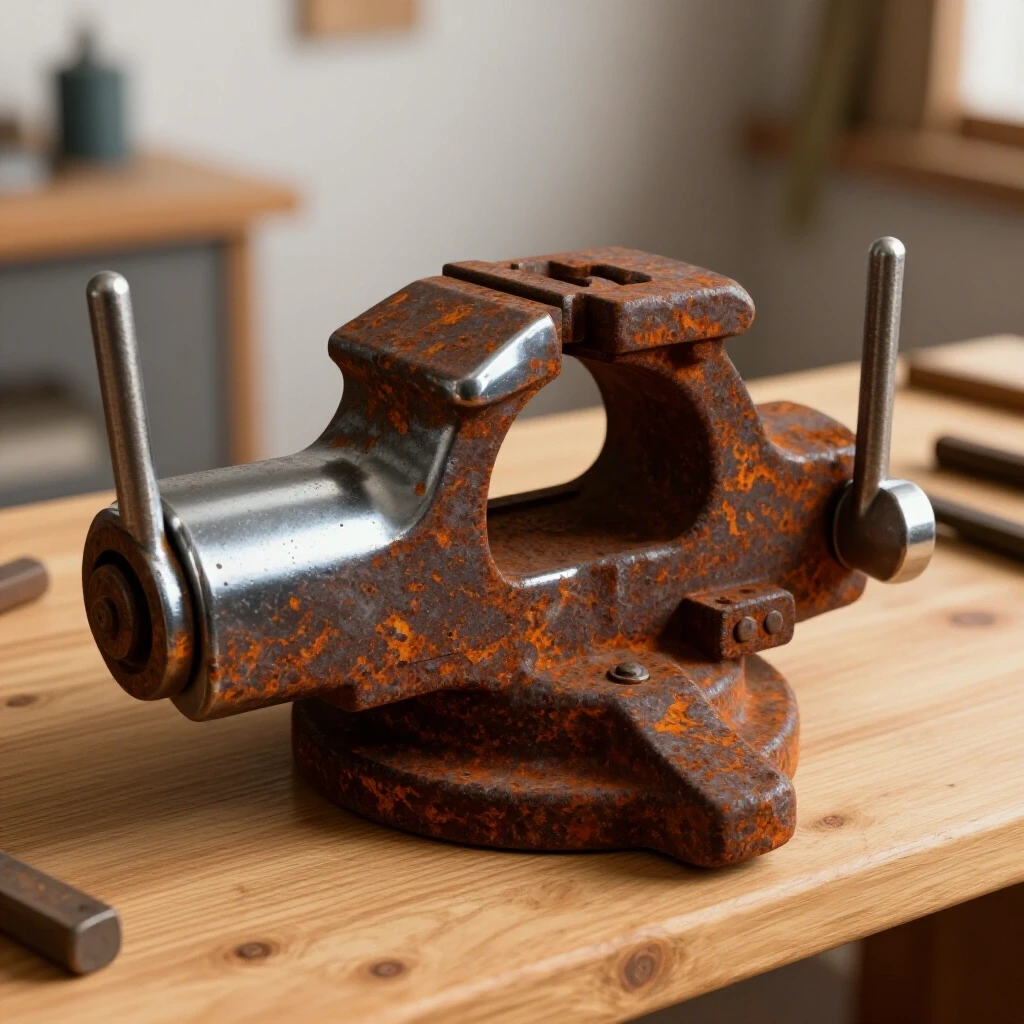
Many fabricators I talk to are tired of the marketing hype. They want to know if a tool will actually hold up when they are putting 200 foot-pounds of torque on a handle or if the casting will snap under a high-load bend. When you find a piece of heavy-duty shop equipment that has been sitting in a damp garage for a decade, it is easy to see only the surface oxidation and assume it is scrap. However, if you understand the metallurgy and the mechanical interface of these tools, you can bypass the “disposable” tool cycle. Restoring the structural integrity and smooth operation of a seized clamping tool is a fundamental skill for any shop owner looking to manage their equipment inventory effectively.
Assessing the Structural Viability of Found Metalworking Tools
Determining if a piece of workshop equipment is worth the effort of a full overhaul requires a cold, analytical look at the base material and the wear on non-replaceable parts. You must distinguish between cosmetic surface damage and terminal structural failure in the casting or the primary drive screw before investing time or resources.
I always start by looking at the material of the body. In the world of heavy-duty shop tools, you generally encounter two types of iron: grey iron and ductile iron. Grey iron is common in older or budget-friendly tools; it is excellent for vibration dampening but can be brittle. Ductile iron, often found in high-end professional brands, has a higher tensile strength and can withstand more shock without cracking. If I see a hairline fracture in a grey iron casting, I usually walk away. It is a sign of past abuse that no amount of cleaning will fix.
Next, I inspect the lead screw. This is the heart of the tool’s mechanical advantage. I look for “rolled” threads versus “cut” threads. Rolled threads are generally stronger and smoother. I also check for “backlash,” which is the amount of free movement in the handle before the jaws actually start to move. A little is normal, but more than a quarter-turn usually indicates a worn-out nut or a stripped screw.
- Check for Cracks: Use a wire brush to clear the base and the “anvil” portion. Look for spider-web patterns that indicate metal fatigue.
- Evaluate the Screw: Fully extend the sliding jaw to inspect the entire length of the Acme thread for flattened peaks or chips.
- Inspect the Ways: The sliding surfaces should be flat. Heavy gouging here will lead to jerky movement and poor clamping alignment.
- Test the Swivel Base: If equipped, ensure the locking nuts aren’t sheared off inside the casting.
| Metric | Acceptable Range | Failure Point |
|---|---|---|
| Screw Backlash | < 15 degrees | > 45 degrees |
| Jaw Parallelism | < 0.005″ | > 0.020″ |
| Casting Integrity | Surface pitting only | Visible hairline cracks |
| Slide Clearance | 0.002″ – 0.010″ | > 0.030″ (Wobble) |
Systematic Disassembly and Seized Component Recovery
Taking apart a tool that has been fused by years of oxidation requires patience and the right chemical intervention rather than brute force. Forcing a stuck fastener or a seized lead screw can lead to stripped threads or broken castings, which significantly increases the total cost of ownership and repair.
In my experience, the biggest mistake people make is reaching for a six-foot cheater pipe the moment something doesn’t move. I have a log entry from 2012 where I snapped a Grade 8 bolt on a vintage press because I was in a hurry. Now, I use a 50/50 mix of automatic transmission fluid (ATF) and acetone as a penetrating oil. It outperforms almost every commercial spray on the market for deep-seated rust.
When the lead screw is seized, I submerge the entire unit in a plastic tub of this mixture for 48 hours. If it still won’t budge, I use a propane torch to apply localized heat to the nut area, not the screw. The goal is to expand the female threads slightly to break the bond of the iron oxide.
- Remove the Jaw Inserts: These are often held by flat-head screws that are severely rusted. Use an impact driver (the kind you hit with a hammer) to shock them loose.
- Extract the Main Screw: Remove the cotter pin or retaining ring at the back of the slide. If the screw is stuck, use the heat-and-quench cycle.
- Separate the Slide: Once the screw is out, the sliding jaw should move freely. If it doesn’t, there is likely rust buildup between the ways.
- Disassemble the Swivel: Take apart the base to inspect the serrated plates that provide the grip when the base is locked.
Mechanical Oxidation Removal and Surface Refining
Stripping years of rust and old, flaky paint back to bare metal is essential for a smooth mechanical interface and a long-lasting protective finish. This process involves a combination of manual abrasives and chemical converters to ensure that no active corrosion is trapped under the new coating.
I avoid sandblasting for precision shop tools. The grit can get into the machined ways and act as an abrasive for the rest of the tool’s life. Instead, I rely on wire wheels and abrasive pads. For the main body, a knotted wire wheel on a 4.5-inch angle grinder is the most efficient. It removes the scale without eating into the cast iron.
For the machined surfaces—the parts where metal slides against metal—I am much more careful. I use a fine-grit sanding block (320 to 400 grit) with a bit of light oil. This removes the rust while keeping the surface flat. If you use a power tool on the ways, you risk creating “low spots” that will make the tool feel sloppy during use.
- Body Cleaning: Use a knotted wire wheel for heavy scale and a crimped wire wheel for hard-to-reach corners.
- Machined Surfaces: Use Scotch-Brite pads or high-grit wet/dry sandpaper. Move in a linear motion to maintain the “grain” of the metal.
- Thread Cleaning: A small brass wire brush is perfect for cleaning the valleys of the Acme threads without dulling the peaks.
- Chemical Soaking: For small parts like pins and washers, an overnight soak in a pH-neutral rust remover like Evapo-Rust saves hours of manual scrubbing.
Evaluating the Cost of Restoration Versus New Equipment
When managing a shop budget, you have to decide if the hours spent on a restoration project provide a better return than simply purchasing a new, modern equivalent. This decision should be based on the “tool lifespan” and the “duty cycle” requirements of your specific fabrication tasks.
I recently compared a 1970s American-made 6-inch vise I restored to a mid-range model from a popular tool catalog. The old vise cost me $40 at a yard sale and $20 in materials. The new one was $280. After 200 hours of heavy use, the new model’s swivel base began to slip because the serrations were poorly machined. The restored vise, with its superior casting density and deeper serrations, remained rock solid.
| Factor | Restored Vintage (Heavy Duty) | New Mid-Range (Budget Brand) |
|---|---|---|
| Initial Cost | $20 – $60 | $150 – $300 |
| Restoration/Setup Time | 8 – 12 Hours | 0.5 Hours |
| Casting Material | High-Density Grey/Ductile Iron | Often Thinner Cast Iron |
| Expected Lifespan | 30+ Years | 5 – 10 Years |
| Parts Availability | Generic/Custom Fabricated | Manufacturer Dependent |
Precision Reassembly and Friction Management Strategies
Putting the tool back together is more than just reversing the disassembly steps; it is about calibrating the fit and choosing lubricants that won’t attract shop dust or break down under high pressure. Proper lubrication is the single most important factor in preventing future “mid-project tool failure.”
In my maintenance logs, I have tracked different types of grease over three-year intervals. I found that standard lithium grease is too thin for the heavy loads seen in clamping tools. It squeezes out of the threads, leaving them dry. I now use a high-pressure molybdenum disulfide grease. It contains solid lubricants that stay in the pores of the metal even when the base oil is under extreme pressure.
For the sliding ways, I prefer a dry-film lubricant or a very light coat of “way oil” used in lathes. Thick grease on the ways tends to catch metal shavings and grinding dust, turning into a “lapping compound” that wears down the precision surfaces every time you open or close the tool.
- Dry Fit: Assemble the slide into the body without the screw first. It should move smoothly with no side-to-side wobble.
- Lubricate the Nut: Apply a generous amount of moly grease to the internal threads of the nut and the thrust washer behind the handle.
- Align the Jaws: Install the jaw inserts but leave the screws slightly loose. Close the tool tightly on a flat piece of steel to align the jaws, then tighten the screws.
- Seal the Casting: Apply a high-quality machinery enamel or a clear coat to the non-machined surfaces to prevent flash rusting.
Establishing a Long-Term Maintenance Schedule for Shop Tools
Once a tool is restored, its longevity depends on a consistent preventative maintenance schedule. Tracking these intervals in a workshop journal ensures that the equipment remains a reliable asset rather than a liability that fails during a critical job.
I use a simple “10/50/200” rule for my heavy-duty workshop equipment. Every 10 hours of use, I wipe down the ways. Every 50 hours, I check the jaw tightness and look for debris in the screw. Every 200 hours, I do a partial teardown to replace the grease and inspect for wear patterns. This systematic approach has kept my primary fabrication tools in “like-new” condition for over a decade.
- Daily: Wipe off metal chips and moisture after use.
- Monthly: Apply a light coat of corrosion inhibitor (like fluid film) to the exposed machined surfaces.
- Annually: Remove the main screw, clean out the old grease, and inspect the thrust washers for thinning.
- Record Keeping: Note any changes in the “feel” of the tool in your maintenance log. Increased resistance usually means there is a buildup of grit in the internal nut.
Why Cheap Material Specifications Lead to Unexpected Tool Failure
Understanding the technical specifications of tool steel and iron castings is vital when you are planning your next equipment purchase. Manufacturers often hide lower-quality materials behind “powder-coated” finishes, but the spec sheet—if you know how to read it—will tell the truth.
In welder buying guides, we often talk about “duty cycle,” but in mechanical tools, we should talk about “yield strength.” Yield strength is the point at which a material will permanently deform. Cheap tools use low-grade cast iron with a yield strength of around 20,000 psi. A high-quality, heavy-duty tool will use ductile iron with a yield strength of 45,000 to 60,000 psi. When you are using a tool to bend a 1/2-inch steel plate, that difference is what prevents the tool from snapping in half.
- Ductile Iron (60-40-18): The numbers represent 60,000 psi tensile strength, 40,000 psi yield strength, and 18% elongation. This is the gold standard for shop tools.
- Acme Thread Profile: Unlike V-shaped threads on a bolt, Acme threads are trapezoidal. This shape is designed to carry heavy loads and resist wear over thousands of cycles.
- Hardened Jaw Inserts: Look for jaws rated at 45-55 HRC (Rockwell Hardness Scale). Anything softer will dull quickly when gripping hardened fasteners or rough scale.
Managing Warranties and Equipment Documentation
Even the best-maintained tools can have defects, and keeping a “warranty recovery system” is part of being a professional shop owner. I keep a digital folder for every major tool purchase, containing the original receipt, the manufacturer’s spec sheet, and my own maintenance logs.
If a casting fails on a tool that is supposedly “lifetime guaranteed,” having a log that proves you lubricated it every 200 hours makes the warranty claim much easier. Most manufacturers look for any excuse to claim “user abuse” or “lack of maintenance.” Your data is your defense.
- Digital Backups: Scan all receipts. Thermal paper fades over time, and a blank receipt is useless for a warranty claim.
- Part Numbers: Keep a list of common wear parts (like jaw screws or handle pins) so you can order them immediately if they break.
- Manufacturer Contacts: Save the direct line to the technical support department, not just the general customer service number.
- Performance Benchmarks: Record the tool’s performance when new (e.g., “requires 10 lbs of force to close”). This helps you identify gradual wear that you might otherwise miss.
Frequently Asked Questions
How do I know if the rust on my tool is too deep to fix? If you see “exfoliating” rust—where the metal is coming off in thick, potato-chip-like flakes—the structural integrity may be compromised. Use a hammer to lightly tap the casting. A healthy casting will “ring,” while a cracked or severely corroded one will produce a dull “thud.” If pitting on the machined ways is deeper than 0.015″, it will be difficult to get the tool to slide smoothly without significant machining.
Is it safe to use a torch to loosen a seized lead screw? Yes, but you must be careful. Cast iron can crack if heated or cooled too rapidly. Use a propane or MAPP gas torch to apply heat evenly around the area of the nut. Do not get the metal “cherry red.” You only need to reach about 300-400 degrees Fahrenheit to break the bond of most oxidation and old grease. Let it cool naturally; never quench it in water.
What is the best way to prevent rust from returning after a restoration? For the painted body, a high-quality machinery enamel is best. For the bare metal surfaces, I recommend a “dry” rust preventative. Products like Boeshield T-9 or specialized paste waxes work well because they leave a protective film that isn’t sticky. This prevents shop dust from clinging to the surfaces.
Can I replace the jaws if the original manufacturer is out of business? Yes. Most heavy-duty tools use standard spacing for jaw inserts. If you cannot find an exact match, you can buy “soft” steel blanks and drill/tap them to match your tool’s hole pattern. This is often a better solution than hunting for rare vintage parts.
Why does my handle feel “springy” when I tighten the tool? This is usually a sign of “flex” in either the casting or the lead screw. If the base isn’t bolted down to a heavy, flat surface, the base plate itself might be bending. Ensure you are using Grade 5 or Grade 8 bolts to mount the tool to a bench that is at least 2 inches thick.
How often should I completely disassemble my bench tools? For a tool used daily in a fabrication environment, a full teardown every two years is sufficient. If you work in a high-moisture environment or do a lot of grinding nearby, you should move that to once a year to prevent grit from scoring the internal nut.
What is the difference between a “utility” vise and a “heavy-duty” one? It comes down to the material and the weight. A utility model is often made of thinner grey iron and weighs 20-30 lbs. A true heavy-duty model of the same size will weigh 50-70 lbs and be made of ductile iron. The extra mass is essential for absorbing the energy of hammer blows or high-torque pulls.
Do I really need to use “moly” grease? While any grease is better than none, molybdenum disulfide grease is specifically designed for high-pressure, low-speed applications. In a clamping tool, the threads aren’t spinning fast, but they are under immense pressure. Moly grease prevents the “galling” (cold welding) of the threads under these loads.
Is Evapo-Rust better than vinegar for removing oxidation? Yes. While vinegar (acetic acid) works, it is an acid and will continue to eat the base metal if not neutralized perfectly. Evapo-Rust uses a process called chelation to only target the iron oxide, leaving the healthy metal untouched. It is safer for the tool and easier to dispose of.
What should I do if the swivel base keeps moving even when locked? This is usually caused by oil or grease getting onto the serrated locking plates. Disassemble the base and clean both the serrations and the locking pads with brake cleaner. If the serrations are worn flat, you can sometimes sharpen them carefully with a small triangular file.
(This article was written by one of our staff writers, David Reynolds. Visit our Meet the Team page to learn more about the author and their expertise.)