Belt Drive vs Direct Drive Air Compressors for Shop (Review)
I remember standing over a 4130 chromoly frame, my TIG torch in hand, watching a beautiful bead suddenly turn into a porous, grey mess. It was one of those moments that makes you want to throw your helmet across the shop. After three hours of checking my shielding gas, cleaning my filler rods, and swapping out regulators, I realized the issue wasn’t at the weld puddle. It was thirty feet away, coming from my air compressor. The unit was cycling so hot that it was pushing moisture right through my desiccants. That day taught me that your air source is more than just a tank; it is a critical component of your fabrication precision.
In my 18 years as a millwright and diagnostic specialist, I have found that most shop owners view their air supply as a “set it and forget it” utility. However, when you are chasing tool chatter on a lathe or trying to eliminate micro-porosity in a critical weld, the mechanical design of your compressor becomes a primary variable. Choosing between a system that uses a belt-and-pulley interface or one that couples the motor directly to the pump changes the vibration profile, heat output, and air quality of your entire workspace.
Analyzing Power Transmission Methods in Workshop Air Systems
This section explores how different mechanical configurations translate electrical energy into compressed air. We examine the physics of pulley-driven systems versus those where the pump and motor share a single shaft, focusing on how these designs impact the daily workflow of a metalworker.
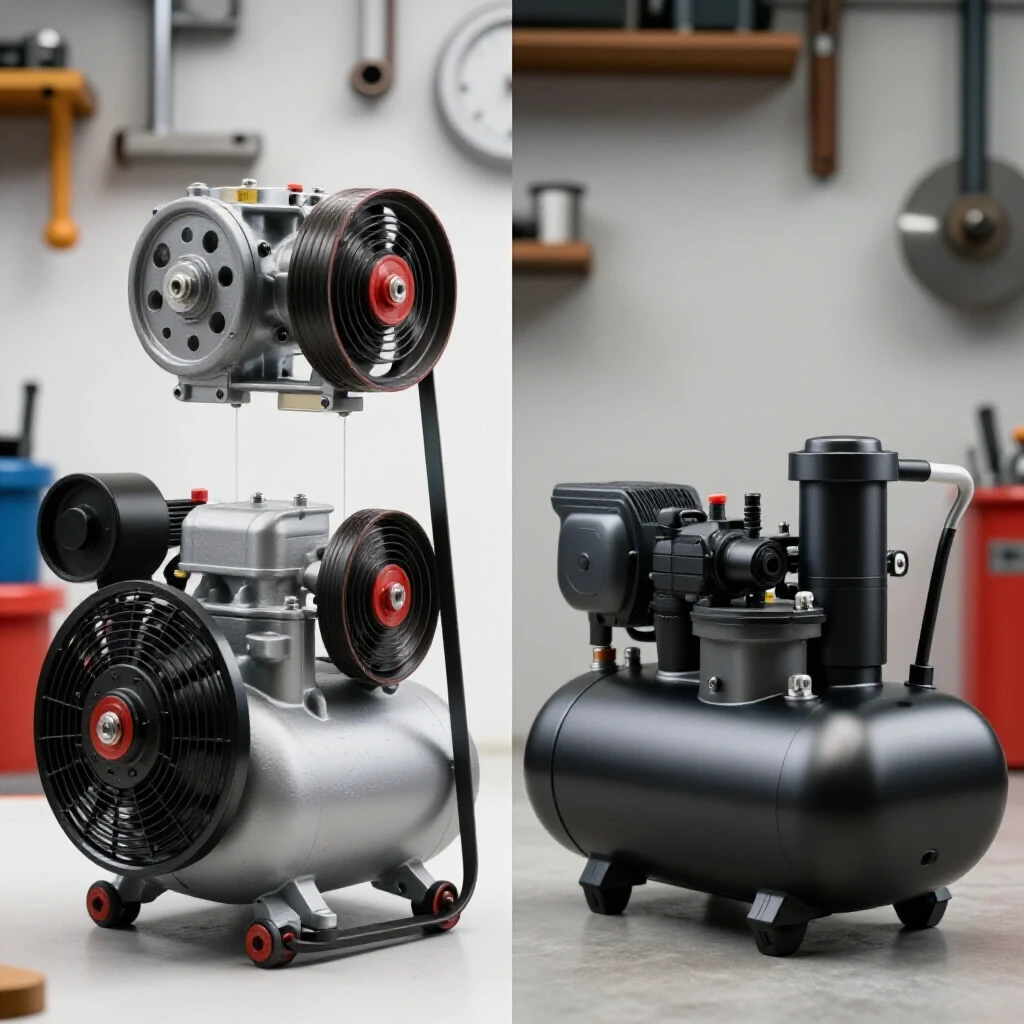
The most common setup in mid-sized shops involves a motor connected to a pump via a rubber V-belt. This configuration allows the pump to spin at a significantly lower speed than the motor. While a standard motor might run at 3,450 RPM, the pulley ratios can drop the pump speed to 800 or 1,200 RPM. This reduction is vital for heat management. Lower speeds mean less friction and lower discharge temperatures, which is a key factor when you are trying to keep air lines dry for plasma cutting or painting.
In contrast, systems that couple the motor directly to the pump operate at the full speed of the motor. These units are often more compact and eliminate the need for belt adjustments. However, the high-speed operation creates a different set of challenges for the fabricator. The increased RPM leads to higher frequency vibrations and significantly more heat. If you are diagnosing a finish issue on a precision-ground part, the high-frequency hum of a direct-coupled unit can actually transmit through the floor and influence your machine’s harmonics.
Air Delivery Performance and Duty Cycle Comparison
| Feature | Pulley-Driven (Belt) | Shaft-Coupled (Direct) |
|---|---|---|
| Pump RPM | 700 – 1,300 RPM | 3,450 RPM |
| Heat Generation | Moderate to Low | High |
| Vibration Frequency | Low Frequency (Thumping) | High Frequency (Buzzing) |
| Maintenance Needs | Belt Tension / Alignment | Bearing Lubrication Only |
| Typical Duty Cycle | 60% – 100% | 25% – 50% |
Why Machining Chatter and Surface Finish Depend on Compressor Harmonics
Vibration analysis is the process of measuring the frequency and amplitude of mechanical movement to identify instability. In a fabrication environment, these vibrations can travel through the slab or air lines, causing tool chatter—a phenomenon where the cutting tool bounces off the workpiece, leaving a wavy finish.
When I was troubleshooting a CNC mill in a small aerospace shop, we couldn’t figure out why the finish on aluminum parts looked like a washboard. We checked the spindle backlash and the gib tightness, but everything was within the 0.002-inch tolerance. It wasn’t until I used a smartphone vibration spectrum analyzer that I saw a massive spike at 60Hz. It turned out the direct-coupled compressor was bolted to the same section of the floor as the mill.
The high RPM of the direct-drive motor was creating a resonant harmonic. Because the motor and pump were one unit, there was no belt to act as a dampener. In a belt-driven system, the rubber belt serves as a mechanical isolator, absorbing much of the motor’s vibration before it reaches the pump or the shop floor. If your work involves high-precision lathes or mills, the lower-frequency “thumping” of a belt-drive unit is much easier to isolate with rubber mounting pads than the high-speed “buzz” of a direct-drive unit.
Steps for Isolating Compressor Vibration
- Baseline Measurement: Use a digital vibration meter or an app to record the frequency while the compressor is off.
- Active Testing: Start the compressor and measure the vibration at the base of your most sensitive machine tool.
- Isolation Check: Place the compressor on 1-inch thick ribbed neoprene pads. If the vibration at the tool drops by more than 40%, the transmission is through the floor.
- Damping: If the vibration persists, install a flexible braided hose between the compressor tank and the shop’s hard piping to break the acoustic path.
Troubleshooting Weld Porosity and Moisture Contamination
Welding porosity refers to the small holes or “voids” trapped in a weld bead, usually caused by gas contamination. In many shops, the primary contaminant is moisture or oil carryover from the air system, especially during processes like air-arc gouging or when using pneumatic tools near a weld prep area.
The relationship between your compressor’s drive type and weld quality comes down to the “Dew Point.” Direct-drive compressors run hot. When air is compressed quickly at high RPMs, it generates significant thermal energy. Hot air can hold much more water vapor than cool air. As that air travels down your lines and cools, the water drops out of suspension, leading to “slugs” of water in your tools or, worse, your weld puddle.
In my experience, belt-driven units are superior for shops where air quality is a priority. Because the pump turns slower, the air leaves the pump at a lower temperature. This allows your aftercooler and moisture traps to work more efficiently. If you are seeing tiny pinholes in your TIG welds, check your air lines. If you find liquid water, your compressor might be running too hot for your filtration system to handle.
Air Quality Diagnostic Checklist
- Discharge Temperature: Measure the temperature at the pump head. It should stay under 250°F.
- Drain Frequency: Check the tank drain. If you get more than a cup of water after two hours of use, your air is too hot.
- Filter Saturation: Inspect the internal elements of your moisture separators. If they are oily, your pump seals may be failing due to excessive heat.
- Flow Rate Consistency: Use a flow meter to ensure your plasma cutter is getting a steady 6.0 SCFM at 75 PSI without pressure drops that cause arc sputtering.
Mechanical Alignment and Maintenance of Pulley Systems
Mechanical alignment is the process of ensuring that two or more rotating shafts are perfectly parallel or co-linear. In a belt-driven compressor, misalignment of the pulleys leads to premature belt wear, increased noise, and wasted electrical energy.
Many fabricators ignore their belts until they snap. However, a slipping or misaligned belt can cause subtle issues, like a slow recovery time that leaves your grinders starving for air. I use a simple straightedge or a laser alignment tool to check that the motor pulley and the pump flywheel are in the same plane. A deviation of even 1/16th of an inch can increase the load on the motor bearings.
Direct-drive units are often marketed as “maintenance-free” because they lack belts. While true, this is a bit of a misnomer. In these units, the pump bearings are often subjected to more heat and higher speeds. When they fail, you cannot simply swap a belt; you often have to replace the entire motor-pump assembly. For a fabricator who values repairability, the belt-drive system is much more “diagnostic-friendly.” You can see the wear, hear the slip, and fix it with a $20 part.
Belt Tension and Alignment Parameters
- Deflection: A properly tensioned belt should have about 1/2 inch of play for every foot of distance between the pulley centers.
- Pulley Offset: Use a dial indicator to ensure the flywheel runout is less than 0.005 inches.
- Temperature Rise: After 15 minutes of running, the belt should be warm to the touch but not hot enough to smell like burning rubber.
Electrical Diagnostics: Voltage Drops and Startup Loads
Electrical troubleshooting in a shop involves measuring voltage, current (Amps), and resistance (Ohms) to ensure machinery is operating within its design limits. Air compressors are often the largest single-phase loads in a small shop, making them a common source of electrical “gremlins.”
Direct-drive compressors typically have a higher “inrush current” than belt-driven units. Because the motor is directly connected to the mass of the pump, it takes a massive gulp of electricity to get everything moving from a dead stop. If your shop lights flicker or your CNC controller resets when the compressor kicks on, you are likely experiencing a voltage drop.
Belt-driven units often use a “centrifugal unloader” or a heavy flywheel that helps the motor get up to speed before it takes on the full load of compression. This makes them more “electrically friendly” for shops with limited power. When I troubleshoot startup issues, I always look at the back-EMF (Electromotive Force). If the motor is struggling to overcome the compression stroke, the resistance in the windings can cause the internal thermal protector to trip.
Electrical Reading Benchmarks
- Idle Voltage: Should be between 230V and 245V for a standard 240V circuit.
- Startup Sag: Voltage should not drop below 208V during the first second of the motor turning.
- Running Amperage: Use a clamp-on ammeter. The reading should be at or below the “Full Load Amps” (FLA) listed on the motor nameplate.
- Capacitor Health: A bulging start capacitor is a sign that the motor is struggling with the mechanical load of the pump.
Case Study: Resolving Tool Chatter in a Precision Grind Shop
I was called into a shop that specialized in sharpening industrial blades. They had recently installed a new direct-drive compressor to save space. Within a week, their surface grinders were producing “chatter marks” that looked like fine threads. The operator thought the spindle bearings were shot.
We started our systematic isolation. First, we ran the grinder with the compressor off; the finish was perfect. This told us the issue was external. Next, we looked at the air lines. The high-speed pulses from the direct-drive pump were creating pressure waves in the air lines that were vibrating the pneumatic guard on the grinder.
The solution wasn’t a new grinder. We installed a 50-foot “surge hose” and moved the compressor to a separate pad outside the main shop floor. We also added a heavy-duty regulator to dampen the pressure pulses. This case highlighted how the high-frequency nature of direct-coupled units can interfere with precision work in ways a slower belt-driven unit wouldn’t.
Master Checklist for Compressor Diagnostics
To keep your shop running without unexpected downtime, follow this systematic diagnostic routine. Treating your air supply like a precision tool will prevent many of the “mystery” defects that plague metal fabrication.
- Weekly Visual Inspection: Check for oil leaks around the pump seals and look for fraying on the V-belts.
- Monthly Thermal Scan: Use an infrared thermometer to check the temperature of the motor bearings and the discharge pipe. A sudden increase in temperature indicates internal wear.
- Quarterly Bolt Torque: Check the mounting bolts. Vibration can loosen the feet, leading to structural misalignment and increased noise.
- Semi-Annual Air Quality Test: Spray a burst of air against a clean white cloth. If you see yellow staining (oil) or damp spots (water), your filtration is failing.
- Annual Amp Draw Test: Record the running amps and compare them to the previous year. An increase in amps usually means the pump is becoming harder to turn due to internal friction.
Final Thoughts on Shop Air Systems
Choosing the right power transmission for your air system isn’t just about the initial cost. For the fabricator, it is about controlling the variables of heat, vibration, and air consistency. Belt-driven units offer the longevity and low-vibration performance required for precision machining and high-quality welding. Direct-drive units offer compactness and simplicity but require more aggressive moisture management and vibration isolation in a professional shop environment.
When you approach your air system with the same diagnostic rigor you apply to a complex weldment or a precision-machined part, you eliminate a massive source of frustration. The goal is a shop where the air is dry, the floor is still, and your tools perform exactly as they were designed to.
Frequently Asked Questions
Why does my compressor cause my TIG welder to arc wander? This is often caused by high-frequency interference or voltage drops. If your compressor is on the same circuit or even the same sub-panel as your welder, the startup surge can create an electrical “noise” that disrupts the welder’s high-frequency start circuit. Additionally, if the compressor is a direct-drive unit, the high-speed motor can create electromagnetic interference (EMI) if it isn’t properly grounded.
How can I tell if my tool chatter is coming from the air compressor? The simplest test is the “Off-Power Test.” Run your machine tool through a cycle while the air compressor is physically unplugged and the air tank is full. If the chatter disappears, the vibration is being transmitted through the floor or the air lines. If the chatter remains, the issue is likely within the machine tool itself, such as spindle backlash or dull tooling.
What is the best way to reduce moisture for plasma cutting? For plasma cutting, you need dry air to prevent nozzle wear and dross. A belt-driven compressor is a better starting point because it produces cooler air. Beyond that, you should have at least 25 feet of metal piping (like copper or black iron) between the compressor and your first filter. This allows the air to cool and the water to condense so the filter can actually catch it.
Is a belt-drive compressor always quieter than a direct-drive? Generally, yes. Because belt-drive pumps spin at much lower RPMs (often 1,000 RPM vs 3,450 RPM), the “pitch” of the sound is much lower and less intrusive. Direct-drive units have a high-pitched whine that can be more fatiguing in a small shop. However, a poorly maintained belt-drive with a loose belt can produce a loud squealing noise.
How often should I change the oil in a shop compressor? For most fabrication shops, I recommend changing the oil every 500 hours of run time or at least once a year. Use a high-quality non-detergent compressor oil. Standard automotive oil has detergents that will cause the moisture in the pump to emulsify, turning your oil into a “milky” mess that doesn’t lubricate well.
Can I convert a direct-drive compressor to a belt-drive? No. The motor and pump in a direct-drive unit are designed as a single integrated assembly. The motor shaft is usually the same shaft that drives the piston. A belt-drive unit requires a separate motor and a pump with a flywheel, which are mounted independently on a baseplate.
What causes a compressor belt to keep flipping over? This is a classic sign of pulley misalignment. If the motor pulley and the pump flywheel are not perfectly parallel, the belt will try to “climb” the side of the groove and eventually flip over or jump off. Use a straightedge to ensure the faces of the pulleys are aligned within 1/32nd of an inch.
Does the tank size matter for vibration control? The tank acts as a massive dampener. A larger, heavier tank has more “mass” and is harder to vibrate than a small, lightweight tank. If you have a high-vibration direct-drive unit, mounting it on a larger tank or bolting that tank to a concrete floor with vibration isolators will significantly reduce the harmonics felt in the rest of the shop.
Why is my compressor taking longer to reach pressure than it used to? First, check for air leaks in your shop lines using soapy water. If there are no leaks, the issue is likely internal. In belt-driven units, the belt might be slipping under high pressure. In both types, it could be worn piston rings or a leaking valve plate. Measure the time it takes to go from 90 PSI to 120 PSI; if this time increases over a month, your pump is losing efficiency.
What electrical protection do I need for a 5HP shop compressor? A 5HP motor usually requires a 30-amp or 40-amp circuit. You should use a dedicated motor-rated circuit breaker and a magnetic starter. The magnetic starter includes “overload heaters” that will trip and protect the motor windings if the compressor stalls or if there is a significant voltage drop that causes the amperage to spike.
(This article was written by one of our staff writers, Paul Whitaker. Visit our Meet the Team page to learn more about the author and their expertise.)