How to Flatten Warped Sheet Metal Panels at Home (DIY Guide)
I have spent nearly two decades standing over workbenches and heavy machinery, chasing the kind of microscopic errors that drive most people to frustration. There is a specific kind of sinking feeling you get when a piece of 16-gauge steel, intended to be a precision cover or a clean fascia, suddenly develops a “memory” of its own. It buckles, it bows, or it develops that dreaded “oil can” pop that refuses to sit flush. In my 18 years as a diagnostic specialist, I have learned that metal is not a static object; it is a collection of internal stresses and thermal histories. Whether I am diagnosing an intermittent electrical fault in a CNC cabinet or trying to figure out why a spindle is throwing 0.005 inches of runout, the methodology remains the same. You have to stop guessing and start measuring.
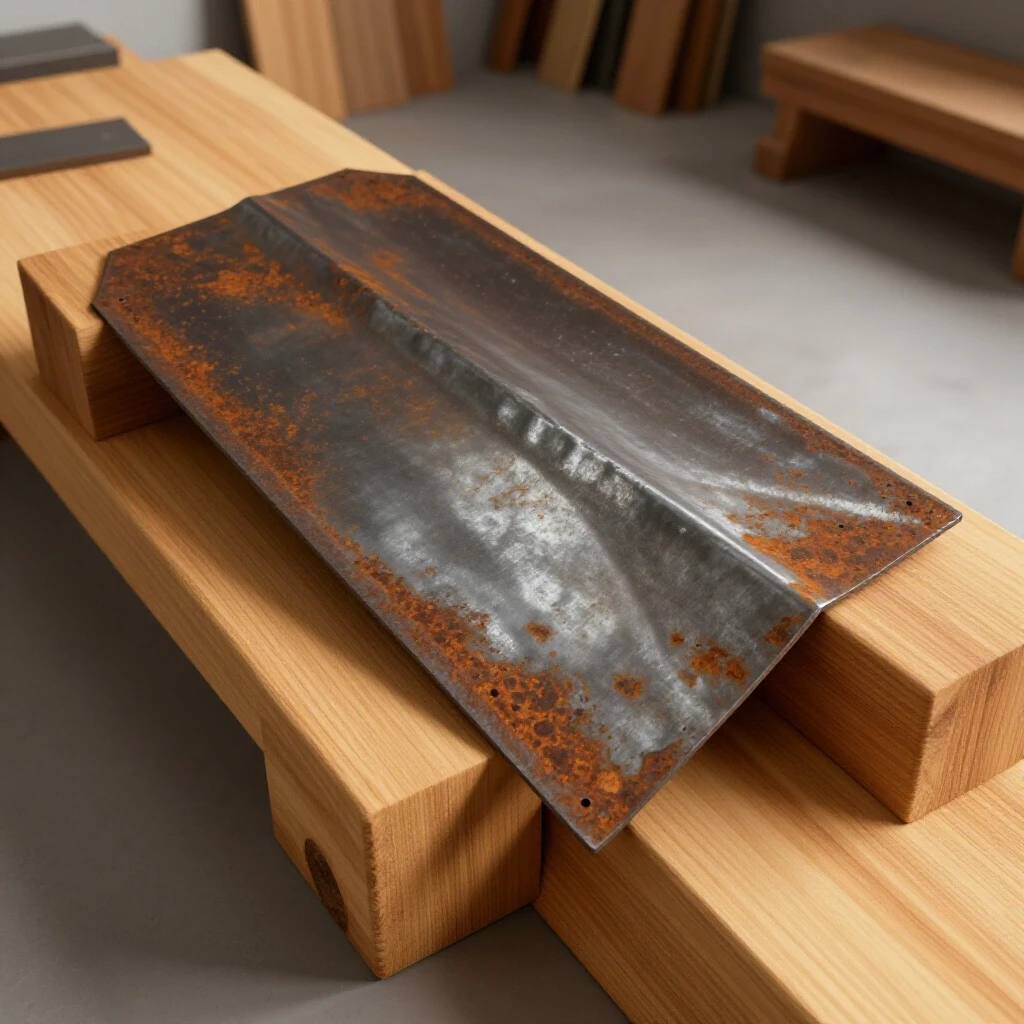
When a thin panel loses its planar integrity, most fabricators reach for a hammer and start swinging. That is usually where the real damage begins. My background in millwrighting and industrial repair has taught me that force without direction is just noise. To bring a distorted sheet back to a true flat state, you must understand the metallurgical “why” behind the “what.” This guide focuses on the systematic correction of distortions in thin stock using bench tools and patient, iterative logic. We are going to look at how to identify the root cause of the bow and how to move that material back into alignment without making the problem permanent.
Identifying the Root Cause of Material Distortion
Identifying the specific nature of a surface irregularity involves locating the areas of internal tension and compression within the metal. By using a flat reference surface and light pressure, a fabricator can determine if the sheet is “long” in the center or “tight” at the edges. This diagnostic phase prevents the common mistake of working the wrong area.
Before you pick up a tool, you have to map the problem. In my early days troubleshooting vibration in high-speed lathes, I learned that you cannot fix a harmonic issue if you do not know where the resonance starts. Sheet metal is the same. A warp is simply an area where the metal has been stretched more than the surrounding material. If the center of your sheet is bulging, that metal is “long.” If the edges are wavy, the perimeter is “long.”
I use a simple diagnostic framework to categorize the distortion:
- The “Oil Can” Effect: This is a localized bulge. When you push it down, it pops out the other side. This indicates the center has more surface area than the frame can contain.
- The Simple Bow: The entire sheet follows a single curve. This is often caused by the manufacturing process or how the sheet was stored.
- The Twist: This is a complex distortion where opposite corners rise. This usually points to diagonal stress, often introduced during shearing or improper handling.
To see these clearly, you need a reference. I suggest a heavy steel welding table or a thick piece of MDF if you are working at home. Lay the sheet down and tap the corners. If it rattles, it’s not flat. I use a standard 24-inch machinist’s straightedge to find the gaps. If I can slide a 0.005-inch feeler gauge under the straightedge, I know exactly where my work needs to begin.
The Physics of Manual Leveling and Stress Relief
Manual correction relies on the principle of plastic deformation to counteract existing internal stresses. By strategically stretching the “tight” areas of a panel, a fabricator can equalize the tension across the entire surface. Understanding the transition from elastic to plastic states is essential for achieving a permanent, stable repair without overworking the material.
In metalworking, we deal with two types of “memory”: elastic and plastic. Elastic is when the metal springs back. Plastic is when you have moved it far enough that it stays put. When a sheet is warped, it is trapped in a state of uneven plastic deformation. My goal is to use a metalworking diagnostic guide approach to find the “short” sections and stretch them to match the “long” sections.
Think of it like a drumhead. If one side is tighter than the other, the skin ripples. You don’t fix the ripple by hitting the ripple; you fix it by adjusting the tension around it. In fabrication fixes, we often find that the area that looks “wrong” is actually the only part that is correct—it is just being pushed around by the stressed metal next to it.
| Distortion Type | Root Cause | Primary Fix Strategy |
|---|---|---|
| Center Bulge | Center is “long” (stretched) | Stretch the edges to match the center |
| Wavy Edges | Edges are “long” (stretched) | Stretch the center to match the edges |
| Diagonal Twist | Opposing stresses | Work the “short” diagonal to equalize tension |
| Localized Dent | Impact or point stress | Planishing the high spot into the surrounding area |
Essential Bench Tools for Precision Flatness
Correcting thin-gauge stock requires tools that distribute force evenly rather than creating new localized points of stress. Specialized mallets, wooden cauls, and flat reference plates allow for incremental adjustments. These tools are selected to minimize surface marring while providing enough impact to induce the necessary plastic deformation in the material.
You do not need a 50-ton press to fix a 2mm sheet. In fact, heavy machinery often hides the feedback you need. I rely on a “soft touch” kit that allows me to feel the metal’s response. This is similar to how I diagnose tool chatter solutions; you look for the smallest change in feedback to know if you are moving in the right direction.
- Dead-Blow or Rubber Mallet: Avoid steel hammers. A steel hammer on a steel sheet will thin the metal, stretching it further and making your warp worse. A 16-ounce rubber or plastic-faced mallet is my go-to.
- Wooden Cauls: These are simply flat blocks of hardwood (like oak or maple). You place the caul on the metal and strike the caul, not the metal. This spreads the force over a 4×4 inch area instead of a 1-inch hammer face.
- The Reference Plane: You cannot make something flat against a surface that isn’t flat. A thick remnants of a granite countertop or a heavy steel plate is perfect.
- C-Clamps and Sandbags: Sometimes you need to hold one area dead still while you work another. A heavy leather sandbag is excellent for absorbing shock when you are trying to “sink” a high spot.
Systematic Cold Working and Edge Stretching
Cold working involves the mechanical manipulation of metal at room temperature to alter its shape and internal tension. The most effective method for flattening a panel is to work from the edges inward, gradually stretching the perimeter to accommodate a center bulge. This process must be monitored closely to avoid work-hardening, which increases brittleness.
When I am troubleshooting a mechanical system, I never change five variables at once. I change one, test, and observe. You must apply this same mechanical troubleshooting steps logic to your sheet metal. If you have a center bulge (an oil can), the center is too big for the edges. You have two choices: shrink the center or stretch the edges. At home, stretching the edges is often more predictable.
Start at the perimeter. Using your mallet and a wooden caul, lightly tap the edges of the sheet against your flat reference surface. You are trying to microscopically thin the edges. As the edges get thinner, they get longer. As they get longer, they pull the center bulge flat.
- The 10% Rule: Never try to fix the warp in one pass. Aim to remove 10% of the distortion, then flip the sheet.
- The Spiral Pattern: Work from the outside in, moving in a slow spiral.
- Observation: Every 20-30 hits, check the sheet with your straightedge. If the metal starts to feel “stiff” or bouncy, stop. You are work-hardening the material.
I remember a project involving a large stainless steel panel for a laboratory. The client had tried to “beat” a warp out of it, and by the time I arrived, the metal was so work-hardened it was as brittle as glass. I had to explain that metal has a “grain” and a limit. Once you push it too far, the molecular structure changes, and your only option is a furnace anneal, which isn’t practical for a home shop.
Thermal Relief Techniques for Localized Stress
Localized heating with a propane torch can be used to “shrink” areas of expanded metal that cause bulging. By heating a small spot to a dull red and then allowing it to cool, the metal contracts more than it expanded, pulling the surface flat. This method requires precise temperature control to prevent warping the surrounding areas.
Sometimes, mechanical stretching isn’t enough. If you have a significant “high spot” that won’t settle, you might need to use heat. In industrial settings, we use this to straighten massive I-beams, but the principle works on 22-gauge sheet just as well. This is the “surgical” side of metal fabrication fixes.
The goal is “spot shrinking.” When you heat a small circle of metal, the surrounding cold metal prevents it from expanding outward. Instead, it expands in thickness. As it cools, it contracts in all directions, including the width. The result is a slightly thicker, but “shorter” piece of metal.
- Preparation: Mark the very peak of the bulge with a pencil.
- Heating: Use a propane torch with a fine tip. Heat a spot no larger than a dime until it just starts to change color. You do not need a bright orange glow; a dull blue or straw color is often enough for thin stock.
- Cooling: You can let it air cool for a slow shrink, or use a damp rag for a “quench” shrink. Be careful—quenching can make some steels brittle.
- Assessment: Once the spot is cool to the touch, check your flatness. The “pop” should be less aggressive.
I once used this method to fix a distorted motor housing that was causing a resonance issue, much like the tool chatter solutions I develop for lathes. The housing was vibrating because it wasn’t sitting flat against the base. Three small heat spots pulled the flange into a 0.003-inch tolerance, and the vibration vanished.
Monitoring Progress with Precision Measurements
Continuous verification using straightedges, feeler gauges, and light-gap tests ensures that the leveling process stays on track. By establishing a baseline measurement and tracking changes after each set of adjustments, a fabricator can avoid over-correction. This data-driven approach mirrors professional machinery alignment procedures to achieve high-accuracy results.
You cannot trust your eyes. Light can play tricks on a polished or brushed surface. I rely on the “Light Gap” test. Place your straightedge across the work and hold a flashlight behind it. If you see light peeking through, you have a low spot.
In my diagnostic logs, I keep track of “Progressive Flatness.” If I start with a 0.125-inch gap and after one round of edge-stretching I have a 0.100-inch gap, I know my method is working. If the gap stays the same but the sheet starts to twist, I have introduced a new variable and need to stop.
- Feeler Gauges: Use these to quantify your progress. A gap of 0.020 inches is a “rough” fix; 0.005 inches is professional grade for most home projects.
- Dial Indicators: If you have a magnetic base, you can sweep the sheet to find the exact “peak” of a warp. This is how I handle lathe alignment checklist tasks, and it works just as well for sheet goods.
- Surface Plate: If you are serious about flatness, a Grade B granite surface plate is the ultimate truth-teller.
Common Pitfalls in Manual Sheet Correction
Over-working the material is the primary cause of failure when attempting to level thin-gauge panels. Excessive striking can lead to thinning, which creates new distortions that are harder to remove than the original warp. Recognizing the signs of material fatigue and knowing when to stop are critical skills for any diagnostic specialist.
The biggest mistake I see is “chasing the ghost.” This happens when you fix a high spot in the center, only to see a new one appear three inches to the left. You start chasing it around the sheet until the whole piece of metal is hammered thin and ruined.
- Avoid the “Over-Strike”: If you hit the metal and it doesn’t move, don’t hit it harder. Change your technique or check if you are hitting a “tight” spot that has nowhere to go.
- Beware of Work-Hardening: If the metal starts to sound higher-pitched when struck, it is becoming brittle.
- Cleanliness Matters: A single grain of sand on your reference plate will leave a dimple in your sheet. I wipe my table down with a microfiber cloth before every single flip of the metal.
Strategic Checklist for Material Leveling
A systematic approach ensures that no steps are skipped and that the material is handled logically. This checklist follows the same principles I use for mechanical troubleshooting steps in industrial environments, focusing on observation, isolation, and controlled action.
- Clean and Deburr: Remove any burrs from the edges of the sheet. A burr will prevent the sheet from sitting flat on your reference surface and give you a false reading.
- Map the High Spots: Use a marker to circle the “peaks” and “valleys” on both sides of the sheet.
- Check for “Spring”: Push on the bulges. If they snap back and forth, you have an oil can that requires edge stretching or heat shrinking.
- Start Small: Apply 5-10 minutes of light work, then re-measure.
- Flip Frequently: Working only one side can introduce a secondary bow. Flip the sheet every few minutes to equalize the surface stresses.
- Final Verification: Once you are within your target tolerance (e.g., 0.010 inches), stop. While you can make the sheet “flatter,” the crease line will almost always remain visible because the grain of the metal has been permanently displaced. You can use a planishing hammer and a dolly to smooth the ridge, but it will never be “factory new” without industrial rolling.
Why does my sheet warp even more when I try to fix it? This usually happens because you are stretching the “long” parts instead of the “short” parts. If you have a bulge and you hit the bulge directly against a hard surface, you are thinning that metal, making it even longer, which increases the bulge. You must work the surrounding “tight” areas to give the bulge room to flatten out.
Is aluminum harder to flatten than steel? Aluminum work-hardens much faster than mild steel. It also doesn’t show “heat color” the same way, making thermal relief much riskier. If you are working aluminum, use very soft mallets and be extremely cautious with a torch; aluminum can melt without ever glowing red.
What is the best reference surface if I don’t have a professional table? A thick piece of float glass (at least 1/2 inch thick) can work for small parts, but it is fragile. A better DIY option is a thick piece of MDF or a kitchen countertop remnant. The key is that the surface must be stiffer and flatter than the piece of metal you are trying to fix.
How do I know if I should use heat or cold working? I always start with cold working. It is less invasive and easier to control. If the sheet has a “memory” that snaps back no matter how much you stretch the edges, then the center is likely over-stretched, and a small heat-shrink is the only way to pull that extra material back in.
Can I use a hair dryer instead of a propane torch? No. A hair dryer does not produce enough concentrated BTUs to reach the plastic deformation temperature of the metal. You need the localized, intense heat of a torch to create the “upsetting” effect required for shrinking.
Does the thickness of the metal change the technique? Yes. For stock under 1mm, you have to be incredibly gentle; a single heavy blow can ruin the panel. For stock near 3mm, you will need more force and potentially a heavier caul to transfer enough energy to move the material.
What if the warp is caused by a weld? Welding introduces massive thermal stress. While the techniques of stretching and shrinking still apply, the area around the weld is often much harder and more resistant to change. You are effectively troubleshooting weld porosity and stress at the same time. You may need to “peen” the weld bead itself to relieve the tension it created as it cooled and contracted.
How flat is “flat enough”? In my experience, for most fabrication projects, if you cannot see a gap against a straightedge when held up to the light, you are well within tolerance. For precision machine covers, a gap of 0.010 inches over a 24-inch span is usually acceptable.
Can I use these methods on stainless steel? Stainless steel is notoriously difficult because it work-hardens almost instantly. You have fewer “tries” to get it right. If you are working stainless, be very deliberate with your strikes and try to avoid repeated hitting in the same spot.
By following these systematic diagnostic and correction steps, you can take a piece of distorted material and return it to a functional, flat state. It requires patience and a refusal to settle for “close enough,” but the skills you develop in observing how metal moves will serve you in every other aspect of your shop work. Whether you are aligning a lathe or fixing a warped panel, the logic of the diagnostic specialist remains your best tool.
(This article was written by one of our staff writers, Paul Whitaker. Visit our Meet the Team page to learn more about the author and their expertise.)