How to Remove Mill Scale From Steel Before Welding (Guide)
In my fourteen years of inspecting industrial steel frames and managing shop floor fabrication, I have learned that the most dangerous mistakes are often the ones you cannot see until the structure is under a full load. I remember a specific project early in my career—a heavy-duty equipment rack designed to hold several tons of hydraulic components. The fabricator was skilled, the beads looked uniform, and the geometry was square. However, during a routine load test, a critical fillet weld sheared away from the base metal with a sickening crack.
When we analyzed the failure under a microscope, the culprit was clear. A thin, brittle layer of dark grey oxide, commonly known as mill scale, was still present on the surface of the steel before the welder struck his arc. The weld hadn’t actually fused with the structural steel; it had merely “glued” itself to the oxide layer. This experience taught me that structural integrity starts long before you pull the trigger on a MIG gun. It starts with the tedious, unglamorous work of preparing the metal surface to ensure a true metallurgical bond.
The Metallurgy of Surface Oxides on Hot-Rolled Steel
Surface oxides are a byproduct of the manufacturing process for hot-rolled carbon steel. When steel is processed at temperatures above 1,100 degrees Fahrenheit, the oxygen in the air reacts with the hot metal to form a multi-layered coating of iron oxides.
This coating, primarily composed of magnetite ($Fe_3O_4$), acts as a physical and electrical barrier. While it might look like a protective “skin,” it is actually a brittle ceramic-like material. In the world of mechanical engineering, we view this layer as a contaminant. It has a higher melting point than the base steel—roughly 2,800°F compared to the 2,500°F to 2,700°F range for structural carbon steel. If you do not remove this layer, you are essentially trying to weld through a shell that is tougher to melt than the metal underneath.
Common Characteristics of Hot-Rolled Surface Oxides: * Thickness: Can range from 0.001 to 0.005 inches depending on the cooling rate. * Hardness: Significantly harder and more brittle than the underlying A36 or 1018 steel. * Conductivity: Poor electrical conductor, which leads to unstable arc starts and “arc wander.” * Melting Point: Higher than the base metal, leading to “cold lap” or lack of fusion.
Why Surface Impurities Compromise Structural Integrity
When you weld over the dark grey patina of hot-rolled steel, the intense heat of the arc does not always fully dissolve the oxide. Instead, pieces of the scale can become trapped within the molten weld pool. This creates what we call “inclusions.” Inclusions act as tiny internal stress risers—microscopic cracks waiting to happen.
Furthermore, because the scale is an insulator, it prevents the welding arc from penetrating deeply into the base metal. This results in a “cold” weld where the filler metal sits on top of the plate rather than becoming part of it. In a structural load path, this lack of penetration reduces the effective throat of the weld, significantly lowering the weight the joint can safely support. For a risk-averse fabricator, this is the difference between a project that lasts decades and one that fails under its first heavy load.
| Failure Mode | Root Cause Related to Surface Prep | Consequence |
|---|---|---|
| Lack of Fusion | Arc cannot penetrate through the oxide layer. | Weld peels off under tension. |
| Porosity | Trapped moisture or impurities in the scale vaporize. | Internal voids weaken the weld structure. |
| Inclusions | Brittle scale fragments get trapped in the puddle. | Brittle fracture points under cyclic loading. |
| Arc Instability | High electrical resistance of the oxide layer. | Spatter and inconsistent bead profile. |
Mechanical Tools for Effective Surface Stripping
In a home workshop or small fabrication shop, mechanical abrasion is the most reliable way to ensure you have reached “bright metal.” I have found that relying on a single tool is usually a mistake. Different geometries—like the inside of a C-channel or the corner of an angle iron—require different approaches.
The 4.5-Inch Angle Grinder
The angle grinder is the workhorse of metal preparation. For most structural projects involving A36 steel, a 4.5-inch grinder provides the best balance of power and maneuverability. I recommend using a tool with a minimum 7-amp motor to prevent stalling when applying the pressure necessary to cut through heavy scale.
Flap Discs vs. Grinding Wheels
Hard grinding wheels (Type 27) are aggressive and excellent for removing heavy scale on thick plate (1/4 inch and up). However, they can easily gouge the metal, creating thin spots that compromise the structural load capacity. Flap discs, which consist of overlapping sandpaper strips, are often a better choice for intermediate fabricators. They provide a more consistent finish and are less likely to remove excessive base material.
Wire Wheels and Brushes
A “knot-wire” cup brush is a powerful tool for cleaning up tight corners, but it has a major limitation: it often “polishes” the mill scale rather than removing it. If you see the dark grey surface turning shiny but staying dark, you haven’t reached the steel yet. You have just burnished the oxide. For structural welds, always follow up with an abrasive that actually removes metal.
Selecting the Right Abrasive Media for the Job
Choosing the right grit is a matter of efficiency and safety. If the grit is too fine, you will spend hours on a five-minute job. If it is too coarse, you risk leaving deep scratches that can act as crack initiators in high-stress zones.
- 36 to 40 Grit: Ideal for heavy scale removal on structural beams and thick plate. These are aggressive and fast.
- 60 to 80 Grit: The “sweet spot” for most workshop projects. They remove the oxide layer efficiently while leaving a surface finish that is ideal for weld adhesion.
- Ceramic Abrasives: While more expensive, ceramic grains stay sharp longer and generate less heat. This is beneficial for preventing warping in thinner materials.
- Non-Woven “Strip and Clean” Discs: These look like hard sponges. They are fantastic for removing scale without removing any of the underlying steel. They are my go-to for precision projects where maintaining exact material thickness is critical.
Workshop Safety and Dust Management Protocols
Stripping metal produces a significant amount of airborne debris. This isn’t just “dust”; it is a mixture of iron oxide particles and abrasive grit (like aluminum oxide or zirconia). Inhaling these particulates is a serious health risk and can lead to long-term respiratory issues.
Personal Protective Equipment (PPE)
When I am in the shop, I treat the grinding phase with the same safety rigor as the welding phase. 1. Eye Protection: Use a full-face shield over safety glasses. Grinding sparks can easily bounce off a cheek and find their way behind standard glasses. 2. Respiratory Protection: An N95 mask is the bare minimum. I prefer a P100 half-mask respirator, which filters out 99.9% of particulates. 3. Hearing Protection: Angle grinders often exceed 100 decibels. Prolonged exposure will cause permanent hearing loss. Use earplugs or muffs. 4. Hand Protection: Wear leather work gloves. The friction of grinding can heat the steel to over 300°F in seconds, leading to contact burns.
Creating a Safety Zone
Designate a specific area of your workshop for metal preparation. This keeps the conductive metallic dust away from your welding machine’s internal cooling fans and prevents sparks from landing on flammable materials. I always keep a fire extinguisher (Type ABC) within arm’s reach of the grinding station.
A Systematic Approach to Manual Steel Preparation
To ensure consistent results, I follow a specific checklist for every joint I prepare. This process minimizes the risk of leaving hidden contaminants that could lead to structural failure.
- Initial Inspection: Identify the “face” and “edge” of the joint. Mill scale is usually thicker on the edges of hot-rolled flat bar.
- Marking the Zone: Use a soapstone or silver pencil to mark an area at least one inch back from where the weld will be. This is your “cleaning zone.”
- The First Pass: Use a 40 or 60-grit flap disc at a 15-degree angle. Move the grinder in a steady, overlapping pattern.
- The Visual Check: Look for “bright metal.” Steel should look like a dull silver coin. If there are any dark splotches or “peeled” areas, the scale is still there.
- Edge Beveling: If the material is thicker than 3/16 of an inch, use a hard grinding wheel to create a 45-degree bevel. This allows the weld to penetrate deeper into the thickness of the metal, increasing the joint’s load-carrying capacity.
- De-burring: Always run the grinder over the sharp edges created by cutting or grinding. Sharp burrs can cause “cold shuts” in the weld and are a safety hazard for handling.
Identifying “Bright Metal” and Verifying Surface Quality
How do you know when the steel is truly clean? This is a common point of confusion for many makers. Steel has several different “looks” depending on how it was processed and how you cleaned it.
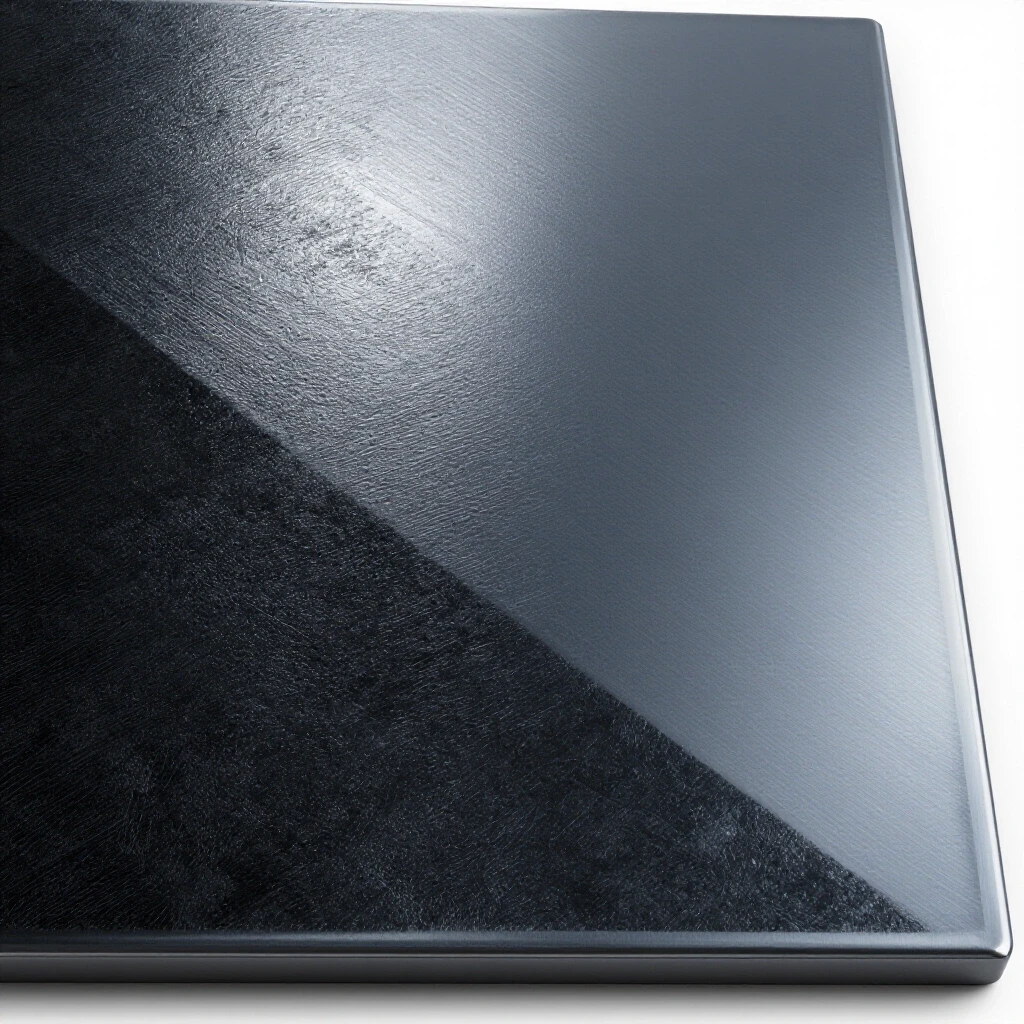
The “Bright Metal” Standard: When the mill scale is fully removed, the steel will have a uniform, silvery-white appearance. It should reflect light evenly. If you see any “blue-grey” shadows, that is residual scale. Under a bright shop light, tilt the piece back and forth. Mill scale is non-reflective and matte; clean steel is metallic and slightly reflective.
In industrial settings, we sometimes use a “white metal” blast standard (SSPC-SP 5), which means all visible shadows, streaks, and stains are gone. For garage fabrication, aiming for this level of cleanliness on the areas to be welded ensures your safety margins remain intact. If you are building a trailer or a lift point, there is no such thing as “clean enough”—it is either clean or it is a risk.
Measuring Success: Load Capacities and Safety Margins
In mechanical engineering, we design structures with a safety factor. For example, if a bracket needs to hold 500 lbs, we might design it to hold 2,000 lbs (a 4:1 safety factor). However, these calculations assume a 100% sound weld.
If you leave mill scale on the joint, you might only get 50% fusion. Suddenly, your 4:1 safety factor has dropped to 2:1. If you also have a slightly off-center load or a bit of vibration, that margin disappears completely. By taking the ten minutes to properly strip the oxide layer, you are effectively protecting the safety factor you’ve built into your design.
| Material Thickness | Recommended Prep Method | Target Weld Penetration |
|---|---|---|
| 1/8″ (11 Gauge) | 60-grit flap disc, clean 1″ back. | 100% (Full penetration) |
| 1/4″ Plate | 40-grit disc + 45° bevel. | 75% to 100% |
| 1/2″ Structural | Hard wheel + deep V-groove bevel. | Multi-pass, 100% fusion |
Common Mistakes in Surface Preparation
Even experienced fabricators can fall into traps when they are rushing to finish a project. Here are the most frequent errors I’ve documented over the years:
- The “Good Enough” Fallacy: Thinking that the heat of a high-voltage welder will “burn through” the scale. It won’t. It will just trap the impurities.
- Over-Grinding: Removing so much metal that you change the structural profile of the part. If you have to grind deeply to find clean metal, the steel may be heavily pitted or rusted, and you should consider a different piece of stock.
- Contaminating Clean Metal: Laying a freshly cleaned piece of steel on a dirty, oily workbench. Always keep your “clean” parts on a dedicated welding table or clean blocks.
- Ignoring the Backside: In a T-joint, fabricators often clean the vertical piece but forget to clean the flat plate it sits on. Both surfaces must be stripped to bright metal.
Workshop Safety Checklist for Preparation
Before you start your next project, run through this quick audit to ensure you are operating within safe parameters:
- [ ] Ventilation: Is the shop door open or is the fume extractor on?
- [ ] Fire Watch: Are there any sawdust piles or gas cans near the grinding area?
- [ ] Tool Inspection: Is the guard on the angle grinder? Is the cord free of nicks?
- [ ] PPE Check: Are you wearing a respirator and a face shield?
- [ ] Material Stability: Is the workpiece securely clamped so it won’t fly off under the pressure of the grinder?
Conclusion: The Foundation of Structural Integrity
Removing the oxide layer from hot-rolled steel is the most critical step in the fabrication process, yet it is the one most often skipped by those in a hurry. My years in the industry have shown me that you can have the most expensive welder and the most precise CAD drawings, but they mean nothing if your weld pool is contaminated by mill scale.
By adopting a disciplined approach to mechanical cleaning, you are doing more than just making the metal look pretty. You are ensuring that the atoms of your filler metal can properly bond with the atoms of your base steel. This creates a monolithic structure capable of handling the stresses and loads it was designed for. Treat every joint with the respect that structural physics demands, and your projects will be as safe as they are functional.
Frequently Asked Questions
Can I just use a wire brush on a drill to remove mill scale? Generally, no. A wire brush on a standard drill lacks the RPM and the abrasive “bite” to remove mill scale effectively. It will often just polish the surface, leaving the brittle oxide layer intact. For structural welds, use an angle grinder with a flap disc or a grinding wheel.
Is it okay to weld through mill scale if I turn my voltage up? No. While higher voltage might help you melt through the scale, it doesn’t solve the problem of chemical impurities and gas being trapped in the weld. You will likely end up with internal porosity and a brittle joint that is prone to cracking.
Why does my weld pop and spatter when I hit a spot of mill scale? The oxide layer has high electrical resistance. When the arc hits it, the current flow is interrupted, causing the arc to stutter and “pop.” This instability leads to excessive spatter and a very poor bead profile.
How far back from the weld should I clean the metal? I recommend cleaning at least one inch back from the weld zone on all sides. This ensures that the heat-affected zone (HAZ) is also on clean metal and prevents the arc from pulling in contaminants from the surrounding area.
Does mill scale cause rust? Actually, mill scale can temporarily protect steel from rusting, but it eventually cracks and allows moisture to get underneath. This causes “under-film” corrosion, which can be even more damaging because it is hidden.
Should I clean the steel if I am only doing a “tack” weld? Yes. A tack weld is a structural weld in its own right during the assembly phase. If a tack fails because of mill scale, the entire assembly could shift or fall, causing injury or ruining the alignment of your project.
What is the best way to clean the inside of square tubing? The inside is difficult to reach. I use a small “die grinder” with a carbide burr or a small sanding drum. If you cannot reach the inside, at least ensure the edges and the outside surfaces are stripped to bright metal.
Is mill scale toxic when ground off? The dust is an irritant and can contain various iron oxides. While not as toxic as lead or hexavalent chromium (found in stainless), it is still hazardous to your lungs. Always wear a P100 respirator when grinding.
Does all steel have mill scale? No. Cold-rolled steel is processed at lower temperatures and has a smooth, shiny finish without mill scale. However, most structural shapes (angles, channels, I-beams) are hot-rolled and will have the dark grey oxide layer.
Can I use a sander instead of a grinder? A belt sander or orbital sander can work, but they are much slower than an angle grinder. If you use a sander, ensure you are using a coarse grit (40-60) designed for metal, as wood sandpaper will dull almost instantly.
(This article was written by one of our staff writers, James Harlan. Visit our Meet the Team page to learn more about the author and their expertise.)