How to Save Money on Welder Consumables and Gas (Guide)
I have spent more than 15 years in a small-scale fabrication shop, and if there is one thing I have learned, it is that the price on the sticker of a new welder is only the down payment. The real cost of owning and operating metalworking equipment reveals itself over hundreds of arc hours. I have filled dozens of maintenance journals with data on wire usage, gas cylinder refills, and the premature failure of contact tips. Most reviews you see online are based on an hour of use, but they fail to mention how much it costs to keep that machine running for five years.
Early in my career, I focused on finding the cheapest replacement parts I could find. I quickly discovered that a cheap contact tip that burns back every twenty minutes is far more expensive than a quality one that lasts all week. I also realized I was wasting nearly 30 percent of my shielding gas due to poor regulator settings and tiny leaks I never bothered to check. This guide is built from those logs and metrics, designed to help you treat your workshop like a precision operation where every penny of overhead is accounted for.
Analyzing the True Cost of Metal Joining Operations
Evaluating the ongoing expenses beyond the initial purchase price involves focusing on the recurring costs of shielding gas and replaceable torch components. By tracking these variables over time, a fabricator can identify where money is being wasted through inefficient settings or poor maintenance habits that lead to premature wear.
When you bring a new machine into your shop, you are essentially entering a long-term financial relationship with its consumables. In my experience, for every dollar spent on the machine itself, you will eventually spend two or three dollars on the wire, gas, and torch parts it consumes. I keep a detailed log of every cylinder swap and every pack of nozzles I buy. This data allows me to see patterns that most people miss. For instance, I noticed that my gas consumption spiked during winter months, not because I was welding more, but because the cold was affecting the seals on my older regulators.
Understanding your operational overhead starts with a simple reality check: the manufacturer’s specifications are often based on ideal laboratory conditions. They do not account for the dusty environment of a home garage or the fluctuating power of a residential circuit. To truly manage your costs, you must look at the “hidden” metrics like gas surge at the start of a weld and the electrical efficiency of your inverter.
The Impact of Inverter Efficiency on Power Consumption
Inverter efficiency refers to how effectively a welding machine converts input power from the wall into a usable welding arc. Modern digital inverters are significantly more efficient than old transformer-based machines, meaning they pull less amperage from your panel to produce the same heat at the torch.
I transitioned most of my shop to modern inverter-based machines about eight years ago. The primary reason was the power factor correction (PFC) found in higher-end models. PFC ensures the machine uses the power it draws more effectively, which is critical if you are running on a 240V residential circuit with other tools active. In my logs, I found that machines with high efficiency ratings reduced my monthly utility bill by about 12 percent compared to my old heavy-transformer units.
Understanding Duty Cycle Realities
A duty cycle is the percentage of a ten-minute period that a machine can operate at a specific output before it must cool down. For example, a 40 percent duty cycle at 200 amps means you can weld for four minutes and must idle for six minutes to prevent internal thermal damage.
Many hobbyist machines claim high peak amperages but have very low duty cycles, sometimes as low as 20 percent. If you constantly push a machine to its thermal limit, you are not just wasting time; you are degrading the internal insulation of the transformer or the capacitors in the inverter. I have found that running a machine at 60 percent of its maximum capacity significantly extends the life of the internal components and prevents the cooling fans from running constantly, which also saves a small amount of electricity.
Maximizing Efficiency Through Precise Gas Flow Control
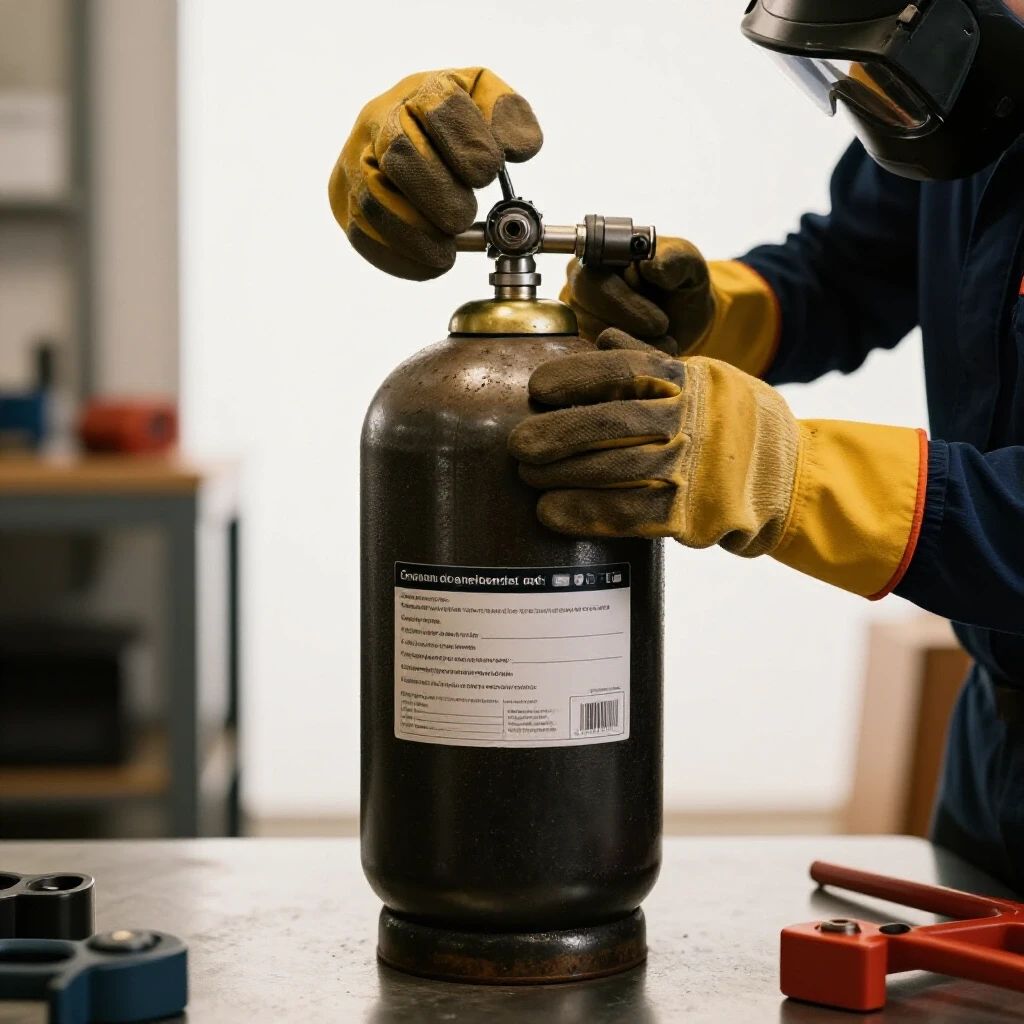
Managing the flow and delivery of protective gases like Argon or CO2 mixtures ensures weld quality while minimizing waste through precise regulator adjustment and system leak detection. Proper gas management prevents atmospheric contamination of the weld pool while ensuring that every cubic foot of gas is utilized effectively.
Gas is often the most expensive recurring cost for a TIG or MIG setup. I used to set my flow meter to 25 cubic feet per hour (CFH) regardless of what I was doing, just because that is what I was told to do. After tracking my gas usage, I realized I was literally blowing money into the air. Most indoor welding tasks on clean steel only require 15 to 18 CFH. By dropping my flow rate to the minimum necessary for a clean weld, I extended the life of my 80-cubic-foot cylinders by nearly 25 percent.
Another major source of waste is the “gas surge.” When you pull the trigger, the pressure built up in the hose between the regulator and the machine escapes in a high-pressure burst. This burst doesn’t help the weld; it just wastes gas. I installed a gas-saving orifice at the machine inlet, which smoothed out that initial surge and saved me a noticeable amount of gas over a year of projects.
The Difference Between Pressure and Flow
Pressure is the force of the gas inside the tank or lines, measured in PSI, while flow is the volume of gas exiting the nozzle, measured in CFH. A regulator reduces high tank pressure to a manageable working pressure, while a flow meter allows you to set the exact volume of gas needed.
I highly recommend using a dedicated flow meter (the glass tube with the floating ball) rather than a simple dual-gauge regulator. Dual-gauge regulators are notorious for being inaccurate as the tank pressure drops. In my shop, I found that switching to flow meters allowed for much more repeatable settings. I can dial in exactly 17 CFH for a TIG project and know that I am not over-consuming gas just because the tank is full.
Identifying and Fixing Gas Leaks
A gas leak is a silent drain on your workshop budget that occurs in the fittings, hoses, or internal valves of your welding equipment. Even a tiny leak that drops the tank pressure by 50 PSI overnight can result in the loss of several full cylinders of gas over a year.
I perform a “leak down test” every time I swap a cylinder. I open the tank valve, let the lines pressurize, and then close the valve. I check the gauge after thirty minutes. If the needle has moved, I have a leak. I use a simple spray bottle with soapy water on every connection from the tank to the machine. I once found a leak in a brand-new hose that was costing me roughly $15 a month in wasted Argon.
| Component | Inspection Interval | Common Failure Sign |
|---|---|---|
| Regulator O-rings | Every cylinder swap | Hissing sound at the tank valve |
| Gas Hose Fittings | Monthly | Pressure drop during leak down test |
| Internal Solenoid | Every 500 hours | Gas continues to flow after trigger release |
| Torch O-rings | Weekly | Porosity in the weld bead |
Strategies for Reducing Replacement Frequency of Torch Parts
Implementing maintenance habits and operational techniques prevents premature wear on contact tips, nozzles, and diffusers, thereby reducing the frequency of replacement. By protecting these parts from heat and spatter, a fabricator can significantly lower the cost per inch of weld produced in the shop.
Consumables like contact tips and nozzles are designed to be replaced, but they are often replaced far too soon. In my maintenance logs, I noticed that the primary cause of contact tip failure wasn’t wear from the wire, but rather “burn-back” caused by poor wire feeding or incorrect voltage settings. When the wire fuses to the tip, it usually ruins it. By keeping my drive rolls properly tensioned and my liner clean, I reduced my contact tip consumption by 40 percent.
Nozzles also take a beating from spatter. If you let spatter build up inside the nozzle, it disrupts the gas flow, leading to poor welds and eventually shorting out the contact tip against the nozzle. I use a ceramic-based anti-spatter spray, but I use it sparingly. A quick dip or spray at the start of the day is usually enough to make the spatter fall right off with a simple pair of welpers.
Managing Spatter Build-up
Spatter consists of small molten metal droplets that fly out of the weld pool and stick to the surrounding surfaces, including the torch nozzle. Excessive spatter is often a sign of incorrect settings, such as having the wire speed too high for the voltage or using the wrong gas mixture.
I have found that spending five minutes tuning the machine on a scrap piece of metal saves twenty minutes of cleaning spatter later. If you hear a “frying bacon” sound that is inconsistent or loud, your settings are off. A smooth, consistent arc produces very little spatter. By focusing on arc stability, I keep my nozzles clean for weeks rather than days. This also reduces the amount of grinding I have to do on the finished project, which saves money on grinding discs.
Wire Quality and Liner Maintenance
The welding liner is the flexible tube inside the torch lead that guides the wire from the drive rolls to the contact tip. A dirty or kinked liner creates friction, which leads to erratic wire feeding and “bird-nesting” at the drive rolls.
I blow out my liners with compressed air every time I change a roll of wire. You would be amazed at the amount of copper dust and shop grime that accumulates inside. If the liner is dirty, the drive rolls have to squeeze the wire harder to push it through. This deforms the wire, making it wear out the contact tip faster. I also avoid the cheapest “no-name” wire. Better quality wire has a more consistent diameter and a cleaner copper coating, which protects your liner and your tips.
Navigating the Market for Replacement Components and Supplies
Understanding the difference between original equipment manufacturer (OEM) parts and generic alternatives allows a workshop owner to save money without sacrificing performance. This involves knowing which components require high-precision manufacturing and which can be sourced from more affordable third-party suppliers.
There is a constant debate in the fabrication community about whether to buy OEM parts or generic ones. My maintenance logs show a mixed result. For complex parts like TIG torches or MIG liners, I stick with high-quality, reputable brands. The tolerances on the threads and the quality of the materials are usually superior. However, for simple items like MIG nozzles or TIG back caps, generic versions often perform just as well at half the price.
The key is to inspect the generic parts closely. I once bought a bulk pack of contact tips that were slightly off-center. They caused the arc to wander and ruined several precision parts. Now, I buy a small sample pack of any generic brand before committing to a bulk purchase. If the machining looks clean and the threads are smooth, I’ll add them to the inventory.
Evaluating Generic vs. OEM Consumables
OEM parts are made by the machine manufacturer to exact specifications, while generic parts are made by third parties to fit those same machines. While generics are cheaper, they may use lower-grade alloys that don’t conduct heat as well, leading to faster degradation.
I use a simple “Cost per Arc Hour” metric to decide. If an OEM contact tip costs $2.00 and lasts for 10 hours of welding, the cost is $0.20 per hour. If a generic tip costs $1.00 but only lasts 4 hours because it softens under heat, it actually costs $0.25 per hour. In that case, the “cheaper” part is actually more expensive. I have found that for high-amperage work, OEM parts almost always win on value. For light-duty hobby work, generics are often fine.
Bulk Purchasing and Storage Strategies
Buying supplies in larger quantities can reduce the unit price, but it requires proper storage to prevent degradation. Welding wire and electrodes are sensitive to moisture and contaminants, which can ruin their performance if they are not stored correctly.
I never leave a roll of wire on the machine if I am not going to use it for more than a week. The humidity in my shop will cause microscopic surface rust on the wire. This rust acts like sandpaper inside the liner and ruins the contact tip. I store my wire in sealed plastic bins with desiccant packs. This simple habit has saved me hundreds of dollars in ruined wire and clogged liners.
- Inventory Tracking: Keep a whiteboard in the shop to track when you are down to your last two tips or one roll of wire.
- Price Comparison Spreadsheet: Maintain a list of prices from three different suppliers to ensure you are getting the best deal on gas and wire.
- Climate Control: Use a small rod oven for stick electrodes and sealed bins for MIG wire to prevent moisture-related weld defects.
- Digital Manuals: Store PDFs of all your equipment manuals on a cloud drive so you can quickly find part numbers for replacements.
Establishing a Data-Driven Maintenance Schedule
Using a systematic approach to track tool performance and wear patterns allows for preventative care that stops minor component failures from damaging more expensive equipment. A well-maintained machine runs more efficiently and has a much longer service life than one that is only repaired after it breaks.
My workshop runs on a schedule. Every 50 hours of arc time, I perform a “deep clean” on my primary machines. This involves opening the case and blowing out the dust with dry compressed air. Dust is the silent killer of inverters; it can bridge connections on circuit boards and cause catastrophic shorts. By keeping the internals clean, I have kept machines running well past their five-year mark without a single trip to the repair shop.
I also track the “age” of my consumables. If I notice that I am burning through contact tips faster than usual on a specific machine, it tells me that something is wrong with the cooling system or the tension settings. This data-driven approach takes the guesswork out of shop management.
Creating a Maintenance Logbook
A maintenance logbook is a record of every repair, cleaning, and part replacement performed on a piece of equipment. It provides a history of the tool’s performance and helps predict when future maintenance will be required based on past wear patterns.
I use a simple notebook, but you can use a digital spreadsheet. I record the date, the hours on the machine (if it has a meter), and what was done. For example: “Jan 12: Replaced liner, cleaned drive rolls, swapped Argon tank.” Over time, this log becomes a goldmine of information. I can see that my TIG collets usually last about six months before they start to deform. This allows me to order replacements before they fail in the middle of a project.
Diagnostic Checklists for Peak Performance
A diagnostic checklist is a series of steps used to verify that a machine is operating correctly before starting a major project. This prevents wasted materials and consumables caused by equipment that is out of tune.
- Check all electrical connections for tightness and signs of heat discoloration.
- Inspect the ground clamp for a strong spring and clean contact surfaces.
- Verify that the cooling fans are spinning freely and not blocked by debris.
- Test the gas flow at the torch nozzle using a portable flow meter to ensure the regulator is accurate.
- Examine the drive rolls for wear or slippage.
Evaluating Equipment Duty Cycles and Power Efficiency
Understanding how a machine handles heat and electricity is vital for making informed purchasing decisions and managing operational costs. High-efficiency machines with robust cooling systems may cost more upfront but often prove more economical over years of consistent workshop use.
When I look at a new piece of equipment, I don’t just look at the maximum output. I look at the “Efficiency” and “Power Factor” ratings on the spec sheet. A machine with a power factor of 0.9 or higher is much better at using the electricity it pulls from the wall. This is especially important for those of us running shops on residential power. It means less heat generated in the wires of your shop and more heat generated in the weld.
I also pay close attention to the cooling system design. Some machines pull air from the front and exhaust it out the back, while others use a “wind tunnel” design that keeps the sensitive electronics isolated from the cooling air. The latter is far superior for longevity because it prevents metallic dust from settling on the circuit boards.
| Feature | Why It Matters | Long-Term Benefit |
|---|---|---|
| Power Factor Correction (PFC) | Uses input power more efficiently | Lower utility bills and works better on long extension cords |
| Thermal Overload Protection | Shuts down the machine before it melts | Prevents permanent damage to the transformer or inverter |
| Dual-Voltage (120V/240V) | Allows the machine to run on different circuits | Increases the versatility and resale value of the tool |
| Brushless Fan Motors | Longer-lasting cooling components | Reduces the risk of fan failure and subsequent overheating |
Conclusion
Managing the recurring costs of a fabrication shop requires a shift in mindset from “buying stuff” to “managing a system.” By tracking your gas usage, protecting your consumables from unnecessary wear, and maintaining your equipment with a data-driven approach, you can significantly reduce your overhead. My 15 years of logs show that the most successful fabricators aren’t necessarily the ones with the most expensive tools, but the ones who understand exactly how their tools perform and what they cost to run.
Start small. Buy a flow meter, perform a leak test on your gas lines this weekend, and start a simple logbook for your primary welder. These small steps will provide the data you need to make smarter purchasing decisions and keep your workshop running efficiently for years to come.
Frequently Asked Questions
How much gas can I actually save by using a flow meter instead of a regulator?
In my experience, switching from a standard dual-gauge regulator to a true flow meter can save between 10 and 20 percent of your gas. Flow meters are much more accurate at lower volumes, allowing you to dial in the minimum effective flow rate (usually 15-18 CFH for indoor MIG) rather than over-compensating with 25-30 CFH because the gauge is imprecise.
Is it worth buying generic contact tips for my MIG welder?
It depends on the amperage. For light-duty work under 150 amps, high-quality generic tips are usually fine and can save you 50 percent on the part cost. However, for high-heat applications, OEM tips often use superior copper alloys that resist softening and “burn-back,” making them more cost-effective over a full day of welding.
Why does my gas tank seem to empty faster when it gets cold?
The gas itself doesn’t disappear, but the cold affects the seals and O-rings in your regulator and fittings. Rubber contracts in the cold, which can turn a tiny, unnoticeable leak into a significant one. If your shop isn’t heated, it is vital to perform leak tests more frequently during the winter months.
How often should I really change my MIG torch liner?
I don’t change mine on a set schedule; I change it based on my maintenance log. If I blow out the liner with compressed air and still see erratic wire feeding or “stuttering,” it’s time for a change. Typically, for a hobbyist, a liner should last through 50 to 100 pounds of wire if it is kept clean and the wire is stored properly.
Can I use anti-spatter spray on the workpiece instead of the nozzle?
Yes, but use it sparingly. Spraying the workpiece helps with cleanup, but if you get too much near the weld joint, it can cause porosity or inclusions in the weld. For the nozzle, a ceramic-based spray is better as it creates a dry film that lasts longer and doesn’t smoke as much as oil-based sprays.
Does the length of my torch lead affect my consumable costs?
Indirectly, yes. Longer leads (over 15 feet) are harder for the drive rolls to push wire through. This leads to more friction in the liner, which can cause the wire to slip or deform. This deformation leads to faster wear on the contact tip. If you don’t need a long lead, a standard 10 or 12-foot lead is usually more efficient.
What is the most common cause of premature inverter failure?
Dust and metallic particles are the primary killers. Inverters use high-speed fans to cool sensitive electronics. These fans pull in shop dust, which can eventually cause a short circuit on the boards. Blowing out the machine with dry, low-pressure air every few months is the best way to protect your investment.
How do I know if my ground clamp is costing me money?
A poor ground creates resistance, which generates heat at the clamp instead of at the arc. This forces you to turn up the voltage on the machine to get the same results, wasting electricity and putting unnecessary stress on the inverter. If your ground clamp feels hot to the touch after a short weld, it needs to be cleaned or replaced.
Is there a benefit to using a gas-saving “surge” protector?
Yes, these are small orifices or specialized hoses that limit the initial burst of gas when you pull the trigger. In a shop where you do a lot of short “tack” welds, these can save up to 40 percent of your gas because the surge happens every time the solenoid opens.
Should I buy a machine with a built-in gas solenoid or a manual valve on the torch?
Always opt for a machine with a built-in solenoid if possible. Manual valves on TIG torches are notorious for being left open accidentally, which can drain an entire tank of Argon overnight. A solenoid ensures the gas only flows when the arc is active, which is a major long-term cost saver.
(This article was written by one of our staff writers, David Reynolds. Visit our Meet the Team page to learn more about the author and their expertise.)