How to Clean and Rustproof a Rusty Utility Trailer (Guide)
I have spent the last eighteen years in a drafty workshop, surrounded by the smell of sulfur and cutting oil. My hands have felt the grit of a thousand rusted gears and the smooth, cold surface of a freshly scraped lathe bed. When you spend your life in vintage machinery restoration, you learn that metal is not a static thing; it is a living history that requires constant defense against the elements. Restoring a steel utility frame—the kind we use to haul our heavy pre-war drill presses and cast-iron band saws—requires the same methodical eye for detail as rebuilding a precision spindle.
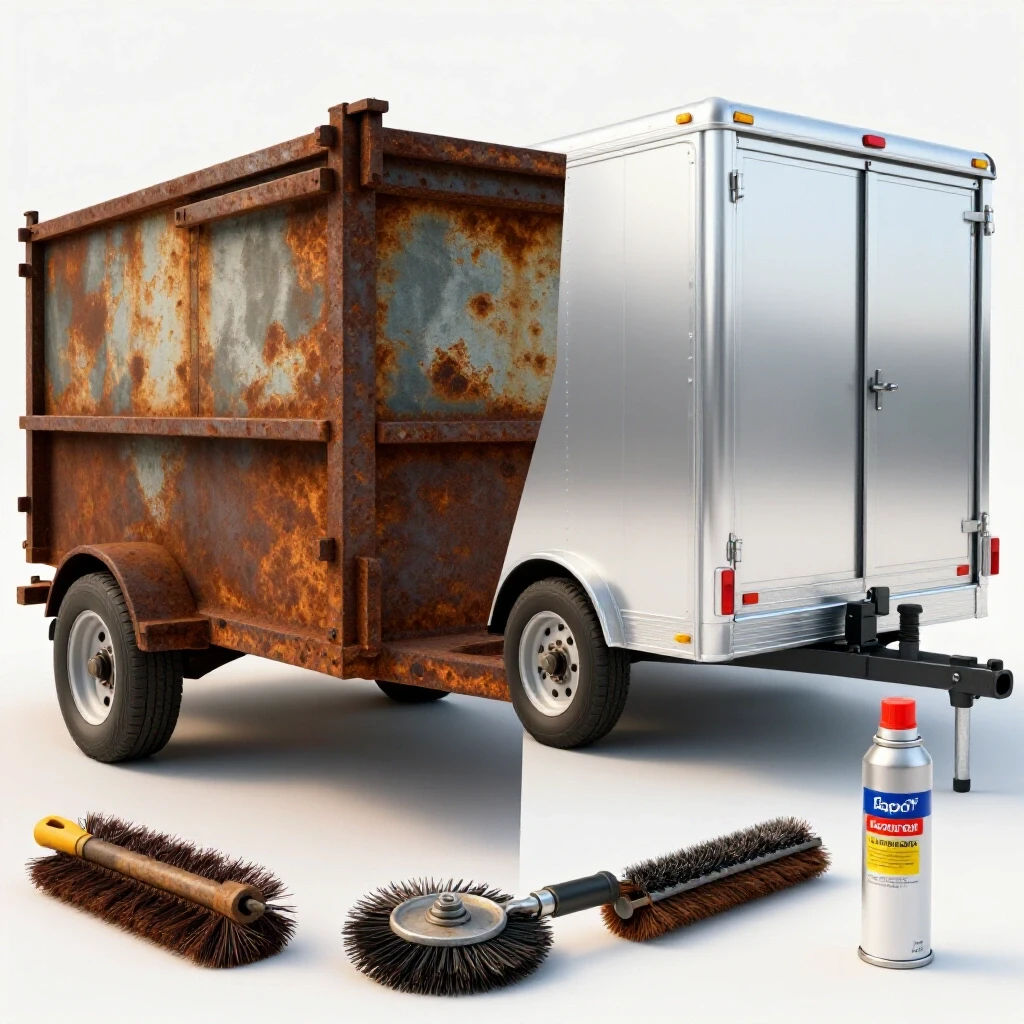
Over the years, I have rescued over 40 pieces of equipment, from abandoned trailers to industrial lathes. I have learned that rust is a patient enemy, but it is also a predictable one. Whether you are removing machinery rust from a 1940s South Bend lathe or stabilizing a weathered hauling rig, the principles of oxidation control remain the same. You cannot rush the metal. You must understand the chemistry of the corrosion and the mechanical requirements of the surface before you ever pick up a spray gun.
Evaluating the Integrity of Weathered Steel Frames
Evaluating the extent of oxidation on a steel frame involves distinguishing between light surface bloom and deep pitting. This step ensures the restoration is viable before investing time and materials into the cleaning process. It requires a systematic physical inspection to determine if the base metal still possesses its original density and strength.
When I first approach a piece of “yard art” that I intend to put back into service, I use a heavy-duty chipping hammer and a wire brush. I am looking for the difference between “scale” and “structural loss.” Surface rust often looks far worse than it is, creating a flaky, orange crust that hides solid steel beneath. However, if I tap the frame and hear a dull thud instead of a sharp metallic ring, I know the oxidation has moved into the interior of the steel.
In vintage machinery restoration, we often talk about “casting metallurgic profiles.” While a trailer frame is usually mild steel rather than cast iron, the concept of “pitting” is identical. Deep pits act as stress concentrators. If the pitting on your frame exceeds 20% of the material thickness, the frame may not be a candidate for a simple surface restoration. I always document these areas in a restoration log, noting the depth of the heaviest corrosion to track my progress during the mechanical cleaning phase.
Mechanical Removal of Heavy Oxidation
Mechanical abrasion uses physical force through grinders, wire wheels, or needle scalers to strip away loose scale and old paint. This provides a clean, textured surface that allows protective coatings to bond effectively to the base metal. It is a labor-intensive process that demands high-quality abrasives and consistent pressure to avoid overheating the steel.
For heavy scale, I prefer a pneumatic needle scaler. This tool uses a bundle of vibrating steel rods to shatter rust away from the base metal without removing the steel itself. It is much more effective than a standard wire wheel for getting into the tight corners of a frame. Once the heavy scale is gone, I move to a 4.5-inch angle grinder equipped with a 40-grit flap disc. This creates a “profile” or “tooth” on the metal, which is essential for the primer to bite into.
One mistake I often see in machine disassembly tips is the over-reliance on wire wheels. While a wire wheel is great for cleaning threads on a vintage bolt, it can “burnish” or smear the rust on a flat surface, essentially polishing the oxidation into the pores of the metal rather than removing it. This creates a slick surface that paint will eventually peel away from. I aim for a “near-white metal” finish, which means the surface is mostly silver with only faint shadows of previous oxidation.
| Tool Type | Best Use Case | Removal Speed | Surface Finish |
|---|---|---|---|
| Needle Scaler | Heavy, flaky scale and corners | High | Pock-marked (requires sanding) |
| Flap Disc (40-60 Grit) | Flat surfaces and welds | Very High | Uniformly scratched (ideal for primer) |
| Wire Cup Brush | Removing loose paint/light rust | Medium | Burnished/Smooth |
| Strip Disc (Poly) | Removing paint without metal loss | Medium | Clean and smooth |
Chemical Conversion and Rust Neutralization
Chemical treatments use phosphoric acid or specialized chelators to transform remaining iron oxide into a stable, inert layer. This process stops the chemical reaction of rust at a molecular level, preventing it from spreading under new paint. It is a critical bridge between mechanical cleaning and the application of protective coatings.
After I have finished the heavy grinding, there is always microscopic rust trapped in the pits of the steel. In my experience restoring classic cast iron, you can never mechanically remove 100% of the oxidation. This is where a rust converter comes in. Most quality converters use phosphoric acid to turn iron oxide (rust) into iron phosphate, which is a hard, black, inert substance.
I apply the converter with a stiff nylon brush, working it into the pits. You will see the metal turn from a dull grey or orange to a deep, matte black. This is a chemical sign that the oxidation has been neutralized. However, be wary of “one-step” products that claim to be primer and converter in one. I prefer a dedicated converter that can be washed or wiped down after it has cured, ensuring no unreacted acid remains on the surface to interfere with my epoxy primer.
Solvent Degreasing for Coating Adhesion
Solvent cleaning involves using chemical degreasers to remove oils, waxes, and residue left behind after mechanical cleaning. This step is critical because any remaining contaminants will cause the primer to peel or bubble over time. Even the oils from your skin can prevent a high-performance coating from bonding correctly to the steel.
In the world of machinery hand scraping and precision alignment, cleanliness is everything. The same applies to frame preservation. After the rust converter has fully cured (usually 12 to 24 hours), I wipe the entire frame down with a high-quality wax and grease remover or denatured alcohol. I use the “two-rag method”: one rag soaked in solvent to dissolve the contaminants, and a second clean, dry rag to wipe them away before the solvent evaporates.
If you skip this, the dust from your grinding and the oils from the environment will act as a barrier. I have seen beautiful restoration jobs fail within a year because the restorer didn’t realize their air compressor was spitting tiny amounts of oil onto the “clean” metal. Always use a moisture trap and an oil separator if you are using pneumatic tools or sprayers.
Applying High-Performance Epoxy Primers
Epoxy primers are two-part coatings that provide a moisture-proof barrier and excellent adhesion to bare steel. They are the preferred foundation for any metal restoration project due to their durability and resistance to chemical breakdown. Unlike standard hardware store primers, epoxy creates a non-porous seal that prevents oxygen and water from reaching the metal.
When I am restoring classic tools, I often look for primers that have a high zinc content. Zinc acts as a sacrificial anode, meaning the zinc will corrode before the steel does. For a utility frame that lives outdoors, a two-part epoxy primer is the gold standard. These primers require a catalyst and have a specific “pot life,” which is the amount of time you have to apply the product before it hardens in the cup.
I typically apply two medium coats, allowing for the proper “flash time” (the time it takes for solvents to evaporate) between them. This builds a film thickness of about 2 to 3 mils (0.002–0.003 inches). This thickness is vital. If the coating is too thin, it won’t provide a sufficient barrier; if it’s too thick, it may become brittle and crack under the vibration of the road.
Final Protective Topcoats and Under-sealing
The final layer of paint or undercoating provides UV protection and physical resistance against road debris. This multi-layered approach ensures the steel remains isolated from the elements, significantly extending the life of the utility equipment. The topcoat protects the primer, which in turn protects the steel.
While epoxy primer is incredibly tough, it is often sensitive to UV light. If left exposed to the sun, it will eventually “chalk” and break down. I follow the primer with a high-solids polyurethane or an industrial-grade acrylic enamel. For the underside of the frame, where rocks and road salt are a constant threat, I often apply a specialized rubberized undercoating or a wax-based cavity film.
In my machinery logs, I always record the specific brand and batch number of the paint used. This makes future touch-ups much easier. When applying the topcoat, I aim for an additional 2 mils of thickness. This brings the total dry film thickness (DFT) to around 4 to 5 mils. For a restorer used to classic tool alignment where we measure in thousandths of an inch, these paint thicknesses are easy to track with a simple magnetic film gauge.
Maintenance and Long-term Preservation Strategies
Long-term preservation requires regular inspections and immediate attention to any chips or scratches in the protective coating. By treating the frame as a piece of precision equipment rather than a disposable tool, you can prevent the cycle of oxidation from restarting. A proactive approach saves hundreds of hours of labor in the future.
Every six months, I perform a “walk-around” inspection of my hauling equipment. I look for “witness marks” of rust—tiny orange streaks that indicate the coating has been breached. If I find a chip, I don’t just paint over it. I use a small wire brush to clean the spot, apply a drop of rust converter, and then touch it up with a matching enamel.
Interestingly, the same “way oils” we use for vintage machinery restoration can be useful here. For the interior of tubular frames where you cannot reach with a brush, I use a long-wand sprayer to apply a lanolin-based or oil-based rust preventative. These products never fully dry; they remain “self-healing,” creeping into crevices to displace moisture. This is the same logic we use when coating the bare iron tables of our saws during the humid summer months.
Practical Tracking for Restoration Projects
Maintaining a structured approach to a project ensures that no steps are skipped and that materials are used efficiently. I use a simple checklist for every frame I restore. This keeps me focused when the work gets tedious, such as during the middle of an eight-hour grinding session.
- Initial Cleaning: Pressure wash the frame to remove dirt, grease, and loose debris.
- Mechanical Strip: Use a needle scaler on heavy scale and a 40-grit flap disc on flat surfaces.
- Detail Sanding: Use a wire wheel or small abrasive bits for corners and tight spots.
- Chemical Neutralization: Apply phosphoric acid-based converter to all pitted areas.
- Solvent Wash: Perform a two-rag wipe down with a dedicated degreaser.
- Primer Application: Apply two coats of two-part epoxy primer (flash 30 mins between coats).
- Topcoat Application: Apply two coats of UV-resistant industrial enamel.
- Internal Protection: Spray cavity wax or oil-based preventative into enclosed frame members.
Technical Benchmarks for Metal Preservation
When you are aiming for a professional-grade restoration, you need to move beyond guesswork. I rely on specific metrics to ensure my work will last. These benchmarks are drawn from both modern industrial standards and vintage mechanical manuals.
- Surface Profile: Aim for a 1.5 to 2.5 mil anchor pattern after grinding. This is roughly equivalent to the texture of 60-grit sandpaper.
- Ambient Temperature: Only apply coatings when the steel temperature is at least 5°F above the dew point to prevent trapped moisture.
- Cure Times: Most epoxy primers require 24 to 48 hours to fully cross-link before they can handle heavy mechanical stress.
- Voltage for Electrolysis: If cleaning small removable brackets, a 12V DC manual battery charger at 2 to 10 amps works best in a sodium carbonate (washing soda) bath.
- Coating Thickness: Total Dry Film Thickness (DFT) should be between 4 and 6 mils for maximum durability without brittleness.
The process of bringing a rusted frame back to life is not about finding a “magic” product. It is about the discipline of the preparation. As I often tell younger restorers, the paint is only there to look pretty; the primer and the prep work are what do the heavy lifting. By following these systematic steps, you are not just cleaning a tool; you are preserving a piece of mechanical history that will serve your workshop for another twenty or thirty years.
FAQ: Common Challenges in Steel Frame Restoration
What is the best way to remove rust from tight corners where a grinder won’t fit? In my experience, a pneumatic needle scaler is the most effective mechanical tool for corners. If you don’t have compressed air, a stiff stainless steel wire brush followed by a liberal application of a liquid rust chelator (like Evapo-Rust) or a phosphoric acid converter is the best chemical approach. The liquid will “wick” into the crevices that physical tools cannot reach.
Can I use a pressure washer to remove rust? A standard consumer pressure washer will remove loose dirt and some flaking paint, but it will not remove “tight” rust or mill scale. There are wet-blasting attachments that use sand or crushed glass, which are very effective, but they introduce a lot of water to the bare steel. If you go this route, you must dry the metal immediately and apply a “flash rust” inhibitor.
Is it better to use a rust converter or strip the metal to bare silver? Stripping to bare silver (near-white metal) is always the superior method for long-term durability. However, on heavily pitted steel, it is nearly impossible to remove every microscopic trace of oxidation. In those cases, stripping the majority of the rust and then using a converter on the remaining pits provides the best of both worlds.
Why did my new paint peel off in large sheets? This is almost always a failure of surface preparation. The most common causes are “burnishing” the metal with a wire wheel (making it too smooth for the paint to stick), failing to remove all the oil and grease with a solvent, or painting over a rust converter that hadn’t fully cured or was incompatible with the primer.
How do I know if the rust is too deep to save the frame? Perform the “hammer test.” Use the pointed end of a welding chipper or a ball-peen hammer to strike the rusted areas firmly. If the metal deforms easily, sounds hollow, or if the hammer blows through, the structural integrity is gone. Surface rust will flake off, but the steel beneath should remain rigid and ring when struck.
What is the difference between a rust “remover” and a “converter”? A remover (like an acid or chelator) is designed to dissolve the iron oxide and leave behind bare metal. A converter is designed to react with the rust and leave it in place as a stable, black primer layer. I use removers for parts I can soak and converters for large structures like frames.
Can I use regular spray paint from a hardware store? You can, but it won’t last long on a utility frame. Hardware store “rattle cans” have a very low solids content and use thinners that evaporate, leaving a thin, porous film. For a frame that sees road debris and moisture, a two-part industrial coating is significantly more durable and cost-effective over time.
How long does the rustproofing process usually take? For a standard 5×8 utility frame, expect to spend about 12 to 16 hours on mechanical cleaning and another 4 to 6 hours on the chemical and painting phases, spread over several days to allow for proper drying and curing times.
Do I need to remove the old paint if it’s not rusting? If the old paint is well-adhered (not bubbling or peeling), you can often scuff-sand it with 120-grit paper and paint over it. However, rust often “creeps” under old paint. If you see any signs of “spider-web” cracking or bubbling, you must strip it back to find the source of the oxidation.
What safety gear is essential for this work? When grinding and using chemicals, I never work without a P100-rated respirator, wrap-around eye protection, and heavy leather gloves. The dust from old lead-based paints and the fumes from epoxy primers are significant health risks that require proper ventilation and personal protective equipment.
(This article was written by one of our staff writers, Richard Beaumont. Visit our Meet the Team page to learn more about the author and their expertise.)