How to Store and Organize Scrap Metal in a Small Shop (Fix)
When I built my first garage workshop in 2013, I had exactly $2,000 and a 12-by-20-foot space to work with. My focus was entirely on getting a welder and a grinder, but I quickly learned a hard lesson about the “hidden” footprint of metal fabrication. Within three months, my floor was a minefield of sharp offcuts, rusted tube remnants, and flat bar pieces that I couldn’t bear to throw away. This clutter didn’t just look bad; it was a safety hazard that made it impossible to move my welding cart safely. Managing these leftovers is one of the most overlooked parts of a starter metal workshop layout, yet it is essential for maintaining a productive and safe environment.
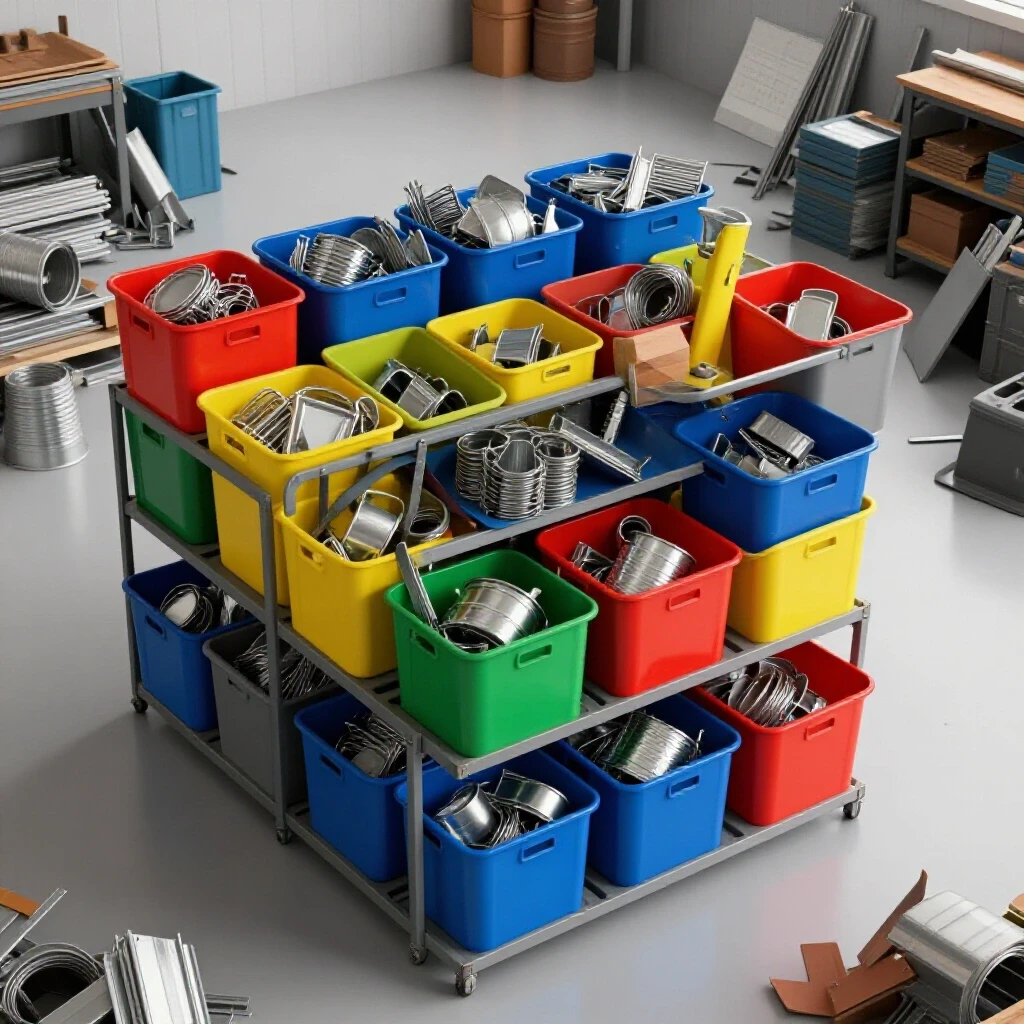
Assessing Your Footprint and Material Volume
Before you buy a single rack or bin, you must evaluate the physical limits of your workspace and the amount of material you realistically expect to keep. Small shops often fail not because they lack tools, but because they lose their “floor-to-surface” ratio to piles of unorganized steel.
A footprint is the total square footage a piece of equipment or storage unit occupies on your floor. In a compact garage, every inch counts, so your goal is to minimize the footprint of your material while maximizing vertical accessibility. I recommend allocating no more than 10% of your total floor space to material storage. If you have a 200-square-foot shop, your storage system should occupy 20 square feet or less. This ensures you have enough room for movement, which is a key component of OSHA-adjacent safety practices for home shops.
| Material Type | Typical Storage Method | Floor Space Impact |
|---|---|---|
| Full Lengths (8-20 ft) | Vertical Wall Racks | Low (Uses wall height) |
| Medium Offcuts (2-4 ft) | Horizontal Cantilever | Moderate |
| Small Scraps (< 1 ft) | Modular Bins/Buckets | High (If on floor) |
| Sheet/Plate Remnants | Vertical Floor Slot | Low to Moderate |
Defining Your Storage Capacity
Storage capacity refers to the maximum weight and volume of material your shop can safely hold without compromising structural integrity or workflow. Overloading a shelf or leaning heavy plate against a thin wall can lead to catastrophic failures.
In my early years, I made the mistake of stacking heavy solid square bar on a shelf meant for light lumber. I tracked the deflection over six months and realized the shelf was bowing by nearly an inch. For a beginner, understanding load ratings is vital. Most DIY wall-mounted racks should be anchored directly into wall studs using 3-inch lag bolts. Following industrial maintenance standards, you should never exceed 75% of a rack’s rated capacity to account for the dynamic force of moving heavy metal pieces.
Categorizing Leftover Materials for Efficiency
Effective organization begins with a logical sorting system that separates pieces by their shape, material grade, and size. This prevents “digging,” which is the primary cause of minor hand injuries and wasted time in a fabrication environment.
Sorting is the process of grouping materials based on shared characteristics so they can be retrieved without moving other items. In a small shop, this usually means separating ferrous (iron-based, like steel) from non-ferrous (aluminum, copper, brass) metals to prevent cross-contamination during the welding process. I use a simple color-coding system on the ends of my stock: blue for mild steel, red for tool steel, and green for aluminum. This visual shorthand saves me from reaching for a magnet every time I need a quick spacer.
Separating by Shape and Dimension
Dimensional sorting involves grouping materials by their cross-section, such as round tube, square tube, angle iron, or flat bar. This is important because different shapes require different storage orientations to prevent rolling or tangling.
I found that nesting smaller tubes inside larger ones is a common mistake. While it saves space, it makes inventory tracking impossible and scratches the surface of your materials. Instead, I use a “rule of thirds” for my offcuts. Pieces over three feet go on the main rack, pieces between one and three feet go into a dedicated vertical tube, and anything under twelve inches goes into a labeled bin. This keeps the most useful pieces visible and prevents the “bottom-of-the-bucket” syndrome where good metal goes to die.
Implementing Vertical Racking Systems
When floor space is at a premium, the only way to go is up. Vertical racking uses the height of your garage to store long stock and medium offcuts, keeping your walking paths clear and your tools accessible.
Vertical racking refers to any storage system that prioritizes height over width, typically using wall-mounted brackets or floor-to-ceiling frames. For a budget metalworking tools setup, you don’t need expensive industrial shelving. A series of heavy-duty brackets spaced every 16 to 24 inches along your wall studs can hold hundreds of pounds of steel. However, you must ensure the “Triangle of Stability”—the weight should be distributed so the center of gravity pulls toward the wall, not away from it.
Building a Cantilever Rack on a Budget
A cantilever rack is a specialized storage system where horizontal arms extend from a central vertical beam, allowing for unobstructed access to long materials. This is the gold standard for storing tube, pipe, and bar stock.
In my second shop iteration, I built a cantilever rack using 2×4 lumber and 1-inch steel pipe for under $50. I drilled holes at a slight upward angle (about 5 degrees) into the wood, then inserted the pipes. This upward tilt is a critical safety feature; it prevents round stock from rolling off the ends. I tracked the cost of this DIY build versus a commercial rack and saved over $200, which I then reallocated toward a higher-quality auto-darkening welding helmet.
- Space brackets 16 inches apart for shorter pieces.
- Use a minimum of three support points for any piece over six feet.
- Cap the ends of pipe arms with rubber or plastic to prevent scratches.
- Label each level by material thickness (e.g., 1/8″, 3/16″, 1/4″).
Managing Small Pieces with Modular Bins
Small scraps are the most difficult to manage because they accumulate quickly and are often the sharpest. Modular bins allow you to contain these “dangerous crumbs” in a way that is both organized and portable.
Modular bins are standardized, stackable containers that can be rearranged or moved to your workbench as needed. For a beginner welder power requirement or layout task, having a bin of small gussets or tabs right at your side is a massive efficiency boost. I prefer clear plastic bins or open-front “picker” bins. This allows me to see the contents without having to dump the bin out, which minimizes the risk of getting a metal splinter or “sliver” from handling the pieces unnecessarily.
Utilizing Mobile Scrap Carts
A mobile scrap cart is a compact, wheeled unit designed to hold various shapes of offcuts, allowing you to move your material storage out of the way or closer to your workstation.
If your garage workshop ventilation is set up in a way that requires you to work near the door, a mobile cart is a lifesaver. I built a cart with a 24-by-24-inch base that holds my vertical tubes for long scraps and a few bins for small pieces. I used 3-inch locking casters, which are essential. Without locks, a cart loaded with 100 pounds of steel becomes a rolling hazard on an uneven garage floor. This cart also serves as a “staging area” for my current project, keeping the rest of the shop clear.
- Start with a heavy plywood or steel base.
- Add vertical PVC pipes of varying heights (12″, 24″, 36″) to hold rods and tubes.
- Mount a side-facing rack for small flat plates.
- Ensure the center of gravity is low by placing the heaviest pieces at the bottom.
Safety Standards for Small Shop Storage
Safety in a metal shop isn’t just about wearing goggles; it’s about how you manage your environment. Poorly stored metal is a leading cause of puncture wounds, lacerations, and tripping accidents in residential workshops.
Workshop safety standards, often derived from OSHA 1910.176, dictate that materials must be stored in a way that prevents them from creating a hazard. This means no jagged edges sticking out into walkways and no unstable stacks. I follow a strict “no-protrusion” rule: if a piece of metal sticks out past the edge of the rack into the walking path, it must be cut down or moved. This simple habit has saved me from countless bruised shins and ruined pairs of work pants.
Preventing Sharp Edge Hazards and Tipping
A sharp edge hazard occurs when the cut end of a metal piece is left exposed in a high-traffic area. Tipping risks occur when the weight of stored material exceeds the structural capacity of the storage unit or its anchors.
To mitigate these risks, I always de-burr my offcuts before putting them in the rack. De-burring is the process of removing the sharp “flags” or ridges left by a saw or grinder. It takes ten seconds with a file or a flap disc, but it makes the material safe to handle later. For tipping prevention, I use a “safety chain” across my vertical racks. Just a simple length of chain and a carabiner across the front of the rack can prevent a whole stack of steel from falling forward if someone bumps into it.
- Always store heavy plate vertically in a “toast rack” style holder to prevent back strain.
- Keep a minimum of 18 inches of clear floor space around all storage units.
- Use magnetic strips for very small, frequently used pieces like washers or spacers.
- Conduct a “shake test” on all new racks before loading them to full capacity.
Budgeting for Organization and Tooling
It is tempting to spend your entire budget on a welder or a cold saw, but a shop without organization will cost you more in the long run. I suggest a specific allocation strategy to ensure your shop remains functional from day one.
A tooling-to-machine cost ratio is the amount you spend on accessories and organization versus the cost of the primary machine. For a beginner, I recommend a 1:1 ratio. If you spend $500 on a welder, expect to spend another $500 on safety gear, gas, wire, and material storage. This might seem high, but it prevents the frustration of having a great tool you can’t use effectively because your workspace is a mess.
| Budget Category | Recommended Percentage | Purpose |
|---|---|---|
| Primary Machines | 40% | Welder, Grinder, Saw |
| Safety & PPE | 20% | Helmet, Gloves, Ventilation |
| Measurement & Layout | 10% | Squares, Calipers, Markers |
| Storage & Organization | 15% | Racks, Bins, Carts |
| Consumables | 15% | Abrasives, Gas, Wire |
Why Cheap Abrasives Cost More in the Long Run
While not directly a storage item, how you organize your consumables like grinding wheels and flap discs affects your scrap management. Poor-quality abrasives leave behind more burrs and jagged edges, requiring more cleanup and creating more dangerous scrap.
I tracked the lifespan of “bargain” grinding wheels versus professional-grade ones. The cheap wheels wore down 40% faster and produced significantly more dust, which clogged my garage workshop ventilation filters prematurely. By spending $3 more per wheel, I reduced my cleanup time and improved the safety of my offcuts. This is a perfect example of how a small increase in initial spending leads to a more organized and safer shop environment over time.
Creating an Implementation Checklist
Setting up your storage shouldn’t be a weekend-long ordeal. By following a structured checklist, you can integrate these systems into your shop layout incrementally as your material collection grows.
An implementation checklist is a step-by-step guide to transforming a disorganized space into a functional one. It starts with the most critical safety issues and moves toward fine-tuned organization. When I consult with beginners, I tell them to focus on the floor first. If you can’t walk from your workbench to your welder without stepping over a piece of steel, you aren’t ready to start a project.
- Clear the Floor: Remove all scrap and sort it into three piles: Keep, Recycle, and Trash.
- Install Wall Anchors: Locate your studs and install your primary vertical racks.
- Establish a “Clean Zone”: Designate an area for non-ferrous metals like aluminum to prevent rust contamination.
- Label Everything: Use a permanent marker or label maker to identify material thickness and type.
- Set a “Scrap Limit”: Decide on a maximum volume for your scrap bins. Once they are full, you must either use the material or recycle it.
- Review Safety Clearances: Ensure your new racks don’t block electrical panels or fire extinguishers.
Maintaining Your System Over Time
Organization is not a one-time event; it is a habit. In a small shop, a single large project can generate enough scrap to overwhelm your system if you aren’t diligent.
I perform a “shop reset” every Sunday evening. This involves putting all my offcuts back in their designated spots, sweeping up metal chips, and emptying the small scrap bins into my larger recycling bucket. This practice ensures that when I walk into the shop on Monday, I am ready to work, not clean. By keeping a simple log of what materials I have in stock, I also avoid buying duplicate pieces of steel, which keeps my startup costs low and my storage manageable.
Tracking Material Usage and Costs
Record-keeping is the final piece of the organizational puzzle. By tracking what you use, you can better predict what sizes of scrap are worth keeping and which are just taking up space.
I use a simple spreadsheet to track my material purchases and the “yield” from each piece. If I find that I am consistently left with 2-foot sections of 1-inch square tube that I never use, I know I can start recycling those pieces immediately rather than letting them clutter my racks. This data-driven approach is what separates a hobbyist from a true fabricator. It allows you to make informed decisions about your workshop layout and your tool budget, ensuring that every dollar and every square inch is working toward your goals.
- Update your inventory list once a month.
- Note which materials are most frequently used for future bulk buys.
- Monitor the weight on your wall racks for any signs of sagging.
- Review your “Scrap Limit” quarterly to see if your storage needs have changed.
Setting up a functional metalworking space on a budget is entirely possible, but it requires discipline in how you handle the “leftovers” of your craft. By prioritizing vertical storage, categorizing by shape and grade, and adhering to industrial safety standards, you can turn a cramped garage into a professional-grade fabrication shop.
FAQ
How do I prevent my stored steel from rusting in a humid garage? Rust is caused by moisture reacting with ferrous metal. To prevent this, I lightly coat my long-term storage stock with a thin layer of WD-40 or a dedicated metal protectant. Additionally, keeping your metal off the concrete floor is crucial, as concrete wicks moisture directly into the steel. Use wooden spacers or plastic bins to create a barrier.
What is the safest way to store heavy steel plates in a small space? Never lean heavy plates against a wall at a steep angle, as they can slide out and crush feet. The safest method is a vertical “toast rack” or “plate rack” on the floor. This consists of several vertical dividers that hold plates upright. This allows you to flip through them like a filing cabinet and pull out a single piece without moving the others.
Should I keep every small piece of scrap metal? No. This is a common rookie mistake that leads to “clutter paralysis.” I follow the “six-inch rule.” If a piece of mild steel is smaller than six inches in all directions and doesn’t have a specific, immediate use (like a gusset), it goes into the recycling bin. Your time and floor space are worth more than a fifty-cent piece of scrap.
How can I tell the difference between aluminum and stainless steel scrap? The simplest way is the magnet test. A magnet will not stick to aluminum, but it will stick to most common grades of mild steel. However, some stainless steels are non-magnetic. In that case, look at the weight and the “spark test.” Aluminum is much lighter and produces no sparks when touched with a grinder. Stainless steel is heavy and produces short, orange sparks.
Is it safe to store metal scrap near my welding area? You should maintain a “fire-safe zone” of at least 35 feet around your welding area according to AWS standards, but in a small shop, this is often impossible. At a minimum, ensure your scrap storage is not directly under your welding table where sparks and slag can accumulate. Use metal bins rather than plastic if they must be near the “hot zone.”
How do I label my metal so the markings don’t rub off? Standard markers often fade or rub off when handled. I recommend using “paint markers” or “metal markers.” These contain actual paint that resists oil and abrasion. For a more permanent solution, you can use a set of metal stamps to indent the material type into the end of the stock.
What size casters should I use for a scrap cart? For a cart that will hold steel, never use casters smaller than 3 inches in diameter. Smaller wheels will get stuck on the tiniest metal chips or cracks in the floor. Look for “polyurethane on iron” wheels with a weight rating of at least 200 pounds per caster to ensure they can handle the density of metal scrap.
Can I use PVC pipe for vertical storage? Yes, PVC pipe is excellent for organizing rods, TIG welding filler wire, and small tubes. However, PVC is brittle. It should be used as a divider inside a more structural frame, not as the primary load-bearing component. Ensure the PVC is securely fastened so it doesn’t tip over when you pull a piece of metal out.
How do I calculate the weight of the steel on my wall rack? You can use a standard “metal weight calculator” online or a simple reference chart. For example, 1-inch square tube (1/8″ wall) weighs about 1.44 pounds per foot. If you have ten 8-foot pieces, that’s 115 pounds. Always round up your estimates to ensure you are staying well within the safety limits of your wall anchors.
What should I do with the metal I decide not to keep? Find a local scrap yard. Most will take “mixed light iron” for a small payout. For a beginner, this is a great way to recoup some of your consumable costs. Keep a 5-gallon bucket for “clean” aluminum and another for “mixed” steel. Once they are full, take a trip to the yard and turn your clutter back into tool money.
(This article was written by one of our staff writers, Michael Thompson. Visit our Meet the Team page to learn more about the author and their expertise.)