How to Weld a Secure Battery Tray onto a Trailer Tongue (Fix)
I remember my first custom fabrication project like it was yesterday. I was building a simple steel frame for a utility trailer, and I had spent four hours measuring and cutting every piece to within a hair of my marks. I felt confident. But as soon as I finished running a long, continuous bead along the main joint, I watched in horror as the steel pulled. The frame, once perfectly square, twisted into a diamond shape that no amount of hammering could fix. That day, I learned that welding isn’t just about sticking two pieces of metal together; it is a constant battle against the physics of heat.
In my 13 years as a prototype technician, I have seen even the most experienced builders get frustrated by metal warping. When you are mounting a storage component to a trailer tongue, the stakes are high. You are working with a structural member of a vehicle that sees constant vibration and road stress. If your layout is off by even 1/8th of an inch, or if your weld sequence causes the tray to sit crooked, you are looking at a project that looks amateur and performs poorly. My goal is to walk you through the process of building a rock-solid mounting solution while keeping your tolerances tight and your structure straight.
Preparing the Design and Material Cut List
Designing a project starts with selecting the right materials and planning your cuts to account for the thickness of your tools. For a trailer-mounted storage tray, I recommend using 14-gauge mild steel sheet or 1/8-inch angle iron to provide the necessary rigidity without adding excessive weight to the front of the trailer.
Before you ever strike an arc, you need a clear blueprint. I start by measuring the “A” section of the trailer tongue. Most utility trailers use C-channel or rectangular tubing for the tongue. You need to design your tray to sit flush across these rails. I prefer a “drop-in” design where the tray frame sits between the rails or a “top-mount” design that spans across them. For this build, we will focus on a frame made of 1-1/2 inch angle iron.
Calculating Metal Kerf Allowances for Precise Fits
Kerf is the width of the material removed by your cutting tool, such as a saw blade or a plasma torch. If you do not account for this 1/16th to 1/8th of an inch gap, your final assembly will be shorter than intended, leading to gaps that are difficult to bridge with a weld.
When I plan my custom fabrication projects, I always mark my lines on the “waste” side of the measurement. If you are using a standard chop saw, your blade is likely 3/32 or 1/8 of an inch thick. If you have four cuts in a row and ignore the kerf, your tray will be nearly half an inch too short by the time you reach the end. I use a fine-point scribe instead of a soapstone for my initial layout because a soapstone line can be 1/16th of an inch wide on its own.
| Cutting Tool | Typical Kerf Width | Accuracy Tolerance |
|---|---|---|
| Cold Saw | 0.080″ – 0.100″ | +/- 0.010″ |
| Abrasive Chop Saw | 0.125″ (1/8″) | +/- 0.030″ |
| Plasma Cutter | 0.040″ – 0.060″ | +/- 0.050″ |
| Angle Grinder (Thin) | 0.040″ – 0.045″ | +/- 1/16″ |
Building Workshop Jigs and Fixtures for Square Assembly
A workshop jig is a temporary structure or tool used to hold your workpieces in the exact position required during the assembly and welding process. Using fixtures ensures that your angles remain at 90 degrees even when the heat of the weld tries to pull the metal out of alignment.
I never weld “in the air.” I use a flat welding table or a pair of heavy sawhorses with a known level surface. To keep the battery tray square, I use heavy-duty magnetic squares and F-clamps. However, magnets can sometimes blow the arc around (a phenomenon called arc blow), so I prefer mechanical clamping. I often tack-weld small “stop blocks” of scrap steel to my table. These blocks act as a fence that I can butt my angle iron against, ensuring every tray I build is identical and square.
Using Clamping Layouts to Combat Metal Warping Solutions
Metal warping solutions often involve physical restraint. When you heat steel to its melting point, it expands; as it cools, it contracts. If the metal is not clamped down, the cooling weld bead will act like a shrinking rubber band, pulling the two pieces toward the side of the weld.
I use a technique called “over-clamping.” I place a clamp every 4 to 6 inches along the joint. For a tray frame, I clamp the corners to a thick steel plate. This forces the metal to stay flat during the cooling phase. If you are working on a wooden workbench, you can bolt your pieces to a temporary plywood jig, though you must be careful with the heat. The goal is to reach a dimensional tolerance of +/- 1/16th of an inch across the diagonals. If the diagonals of your rectangular tray match, the frame is square.
Mastering Weld Sequencing Layout to Control Distortion
Weld sequencing layout is the strategic order in which you apply tacks and final beads to balance the heat input across a workpiece. By jumping from one side of the project to the other, you allow the metal to cool evenly, which prevents the entire structure from bowing in one direction.
The biggest mistake I see in custom fabrication projects is “the long run.” A builder starts at one corner and welds all the way around the tray in one go. This pours a massive amount of heat into the metal, causing it to warp. Instead, I use the backstepping method. I weld a two-inch bead, move to the opposite corner, weld another two inches, and then return to the first side but weld toward my previous start point. This distributes the thermal load and keeps the tray from “potato-chipping.”
The Precision Order of Tacking and Final Beads
Tack welds are small, temporary welds used to hold pieces in place before the final pass. For a tray assembly, I use tacks that are roughly 1/4 inch long. I place them on the inside of the corners first, then check my squareness. If the heat from the first tack pulled the metal, I can still “bump” it back into place with a dead-blow hammer before the second tack.
- Place the first tack at the inner corner of the joint.
- Check the diagonal measurement of the frame.
- Place the second tack on the outer edge of the same joint.
- Move to the opposite corner of the tray and repeat.
- Once all four corners are tacked and the diagonals are equal within 1/16th of an inch, begin the final sequencing.
| Sequence Step | Action | Purpose |
|---|---|---|
| Initial Tacks | Four corners, inner edge | Fixes basic geometry |
| Cross-Check | Measure diagonals | Ensures squareness (+/- 1/16″) |
| Secondary Tacks | Four corners, outer edge | Locks the angle |
| Root Pass | 1-inch beads, alternating sides | Minimal heat input |
| Final Fill | Backstepping technique | Structural completion |
Secure Attachment Techniques for the Trailer Frame
Attaching a tray to a trailer tongue requires understanding where to place the welds to ensure maximum strength without compromising the trailer’s structural integrity. You are essentially joining a smaller, thinner frame to a larger, thicker structural member, which requires careful heat management.
When I attach the tray to the A-frame, I avoid welding across the top of the tongue rails in a continuous line perpendicular to the trailer’s length. This can create a “stress riser,” which is a point where the metal is more likely to crack under the vibration of the road. Instead, I prefer longitudinal fillet welds along the sides of the tongue. A fillet weld is a triangular weld that joins two surfaces at a right angle. By welding parallel to the trailer tongue, you distribute the load along the strongest part of the rail.
Choosing Between Fillet Welds and Plug Welds
A plug weld is created by drilling a hole in the top piece of metal and filling that hole with weld metal to join it to the piece beneath. This is an excellent choice if you want a clean, low-profile look for your tray attachment.
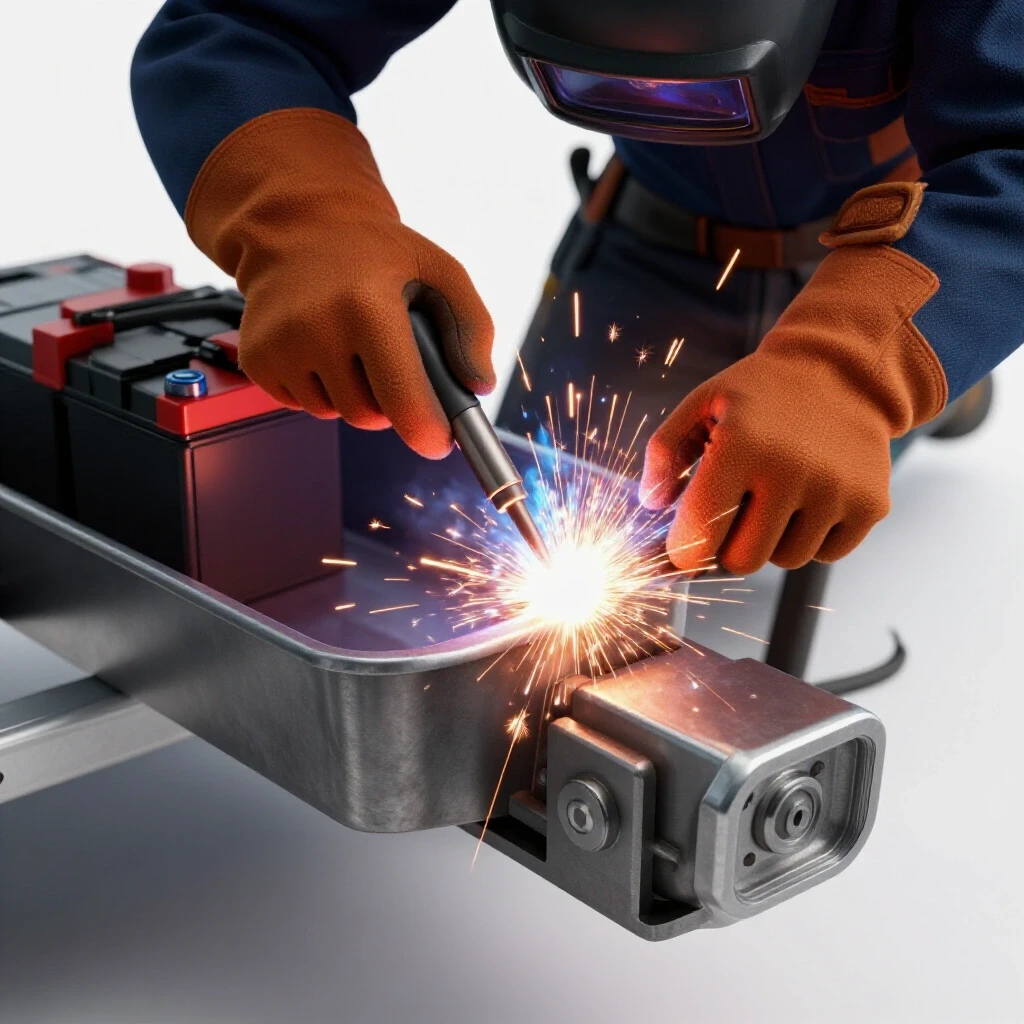
For a battery tray, I often use a combination. I’ll use 1-inch fillet welds on the exterior corners where the tray meets the tongue and two plug welds in the center of the tray’s support bars. This provides multiple points of contact. Remember that the trailer tongue is usually thicker than the tray material. I point my welding torch more toward the thicker trailer steel to ensure I get good penetration without blowing a hole through the thinner tray steel. This is a common challenge in metal layout tips for beginners.
- Use a 60-degree torch angle toward the thicker material.
- Clean the trailer tongue to shiny metal using a flap disc.
- Remove all mill scale, as it acts as an insulator and causes poor weld quality.
- Ensure the tray is clamped tightly to the tongue; even a 1/32″ gap can cause the weld to fail.
Correcting Metal Warping Solutions After Final Welding
Even with the best fixtures, some distortion is inevitable due to the physics of angular weld shrinkage. Correcting these issues involves understanding how to “draw” the metal back into place using controlled heat or mechanical force.
If I notice the tray has bowed upward after I finish the attachment welds, I don’t panic. One of the best metal warping solutions is to use the “heat of the weld” to your advantage. You can sometimes place a small “dummy tack” on the opposite side of the warp. As that tack cools, it will pull the metal in the opposite direction. Alternatively, for 14-gauge or 1/8-inch material, a large crescent wrench can be used to gently tweak the edges of the tray back into alignment.
Post-Weld Cleanup and Structural Integrity Checks
Once the welding is done, the work isn’t over. I always perform a “ring test” on my welds. I lightly tap the tray with a hammer. A solid, well-penetrated weld will result in a clear, high-pitched ring. A dull “thud” might indicate a cold weld or lack of fusion.
I then use a 40-grit flap disc on an angle grinder to smooth out any sharp burrs or weld spatter. Do not grind your structural welds flat; this removes the “throat” of the weld and significantly weakens the joint. You only want to clean up the aesthetics and ensure there are no sharp edges that could cut you or damage the battery casing later. Finally, I wipe the area down with acetone and apply a high-zinc cold galvanizing spray or a dedicated rust-inhibitor primer to prevent corrosion in the Heat Affected Zone (HAZ).
Practical Benchmarks for a Successful Build
To ensure your custom fabrication projects meet professional standards, follow these specific benchmarks during your build. These metrics are what I used in the prototype shop to ensure every part was fit for service.
- Dimensional Tolerance: The tray should be within 1/16th of an inch of the design dimensions.
- Squareness: The two diagonal measurements of the tray should be within 1/8th of an inch of each other.
- Tack Spacing: Tacks should be placed every 3 to 4 inches for thin sheet metal and at every corner for angle iron.
- Heat Control: If the metal turns a dark purple or grey, you are using too much heat. Aim for a straw or light blue tint in the HAZ.
- Gap Management: No gap between the tray and the trailer tongue should exceed 1/16th of an inch prior to welding.
By following these steps, you can move away from “eyeballing it” and toward a structured, repeatable fabrication process. The key is to respect the material. Steel is a living thing when it gets hot; treat it with the right sequence and the right restraints, and it will stay exactly where you want it.
Frequently Asked Questions
What is the best thickness of steel for a trailer storage tray? For most DIY projects, 1/8-inch (11-gauge) angle iron or 14-gauge sheet steel is the sweet spot. It is thick enough to weld easily without burning through, yet light enough that it won’t significantly impact your trailer’s balance. Avoid anything thinner than 16-gauge, as it may crack under the constant vibration of road travel.
How do I stop my tray from warping while I weld it? The most effective metal warping solutions include using heavy-duty clamps to fix the tray to a flat surface, using a backstepping weld sequence, and keeping your heat input low. Never weld a long continuous bead; instead, use short 1-to-2-inch segments and jump from one side of the project to the other to allow for even cooling.
Can I weld a tray onto a galvanized trailer tongue? Yes, but you must be extremely careful. Welding galvanized steel releases toxic zinc fumes. You must grind away the galvanizing layer until you see shiny bare steel at the weld site. Always wear a respirator rated for metal fumes and work in a well-ventilated area. After welding, apply a cold-galvanizing spray to protect the bare metal.
What is the “diagonal rule” for checking squareness? The diagonal rule states that if a four-sided shape is a perfect rectangle, the distance from the top-left corner to the bottom-right corner must be identical to the distance from the top-right to the bottom-left. In my shop, I aim for these measurements to be within 1/16th of an inch of each other.
Why should I avoid welding across the top of the trailer tongue? Welding a “transverse” bead (perpendicular to the frame) creates a potential fracture point. The heat changes the grain structure of the steel, making it more brittle at that specific line. By welding “longitudinally” (parallel to the frame), you allow the tongue to flex naturally under load without putting excessive stress on the weld.
What is kerf, and why does it matter for my cut list? Kerf is the thickness of the material that the saw blade turns into dust. If your blade is 1/8-inch thick and you make four cuts, you have lost half an inch of total material. If you don’t account for this in your layout, your tray components will be too short, resulting in large gaps that make welding difficult and weaken the structure.
How big should my tack welds be? For a standard battery tray project, a tack weld should be about the size of a pencil eraser or roughly 1/4 inch long. It needs to be strong enough to hold the metal’s weight but small enough that you can easily grind it off or weld over it during the final pass.
Should I use a MIG or TIG welder for this project? A MIG welder is generally better for trailer projects because it is faster and handles the slightly thicker structural steel of a trailer tongue more efficiently. TIG is great for precision, but MIG provides excellent penetration and is more forgiving when working in a garage or driveway environment where perfect cleanliness is hard to maintain.
How do I handle gaps if my cuts aren’t perfect? If you have a gap larger than 1/16th of an inch, do not try to fill it with one massive weld bead. Use a “bridge” technique where you lay a bead on one side of the gap, let it cool, and then lay another bead that ties the first one to the other side. However, it is always better to recut the piece for a tighter fit.
What is the best way to clean the steel before welding? I recommend using an angle grinder with a flap disc to remove mill scale (the dark grey coating on new steel) until the metal is shiny. Follow this by wiping the area with acetone to remove any oils or grease. Clean metal is the single most important factor in achieving a strong, crack-free weld.
(This article was written by one of our staff writers, Robert Kline. Visit our Meet the Team page to learn more about the author and their expertise.)