How to Weld Long Sheet Metal Seams Without Warping (DIY Fix)
I remember the first time I tried to join two long pieces of 18-gauge sheet metal for a floor pan project. I had my settings dialed in on a scrap piece, and my beads looked decent. However, as I moved down that two-foot seam, I watched in horror as the metal began to wave and curl like a piece of bacon in a hot frying pan. By the time I finished, the panel was so warped it was unusable. That day, I learned that welding isn’t just about the puddle; it is about managing the invisible forces of heat and tension.
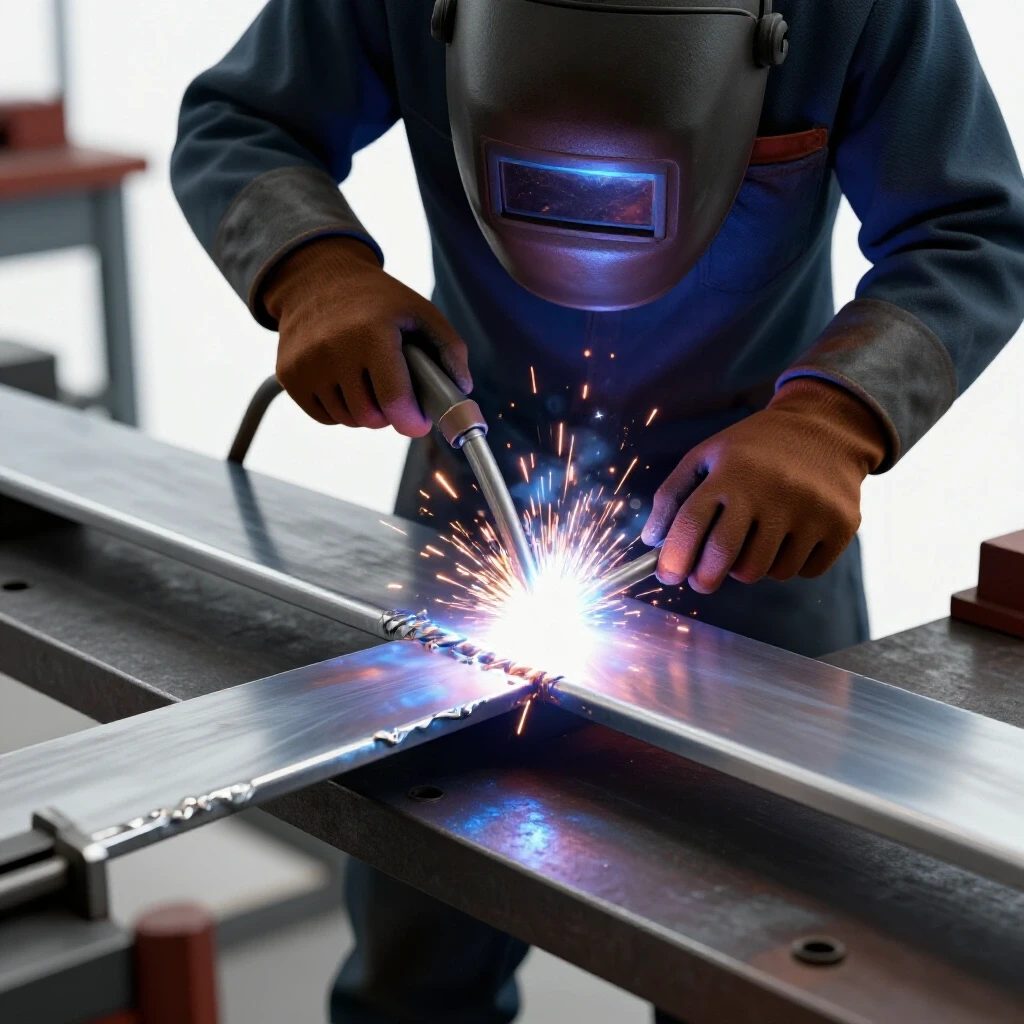
Over the last 12 years, I have tracked my progress through thousands of inches of seams. I have learned that consistency is not a gift; it is a result of structured practice and understanding how metal reacts to high temperatures. If you are struggling with panels that buckle or edges that lift, you are likely hitting a common plateau. Moving from short tacks to long, straight joins requires a shift in how you move your body and how you sequence your work.
Mastering Body Mechanics and Torch Stability
Developing the physical coordination to move a torch smoothly over a long distance is the foundation of any clean fabrication project. Without a stable base, your travel speed will fluctuate, leading to inconsistent heat and eventual distortion.
Body mechanics in welding refers to how you position your feet, hips, and arms to allow for a fluid, unobstructed range of motion. If your arm hits your ribcage halfway through a seam, your torch angle will change, and the puddle will either overheat or lose penetration. I always tell my students to perform a “dry run” before pulling the trigger. Move your cold torch along the entire length of the joint to ensure your cord won’t snag and your elbow has room to swing.
The Importance of the Glide Path
A glide path is the pre-planned physical movement your hand takes across the workpiece to maintain a consistent arc length and travel angle. It ensures that your hand-eye coordination is focused on the puddle rather than fighting your own posture.
When I started, I used to “death grip” the torch. This tension in the hand travels up the arm and causes micro-jitters. To fix this, I began practicing a relaxed grip, using my off-hand as a sliding rest. By resting the side of my gloved hand on the table or a steady-rest block, I could maintain a precise 3/32-inch arc gap. This stability is vital when working on thin sheets where even a small deviation in height can burn a hole through the material.
Physical Practice Progression for Hand Stability
Building muscle memory requires repetitive, low-stakes drills that focus on movement rather than the final weld. I recommend a three-stage progression to help you stabilize your torch control.
- The Ghost Run: Move your torch along a marked line without turning the machine on. Focus on keeping your knuckles exactly one inch from the surface for the entire 12-inch run.
- The Weighted Glide: Tape a small weight to your torch. This forces you to use your larger shoulder muscles rather than your wrist, which leads to smoother, more predictable movements.
- The Prop Block Drill: Practice sliding your hand along a straight piece of square tubing placed parallel to your seam. This provides a physical guide that keeps your travel path perfectly straight.
| Practice Stage | Focus Metric | Goal Benchmark |
|---|---|---|
| Ghost Run | Path Deviation | Less than 1/16″ from line |
| Weighted Glide | Movement Fluidity | No pauses or stutters |
| Prop Block Drill | Torch Angle | Consistent 10-15 degree drag |
Understanding Thermal Expansion and Metal Behavior
To prevent a panel from twisting, you must understand that metal expands when heated and contracts as it cools. This movement is what creates the “wave” in your sheet metal.
Thermal expansion is the physical increase in the volume of a material as its temperature rises. In thin sheet metal, there is very little mass to absorb and dissipate this heat. As you weld, the metal directly under the arc expands rapidly. Because the surrounding metal is still cold and rigid, the expanding hot metal has nowhere to go but up or down, resulting in a warp. When the weld cools, it shrinks, pulling the edges of the panels inward and creating permanent tension.
The Heat-Affected Zone (HAZ)
The Heat-Affected Zone is the area of base metal that has not been melted but has had its mechanical properties and appearance altered by the heat of the weld. You can usually see this as a rainbow-colored band next to your bead.
A wide HAZ is a signal that you are moving too slowly or using too much power. My goal is always to keep the HAZ as narrow as possible. By tracking the width of this zone in my practice log, I was able to correlate my travel speed to the amount of distortion I was seeing. If your HAZ is wider than 1/4 inch on 18-gauge steel, you are likely putting enough heat into the part to cause significant buckling.
Factors Influencing Metal Distortion
Several variables dictate how much a panel will move during the process. Understanding these allows you to adjust your technique before you ever strike an arc.
- Material Thickness: Thinner materials (like 22-gauge) have less structural integrity and warp much faster than 14-gauge plate.
- Travel Speed: Faster travel speeds (8-12 inches per minute) reduce the total time the heat has to soak into the surrounding metal.
- Joint Fit-up: Gaps between panels require more filler metal and more heat to bridge, which increases the risk of warping.
- Clamping Pressure: While clamps hold parts in place, over-clamping can sometimes trap stresses that cause the metal to “pop” once the clamps are removed.
Setting Baseline Parameters for Thin Gauge Seams
Achieving a professional result starts with the settings on your machine. You need enough heat to fuse the metal, but not so much that the puddle becomes uncontrollable.
Machine parameters include voltage, wire feed speed (for MIG), or amperage (for TIG). For DIY fabricators using MIG on common 18-gauge mild steel, I recommend starting with a lower voltage setting and a relatively high wire speed. This creates a “cold” but fast-freezing puddle that fills the seam without overheating the entire panel. I always document my settings in a logbook, noting the material thickness and the resulting bead shape.
Calculating Heat Input
Heat input is a measure of the electrical energy transferred to the workpiece per unit length of the weld. It is calculated by multiplying voltage and amperage, then dividing by the travel speed.
Lowering your heat input is the most effective way to prevent distortion. You can achieve this by either turning down the machine or increasing your travel speed. In my early years, I struggled with “rookie dwell,” where I would linger at the end of a bead. This momentary pause dumped a massive amount of heat into the corner of the panel, causing it to lift. Learning to “snap” the torch away at the end of a run was a major breakthrough for my consistency.
Recommended Starting Points for Mild Steel
These metrics are based on my personal testing and vocational standards for short-circuit MIG welding. Use these as a baseline and adjust based on your specific machine’s behavior.
| Material Gauge | Voltage Range | Wire Speed (IPM) | Target Travel Speed |
|---|---|---|---|
| 22 Gauge | 14-15V | 140-160 | 12-15 IPM |
| 20 Gauge | 15-16V | 160-180 | 10-12 IPM |
| 18 Gauge | 16-17V | 190-210 | 8-10 IPM |
| 16 Gauge | 17-18V | 220-240 | 6-8 IPM |
Strategic Joint Preparation and Clean Zones
A weld is only as good as the preparation that happens before the arc is struck. Contaminants and poor fitment are the primary causes of erratic bead shapes and excessive heat.
A clean zone is a strip of bare, shiny metal on both sides of the joint that has been stripped of all rust, paint, oil, and mill scale. I use a 1-inch rule: every seam gets cleaned one inch back from the edge on both the top and bottom. Any leftover paint or rust will act as an insulator, forcing you to turn up the heat to get a stable arc, which directly contributes to warping.
Achieving the Perfect Fit-Up
Fit-up refers to how tightly the two pieces of metal butt against each other. For long seams in thin sheet metal, a “zero-gap” fit is often preferred by beginners because it is easier to manage.
However, a tiny gap (about the thickness of a razor blade) can actually help with penetration. The danger comes when the gap is inconsistent. If the gap opens up to 1/16 inch in the middle of a panel, you will have to slow down to fill it, creating a hot spot. I use specialized butt-weld clamps or simple magnets to ensure the edges stay perfectly flush and aligned before I begin my tacking sequence.
Step-by-Step Preparation Checklist
- Degrease: Use a dedicated cleaner to remove shipping oils from the metal.
- Mechanical Cleaning: Use a flap disc or clean grinding wheel to reach bright metal.
- Deburr: Remove the sharp “flash” left by your shears or saw, as these small bits of metal can melt instantly and cause the arc to wander.
- Alignment Check: Use a straightedge to ensure the two panels are on the same plane.
- Final Wipe: A quick pass with a clean rag to remove any grinding dust.
Implementing Intermittent and Back-Step Sequences
The secret to a flat panel isn’t a long, continuous bead; it is a series of small, controlled steps that allow the metal to stay cool.
Intermittent welding involves making short beads in different locations along the seam rather than moving from one end to the other. This distributes the heat across the entire length of the panel. If I am welding a 24-inch seam, I might place a one-inch bead at the start, then move to the middle, then to the end. By the time I return to the first area, it has had time to cool down to the touch.
The Back-Step Technique
Back-stepping is a professional method where you move the torch in the opposite direction of the overall weld progression.
For example, if you want the total weld to go from left to right, you start your first bead two inches in from the left edge and weld back toward the edge. Then, you move four inches in and weld back toward the start of your first bead. This technique is incredibly effective because each new bead ends on a section that has already been welded and cooled, which acts as a heat sink and structural brace.
Stitch Welding and Cooling Pauses
Stitch welding is essentially a series of overlapping tacks. For very thin automotive sheet metal, I often use a “pulse” method where I trigger the torch for one second, wait for the orange glow to disappear, and then trigger again, overlapping the previous spot by 50%.
- The 1-Second Rule: Never keep the arc live for more than one second in one spot on thin gauges.
- The Touch Test: If you cannot comfortably place your bare hand an inch away from the weld after a few seconds, the panel is getting too hot.
- Compressed Air Cooling: Some fabricators use a quick blast of air to cool the tacks. While effective, be careful not to introduce moisture or contaminants into the next weld zone.
Structured Practice Drills for Long Seams
To overcome the plateau of inconsistent beads, you must move away from “just building things” and toward dedicated practice sessions.
I recommend setting aside 30 minutes of “bead-on-plate” practice before you start your actual project. Use a large scrap sheet and try to run straight lines across the entire surface. This helps you find your physical rhythm and identify where your body mechanics are breaking down. If you notice your beads getting wider and flatter at the end of a run, it is a sign that the plate is heat-soaking and you need to increase your travel speed.
Tracking Progress with a Weld Log
Objective measurement is the only way to see past the frustration of a bad day in the shop. I keep a simple notebook where I track specific metrics for every practice session.
- Date and Material: (e.g., Oct 12, 18ga Mild Steel)
- Parameters: (e.g., 16.5V, 200 IPM)
- Travel Speed Goal: (e.g., 10 IPM)
- Visual Assessment: (e.g., “Bead too tall in middle, HAZ too wide at end”)
- Correction Plan: (e.g., “Adjust body position to avoid arm-drag at 6-inch mark”)
Self-Assessing Joint Defects
Learning to “read” your welds is a critical skill. When a panel warps, the weld itself usually tells you why.
- Excessive Reinforcement: If the bead is very tall and “ropy,” you are moving too slowly or your wire speed is too high. This extra metal adds more tension as it cools.
- Undercut: A groove melted into the base metal at the edge of the weld. This is caused by too much heat or an improper torch angle, weakening the joint.
- Burn-Through: Holes in the metal. This is the ultimate sign of excessive heat or poor fit-up.
- Discoloration: A dark, charred look around the weld indicates a loss of shielding gas or extreme overheating.
Actionable Framework for Your Next Project
When you are ready to tackle a long seam on a real project, follow this structured workflow to ensure the panel stays flat and professional.
- Secure the Workpiece: Use a heavy steel table if possible. The mass of the table acts as a heat sink, drawing energy away from the sheet metal.
- Tack Frequently: Place tacks every 1 to 2 inches. On a long seam, these tacks act as “anchors” that fight the metal’s urge to move.
- The Planar Check: After tacking, use a straightedge to see if the panel has bowed. If it has, you can often gently tap the tacks with a hammer to relieve the stress before continuing.
- Execute the Back-Step: Use the back-step method described earlier, keeping each individual “stitch” under one inch in length.
- Monitor Temperature: Work on other parts of the project or take a break if the metal becomes too hot to touch. Patience is the best tool for preventing warpage.
By focusing on these systematic steps, you move away from the guesswork that leads to frustration. Welding is a physical trade, and like any sport or musical instrument, it rewards the person who treats their practice with discipline. Don’t be discouraged by a few warped panels; they are just data points on your way to mastery.
Frequently Asked Questions
Why does my metal always pop or “oil-can” after I finish welding? This is usually caused by “shrinkage stress.” As the weld cools, it contracts and pulls the surrounding metal tight. If the tension is uneven, the metal will snap between two different shapes. Using a back-step pattern and keeping your beads small helps distribute these stresses more evenly.
Can I use a wet rag to cool the metal faster? I generally advise against this for beginners. Rapidly quenching a weld can make the metal brittle and may trap moisture, leading to porosity in your next bead. It is better to let the metal cool naturally or use a gentle stream of compressed air.
How do I know if I am moving at the right travel speed? A good rule of thumb for sheet metal is to watch the “puddle shape.” It should look like a small, consistent oval. If it starts to look like a long teardrop, you are moving too fast. If it becomes a wide circle, you are moving too slowly and are about to burn through.
What is the best way to fix a warp if it already happened? If the warp is minor, you can sometimes use a hammer and dolly to “stretch” the weld bead. By thinning the weld slightly with controlled hammer blows, you relieve the tension that is pulling the panel out of shape.
Does the type of gas I use affect warping? Yes. For MIG welding mild steel, a 75% Argon / 25% CO2 mix is standard. Using 100% CO2 creates a hotter arc and more splatter, which can increase the total heat input and the risk of distortion.
Should I weld from the center out or from the ends in? For long seams, it is often best to start with tacks at both ends, then one in the center, then divide those spaces in half. This “rule of halves” ensures the panel is locked in place before you start the final welding sequence.
How long should I wait between welds? If you are working on a sensitive panel, wait until the previous weld is cool enough that you can hold your hand near it comfortably. In a DIY shop, this might mean spending 30 seconds of “cooling time” for every 10 seconds of “welding time.”
What torch angle is best for preventing burn-through? A slight drag angle (10 to 15 degrees) points the heat back toward the already-solidified weld, which helps prevent the arc from “digging” too deep into the thin base metal.
Is TIG better than MIG for preventing warpage? TIG allows for much more precise control over heat, but it is generally slower, which can actually lead to more total heat soak if the operator isn’t highly skilled. For most DIY sheet metal work, a well-tuned MIG setup with a “pulse” technique is faster and easier to manage.
How do I stop the wire from sticking to the tip when I do short tacks? This is often caused by having too much “burn-back.” Ensure your work clamp is on clean metal and that you are maintaining a consistent distance between the tip and the work. If the wire sticks, you may need to increase your wire speed slightly.
(This article was written by one of our staff writers, Thomas Langley. Visit our Meet the Team page to learn more about the author and their expertise.)