How to Align Drill Press Motor Pulley V-Belts (DIY Guide)
I’ve spent the last 18 years in industrial fabrication shops, often knee-deep in metal shavings and the hum of machinery. One thing I’ve learned is that a machine is only as good as its alignment. I remember a particular project where a custom fabrication shop was struggling with persistent tool chatter on a heavy-duty drill press. They were blaming the bits, the coolant, and even the hardness of the steel plates they were drilling. After two days of frustration and ruined workpieces, I was called in to look at the setup. Within ten minutes, I noticed the drive belt was “climbing” the side of the pulley flange. The motor wasn’t sitting square to the spindle. That tiny half-degree of tilt was sending harmonic vibrations straight down the quill, ruining the finish on every hole.
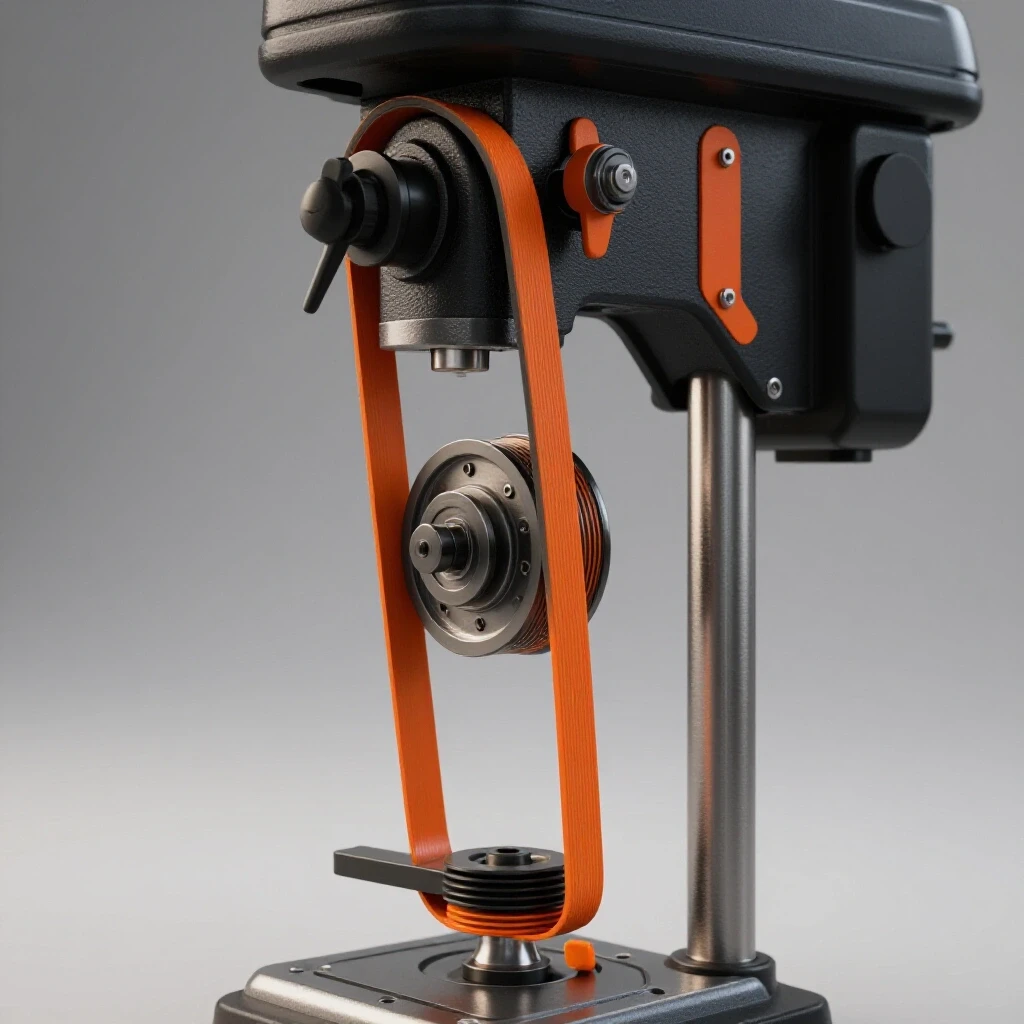
In the world of metalworking, we often look for complex answers to our problems. We suspect metallurgical defects or electrical gremlins when the solution is often much more mechanical. When your power transmission system is out of sync, it doesn’t just wear out parts; it compromises the integrity of your entire fabrication process. A misaligned drive system leads to heat buildup, uneven belt wear, and that dreaded vibration that makes precision work impossible. This guide is about mastering the systematic diagnostic steps needed to bring your drill press back into a state of mechanical harmony.
Establishing a Diagnostic Framework for Power Transmission
A diagnostic framework is a structured mental map used to isolate variables within a mechanical system. Instead of guessing which bolt to turn, we use observation and measurement to identify the root cause of a failure. This prevents “parts cannon” repairs where components are replaced without a clear understanding of the problem.
When I approach a machine that isn’t performing, I start with a high-level observation. I’m looking for the “why” behind the “what.” If a drill press is vibrating, I don’t just tighten the belt. I ask if the vibration is coming from the motor, the spindle, or the interface between them. In metalworking, we call this isolating the drive train. By removing the belt and running the motor solo, we can determine if the motor bearings are the culprit. If the motor is smooth, the issue lies in the alignment or the spindle assembly.
Identifying the Symptoms of Drive Path Errors
Recognizing drive path errors involves using your senses—sight, sound, and touch—to detect deviations from normal operation. It is the process of translating a machine’s “language” into actionable data points.
You might notice a high-pitched squeal during startup or a rhythmic “thumping” while the machine is under load. These aren’t just annoyances; they are indicators of friction and energy loss. A belt that is forced to run at an angle will generate excessive heat. I often use an infrared thermometer to check the temperature of the pulley sheaves after a few minutes of operation. If one side of the pulley is significantly hotter than the other, you have a tracking issue. This heat eventually transfers to the spindle, which can cause thermal expansion and lead to unexpected tool runout.
Mechanical Tolerances and Spindle Integrity
Mechanical tolerance is the allowable limit of variation in a physical dimension. In the context of a drill press, we are looking at the concentricity of the shafts and the rigidity of the mounting surfaces. If the foundation is flawed, no amount of pulley adjustment will fix the vibration.
Before you even look at the belt path, you must verify that the shafts themselves are true. I’ve seen cases where a motor was dropped during installation, slightly bending the output shaft. Even a 0.003-inch bend at the shaft will be magnified at the edge of a four-inch pulley. We use a dial indicator to measure this. If the shaft is wobbling, the pulley will describe a “drunkard’s path,” making it impossible for the belt to track straight.
Measuring Pulley Runout and Shaft Play
Pulley runout refers to the degree to which a pulley deviates from a perfect circle as it rotates. Shaft play is the amount of movement or “slop” present in the bearings supporting that shaft.
To check this, I mount a magnetic base dial indicator to the machine frame and place the tip against the inner “V” of the pulley. As I rotate the pulley by hand, I watch the needle. For most industrial-grade drill presses, I look for a total indicated runout (TIR) of less than 0.005 inches. Anything more than that suggests a poorly machined pulley or a worn-out keyway. Similarly, I push and pull on the spindle to check for axial and radial play. If the spindle bearings are shot, the pulley will shift under the tension of the belt, throwing off your alignment the moment you turn the machine on.
| Diagnostic Factor | Acceptable Tolerance | Tool Required |
|---|---|---|
| Motor Shaft Runout | 0.001″ – 0.002″ | Dial Indicator |
| Pulley Face Runout | 0.003″ – 0.005″ | Dial Indicator |
| Spindle Radial Play | < 0.002″ | Hands / Dial Indicator |
| Belt Tension Deflection | 1/2″ per foot of span | Tension Gauge or Ruler |
| Pulley Temperature Delta | < 15°F across faces | Infrared Thermometer |
The Geometry of Parallel Power Transmission
Parallel power transmission requires that the rotational axes of the motor and the spindle be perfectly parallel in two planes. If these axes are not parallel, the belt will attempt to “climb” the pulley walls, leading to rapid wear and vibration.
Think of it like the wheel alignment on your truck. If the wheels are “toed-in” or have too much “camber,” the tires wear out and the steering shakes. In a drill press, we deal with two types of misalignment: offset and angular. Offset means the pulleys are parallel but shifted vertically or horizontally from each other. Angular means the shafts are actually tilted at different angles. Both are equally destructive to your shop’s productivity.
Vertical Offset vs. Angular Misalignment
Vertical offset occurs when one pulley sits higher on its shaft than the other, while the shafts remain parallel. Angular misalignment happens when the motor mount or the spindle housing is tilted, causing the shafts to point in different directions.
I find that vertical offset is the easiest to fix; you simply loosen the set screws and slide the pulley up or down the shaft. Angular misalignment is the real “electrical gremlin” of the mechanical world. It’s often caused by a stamped-steel motor mount that has warped over time or a casting that wasn’t machined square at the factory. To diagnose this, you need a precision straightedge. When you lay the straightedge across the faces of both pulleys, it should touch at four points. If there is a gap at one of the points, you have an angular issue that requires shimming.
Practical Methods for Correcting Belt Tracking
Correcting belt tracking is the act of physically adjusting the motor’s position to ensure the belt enters and exits the pulleys in a straight line. This process involves iterative testing and measurement to achieve a neutral tracking state.
The goal is to have the belt centered in the “V” grooves without rubbing against the flanges. When I’m troubleshooting a machine that’s throwing belts or vibrating, I start by loosening the motor mounting bolts just enough to allow for movement but not so much that the motor flops around. I use a long, machined straightedge—or even a piece of extruded aluminum if it’s known to be true—and bridge the gap between the motor and the spindle. This gives me a visual reference for how the two components relate to each other in space.
Shimming the Motor Mount for Precision
Shimming is the process of using thin strips of metal, known as shims, to fill small gaps between mounting surfaces. This allows for microscopic adjustments to the tilt and height of the motor.
Often, you’ll find that the motor plate on a drill press is just a piece of bent plate. It’s rarely perfectly flat. If the top of the motor is leaning toward the spindle, the belt will ride high on the motor pulley and low on the spindle pulley. To fix this, I place 0.005-inch or 0.010-inch brass or stainless steel shims under the front or back mounting bolts of the motor. It’s a game of inches—or rather, thousandths. You add a shim, tighten the bolts, check with the straightedge, and repeat. It’s tedious, but it’s the only way to eliminate the root cause of tool chatter and premature belt failure.
- Step 1: Clean all mounting surfaces of oil, rust, and metal chips.
- Step 2: Identify the direction of the tilt using a straightedge or a level.
- Step 3: Select shim stock based on the measured gap (start small).
- Step 4: Place shims under the appropriate mounting feet.
- Step 5: Torque the bolts to the manufacturer’s specification.
- Step 6: Re-verify alignment with the straightedge at four contact points.
Case Study: Solving Persistent Tool Chatter
I once worked on a 20-inch floor drill press that was producing “wavy” holes in 6061 aluminum. The operator was convinced the spindle was bent, but my dial indicator showed the spindle was true within 0.001 inches. I decided to look at the drive system. By using a smartphone vibration spectrum analyzer app, I found a massive spike at 1,750 RPM—the exact speed of the motor.
The issue wasn’t the spindle; it was the motor mounting plate. It was vibrating like a tuning fork because the pulleys were misaligned by nearly 1/8 of an inch. This misalignment was creating a resonant harmonic that traveled through the belt and into the quill. We spent an hour shimming the motor and squaring the pulleys. Once the belt was tracking straight, the vibration disappeared, and the tool chatter vanished. The shop saved hundreds of dollars by not replacing a perfectly good spindle.
Validation and Testing Procedures
Validation is the final step in the diagnostic process where you prove that your adjustments have resolved the issue. It involves running the machine under various loads and monitoring for the return of previous symptoms.
I never consider a job finished just because the straightedge looks good. I want to see the machine in action. I start by running the drill press at its highest speed with no load. I’m listening for a smooth “whir” instead of a “growl.” Then, I’ll take a series of test cuts in a piece of mild steel, gradually increasing the feed rate. I check the surface finish of the hole and use my infrared thermometer to ensure the pulleys aren’t overheating. If the temperature stays within 15°F of the ambient room temperature after ten minutes of work, I know the friction is minimized.
Modern Tools for Machine Diagnostics
While a straightedge is a classic, modern technology has given us some incredible tools for the shop. I frequently use digital dial indicators because they are easier to read in cramped motor housings. I also rely on vibration logging apps that use the accelerometers in a smartphone to graph movement.
- Digital Dial Indicator: For measuring shaft runout and pulley eccentricity with 0.0005″ resolution.
- Infrared (IR) Thermometer: To detect friction-induced heat on pulley flanges and bearing housings.
- Vibration Spectrum Analyzer (Smartphone App): To identify the frequency of vibrations and link them to motor or spindle speeds.
- Precision Machined Straightedge: At least 24 inches long to bridge the gap between pulleys accurately.
- Feeler Gauges: For measuring the exact gap between the straightedge and the pulley face during shimming.
Troubleshooting Common Alignment Failures
When you’re in the middle of a repair, it’s easy to get tunnel vision. You might spend two hours shimming a motor only to realize the pulley itself is loose on the shaft. This is why a systematic checklist is vital. You have to rule out the simple stuff before you dive into the complex geometry.
One common mistake I see is over-tensioning the belt to compensate for a “wobble.” This is a temporary fix that leads to permanent damage. High belt tension puts an enormous radial load on the bearings. I’ve seen spindle bearings crushed and motor shafts snapped because someone thought “tighter is better.” Always aim for the minimum tension required to prevent slipping under load.
| Symptom | Potential Root Cause | Diagnostic Test |
|---|---|---|
| Excessive Tool Chatter | Resonant vibration from misalignment | Run motor without belt; check for harmonics |
| Rapid Belt Wear (Fraying) | Angular pulley misalignment | Straightedge test across pulley faces |
| Squealing on Startup | Loose belt or glazed pulley surfaces | Check tension deflection (1/2″ per foot) |
| Hot Spindle Housing | Vertical offset causing belt side-loading | IR thermometer check on pulley flanges |
| Visible Pulley Wobble | Bent shaft or worn keyway | Dial indicator on shaft and pulley rim |
Maintaining Mechanical Harmony in the Shop
Once you’ve achieved perfect alignment, the goal is to keep it that way. Vibration is the enemy of any mechanical fastener. Over time, the constant hum of a drill press can cause motor mounting bolts to back out, or set screws to loosen. I make it a habit to check the pulley set screws every time I change the belt speed.
I also recommend keeping a maintenance log for your major shop tools. Note the date you aligned the pulleys and what the runout measurements were. If the machine starts acting up again six months down the line, you can refer back to your notes. If the runout has increased, you know a bearing is failing. If the alignment has shifted, you know the mounting bolts weren’t torqued properly. This data-driven approach takes the guesswork out of fabrication and keeps your downtime to a minimum.
- Quarterly: Check pulley set screws for tightness.
- Bi-Annually: Inspect belt for glazing or side-wall wear.
- Annually: Re-verify pulley alignment with a straightedge.
- As Needed: Clean dust and oil from pulley grooves to maintain grip.
Next Steps for the Precision Fabricator
The journey to a perfectly tuned shop doesn’t end with one machine. The principles of alignment—measuring runout, checking for parallel axes, and using shims for precision—apply to lathes, mills, and even bandsaws. By mastering these systematic diagnostic steps, you transition from someone who just “fixes things” to a specialist who understands the physics of their equipment.
The next time you encounter an issue like welding porosity or a rough finish on a turned part, don’t jump to conclusions. Step back, isolate the variables, and look at the mechanical foundation. Often, the answer is hiding in plain sight, waiting for someone with a straightedge and the patience to use it correctly.
FAQ: Frequently Asked Questions on Drive System Alignment
Why does my drill press vibrate even after I’ve tightened the belt?
Vibration is often caused by the belt being too tight or the pulleys being misaligned. Over-tensioning can cause the motor or spindle shafts to flex, creating a rhythmic vibration. If the pulleys aren’t parallel, the belt will fight to stay in the groove, creating a harmonic resonance. Use a dial indicator to check for shaft runout and a straightedge to ensure the pulleys are square to each other.
How can I tell if my pulley is bent or just misaligned?
Use a dial indicator. Place the tip against the outer rim of the pulley and rotate it by hand. If the needle moves more than 0.005 inches, the pulley is either bent, poorly machined, or not sitting square on the shaft. If the pulley is true but the belt still tracks to one side, the issue is misalignment of the motor or spindle housing.
What is the “four-point” straightedge test?
This is the gold standard for checking pulley alignment. You place a precision straightedge across the faces of both the motor and spindle pulleys. The straightedge should touch both the front and back edges of both pulleys simultaneously. If it only touches three points, or if there is a gap at one end, your pulleys are either offset or at an angle to each other.
Can I use a laser level for this instead of a straightedge?
Yes, laser alignment tools are excellent for this, but they can be expensive. A simple laser level can work if you can mount it securely to one pulley face and project the beam onto the other. However, for most shop-grade drill presses, a high-quality 24-inch straightedge is more than accurate enough and much faster to set up.
How much belt tension is actually necessary?
A general rule of thumb is that you should be able to deflect the belt about 1/2 inch for every foot of distance between the pulley centers using moderate finger pressure. If the belt squeals when you start the motor under load, it’s too loose. If the motor sounds like it’s struggling or the bearings are getting hot, it’s too tight.
Why does my drill press produce a better finish at some speeds than others?
This usually indicates a resonant frequency issue. Every machine has a natural frequency at which it wants to vibrate. If your pulley misalignment creates a vibration that matches that frequency, the effect is magnified, leading to tool chatter. Aligning the pulleys minimizes the “input” vibration, allowing you to use all speed ranges effectively.
What kind of shim material should I use for motor mounts?
Stainless steel or brass shim stock is best because it won’t compress over time and is resistant to shop oils. In a pinch, you can use pieces of a soda can (which is usually about 0.004 inches thick), but dedicated shim stock is more reliable for long-term precision.
Is it normal for pulleys to get hot during use?
It is normal for them to be warm to the touch, but they should never be hot enough to burn you. Excessive heat is a sign of friction, usually caused by the belt rubbing against the sides of the pulley grooves due to misalignment. If one pulley is significantly hotter than the other, check your vertical offset.
How do I fix a motor mount that is tilted?
You fix a tilted mount by shimming the bolts that hold the motor to the mounting plate. If the motor is tilted forward, place shims under the front two bolts. This “pivots” the motor back into a vertical position. You may need to go through several iterations of shimming and checking with a straightedge to get it perfect.
Does pulley alignment affect the life of my drill bits?
Absolutely. Misalignment causes vibration, and vibration is the enemy of carbide and high-speed steel. It causes the cutting edges to “micro-chip,” which dulls the bit prematurely. It also causes the bit to wander, leading to oversized or out-of-round holes. A smooth-running machine is essential for precision metalworking.
What should I do if my motor shaft has more than 0.005″ of runout?
If the shaft itself is bent, it usually requires a professional repair or motor replacement. However, first check that the pulley isn’t just sitting on a burr or a piece of debris on the shaft. Remove the pulley, clean the shaft with an emery cloth, and re-measure the bare shaft with your dial indicator.
Can a worn-out belt cause alignment issues?
A worn belt won’t cause the pulleys to go out of alignment, but it can mimic the symptoms. If a belt has “flat spots” or is frayed on one side, it will vibrate and track poorly even if the pulleys are perfectly square. Always inspect the belt for physical damage before you start shimming your motor.
(This article was written by one of our staff writers, Paul Whitaker. Visit our Meet the Team page to learn more about the author and their expertise.)