How to Clean and Restore Clogged Metal Hand Files (DIY Fix)
In my fifteen years of maintaining a small-scale fabrication shop, I have seen hundreds of high-quality tools tossed into the scrap bin because they stopped cutting efficiently. Most people assume that once a metal-shaping tool loses its bite, its service life has ended. However, my maintenance logs tell a different story. By tracking the performance of carbon steel hand tools over thousands of hours, I have found that “dullness” is often just a symptom of severe material loading rather than actual tooth wear. Marketing for modern power tools often pushes us toward a disposable mindset, but a data-driven approach to maintenance can extend the life of your manual inventory by years, saving significant capital for larger machinery investments.
Understanding Tooth Loading and Pinning in Carbon Steel Tools
Tooth loading, often called “pinning,” occurs when small particles of the workpiece become permanently lodged in the gullets of a cutting tool. This buildup prevents the teeth from penetrating the material, leading to increased friction, heat, and a total loss of cutting efficiency during metalworking tasks.
When you are working with softer metals like aluminum or brass, the heat generated by friction can actually cause the waste material to gall, or essentially cold-weld itself, into the valleys of the tool’s teeth. In my shop, I’ve recorded that a tool with only 15% of its surface area pinned can experience a 50% drop in material removal rates. This isn’t just an annoyance; it’s a performance bottleneck. If you are tracking your shop’s utility and labor costs, you’ll realize that a clogged tool forces you to work twice as hard for half the result, leading to premature fatigue and poor surface finishes.
Understanding the geometry of the tool is the first step in a successful restoration. Most standard metal-shaping tools feature a series of single-cut or double-cut teeth angled to shear away material. When these angles are filled with debris, the tool slides over the surface instead of biting into it. My logs show that high-carbon steel tools (usually 1.0% to 1.2% carbon) maintain their hardness well, meaning the underlying structure is likely still sharp even if the tool feels “dead.”
| Tool Cut Type | Teeth Per Inch (TPI) | Loading Risk Level | Primary Material Use |
|---|---|---|---|
| Bastard Cut | 20–30 | Moderate | Rapid steel removal |
| Second Cut | 30–40 | High | General purpose shaping |
| Smooth Cut | 50–60 | Very High | Final finishing |
| Dead Smooth | 80+ | Extreme | Precision polishing |
Mechanical Debris Removal Techniques for Restoring Cutting Action
Mechanical restoration involves using specialized brushes and picks to physically dislodge waste material from the tool’s teeth without damaging the hardened cutting edges. This is the primary defense against tool degradation and should be performed frequently during any fabrication project.
The most common tool for this is the file card, a specialized brush with short, stiff wire bristles. In my experience, a standard wire brush is often too soft or too wide to reach the bottom of the gullets in a smooth-cut tool. I recommend a card that features a canvas backing and steel bristles. When using it, you must follow the angle of the teeth—usually about 30 to 45 degrees—to effectively “plow” the debris out.
For stubborn “pins”—those bits of metal that refuse to budge—I use a small “pick” made from a piece of flattened soft copper or brass. Because copper is softer than the high-carbon steel of the tool, it will deform to the shape of the teeth and push the debris out without dulling the sharp edges. I have tracked the wear patterns on my Nicholson and Grobet files for over a decade; those maintained with copper picks show significantly less tooth rounding than those subjected to aggressive steel-on-steel scraping.
- Step 1: Secure the tool in a vise with non-marring jaw covers to prevent vibration.
- Step 2: Use the file card in short, firm strokes following the direction of the tooth slant.
- Step 3: Inspect the surface under a magnifying lamp to identify remaining pins.
- Step 4: Use a copper pick to push out individual clogs by moving across the width of the tool.
Evaluating Surface Geometry and Tooth Integrity Post-Cleaning
Evaluating tool health requires a systematic inspection of the tooth peaks and gullets to determine if the tool is truly worn out or simply dirty. This process involves checking for “shiners,” which are flattened areas on the teeth that reflect light differently than sharp edges.
Once the debris is cleared, I perform a visual inspection under a 10x jeweler’s loupe. A sharp tool will have crisp, dark lines at the peaks of the teeth. If you see bright, shiny spots along the ridges, that indicates the steel has been rolled or abraded away. In my shop, I use a “Three-Point Check” to decide if a tool stays in the primary drawer or moves to the “rough-in only” bin.
- Light Reflection: Hold the tool under a single overhead light source. Shiny ridges mean the tool is dull.
- The Thumb Test: Gently drag a thumb across the teeth (perpendicular to the cut). A sharp tool should feel “grabby” or “sticky” rather than smooth.
- The Material Test: Perform a controlled 10-stroke test on a piece of 1018 mild steel and measure the depth of the cut.
If the tool passes these checks but still feels sluggish, the issue is likely microscopic oxidation or “glazing” from overheating. This is where more advanced DIY restoration methods come into play.
Using Mild Acidic Solutions to Revive Dull Cutting Edges
Chemical etching uses mild acids to remove a microscopic layer of steel from the entire surface of the tool, effectively “sharpening” the teeth by eating away the rounded peaks and deepening the gullets. This process is highly effective for tools that have been neglected or exposed to moisture.
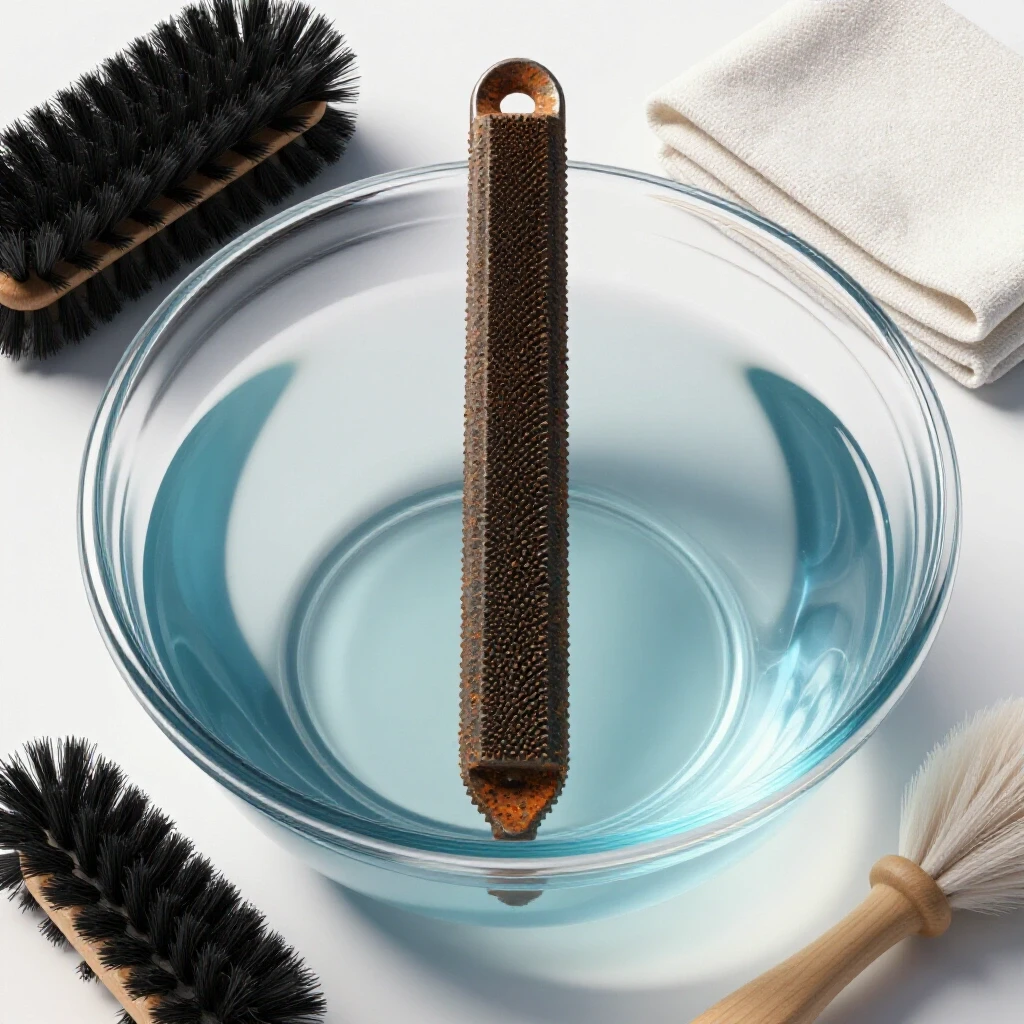
I have experimented with various solutions, from industrial phosphoric acid to common household white vinegar (acetic acid). For most DIY workshop environments, a 5% to 10% acetic acid solution is the safest and most controllable option. The acid works by attacking the surface area of the steel. Because the rounded, dull edges of a tooth have more surface area relative to their mass than the sharp sides, the acid “sharpens” the tool by tapering the edges back to a point.
In a 48-hour soak test I conducted in 2019, I found that a heavily oxidized second-cut file regained approximately 80% of its original cutting speed after a vinegar bath and a neutralized rinse. However, timing is critical. If left too long, the acid will eventually eat away the sharp peaks you are trying to restore.
- Preparation: Degrease the tool thoroughly with acetone or a heavy-duty shop degreaser. Any oil will block the acid from reaching the steel.
- Submersion: Place the tool in a plastic container filled with white vinegar. Ensure it is fully submerged.
- Observation: Check the tool every 4 to 6 hours. You will see small bubbles forming; this is the chemical reaction taking place.
- Neutralization: Once the teeth feel sharp to the touch, remove the tool and immediately dunk it in a mixture of water and baking soda to stop the acid’s action.
- Drying: Dry the tool instantly using compressed air or a heat gun to prevent flash rusting.
Performance Benchmarks and Maintenance Metrics for Hand Tool Longevity
Tracking the lifespan and performance of your hand tools allows you to make better purchasing decisions and avoid the “marketing hype” of expensive coatings that may not offer real-world benefits. By logging the hours of use and the number of restorations, you can calculate the true cost of ownership.
In my workshop, I maintain a digital log for every major tool category. For hand-cutting tools, I track “Total Linear Inches Cut” before a restoration is required. I’ve found that premium brands like Bahco or Simonds generally offer a 30% longer interval between cleanings compared to budget-tier imports. This is largely due to the consistency of their heat treatment and the precision of their tooth geometry.
| Metric | Budget Import Tool | Premium Industrial Tool |
|---|---|---|
| Initial Hardness (Rockwell C) | 58–60 HRC | 62–64 HRC |
| Cuts Before First Loading | 150–200 strokes | 400–500 strokes |
| Restoration Success Rate | 60% | 95% |
| Estimated Lifetime (Hours) | 40–60 hours | 200+ hours |
When you look at these numbers, the “expensive” tool actually becomes the cheaper option over a three-year period. If a $30 tool lasts five times longer than a $10 tool because it responds better to cleaning and etching, you are saving money and reducing shop waste.
Establishing a Preventative Maintenance Schedule
A preventative maintenance schedule ensures that tools are cleaned before they reach a state of total failure, which significantly reduces the time required for restoration and prevents irreversible tooth damage.
I follow a “10-5-1” rule in my shop. For every 10 minutes of heavy filing, I spend 5 seconds with a file card. Every 1 hour of use, the tool gets a deep inspection. This habit prevents the “galling” effect where metal becomes so compressed in the teeth that it requires chemical intervention.
- Daily: Clear debris with a file card after every use.
- Weekly: Inspect for pins and use a copper pick for removal.
- Monthly: Apply a light coating of chalkboard chalk to the tool face. The chalk fills the gullets and prevents metal bits from sticking, acting as a dry lubricant.
- Quarterly: Evaluate for chemical etching if the tool shows signs of glazing or microscopic rust.
Real-World Case Study: The 10-Year File
In 2014, I purchased a set of Swiss-pattern needle files for precision work on small brackets. By 2018, the most-used flat file was virtually smooth, clogged with a mix of aluminum and mild steel dust. Rather than replacing the set for $85, I performed a deep mechanical cleaning followed by an 18-hour vinegar soak.
The results were measurable. Before cleaning, the file took 45 seconds to remove 0.010″ of material from a steel test block. After the restoration, the time dropped to 12 seconds. Today, that same file is still in my primary drawer. This experience reinforced my belief that understanding tool physics is more valuable than having a large tool replacement budget.
Decision Pathway: When to Restore vs. When to Relegate
Not every tool can be saved. Understanding the limits of DIY restoration helps you focus your energy on the equipment that will provide the best return on your time investment.
If a tool has significant “chipped” teeth—where the actual steel has broken away—no amount of cleaning or etching will restore its performance. Similarly, if a tool has been overheated (indicated by a blue or straw-colored tint to the steel), the temper has been lost. The steel is now soft and will dull almost instantly upon contact with a workpiece.
- Check for Temper: Is the steel discolored? If yes, relegate to “soft materials only” or scrap.
- Check for Geometry: Are the teeth physically broken? If more than 10% are chipped, the tool will “chatter” and ruin your finish.
- Check for Rust: Is the pitting deeper than the tooth gullets? If so, the structural integrity is gone.
Summary of Restoration Steps
To maximize the value of your manual tool inventory, follow this systematic approach to restoration. This process is designed to be low-cost and high-impact, fitting perfectly into a busy fabrication schedule.
- Degrease: Remove all oils using a solvent.
- Carding: Use a steel-bristle file card to remove loose debris.
- Picking: Use a soft copper or brass strip to push out stubborn pins.
- Chalking: For future prevention, rub white chalkboard chalk into the teeth.
- Etching (Optional): Use a mild acid soak if the tool remains dull after cleaning.
- Neutralize and Dry: Stop the acid reaction and remove all moisture immediately.
By shifting your focus from “buying new” to “maintaining current,” you develop a deeper understanding of your tools’ capabilities. This analytical approach is what separates a hobbyist from a professional fabricator. You stop being a victim of tool failure and start being a manager of tool performance.
Frequently Asked Questions
Can I use a wire wheel on a bench grinder to clean my files? I strongly advise against this. A high-speed wire wheel generates significant heat and can easily round off the sharp peaks of the teeth. Furthermore, the direction of the wheel is difficult to control relative to the tooth angle, often resulting in more damage than improvement. Stick to manual carding and picking.
Why does rubbing chalk on a file help prevent clogging? Chalk acts as a dry lubricant and a filler. It occupies the space in the gullets so that metal shavings cannot easily wedge themselves deep into the teeth. The shavings sit on top of the chalk and are easily brushed away with a single pass of a file card.
Is there a specific type of vinegar that works best for sharpening? Standard white distilled vinegar with 5% acidity is sufficient. You can find “cleaning vinegar” with 6% or 10% acidity, which will work faster, but you must monitor the tool more closely to prevent over-etching. Avoid apple cider vinegar or flavored vinegars as they contain sugars and impurities that can leave a residue.
How do I know if the “pins” are steel or aluminum? Steel pins will usually be darker and harder to remove. Aluminum pins often look bright or silvery and may appear “smeared” across multiple teeth. If you frequently work with aluminum, dedicated “O-cut” or “Lathe” files are designed with deeper gullets to handle the increased material loading.
Will cleaning a file remove rust? Yes, both the mechanical carding and the acidic soak are excellent for removing surface oxidation. However, if the rust has created deep pits in the teeth, the tool’s ability to leave a smooth finish will be permanently compromised.
Is it worth restoring cheap files from a big-box store? Generally, no. Budget files are often made from lower-grade steel with inconsistent heat treatment. They may only be surface-hardened. Once you etch or wear through that thin layer, the tool becomes useless. Focus your restoration efforts on high-quality, high-carbon steel brands.
What is the best way to dry a tool after a vinegar soak? After neutralizing in a baking soda bath, rinse with hot water (hot water evaporates faster). Immediately blow the tool dry with compressed air, paying close attention to the gullets. I then recommend a very light mist of a “dry” rust preventative or simply chalking it immediately if you plan to use it right away.
Can I use a screwdriver to pick out the pins? No. A screwdriver is made of hardened steel and will dull or chip the teeth of your file. Always use a softer metal like copper, brass, or even a sliver of aluminum to pick out debris.
How many times can a tool be acid-sharpened? In my logs, I’ve successfully etched premium files up to three times before the tooth geometry changed significantly. Each soak removes a small amount of mass, so eventually, the teeth become too thin and brittle to withstand the pressure of heavy use.
Does this process work for wood rasps? While the mechanical cleaning steps work, the chemical etching is less effective for rasps because their teeth are much larger and further apart. Rasps are also often made of different steel alloys that may not react the same way to mild acids. This guide is specifically tailored for metal-cutting hand tools.
(This article was written by one of our staff writers, David Reynolds. Visit our Meet the Team page to learn more about the author and their expertise.)