How to Reinforce an Unstable Wooden Workshop Bench (Guide)
I remember standing in a small job shop in Ohio about ten years ago, staring at a high-end metal lathe that was producing the most aggressive tool chatter I had ever heard. The operator was frustrated, having already replaced the carbide inserts and checked the spindle bearings twice. We spent three hours chasing mechanical ghosts until I leaned against the heavy wooden bench supporting the machine. The whole structure shifted nearly a quarter of an inch. It wasn’t the lathe; it was the foundation. The wooden frame had developed a “racking” problem—a lateral instability that turned the entire bench into a tuning fork for vibration.
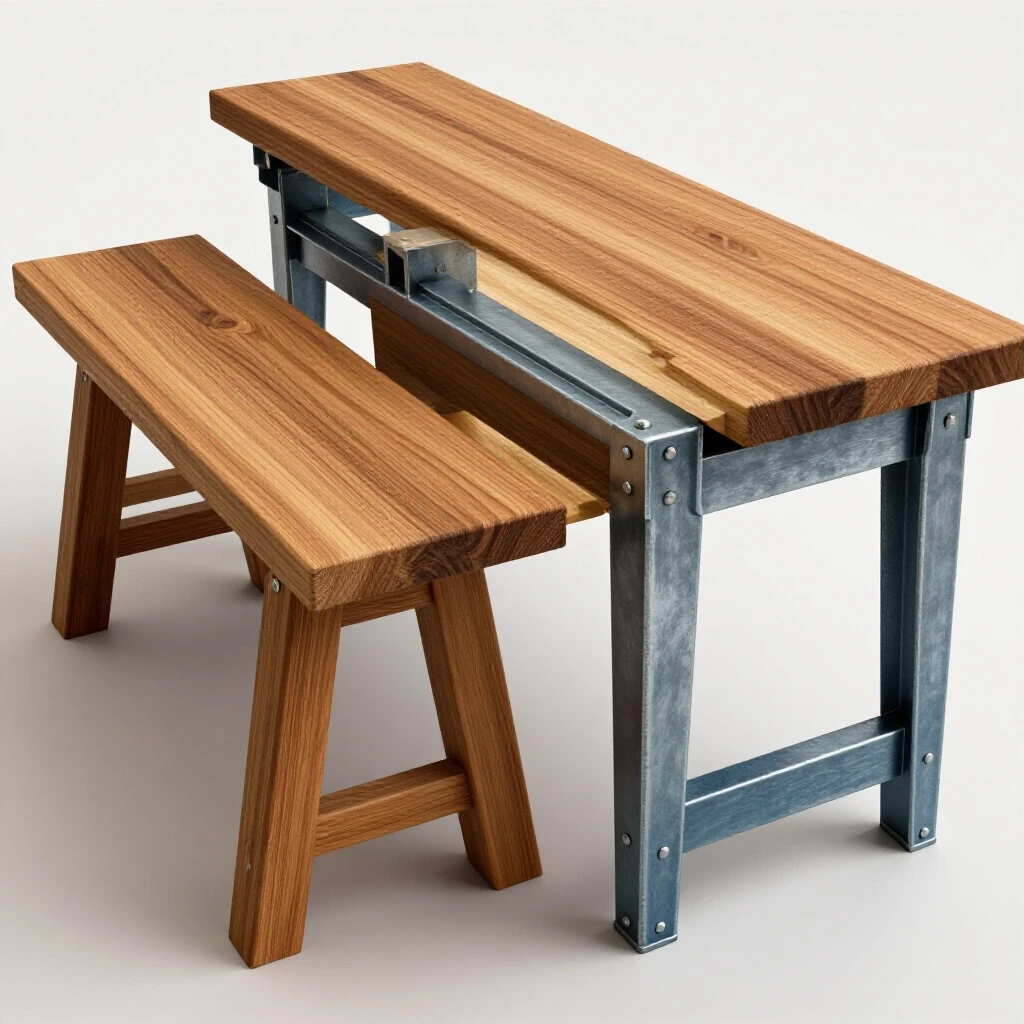
In my 18 years as a millwright and diagnostic specialist, I have learned that the most advanced machinery is only as reliable as the surface it sits on. When a wooden bench begins to sway, it isn’t just an annoyance; it’s a failure of structural integrity that leads to poor weld quality, inaccurate measurements, and premature tool wear. We are going to break down how to diagnose these structural failures and use metal fabrication techniques to turn a flimsy wooden frame into a rigid, industrial-grade workstation.
Diagnosing Structural Movement in Workshop Foundations
Structural movement diagnosis involves identifying the specific points where a frame fails to maintain its geometry under load or vibration. By isolating these points, we can determine whether the issue is a failure of the joints, the material itself, or the connection to the floor.
When you notice your work surface shaking during a heavy grind or a long cut, you cannot simply throw a few more screws at the problem. You need to find the “pivot point.” I use a systematic approach: I clear the bench, then apply a lateral load while watching the joints. If the legs stay perpendicular to the floor but the top moves, the issue is racking. If the legs themselves are bowing, you have a material thickness issue.
I often use a dial indicator magnetic base attached to a heavy weight on the floor, with the tip touching the bench leg. If I can push the bench and see more than 0.005 inches of movement, I know the harmonic vibrations from a motor or a drill press will be amplified. This is the same logic we use in lathe alignment checklists; if the base isn’t true, the spindle will never be either.
Identifying Racking and Lateral Shear
Racking is the tendency of a rectangular frame to deform into a parallelogram when side-to-side force is applied. This usually occurs because the 90-degree joints lack the triangulation necessary to resist shear forces.
In most wooden benches, racking happens because the fasteners—usually wood screws—have compressed the wood fibers over time. This creates “slop” or backlash in the joint. In my experience, even the tightest wood-to-wood joinery will eventually fail under the constant vibration of a fabrication shop. To fix this, we have to introduce materials that don’t compress, which is where mild steel reinforcement becomes essential.
Analyzing Vertical Deflection and Load Distribution
Vertical deflection refers to the “sag” or bowing of a horizontal member when a heavy load, like a 150-pound vise or a bench grinder, is placed in the center. This movement changes the geometry of your work, making it impossible to maintain tight tolerances during assembly.
If you are seeing tool chatter solutions fail, check the deflection of your bench top. A top that flexes even a few thousandths of an inch will allow a machine to bounce, creating resonant harmonics. We measure this by placing a straightedge across the surface and using feeler gauges to find the gap. Anything over 0.015 inches across a four-foot span is a candidate for steel plate reinforcement.
Material Selection for Rigid Steel Reinforcements
Selecting the right metal components involves matching the steel profile to the specific type of stress the bench is experiencing. Using the wrong material can add unnecessary weight without actually solving the vibration or stability issues.
I prefer using A36 mild steel for shop reinforcements. It is easy to weld, relatively inexpensive, and provides the modulus of elasticity needed to stiffen wood. For most bench upgrades, I keep a stock of 2″ x 2″ x 1/8″ angle iron and 1/4″ thick flat bar. The goal is to use the steel to create a “skeleton” that the wood can lean on.
| Steel Profile | Best Use Case | Diagnostic Benefit |
|---|---|---|
| Angle Iron (2″x2″) | Leg bracing and corner stiffening | Eliminates 90-degree joint flex |
| Flat Bar (1/4″ thick) | Cross-bracing (X-brace) | Stops lateral racking/sway |
| Steel Plate (3/8″) | Vise and Tool Mounting | Distributes point-load weight |
| Square Tubing | Heavy Equipment Pedestals | Maximum torsional rigidity |
The Role of Angle Iron in Corner Stabilization
Angle iron is the workhorse of mechanical troubleshooting steps for unstable furniture. Its L-shaped cross-section provides resistance to bending in two planes, making it perfect for wrapping wooden 4×4 legs.
When I reinforce a bench, I don’t just bolt the steel to the side. I “box” the joint. By placing angle iron on the outside of a leg-to-apron joint and through-bolting it, you are sandwiching the wood. This prevents the wood fibers from crushing and ensures that the joint remains rigid even as the wood shrinks or expands with the shop’s humidity.
Utilizing Flat Bar for Tension-Based Bracing
Flat bar is exceptionally strong in tension but weak in compression. However, when used in an “X” pattern across the back or sides of a bench, it creates a tension web that makes racking physically impossible.
I often see fabricators make the mistake of using thin wood slats for bracing. Wood moves; steel doesn’t. A 1-inch wide, 1/8-inch thick flat bar stretched diagonally across the back of your bench will do more for stability than a 2×4 ever could. When you’re troubleshooting weld porosity in your shop, you’ll appreciate a bench that doesn’t move while you’re trying to maintain a steady arc.
Fabricating Custom Gussets to Eliminate Lateral Sway
Gussets are triangular plates used to reinforce the corners of a frame, effectively turning a flexible joint into a rigid, non-moving structure. They are the primary defense against the vibrations that cause tool chatter.
In my repair logs, I’ve found that a 6-inch triangular gusset made of 3/16-inch steel plate can increase the lateral stiffness of a wooden joint by over 400%. The key is the “leverage arm.” The further the gusset extends from the corner, the more mechanical advantage it has against the swaying force.
Cutting and Prepping Steel Gussets
To start, I cut 6-inch squares of 3/16-inch steel and then cut them diagonally to create two triangles. Accuracy matters here. If your gusset isn’t a true 90-degree triangle, you will force your bench out of square when you bolt it down.
- Marking: Use a layout dye or a sharp scribe for precision.
- Cutting: A cold saw or a bandsaw is preferred to keep the edges square and minimize heat-affected zones.
- Deburring: Remove all dross and sharp edges. A clean edge allows for a tighter fit against the wooden members.
- Drilling: I drill at least three holes per side. For a 6-inch gusset, I space the holes 1.5 inches apart to distribute the clamping force.
Welding Gussets for Maximum Rigidity
If you are welding your gussets into a sub-frame before attaching them to the wood, you must be careful about distortion. Heat is the enemy of alignment. I always tack my pieces in four places before running a full bead.
When troubleshooting weld porosity during this phase, check your shielding gas flow. I usually set my CO2/Argon mix to 20-25 CFH (cubic feet per hour). If you’re getting “pinholes” in your gusset welds, you likely have a draft in the shop or a contaminated base metal. Clean the steel with an angle grinder until it’s bright white before you strike an arc. A porous weld is a brittle weld, and it will eventually crack under the vibration of a heavy grinder.
Mechanical Fastening and Joint Integrity
The connection between the steel reinforcement and the wooden frame is the most common point of failure in a hybrid structure. Choosing the right fastener ensures that the load is transferred efficiently from the wood to the rigid steel.
I never use wood screws for structural reinforcement. They rely on the friction of the wood threads, which will fail under vibration. Instead, I use through-bolts or heavy-duty lag screws. Through-bolts are the gold standard because they use a nut and washer to compress the entire joint together, creating a friction-fit that doesn’t rely on the wood’s internal strength.
Through-Bolting vs. Lag Screws
Through-bolting requires drilling a hole all the way through the steel and the wood. I use Grade 5 zinc-plated bolts for this. The bolt acts in “shear,” meaning the force is trying to snap the bolt sideways. A 3/8-inch Grade 5 bolt has a shear strength that far exceeds anything a wooden bench can throw at it.
Lag screws are acceptable when you can’t reach the other side of the timber, but they require a specific pilot hole strategy. If the hole is too small, you’ll split the wood; too large, and the threads won’t bite. For a 3/8-inch lag, I drill a 1/4-inch pilot hole in hardwood and a 3/16-inch hole in softwood.
The Importance of Washers and Load Distribution
Wood is soft; steel is hard. If you tighten a bolt directly against wood, the head will sink in, loosening the joint. I always use “fender washers” or “Oversized USS washers” on the wood side. This spreads the clamping pressure over a larger surface area, preventing the wood fibers from crushing.
In my experience, a loose bolt is worse than no bolt at all. A loose bolt allows the bench to “jolt” back and forth, which creates impact loads that can eventually shear the fastener. I check my bench bolts every six months with a torque wrench, usually aiming for about 15-20 lb-ft—just enough to be snug without crushing the timber.
Dampening Resonant Harmonics Through Mass and Bracing
Resonant harmonics occur when the vibration frequency of a machine matches the natural frequency of the bench it sits on. This causes the vibration to grow in intensity, leading to the dreaded “chatter” in your metalwork.
To solve this, we use two methods: stiffening and mass-loading. Stiffening (adding steel braces) raises the natural frequency of the bench above the operating range of your tools. Mass-loading (adding weight) makes it harder for the vibration to move the structure. I once solved a persistent lathe vibration issue by simply bolting a 1/2-inch steel plate to the top of the wooden bench. The added mass absorbed the high-frequency energy before it could reach the floor.
Using Steel Plate to Create a Rigid Work Surface
A wooden bench top, even if made of thick maple or plywood, will always have some “give.” For precision metal fabrication, I recommend skinning the top with a sheet of 11-gauge (1/8-inch) or 7-gauge (3/16-inch) cold-rolled steel.
- Step 1: Ensure the wooden top is as flat as possible using a hand plane or a large sander.
- Step 2: Lay the steel plate over the top.
- Step 3: Instead of screwing the plate down in the center, only secure it around the edges. This allows the wood and steel to expand at different rates without buckling.
- Step 4: Countersink the holes so the screw heads sit flush with the surface. This prevents your workpieces from catching on the fasteners.
Implementing X-Bracing for Torsional Rigidity
If your bench twists when you put weight on one corner, you have a torsional rigidity problem. The best fix is an X-brace made of 1/8-inch x 1-inch flat bar installed on the back plane of the bench.
I weld the two bars together where they cross in the middle. This turns the “X” into a single rigid unit. When you bolt the four ends of the “X” to the four corners of the bench’s back frame, you create a structure that cannot be twisted. It’s the same principle used in bridge construction and crane booms.
Systematic Testing and Validation of Structural Repairs
Once the reinforcements are installed, you must verify that the “troubleshooting steps” actually worked. This isn’t about “feeling” if it’s sturdy; it’s about measurable data.
I use a simple “bounce test” with a dial indicator. Place the indicator on the bench top, zero it, and then drop a 5-pound weight from a height of 12 inches onto the other end of the bench. A well-reinforced bench should see the needle jump and return to zero almost instantly. If the needle “oscillates” (wiggles back and forth), you still have a harmonic issue that needs more dampening.
Measuring Deflection Under Load
To ensure your bench is ready for a heavy vise or a milling attachment, perform a static load test.
- Set up: Place a precision level or a dial indicator on the center of the bench.
- Load: Place your heaviest piece of equipment (or yourself) on the bench.
- Record: Note how much the surface drops.
- Tolerance: For general fabrication, a deflection of less than 0.005 inches is excellent. If it drops more than 0.010 inches, you need to add a center leg or a steel “C-channel” under the top.
Long-Term Maintenance of Hybrid Structures
Steel and wood react differently to the environment. Steel doesn’t change, but wood shrinks in the winter and swells in the summer. This seasonal movement will eventually loosen your bolts.
I keep a maintenance log for my shop benches. Every January and July, I go through with a socket wrench and check every structural connection. If I find a bolt that is consistently coming loose, I’ll switch to a nylon-insert lock nut or apply a medium-strength thread-locking compound. This proactive approach prevents the “creeping instability” that leads to those hard-to-diagnose tool chatter problems.
FAQ: Structural Reinforcement and Diagnostic Logic
Q: Why shouldn’t I just build a new steel bench instead of reinforcing wood? A: Wood is actually an excellent dampener for high-frequency vibrations. A hybrid bench—wood for dampening and steel for rigidity—often performs better for sensitive machines like small lathes than a thin-walled, all-steel bench that can “ring” like a bell.
Q: How do I know if my bench instability is causing my welding porosity? A: If the bench sways while you weld, your arc length changes. This “pumping” action can pull atmospheric air into the weld pool, causing porosity. A rock-solid bench allows for the steady hand required to maintain a perfect gas shield.
Q: What is the best way to attach steel angle to a wooden leg? A: Use through-bolts with large washers. If you use screws, the vibration will eventually “wallout” the hole in the wood, and the reinforcement will stop working.
Q: Can I use 1/4-inch aluminum instead of steel for gussets? A: I don’t recommend it for this application. Aluminum has a lower modulus of elasticity, meaning it flexes more than steel under the same load. For maximum rigidity, steel is the superior choice.
Q: How much weight can a reinforced 4×4 wooden leg actually hold? A: A standard Douglas Fir 4×4 can hold over 10,000 pounds in pure compression. The failure point is almost always the joints, not the legs. Reinforcing the joints with steel gussets allows you to actually utilize the full strength of the timber.
Q: My bench is bolted to the wall, but it still vibrates. Why? A: You’ve likely created a “drum head” effect. The wall might be acting as a resonator. You need to decouple the bench from the wall using rubber isolation pads or increase the mass of the bench top with a steel plate to change its resonant frequency.
Q: What’s the “0.005 inch rule” in bench stability? A: It’s a benchmark I use: if a bench top moves more than 0.005″ under the normal operating force of the tool (like pulling a saw or pushing a file), that movement will be reflected in the inaccuracy of your finished part.
Q: Should I weld the steel reinforcements together or bolt them individually? A: Welding the steel into a “sub-frame” and then bolting that frame to the wood is the most rigid method. It eliminates the “play” that can exist between individual bolted components.
Q: Does the thickness of the steel plate on top matter? A: Yes. Anything thinner than 1/8-inch (11ga) will dent easily and won’t add much structural rigidity. I find 3/16-inch or 1/4-inch to be the “sweet spot” for most fabricators.
Q: How do I fix a bench that “walks” across the floor? A: This is usually caused by high-frequency vibration and a lack of mass. Reinforce the frame to stop the vibration at the source, and add a lower shelf loaded with heavy material (like your steel scrap bin) to increase the “footprint” pressure.
(This article was written by one of our staff writers, Paul Whitaker. Visit our Meet the Team page to learn more about the author and their expertise.)