Corded vs Cordless Angle Grinders for Heavy Metalwork (Tips)
I have spent the last 18 years in industrial fabrication bays and millwright shops, often knee-deep in structural steel projects where the equipment is pushed to its absolute limit. There is a specific kind of frustration that sets in when you are mid-pass on a heavy bevel and your primary metal removal tool starts to stutter, overheat, or lose torque. You are left standing there with a dead tool and a half-finished weld prep, wondering if the issue is the power source, the motor, or a mechanical failure buried deep in the gearbox.
In my experience, resolving these issues requires moving away from guesswork and toward a systematic diagnostic framework. Whether you are using a tool tethered to a 110V outlet or a high-voltage battery-operated unit, the physics of heavy metalwork remain the same. The resistance of the steel does not care how your tool gets its juice. If the torque drops or the vibration spikes, there is a root cause waiting to be isolated. This guide focuses on how to diagnose those failures, maintain your equipment, and ensure your surface preparation does not lead to weld defects like porosity or inclusions.
Analyzing Power Delivery Systems in Heavy Fabrication
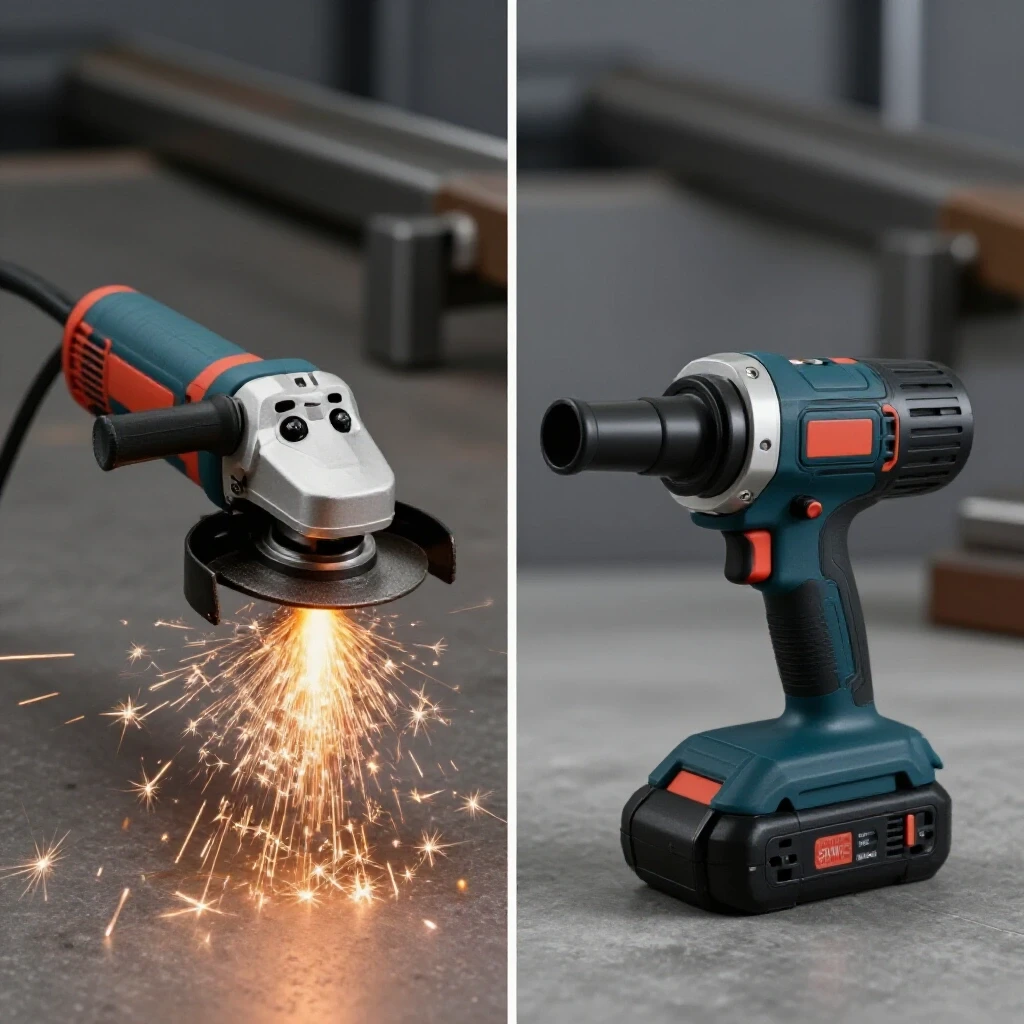
This section examines how power supply stability influences torque output during heavy material removal. It focuses on the mechanical consequences of amperage fluctuations and voltage sag when processing thick structural steel sections. Understanding the difference between constant current and stored energy systems is the first step in troubleshooting performance drops.
When you are grinding 2-inch thick plate, the motor is under constant, heavy load. A cord-connected tool relies on the steady amperage of the shop’s electrical grid. If you notice a sudden drop in RPM, the first thing I check is the extension cord gauge and length. A 50-foot cord that is too thin will cause a significant voltage drop. This starves the motor, causing it to run hot and lose the torque necessary to bite into the steel.
Battery-driven units face a different set of challenges. They deal with voltage sag, which is a temporary drop in voltage under high current draw. As the battery depletes or gets too hot, the internal resistance increases. This can lead to intermittent cutting or the tool’s thermal protection circuit tripping. If your portable unit keeps cutting out, you need to determine if it is a heat-soak issue in the cells or a failure in the motor controller’s ability to manage the discharge rate.
Troubleshooting Electrical Resistance and Voltage Drop
Voltage sag occurs when a motor draws more current than the supply can provide, leading to RPM drops and increased heat. Understanding this relationship is vital for preventing motor burnout during deep groove grinding. High resistance in the circuit often mimics a failing motor when the problem is actually external.
To diagnose power issues, I use a multimeter to check for resistance (Ohms) in the power path. For a corded setup, check the continuity of the plug and the brushes. For a battery setup, inspect the contact terminals for carbon buildup or arcing. A resistance reading higher than 0.5 Ohms on the main power contacts usually indicates a poor connection that will generate heat and sap power.
- Check the source: Ensure the outlet is providing a stable 115V to 120V under no load.
- Measure under load: If possible, check the voltage at the tool while it is running; a drop below 105V indicates a serious supply issue.
- Inspect the brushes: On corded motors, worn brushes (less than 1/4 inch remaining) cause arcing and erratic RPM.
- Test battery health: Use a dedicated tester to check for cell imbalance; a single weak cell can cause the entire unit to shut down under heavy torque.
Isolating Mechanical Vibrations and Spindle Play
Vibration diagnostics involve identifying whether a tool’s oscillation stems from internal bearing failure, spindle misalignment, or external disc imbalance. High-frequency chatter can damage the workpiece and cause premature tool failure in structural fabrication. Identifying these harmonics early prevents the destruction of expensive gear sets and bearings.
Tool chatter is more than an annoyance; it is a diagnostic signal. When I feel a high-frequency vibration, I immediately look at the spindle. If there is more than 0.002 to 0.005 inches of lateral play in the spindle, the bearings are likely shot. This play allows the grinding disc to “walk” across the metal, which creates uneven surfaces and can even lead to micro-cracking in the base material.
Interestingly, the source of vibration can sometimes be the disc itself rather than the tool. An unbalanced or glazed disc creates a resonant harmonic that can vibrate the internal components of the grinder to pieces. In heavy metalwork, where we use thick grinding wheels, this mass-unbalance is magnified. I always start by swapping the disc for a known-balanced one to see if the chatter persists.
Resolving Structural Alignment and Spindle Backlash
Mechanical tolerances in heavy-duty grinders must be tight to ensure smooth power transfer from the motor to the disc. Backlash, or the “play” between the gears in the head, should be minimal to prevent shock loading during start-stop cycles. Excessive backlash leads to chipped gear teeth and erratic torque delivery.
To test for gear backlash, unplug the tool and rotate the spindle by hand. There should be a very slight click as the gears engage, but no significant free-spinning. If the spindle moves more than a few degrees before engaging the motor, the gear set is worn. This is a common issue in tools used for heavy “hogging” where the operator puts significant body weight behind the tool.
| Symptom | Potential Root Cause | Diagnostic Test |
|---|---|---|
| High-pitched whining | Bearing failure or dry gears | Check gear housing temperature with IR thermometer |
| Low-frequency thumping | Unbalanced disc or bent spindle | Run tool without disc; check spindle runout with dial indicator |
| Grinding or crunching | Broken gear tooth | Rotate spindle manually; feel for “dead spots” |
| Tool “wandering” | Spindle backlash or loose flange | Measure lateral play with a feeler gauge |
The Impact of Surface Preparation on Weld Integrity
Proper grinding techniques directly influence weld quality by removing oxides and contaminants. This section explores how tool performance can inadvertently introduce porosity or inclusions into heavy structural welds. A failing or improperly used tool can leave behind debris that compromises the entire fabrication.
In my years of troubleshooting weld porosity, I’ve found that the grinding stage is often the culprit. If a grinder is running too slow due to power loss, it can “smear” the metal rather than cutting it. This traps surface contaminants, oils, and oxides beneath a thin layer of moved metal. When the welder strikes an arc, those trapped impurities gas out, creating a Swiss-cheese effect in the root pass.
Furthermore, the choice between a high-torque corded unit and a high-RPM battery unit affects the surface finish. A tool that bogs down under load creates a rough, jagged surface that is prone to trapping slag. For critical structural welds, you need a consistent surface profile. I aim for a clean, bright metal finish with no visible “blueing,” which indicates excessive heat input and potential metallurgical changes in the heat-affected zone (HAZ).
Thermal Management in Sustained Metal Removal
Heat tracking is essential for maintaining both the tool’s longevity and the integrity of the steel being worked. Excessive heat can alter the grain structure of the metal or cause the tool’s internal electronics to fail prematurely. Monitoring temperatures helps identify when a process is becoming inefficient.
I often use an infrared (IR) heat gun to monitor the gear housing. If the temperature exceeds 160 degrees Fahrenheit, it is time to back off. For the workpiece, excessive heat can cause warping, especially on thinner sections of structural members. If you see the steel turning dark blue or purple, you are exceeding 500 to 600 degrees Fahrenheit on the surface, which can affect the temper of high-strength steels.
- Monitor tool temperature: Keep gear housings below 160°F to prevent grease breakdown.
- Watch the HAZ: Avoid overheating the base metal to prevent carbon precipitation or warping.
- Check cooling vents: Ensure the motor’s intake and exhaust are clear of metal dust and grit.
- Use the right RPM: Match the tool speed to the disc rating; over-speeding causes glazing and heat, while under-speeding causes smearing.
Systematic Fault-Tree Analysis for Motor Failures
Modern grinding equipment often uses complex electronics to manage power, especially in brushless battery-operated systems. Testing these components requires measuring resistance and observing back-EMF to distinguish between mechanical jams and electrical controller failures. A systematic approach prevents you from replacing a motor when the issue is a simple sensor.
When a motor fails, I use a “fault-tree” approach. First, I isolate the power source. If the power is good, I move to the switch and the brushes (if applicable). In brushless motors, the problem is often the electronic control unit (ECU). These controllers use back-electromotive force (back-EMF) to sense the motor’s position and speed. If the tool starts and then immediately stops, the ECU might be receiving a “fault” signal due to a short in the windings or a seized bearing.
Testing a brushless motor is more complex than a standard brushed motor. You have to check the resistance across the three phases of the motor. Using a multimeter, I measure the resistance between each pair of wires. The readings should be nearly identical, usually very low—under 1 Ohm. If one pair shows a significantly higher resistance or an “open” circuit, the motor has a burnt winding and must be replaced.
Diagnosing Weld Porosity Pathways
Weld porosity is a common headache in heavy fabrication, and the troubleshooting process must include a look at the grinding equipment. Contamination from the grinding process is a primary variable that must be controlled. If your tool is spitting grease or if the discs are contaminated with moisture, your weld quality will suffer.
| Step | Action | Metric/Observation |
|---|---|---|
| 1 | Inspect grinding disc | Look for oil, moisture, or embedded non-ferrous particles |
| 2 | Check tool for leaks | Ensure gear grease is not leaking onto the spindle or workpiece |
| 3 | Evaluate surface finish | Surface should be bright metal; no “smearing” or dark oxides |
| 4 | Verify gas flow | Ensure grinding dust is not clogging the welder’s gas nozzle |
| 5 | Test for arc blow | Check if the grinding process has magnetized the steel member |
Case Study: The Intermittent Power Loss Mystery
A few years ago, I was working on a bridge girder project. We were using high-output battery-powered grinders for the beveling. One of the units would work perfectly for ten minutes, then suddenly lose about 50% of its torque. It didn’t shut off, but it couldn’t handle any pressure.
I started by swapping batteries, but the problem persisted. I then used an IR camera and noticed a hot spot near the trigger assembly. After teardown, I found that a small amount of fine metallic dust had bypassed the seals and settled on the motor controller’s heat sink. This caused the controller to “throttle” the power to prevent a meltdown. It wasn’t a battery failure or a motor failure; it was a thermal management issue caused by environmental contamination.
Building on this, I’ve learned to never assume the most expensive part is the one that failed. Sometimes, a simple cleaning of the internal sensors or a drop of fresh gear oil can bring a tool back to life. In heavy metalwork, the environment is your biggest enemy. Fine iron filings are conductive and abrasive; they will find their way into every crack of your equipment.
Tool Calibration and Maintenance Checklist
To keep your fabrication shop running with minimal downtime, you need a regular maintenance schedule. I recommend a “Friday teardown” for tools used in heavy production. This doesn’t mean a full rebuild, but a thorough inspection and cleaning to catch issues before they stop the job on Monday.
- Blow out the motor: Use compressed air (under 30 PSI) to clear dust from the motor vents and controller.
- Inspect the cord: Look for nicks or exposed wires; check the strain relief at the base of the tool.
- Check the flange: Ensure the mounting flanges are flat and free of debris; a warped flange causes disc wobble.
- Listen to the bearings: Spin the spindle by hand; any “grittiness” means the bearings need replacement.
- Test the safety switch: Ensure the dead-man switch or lock-off functions correctly every time.
- Verify RPM: Use a non-contact tachometer to ensure the tool is reaching its rated speed; low RPM indicates internal drag or electrical issues.
- Check gear grease: If the gear head feels excessively hot, open it up and ensure the grease hasn’t separated or “channeled” away from the teeth.
- Measure runout: Use a dial indicator on the spindle; aim for less than 0.003 inches of deviation.
- Battery contact cleaning: Use an electronics cleaner on the terminals to ensure maximum current flow.
- Brush inspection: If the tool has brushes, replace them when they reach the manufacturer’s wear mark.
Mastering Systematic Troubleshooting
The key to mastering these diagnostics is to change only one variable at a time. If you swap the battery, the disc, and the extension cord all at once, you will never know what the actual problem was. I always start with the easiest, cheapest fix and work my way toward the complex components.
In heavy metalwork, the stakes are high. A tool failure can lead to a missed deadline or, worse, a structural defect that requires expensive rework. By understanding the relationship between power delivery, mechanical alignment, and metallurgical impact, you can move from being a “part swapper” to a true diagnostic specialist.
Remember that no tool is invincible. The heat and vibration of grinding thick steel will eventually wear down even the best equipment. The goal isn’t to prevent wear entirely, but to see it coming and address it before it results in a catastrophic failure. Keep your tools clean, your power supply stable, and your spindle tolerances tight.
FAQ
What is the primary cause of torque loss in corded grinders during heavy use? The most common cause is voltage drop, often resulting from using an undersized extension cord. For heavy metalwork, you should use a 12-gauge cord for runs up to 50 feet. If the cord is too thin, the motor cannot pull the amperage it needs, leading to heat buildup and a significant drop in RPM under load.
How can I tell if my grinding vibration is a bearing issue or an unbalanced disc? Remove the disc and run the tool. If the vibration persists, the issue is internal—likely the spindle bearings or an unbalanced motor armature. If the vibration disappears, the problem was the disc or the mounting flange. Use a dial indicator to check the spindle runout; anything over 0.005 inches usually requires a bearing replacement.
Why does my battery-powered grinder keep shutting off when I put pressure on it? This is typically the tool’s electronic protection circuit. It triggers due to “over-current” (drawing too many Amps) or “under-voltage” (the battery cells sagging below a safe limit). In heavy metalwork, this often happens if the battery is too small (low Amp-hour rating) or if the tool is being pushed beyond its design limits for sustained material removal.
Can grinding residue really cause weld porosity? Yes. If the grinder “smears” the metal or leaves behind carbon from the disc binder, it creates a layer of contamination. Additionally, if the tool’s gearbox is leaking grease, even a tiny amount of oil on the weld joint will vaporize under the arc, creating gas pockets (porosity) in the weld bead.
What is “back-EMF,” and why does it matter for my tools? Back-electromotive force is the voltage a motor generates while it is spinning. In brushless tools, the electronic controller monitors this voltage to determine the motor’s speed and position. If there is a fault in the windings or a mechanical jam, the back-EMF signal will be abnormal, and the controller will shut the tool down to prevent damage.
How often should I replace the brushes on a corded tool? Most manufacturers recommend replacing brushes when they reach a length of 1/4 inch (approx. 6mm). However, in heavy fabrication, I check them more frequently. If you see excessive sparking through the motor vents, the brushes are either too short or the springs have lost tension, leading to poor contact with the commutator.
What is the best way to clean metallic dust out of a tool? Use clean, dry compressed air at a pressure of about 25-30 PSI. Higher pressures can actually drive the fine metallic dust deeper into the bearings or behind the seals. Focus on the intake and exhaust vents while the tool is not running. For battery tools, pay special attention to the battery docking port.
Why does the gear head on my grinder get so hot? Heat in the gear head is usually caused by friction from worn gears, lack of lubrication, or overloaded bearings. If the housing exceeds 160°F, the grease can “liquefy” and leak out, leading to rapid gear failure. Check the grease level and ensure you aren’t applying excessive downward force, which puts a high thrust load on the bearings.
Is it safe to use a grinder if the spindle has a little bit of “play”? Small amounts of play (under 0.005 inches) are common, but anything more can lead to tool chatter. Chatter causes uneven wear on the disc and can lead to the disc shattering under load. It also ruins the surface finish of your metalwork and makes it difficult to maintain precise bevel angles for welding.
How do I test a motor controller for failure? Testing a controller usually involves a process of elimination. If the battery and motor windings (tested for resistance) are good, but the tool won’t run or has erratic speed, the controller is the likely culprit. Look for burnt smells, discolored components on the circuit board, or metallic dust buildup that could be causing a short.
(This article was written by one of our staff writers, Paul Whitaker. Visit our Meet the Team page to learn more about the author and their expertise.)