How to Build a Sturdy Steel Pet Gate with Secure Latch (Fix)
I have spent thirteen years in fabrication shops, and if there is one thing that still gets my blood pressure up, it is watching a perfectly square frame pull into a diamond shape as the welds cool. I remember working on a custom utility trailer gate early in my career. I had measured everything three times, cut the miters to the hair, and clamped it down. But I got greedy with the heat, ran long beads without a plan, and ended up with a piece of steel that looked more like a potato chip than a gate. That project taught me that metal is a living thing when heat is involved.
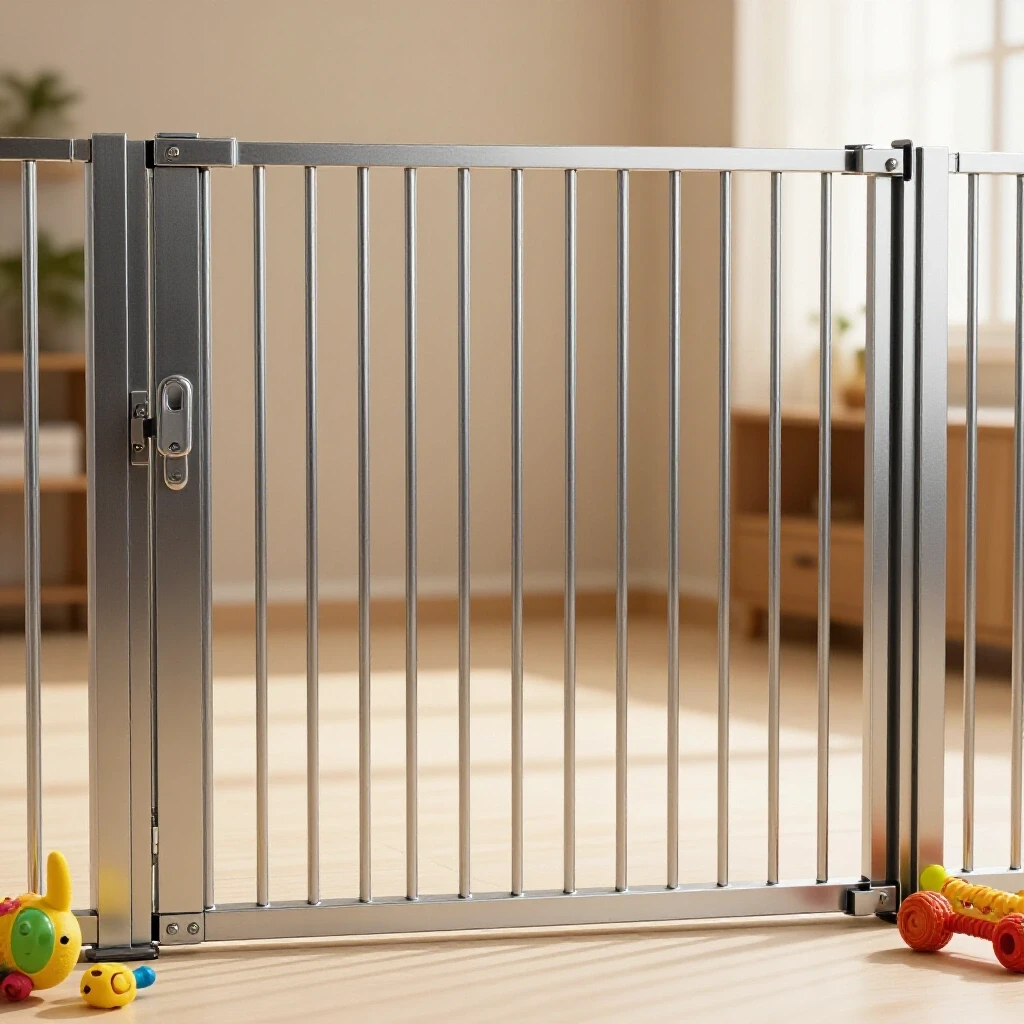
In this guide, I want to walk you through the process of building a rigid steel barrier for containing pets. We are going to focus on the technical side of the build—how to manage material behavior, how to set up a layout that actually stays square, and how to sequence your welds so you are not fighting the steel at the end of the day. Whether you are working in a professional shop or a garage with a basic buzz box, these principles of custom fabrication projects will save you time and wasted material.
Designing the Framework for Structural Stability
Planning the dimensions and material thickness for a metal barrier ensures the final product resists deflection and fits the opening precisely. This phase involves selecting the right steel profiles, such as square tubing or flat bar, to balance weight with the necessary rigidity to withstand impact from a large animal.
When I start a project like this, I look at the span first. For a standard interior opening of 36 to 48 inches, 1-inch square tubing with a 1/8-inch wall thickness is my go-to. It is heavy enough to weld easily without blowing through, but light enough that it won’t rip the hinges off the wall. If you go thinner, like 16-gauge, you save money but increase the risk of warping during the welding process.
I always draw my blueprints to include the “gap” for hinges and the latch. If your opening is exactly 40 inches, your gate frame should be roughly 39 inches wide. This gives you a 1/2-inch clearance on each side. In my experience, builders often forget that hinges have a physical thickness. If you don’t account for that in your initial cut list, you will be grinding down your frame later just to get it to swing.
Selecting Steel Profiles for Longevity
Choosing the specific shape and grade of steel is the foundation of any custom fabrication project. Square tubing offers excellent torsional rigidity, while solid round bar or flat stock is often used for the vertical pickets to provide visibility and airflow without sacrificing the overall strength of the frame.
For the main frame, I prefer cold-rolled steel because the dimensions are more consistent and the surface is cleaner for welding. For the pickets—the vertical bars that keep the pet inside—I usually use 1/2-inch square tube or 3/8-inch solid round bar. Solid bar is harder to bend but adds significant weight. If you are building a barrier for a high-energy dog, the mass of solid bar can help dampen the noise and vibration when they jump against it.
| Material Type | Common Dimensions | Best Use Case | Weight per Foot |
|---|---|---|---|
| Square Tubing | 1″ x 1″ x 1/8″ | Main outer frame | 1.44 lbs |
| Square Tubing | 3/4″ x 3/4″ x 14ga | Lightweight pickets | 0.66 lbs |
| Solid Round Bar | 1/2″ Diameter | Heavy-duty pickets | 0.67 lbs |
| Flat Bar | 1-1/2″ x 3/16″ | Hinge mounting plates | 0.96 lbs |
Calculating Kerf and Material Allowances for Precise Cuts
Accounting for the width of the saw blade or cutting disc is vital for ensuring final assembly dimensions match your blueprint. This process, known as kerf calculation, prevents the cumulative error that occurs when multiple pieces are cut from a single length of steel without adjusting for lost material.
One of the most common metal layout tips I give is to “measure twice, cut once, but account for the blade.” If you are using a standard abrasive chop saw, the blade is usually 3/32 to 1/8 of an inch thick. If you need four pieces at exactly 30 inches and you just mark 30, 60, 90, and 120 on a 10-foot stick, your last piece will be nearly half an inch short.
I always mark my cut line and then place the blade on the “waste side” of the line. This ensures that the finished piece is exactly the length I intended. For accurate square cuts, I use a high-quality speed square to scribe my lines all the way around the tube. This gives me a visual guide to ensure the blade isn’t wandering as it moves through the steel.
Tools for Achieving Accurate Square Cuts
Using the right cutting equipment determines the level of prep work required before welding. While a portable band saw or a cold saw provides the cleanest results with minimal heat, an angle grinder or abrasive saw requires more attention to deburring and squaring the ends.
I prefer a dry-cut metal saw with a carbide-tipped blade for projects like this. It produces a finish that is almost ready to weld right off the saw. If you are using an angle grinder with a zip wheel, your cuts might not be perfectly square. In that case, I keep a 12-inch disc sander or a flap disc on a grinder nearby to “true up” the ends. A gap of even 1/16th of an inch in a miter joint can cause the weld to pull the frame out of square as it cools.
- Marking: Use a silver streak pencil or a carbide scriber for thin, visible lines.
- Squaring: Check the saw fence with a machinist’s square before the first cut.
- Deburring: Remove the internal and external burrs with a file or deburring tool to ensure the pieces sit flush.
- Verification: Measure the first cut of a series and compare it to the blueprint before cutting the rest.
Building Workshop Jigs and Fixtures for Square Alignment
Creating temporary or permanent guides on a welding table holds steel members in place during the tacking process. These workshop jigs and fixtures act as a second set of hands, resisting the initial pull of the weld and ensuring the frame stays flat and true throughout the assembly.
You don’t need a $5,000 professional fixture table to get professional results. I often build “temporary jigs” by tacking scrap pieces of angle iron directly to my steel workbench. For this barrier project, I would tack four pieces of angle iron to the table to create a “cradle” for the corners. This prevents the frame from shifting while I am clamping it down.
If you are working on a wooden bench or the floor, you can use heavy-duty F-clamps and 90-degree corner clamps. The goal is to physically restrain the metal so it cannot move. However, remember that no clamp is stronger than the force of cooling steel. The jig is there to help you get the tacks in the right place, not to stop all movement during final welding.
Using Squares and String Lines for Layout Verification
Checking for squareness requires more than just looking at a corner tool; it involves measuring diagonals to ensure the entire assembly is a perfect rectangle. This verification step identifies “parallelogramming,” where the corners might be 90 degrees, but the overall frame is shifted to one side.
After I have my pieces in the jig, I measure from the top-left corner to the bottom-right corner, then from the top-right to the bottom-left. If those two numbers are within 1/16th of an inch, the frame is square. If they are off, I use a long bar clamp to “squeeze” the long diagonal until the numbers match.
- Diagonal A: 45-1/8 inches
- Diagonal B: 45-1/8 inches
- Result: Perfectly square.
- Diagonal A: 45-1/4 inches
- Diagonal B: 45 inches
- Result: Out of square; needs adjustment before tacking.
Managing Thermal Expansion with Strategic Weld Sequencing
Applying heat in a specific order balances the pulling forces of cooling metal, preventing the frame from twisting or bowing. A proper weld sequencing layout distributes the heat input across the structure, allowing one weld’s shrinkage to be countered by another weld on the opposite side.
When metal melts, it expands. When it cools, it contracts. If you weld the entire front side of a gate frame all at once, the steel will “pull” toward those welds, causing the whole gate to bow like a recurve bow. My rule of thumb is to never finish a joint until the entire project is tacked together and checked for square.
I start by placing small, strong tacks (about 1/4 inch long) on the inside corners of the frame. Then, I move to the outside corners. After the frame is fully tacked and I’ve re-verified the diagonals, I follow a “staggered” welding sequence. I might weld the top-left corner, then move to the bottom-right corner. This keeps the heat from building up in one area and pulling the frame out of alignment.
The Science of Angular Weld Shrinkage
Understanding how a weld bead acts as a “muscle” that pulls the metal toward the center of the weld helps you predict and counteract distortion. This phenomenon, known as angular shrinkage, is especially prevalent in fillet welds and miter joints where the heat is concentrated on one side of the material.
If you are welding a picket to the frame, the weld will try to pull the picket toward the side you are welding on. To fix this, I tack both sides of the picket before running a bead. For the main frame joints, I often “preset” the joint by a fraction of a degree in the opposite direction of the expected pull. It takes practice to know how much a joint will pull, but for 1/8-inch tubing, a 1/32-inch gap on the “pull side” can sometimes result in a perfectly square finished joint.
| Weld Type | Potential Distortion | Mitigation Strategy |
|---|---|---|
| Miter Joint | Corner closes (becomes <90°) | Tack the outside corner first; weld inside to outside. |
| Butt Joint | Ends pull together or “peak” | Use a heavy tack in the center; weld from center out. |
| Fillet (Pickets) | Picket tilts toward the weld | Tack both sides; skip-weld pickets in a random order. |
| Lap Joint | Top plate curls upward | Clamp the plate to a heat sink (thick copper or steel). |
Fabricating a Reliable Mechanical Latch System
Constructing a heavy-duty sliding or gravity-fed locking mechanism ensures the barrier remains functional even if the frame shifts slightly over time. A secure latch must be robust enough to resist prying forces and simple enough to operate with one hand while remaining pet-proof.
I’ve seen many builders use cheap, store-bought gate latches that are meant for wood fences. Those usually fail on a steel gate because the tolerances are too loose. For a custom steel barrier, I prefer to build a “slam latch” or a heavy-duty sliding bolt. I use a piece of 1/2-inch solid round bar as the bolt and a short section of 1/2-inch ID (inside diameter) pipe as the sleeve.
To make it secure, I weld a “stop” on the bolt so it cannot be pulled all the way out. I also include a spring-loaded mechanism if I want it to self-close. The key is to ensure the “strike plate” (the part on the wall or post) has a wide enough opening to account for any slight sagging of the gate over the next ten years.
Designing for Ease of Use and Security
A well-designed latch balances the need for a firm lock with the reality of daily use. By using mechanical advantages like gravity or spring tension, you can create a closure that stays shut against a pet’s weight but opens easily for a human.
One trick I use is the “gravity-drop” latch. It is essentially a U-shaped piece of steel that drops over the frame of the gate. It is nearly impossible for a pet to figure out because it requires a vertical lift before the gate can swing. Since it is made of steel, it won’t snap like plastic or thin aluminum latches.
- Cut the bolt: Use 6 inches of 1/2-inch round bar.
- Create the sleeve: Cut two 1-inch pieces of pipe that fit the bar.
- Weld the handle: Attach a small perpendicular piece of bar to the bolt as a finger pull.
- Align the strike: Weld a piece of angle iron to the post to receive the bolt.
- Test the tolerances: Ensure there is at least 1/8-inch of “play” so the latch doesn’t bind if the house settles.
Correcting Heat Distortion and Final Straightening
Even with the best sequencing, some metal warping is inevitable in custom fabrication projects. Post-weld straightening involves using controlled heat, mechanical leverage, or “cold working” to return the frame to its intended dimensions and ensure it hangs straight.
If you finish your welds and find the gate has a slight twist, don’t panic. This is where a “strong back” or a heavy beam comes in handy. You can clamp the gate to the beam with a spacer in the middle and “over-bend” it slightly in the opposite direction of the warp. Sometimes, a well-placed hit with a dead-blow hammer while the metal is still warm can move it back into place.
Another technique is “flame straightening,” though this requires a torch and some experience. By heating a small spot on the side opposite the warp, you can cause that area to expand and then contract, pulling the metal back. For most DIY builders, however, mechanical straightening with clamps and levers is the safer and more predictable metal warping solution.
Final Inspection and Mounting
The last step of the build is to verify that all welds are sound and the barrier moves freely on its hinges. A final check with a level and square ensures that the gate won’t swing open or shut on its own due to being out of plumb.
Before I paint or powder coat, I always do a “test hang.” I clamp the hinges to the wall or post and check the swing. I look for any rubbing or binding. This is the time to make adjustments with a grinder or a shim. Once I am happy with the fit, I take it back down, clean the steel with a degreaser, and apply a durable finish.
- Check 1: Are there any sharp burrs or weld spatter that could hurt a pet?
- Check 2: Does the latch engage fully without needing to “lift” the gate?
- Check 3: Are the hinge pins greased or lubricated for silent operation?
- Check 4: Is the gap between pickets small enough that a pet’s head cannot get stuck? (Usually less than 3 inches).
Summary of Best Practices for Steel Barriers
Building a durable metal enclosure requires a mix of careful planning and reactive problem-solving. By focusing on accurate square cuts and a disciplined weld sequencing layout, you can minimize the frustrations of warping and misalignment.
Remember that fabrication is a skill that rewards patience. Taking the extra ten minutes to build a jig or check your diagonals will save you two hours of grinding and “fixing” later. Use the right materials, respect the heat of the weld, and always build for the “worst-case scenario” regarding the strength of the latch and the rigidity of the frame.
Key Takeaways for the Builder
- Plan for Kerf: Always account for the 1/8-inch of material lost during each cut.
- Jig Your Work: Physical restraints are your best defense against the initial pull of a weld.
- Sequence Your Welds: Move around the project to distribute heat evenly and prevent bowing.
- Over-Build the Latch: Use solid steel components for the locking mechanism to ensure long-term reliability.
- Check Diagonals: Diagonals are the only true way to verify a frame is square.
Frequently Asked Questions
Why does my steel frame always turn into a diamond shape after welding?
This happens because the welds on one side of the joint are cooling and shrinking faster than the other side, or because you are welding all the corners in a circle. To prevent this, use a staggered weld sequencing layout. Weld the top-right, then the bottom-left, then the top-left, then the bottom-right. This balances the “pull” across the frame.
How do I calculate the gap for my hinges?
Most heavy-duty weld-on hinges require about 1/2 inch to 5/8 inch of clearance. Check the specifications of your specific hinges before cutting your steel. If you are using “bullet” hinges, measure the diameter of the barrel and add 1/16th of an inch for clearance.
Can I build this project with a 110v welder?
Yes, a 110v MIG or stick welder is perfectly capable of welding 1/8-inch square tubing. Just ensure you are plugged into a 20-amp circuit and use the correct wire speed or rod diameter. For 1/8-inch steel, a 3/32-inch 7018 rod or .030-inch solid wire with gas works well.
What is the best way to keep pickets evenly spaced?
I use “spacer blocks.” If I want a 3-inch gap between pickets, I cut two pieces of wood or scrap steel to exactly 3 inches. I place a picket, put the spacers next to it, then place the next picket against the spacers. This ensures every gap is identical without having to measure each one individually.
How do I stop the gate from sagging over time?
Sagging is usually caused by the hinges pulling away from the wall or the frame itself twisting. To prevent this, ensure your hinge-side vertical tube is the full height of the gate and that your hinges are welded securely. You can also add a diagonal “gusset” or brace from the bottom hinge corner to the top latch corner to provide extra rigidity.
My welds are “blowing through” the thin tubing. What am I doing wrong?
You likely have too much heat or your travel speed is too slow. If you are using 14-gauge or 16-gauge tubing, try “stitch welding”—doing short 1/2-inch beads and letting the metal cool—rather than running one continuous bead. Also, ensure your fit-up is tight; gaps make blow-through much more likely.
Should I paint or powder coat my steel pet gate?
Powder coating is much more durable against pet claws and cleaning chemicals, but it is more expensive and harder to touch up. If you are on a budget, a high-quality “chassis paint” or industrial enamel applied over a clean, primed surface will work well. Just make sure the steel is 100% free of mill scale and oils before painting.
How many tack welds are necessary before final welding?
For a standard corner joint on square tubing, I recommend at least four tacks—one on each flat side of the tube. This prevents the joint from “opening up” or “closing” regardless of which side you start your final weld on. For pickets, two tacks (one on top, one on bottom) are usually sufficient.
What is the safest spacing for pickets to keep a pet secure?
For most medium to large dogs, a 3-inch to 4-inch gap is standard. For smaller pets, you may need to go down to 2 inches. Always measure the width of your pet’s head; if the head can fit through, the body usually can too, or worse, the pet could get stuck.
How do I fix a gate that is already warped?
If the gate is bowed, you can use a “cold straightening” method. Place the gate on two blocks with the “hump” facing up. Use a heavy weight or a large clamp to press down on the hump until it moves past the straight point. Because steel is elastic, you have to bend it slightly past straight for it to spring back to the correct position.
(This article was written by one of our staff writers, Robert Kline. Visit our Meet the Team page to learn more about the author and their expertise.)