How to Clean and Rustproof Metal Lathe Tool Holders (Guide)
In my eighteen years of restoring vintage metalworking machinery, I have learned that the smallest components often dictate the success of the entire machine. I once spent three months rebuilding a 1942 Hendey lathe, only to find that the original tool holders were so encrusted with petrified grease and “flash rust” that they couldn’t hold a bit on center. These small, cast-iron and steel blocks are the bridge between the machine’s power and the work itself. If they are neglected, your precision vanishes.
Restoring these components is a lesson in patience. You are not just cleaning a piece of metal; you are preserving a mechanical interface that was likely ground to within a thousandth of an inch of perfection decades ago. My approach focuses on a “preservation-first” mindset. This means we remove the grime and the oxidation without removing the actual metal that gives the tool its accuracy.
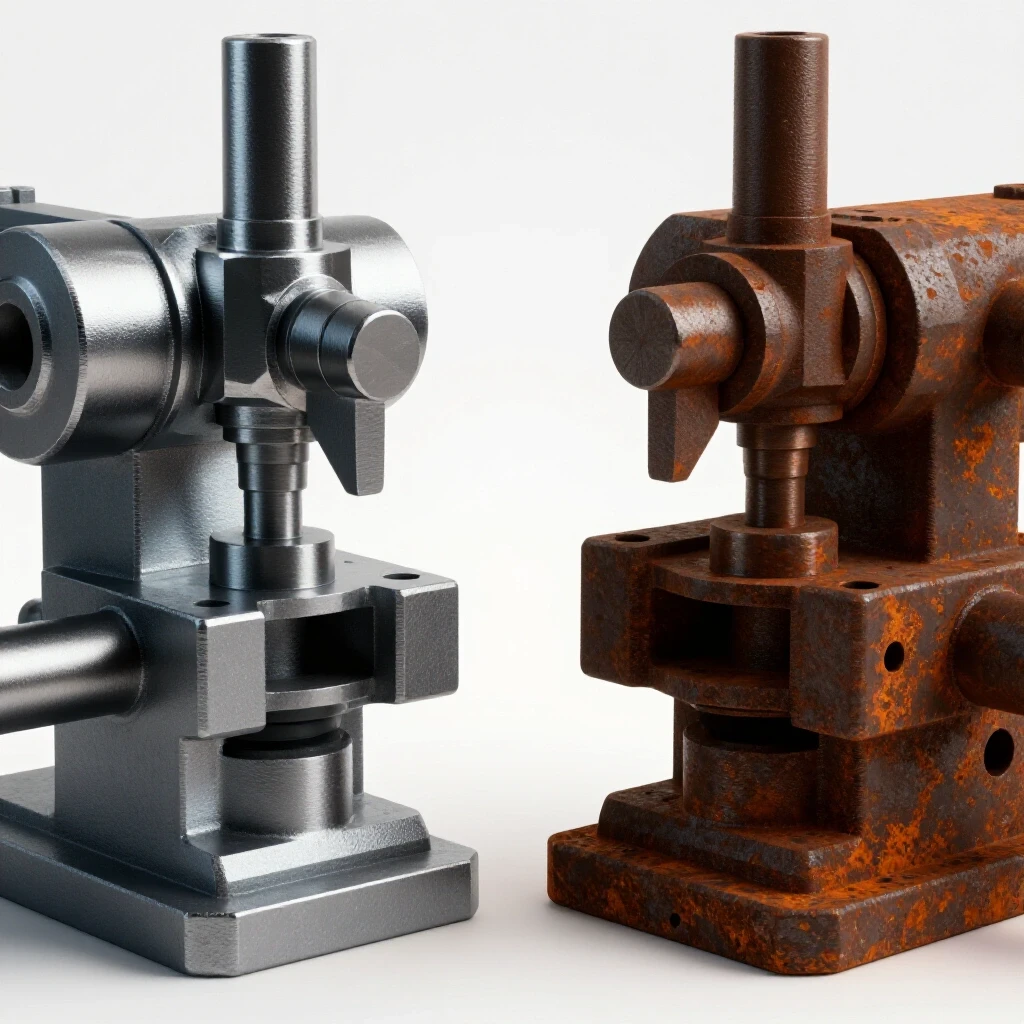
Evaluating the Structural Integrity of Vintage Tooling
Before you pick up a wrench or a wire brush, you must understand what you are holding. This initial assessment determines if a piece is a candidate for restoration or a safety hazard destined for the scrap bin.
This phase involves a close inspection of the material for stress cracks, severe pitting on mating surfaces, and the identification of original manufacturing marks. I look for “mushrooming” on the heads of set screws and signs of “work hardening” where the metal has been compressed by over-tightening.
When I evaluate a tool holder, I check for three specific types of damage. First, I look for structural fractures. Cast iron is brittle. If a previous owner over-torqued a clamping bolt, the internal corners of the dovetail or the tool slot might have hairline cracks. I use a magnifying glass and a bright light to inspect these high-stress areas. If a crack is deep, the holder is a paperweight; the forces of a heavy cut could cause it to shatter during use.
Second, I assess the “mating surfaces.” These are the flat areas that sit against the lathe’s compound rest or the dovetails of a quick-change system. If these are heavily pitted, the tool will vibrate or “chatter” during a cut. Third, I check the threads. Vintage machinery often uses obsolete thread patterns that are difficult to replace. If the threads are stripped, I have to decide if I can chase them with a tap or if the hole needs to be plugged and re-machined.
- Material Identification: Steel holders (often blued or black oxide) vs. Cast Iron (grey, porous).
- Deformation Check: Use a machinist’s straightedge to check for bowing in the tool slot.
- Fastener Assessment: Determine if the screws are standard or a legacy pitch like 1/2-12.
| Damage Type | Visual Indicator | Restoration Potential |
|---|---|---|
| Surface Rust | Brown/Orange dusting | High – easily cleaned |
| Deep Pitting | “Craters” in the metal | Moderate – may require light lapping |
| Structural Cracks | Thin black lines in corners | Zero – unsafe to use |
| Mushroomed Screws | Flared tops on bolts | High – replace with new fasteners |
Why Seized Cast Iron Screws Crack Under Force
One of the most common hurdles in restoring classic metalworking gear is the seized fastener. Over decades, coolant, oil, and moisture create a galvanic bond between a steel screw and a cast-iron body.
This section covers the mechanical and thermal strategies required to free stuck components without snapping the fastener or cracking the surrounding casting. It emphasizes the “slow and steady” approach over brute strength.
I have seen many restorers ruin a rare tool holder by using a cheater bar on a stuck set screw. When a screw won’t budge, I start with a 50/50 mix of Automatic Transmission Fluid (ATF) and Acetone. This home-brewed penetrant has a lower surface tension than most commercial sprays and can “wick” into the threads. I apply it twice a day for three days before even attempting to turn the screw.
If the chemical approach fails, I move to thermal release. I use a propane torch to heat the body of the tool holder, not the screw itself. The goal is to cause the cast iron to expand slightly more than the steel screw. Once the metal is hot to the touch—but not glowing—I apply a paraffin wax stick to the thread interface. The wax melts and draws into the threads, acting as a lubricant. Only then do I use a high-quality, tight-fitting hex key or wrench to apply steady, even pressure.
- Clean the socket: Use a dental pick to remove all impacted chips and grease from the screw head.
- Chemical Soak: Apply penetrant and allow 24 to 72 hours for penetration.
- Vibration: Lightly tap the head of the screw with a brass hammer to “shock” the rust bonds.
- Heat Application: Heat the casting to approximately 200°F (93°C).
- Steady Torque: Use a T-handle wrench to ensure the force is centered and not “cocked” to one side.
Stripping Oxidation While Preserving Base Metal
Once the tool holder is disassembled, the goal is to remove the rust without using aggressive abrasives that change the dimensions of the tool.
This process utilizes modern chemical chelators and manual scrubbing techniques to lift rust molecules from the surface while leaving the healthy, unoxidized metal untouched. It avoids the use of harsh acids that can cause hydrogen embrittlement.
I avoid wire wheels on a bench grinder for precision parts. A wire wheel can round off sharp edges that are critical for tool alignment. Instead, I use water-based rust chelators, such as Evapo-Rust. These solutions work through a process called chelation, where a large molecule bonds with the iron oxide (rust) but ignores the base iron or steel.
I submerge the parts in a plastic container for 12 to 24 hours. When they come out, the rust has turned into a black, soot-like substance that can be washed away with a stiff nylon brush and warm water. For stubborn spots, I use a piece of “0000” grade steel wool or a fine brass brush. Brass is softer than steel and cast iron, so it won’t scratch the precision-ground surfaces.
- Submersion Time: 4 hours for light rust; 24 hours for heavy “scale.”
- Temperature: These chemicals work best at room temperature (above 65°F).
- Post-Bath Neutralization: Rinse thoroughly with water, then immediately dry with compressed air to prevent “flash rusting.”
Restoring Precision Mating Surfaces and Flatness
A tool holder must sit perfectly flat on the lathe’s compound rest. Even a tiny burr or a speck of rust can cause the tool to tilt, which changes your cutting angle and ruins your finish.
This stage focuses on verifying and correcting the flatness of the holder’s base and the internal clamping surfaces using a surface plate and fine-grit abrasives. It ensures the tool remains rigid under the high pressures of metal cutting.
After cleaning, I perform a “bluing test.” I apply a thin layer of Engineer’s Blue (a non-drying pigment) to a certified grade-B granite surface plate. I then gently slide the base of the tool holder across the plate. The high spots on the tool holder will pick up the blue pigment, while the low spots will remain bare.
If the contact area is less than 70%, I use a process called “lapping.” I place a sheet of 400-grit wet/dry sandpaper on the surface plate, lubricated with a drop of light oil. I move the tool holder in a figure-eight pattern, using very light pressure. I check the progress every ten strokes. The goal is not to remove a lot of metal, but to “level” the surface so it makes full contact with the machine. This ensures maximum rigidity and prevents the “creeping” that happens when a tool holder isn’t properly seated.
- Deburring: Use a fine Arkansas stone to remove any raised nicks on the edges.
- Flatness Check: Use a 0.001-inch feeler gauge under the holder while it’s on the surface plate.
- Slot Cleaning: Use a small, square file wrapped in 600-grit paper to clean the internal corners where the tool bit sits.
Long-Term Rustproofing and Preservation Methods
After the metal is clean and flat, it is highly “reactive.” If left unprotected, it will begin to rust again within hours just from the moisture in the air.
This final step involves applying a durable, non-tacky protective barrier that prevents oxygen from reaching the metal surface. The focus is on products that do not attract dust or metal chips, which can interfere with the tool’s operation.
In my shop, I use two different methods for rustproofing, depending on how often I use the tool. For holders I use daily, I apply a thin coat of “way oil” (specifically ISO 68 grade). This oil contains tackifiers that help it “stick” to the metal even on vertical surfaces. For tools going into long-term storage, I prefer a microcrystalline wax, such as Renaissance Wax, or a dedicated corrosion inhibitor like Boeshield T-9.
I apply the wax while the metal is slightly warm (about 100°F). The heat helps the wax penetrate the microscopic pores of the cast iron. Once it cools, I buff it with a lint-free cloth. This creates a hard, dry barrier that doesn’t feel oily and won’t attract the sharp metal chips (swarf) produced during machining. Avoiding “tacky” protectors is vital because chips stuck to a tool holder can get trapped between the holder and the machine, causing permanent scoring.
- Daily Use: Light wipe with ISO 68 Way Oil.
- Seasonal Storage: Boeshield T-9 (a paraffin-based aerosol).
- Historical Display: Microcrystalline wax for a dry, matte finish.
| Protectant | Application | Pros | Cons |
|---|---|---|---|
| Way Oil | Wipe on | Excellent lubrication | Attracts dust/chips |
| Paste Wax | Rub on/Buff | Dry finish, very cheap | Requires frequent re-app |
| VCI Paper | Wrap part | Best for drawers/boxes | No lubrication |
| T-9 Spray | Spray/Wipe | Long-lasting barrier | Can be slightly “waxy” |
Sourcing and Replacing Obsolete Fasteners
Many vintage tool holders, especially those from the early 20th century, use thread pitches that you cannot find at a local hardware store.
This section discusses the identification of legacy thread standards and the options for replacing damaged hardware, including custom machining or sourcing from specialized vintage machinery suppliers.
When I find a damaged screw on a 1920s tool post, I first check it with a thread pitch gauge. It is common to find “odd” sizes like 7/16-14 or 1/2-12 (which is different from the modern 1/2-13). If the screw is damaged, I don’t try to force a modern “close-enough” bolt into the hole. That will destroy the original threads in the casting.
Instead, I search for “New Old Stock” (NOS) fasteners on industrial auction sites or specialized forums dedicated to vintage machinery restoration. If the part is truly unobtainable, I use my lathe to “single-point” a new screw from a high-tensile steel like 4140. This ensures the thread fit is perfect and the tool holder remains historically accurate.
- Identify the Standard: Determine if it is Unified National (UNC/UNF), British Standard Whitworth (BSW), or an older proprietary shop standard.
- Measure the Pitch: Use a dedicated pitch gauge; do not “eye-ball” it.
- Check the Fit: A new screw should thread in by hand with zero resistance; if it binds, the internal threads need cleaning with a “bottoming tap.”
Maintaining Alignment and Factory Tolerances
The ultimate goal of this restoration is to return the tool holder to a state where it can hold a cutting tool within a 0.001-inch tolerance of the lathe’s center height.
This concluding technical phase explains how to verify the alignment of the restored holder on the machine and how to make micro-adjustments to ensure the tool performs as it did when it left the factory.
After the holder is clean and rustproofed, I mount it back on the lathe. I place a “test bar” (a ground steel rod) in the lathe’s spindle and use a dial indicator to check the holder’s repeatability. If I remove the holder and put it back, does it return to the exact same spot? On a quick-change system, I look for a variance of no more than 0.0005 inches.
If the holder is sitting too low, I don’t use “shims” made of soda cans. I use precision-ground steel shim stock. If the holder is a “lantern style,” I ensure the “rocker” and the “ring” are clean and free of burrs. Any debris in these curved interfaces will cause the tool to “dip” under the pressure of a cut, leading to a poor surface finish or a broken tool bit.
- Center Height Check: Use a “dead center” in the tailstock to verify the tool tip is exactly on the horizontal centerline.
- Rigidity Test: Apply 20 lbs of pressure to the tool holder and watch the dial indicator for “flex.”
- Repeatability: Cycle the locking mechanism 10 times and record the deviation.
Frequently Asked Questions
Can I use a wire wheel to remove the rust faster? I advise against it for precision surfaces. A wire wheel can “dub” or round over the sharp edges of the tool slot and dovetails. This reduces the contact area and can lead to tool vibration. Stick to chemical chelators and manual scrubbing with brass brushes.
What if the tool holder is painted? Many vintage holders were originally painted with a heavy “machinery grey” enamel. If the paint is flaking, remove it using a citrus-based paint stripper. Do not sand it off, as you may damage the underlying metal. Once clean, you can repaint it with a modern oil-resistant enamel or leave it as bare, oiled metal for a “working” look.
Is Evapo-Rust safe for cast iron? Yes, it is pH-neutral and specifically targets iron oxide. However, do not leave cast iron in the bath for more than 48 hours. Long-term immersion can sometimes cause “carbon darkening,” where the surface of the iron turns a dark grey or black. This isn’t harmful, but it can be difficult to remove if you want a bright finish.
How do I clean the inside of small threaded holes? I use a “thread chaser” rather than a cutting tap. A chaser is designed to push the metal back into shape and clean out debris without removing new material. If you don’t have a chaser, you can take a sacrificial bolt of the same size, cut a vertical “flute” into the threads with a hacksaw, and use that to scrape out the gunk.
Why shouldn’t I use WD-40 for long-term rustproofing? WD-40 is a “Water Displacer.” It is excellent for drying a part after a water-based bath, but it evaporates quickly and leaves behind a very thin film that doesn’t provide long-term protection in a humid workshop. Use a dedicated way oil or wax for lasting results.
What is “mushrooming” and why is it dangerous? Mushrooming happens when the top of a set screw is hit with a hammer or over-tightened until the metal deforms and spreads outward. If you try to back a mushroomed screw out through a threaded hole, the flared top will destroy the internal threads of the tool holder. You must file or grind the flared part back to the original diameter before unscrewing it.
Can I use sandpaper to clean the dovetails? Only if the sandpaper is backed by a hard, flat block. Never use your fingers to press sandpaper into a precision surface, as your fingers are soft and will create an uneven, “wavy” surface. Use a small piece of ground steel or a dedicated sanding block.
How often should I re-apply rustproofing? In a typical home shop, I recommend a quick wipe-down with an oily rag after every use. For the wax-based protection, once every six months is usually enough, provided the tools are kept in a drawer or covered when not in use.
What should I do if the tool holder has “pockmarks” from old rust? If the pitting is on a non-critical surface, leave it. It adds character and shows the tool’s age. If it is on a mating surface, you must lap it flat as described in the precision section. You don’t need to remove the “craters” entirely; you only need to ensure that the surrounding metal is flat and true.
Is it worth restoring a tool holder with a broken corner? Generally, no. The corners of a tool holder take the brunt of the clamping force. A broken corner suggests the metal has been overstressed. Welding cast iron is difficult and often results in a brittle zone that can fail unexpectedly. It is safer to use the part for dimensions and fabricate a replacement.
Restoring these small pieces of history is a rewarding part of maintaining a vintage shop. By following a methodical process—assessing the damage, using gentle chemistry, and verifying flatness—you ensure that your classic lathe continues to produce work as accurate as the day it was built. The key is to remember that you are a steward of the machine, and your goal is to preserve its function for the next generation of makers.
(This article was written by one of our staff writers, Richard Beaumont. Visit our Meet the Team page to learn more about the author and their expertise.)