How to Clean Power Tool Electric Cooling Fans Safely (Fix)
In my 17 years of maintaining industrial machinery and evaluating workshop equipment, I have learned that the most expensive tool is the one that fails prematurely due to neglect. We often spend hours reading metal lathe comparison guides or analyzing machine tool reviews to find the perfect motor horsepower or spindle runout specs. However, the longevity of these investments often comes down to how well we manage the heat generated during a long day of fabrication.
When you are choosing workshop machinery, the internal cooling system is your tool’s primary defense against thermal breakdown. Whether you are running a high-end milling machine or a handheld grinder, the electric fan inside the housing is pulling in more than just air. It draws in metallic dust, wood fibers, and abrasive grit. If you do not maintain these pathways, that debris acts like an insulator, trapping heat and cooking the motor windings from the inside out.
Evaluating Motor Ventilation and Housing Design
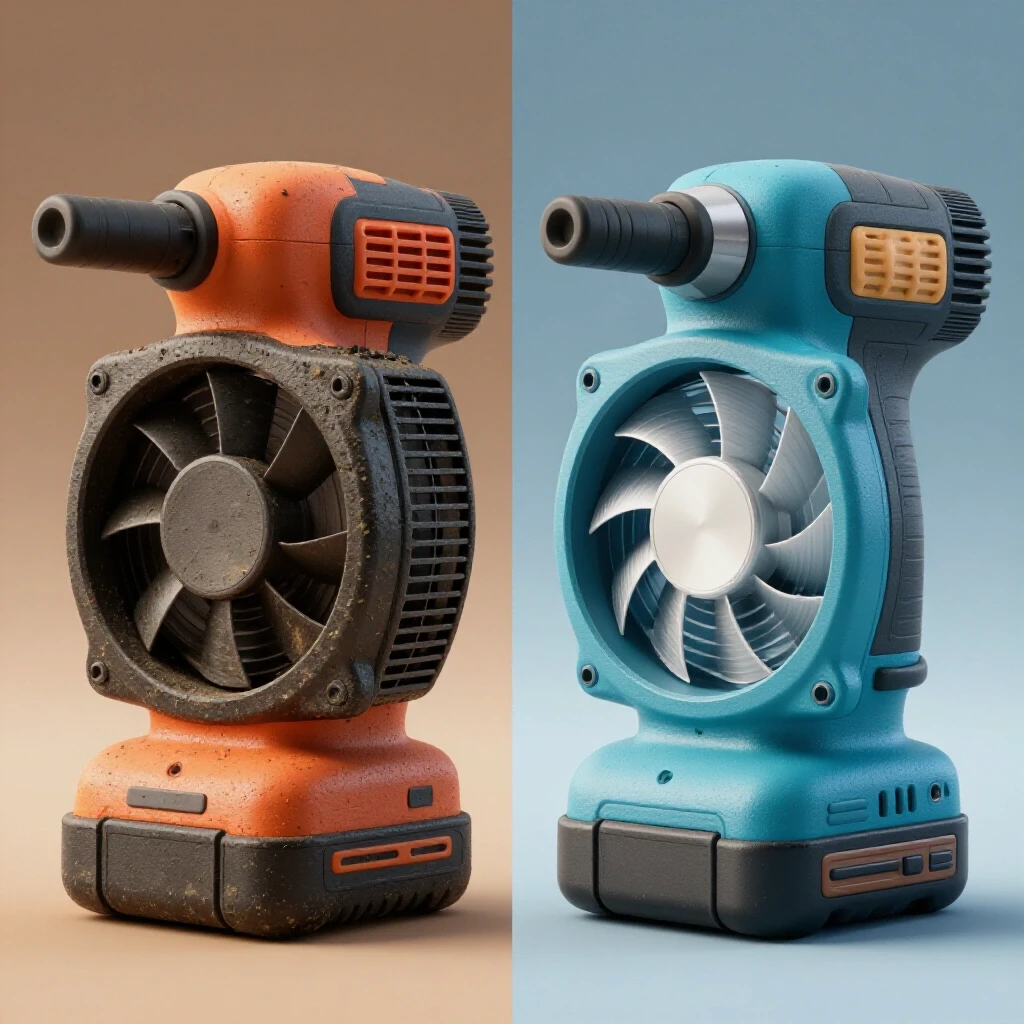
Motor ventilation refers to the engineered pathways and internal impellers designed to move cool air over electrical components. A well-designed tool uses strategic vent placement to maximize airflow while minimizing the intake of heavy shop floor debris.
When I conduct side-by-side machine tool reviews, the first thing I look at is the vent geometry. On premium tools, you will often see “labyrinth” style intakes. These are designed to force air through a series of turns, which helps drop heavy particles before they reach the motor. Budget tools often have wide, open slots that let everything in. While wide slots might look like they offer better airflow, they actually invite more contamination.
The internal fan, or impeller, is usually mounted directly on the armature shaft. As the motor spins, this fan creates a vacuum. In a metalworking environment, the fine dust from grinding is magnetic. It clings to the fan blades and the stator. Over time, this buildup reduces the fan’s aerodynamic efficiency. I have seen tools lose 40% of their cooling capacity simply because the leading edge of the fan blades was coated in a thin layer of packed dust.
The Impact of Material Choice on Thermal Management
Material framework evaluation involves looking at how the tool’s body—whether cast iron, aluminum, or high-impact plastic—interacts with the heat generated by the motor. Each material has a different thermal conductivity rate, which affects how much work the internal fan has to do.
In my experience with metal lathe comparison guides, the heavy cast iron beds are excellent for dampening vibration, but they also act as a massive heat sink. However, the motor itself is usually enclosed. If the internal cooling paths are blocked, the heat cannot transfer to the frame. On handheld tools, plastic housings are poor conductors of heat. This makes the internal airflow even more critical.
| Material Type | Thermal Conductivity (W/m·K) | Cooling Reliance | Common Tool Application |
|---|---|---|---|
| Cast Iron (Grade 25) | 45–55 | Moderate | Lathe beds, Mill bases |
| Aluminum Alloy | 120–180 | Low | Gearboxes, Motor fins |
| Reinforced Polymer | 0.2–0.5 | Extremely High | Handheld drill/grinder bodies |
As shown in the table, a tool with a polymer housing relies almost entirely on its internal fan. If those vents get clogged, the internal temperature can spike to the point of melting the brush holders or degrading the wire insulation in minutes.
Safe Debris Removal from Internal Cooling Paths
Restoring the airflow to your machinery requires a methodical approach that prioritizes the integrity of the electrical system. You are not just “cleaning”; you are performing a critical maintenance “fix” that extends the life of the tool’s most expensive components.
The first and most vital step is disconnecting all power. For corded tools, pull the plug. For cordless tools, remove the battery. This isn’t just for your safety; it prevents the motor from accidentally engaging while you are working near the fan blades. Once the power is killed, I use a three-stage approach to clear the obstructions.
- Low-Pressure Air Blast: Use a compressed air nozzle set between 30 and 60 psi. Hold the nozzle at least six inches away from the vents. Do not use high-pressure industrial air (100+ psi) directly against the fan. Excessive pressure can spin the fan faster than its rated RPM, which can damage the bearings or cause the fan to shatter.
- Mechanical Agitation: Use a soft nylon brush to gently dislodge “caked” dust from the intake and exhaust grilles. I find that a clean, long-bristle paintbrush works best for reaching into the slots.
- Chemical Evaporation: For oily or stubborn residue on accessible plastic surfaces, use 99% isopropyl alcohol on a cotton swab. Do not pour the liquid into the tool. The high percentage of alcohol ensures it evaporates almost instantly, leaving no moisture behind to cause a short circuit.
Measuring the Health of Your Cooling System
Understanding spindle runout explanation or cast iron dampening specs is great for accuracy, but you also need to know how to measure the “health” of your tool’s cooling. I use a simple “No-Load Temperature Test” to see if my cleaning was successful.
Before cleaning, run the tool for two minutes under no load. Use a non-contact infrared thermometer to measure the air coming out of the exhaust vent. After performing the cleaning steps mentioned above, repeat the test. If the exhaust air temperature drops by even 5 or 10 degrees, you have significantly reduced the thermal stress on the motor.
Another diagnostic I use involves checking the “coast-down” time. If a fan is heavily bogged down with debris, the motor will stop spinning almost immediately when you release the trigger. A clean, well-maintained fan allows the motor to coast down smoothly. If you hear a “whirring” or “scratching” sound during coast-down, it usually means debris is physically rubbing against the fan shroud.
Comparing Motor Types and Their Cooling Needs
When you are choosing workshop machinery, you will encounter two main motor types: brushed and brushless. Each handles heat and dust differently, which changes how you approach their maintenance.
Brushed motors generate heat at the commutator where the carbon brushes make contact. This area needs constant airflow to clear away carbon dust. If the fan is clogged, this carbon dust stays inside the motor and can create a “bridge” that causes electrical arcing. This leads to the “burnt smell” many fabricators know too well.
Brushless motors are more efficient and generate less heat, but their electronic control boards (VFDs or ESCs) are extremely sensitive to temperature. These boards are often tucked right next to the cooling fan. If the fan is blocked, the board can overheat and fail. Replacing a control board is often as expensive as buying a new tool, making fan maintenance on brushless equipment a high-stakes task.
- Brushed Motors: Require high-volume airflow to clear carbon dust.
- Brushless Motors: Require consistent airflow to protect sensitive electronics.
- Induction Motors: Often found on lathes and mills; these usually have external fans that are easier to access but still require regular debris removal from the cooling fins.
Practical Checklist for Tool Airflow Inspection
I recommend keeping a log for your major shop investments. Much like you would track TIR runout (Total Indicated Runout) on a new lathe, you should track the cleanliness of your cooling systems.
- Visual Inspection: Every Monday morning, shine a bright LED light into the motor vents. If you can’t see the fan blades clearly, it’s time to clean.
- Airflow Direction Check: Ensure you know which vents are “intake” and which are “exhaust.” Always blow air from the exhaust side toward the intake side first to push the dust back out the way it came.
- Bearing Noise Check: While the tool is unplugged, rotate the fan manually with a thin plastic probe if possible. It should move freely without any gritty feeling.
- Housing Temperature: During use, touch the housing near the motor. If it’s too hot to hold comfortably, your cooling system is failing.
Avoiding Common Maintenance Mistakes
In my shop, I’ve seen many “rookie” mistakes that turn a simple maintenance task into a total tool loss. The most common is using the wrong cleaning agents. Never use water or steam. Even a small amount of moisture trapped in the copper windings will cause a catastrophic short the next time you pull the trigger.
Another mistake is “spinning up” the fan with compressed air. It is tempting to hear the fan scream at high RPMs under an air blast, but this is a fast track to bearing failure. The bearings in your power tools are designed for specific loads and speeds. Forcing them to spin at 50,000 RPM with a 100 psi air nozzle can liquefy the grease and cause the bearing to seize later.
Finally, do not attempt to disassemble the motor housing unless you are a trained technician. Most modern tools use “snap-fit” housings or specialized security screws. Opening these can often misalign the internal components, leading to increased vibration and a loss of accuracy. Stick to the accessible surfaces and the “blow-through” method.
The True Cost of Neglect
When we talk about milling machine buying tips or evaluating machine tool reviews, we focus on the purchase price. But the true cost of a tool is the purchase price divided by its hours of service. A $500 grinder that lasts one year is more expensive than a $1,000 grinder that lasts ten years.
By maintaining the internal cooling pathways, you are protecting the integrity of the motor’s insulation. Once that insulation gets too hot and begins to char, the tool’s life is effectively over. No amount of cleaning can fix a “shorted” armature. Regular, safe removal of shop debris is the most cost-effective way to ensure your machinery performs at its peak for years.
Summary of Best Practices for Airflow Maintenance
To keep your shop running efficiently, follow these data-driven benchmarks for cooling system care:
- Frequency: Clean vents every 5–10 hours of heavy use in metalworking environments.
- Air Pressure: Maintain 30–60 psi to avoid bearing over-speed.
- Cleaning Agent: Use only 99% isopropyl alcohol for stubborn grime on accessible parts.
- Safety: Always verify the “Zero Energy State” (unplugged/no battery) before beginning.
- Monitoring: Use an infrared thermometer to establish a baseline “healthy” operating temperature for each tool.
Frequently Asked Questions
Can I use a vacuum cleaner instead of compressed air? Yes, using a vacuum with a brush attachment is actually safer than compressed air because it pulls the dust away from the tool rather than pushing it deeper. However, a vacuum often lacks the “concentrated force” needed to dislodge packed-in metallic dust. I often use a combination: vacuuming the exterior first, then using low-pressure air for the internal crevices.
What happens if I smell something burning even after cleaning? If the “burnt” smell persists after you have cleared the cooling paths, the motor insulation may already be damaged. At this point, the tool is drawing more current than it should, creating excess heat. Stop using the tool immediately and have the electrical draw tested with a multimeter or take it to a specialist.
Is it safe to use “canned air” like the kind used for computers? Canned air is safe because it is low pressure, but it is often not powerful enough for heavy shop dust. It also contains fluorocarbons that can leave a slight residue. For a professional workshop, a dedicated compressor with a regulated nozzle is a much better investment.
How do I know if my fan is broken inside the tool? If the tool is running but you don’t feel a strong “breeze” coming out of the exhaust vents, the fan may have sheared off the shaft or be missing blades. This is a mechanical failure that requires professional repair. A healthy tool should move a noticeable volume of air even at lower speeds.
Does dust buildup affect the tool’s accuracy? Indirectly, yes. Excessive heat causes the metal components inside the tool to expand. This can lead to increased spindle runout and a loss of precision. In my experience, a cool-running tool is always more accurate than one that is struggling to breathe.
Can I use a wire brush to clean the vents? No. Never use a wire brush. Small wire bristles can break off, fall into the motor, and cause an immediate electrical short. Always use soft nylon or natural fiber brushes.
Why is 99% isopropyl alcohol recommended over 70%? The 70% version contains 30% water, which takes a long time to evaporate and can cause rust or electrical shorts. The 99% version evaporates almost instantly, making it much safer for use around electrical housings.
Should I oil the fan bearings while I’m cleaning? In most modern power tools, the bearings are sealed and “greased for life.” Attempting to add oil can actually attract more dust and turn it into a grinding paste that destroys the bearing. Unless the manufacturer specifies an oiling port, do not add any lubricants.
Is it better to blow air into the intake or the exhaust? Always start by blowing into the exhaust. This pushes the dust out through the larger intake vents. If you blow into the intake first, you risk wedging the debris deeper into the motor windings.
How does shop humidity affect fan cleaning? High humidity causes dust to “clump” and stick to the internal components. If you work in a humid environment, you will need to use mechanical agitation (brushes) more frequently, as compressed air alone won’t be enough to move the damp debris.
Can a clogged fan cause a battery to fail? On cordless tools, yes. If the motor is struggling with heat, it draws more current from the battery. This causes the battery cells to overheat, which can trigger the battery’s internal protection circuit or permanently reduce its capacity. Maintaining the fan protects your expensive batteries as much as the tool itself.
What is the best way to clean tools used for cutting masonry or tile? Masonry dust is extremely abrasive and often “sets” like concrete when it gets damp. For these tools, cleaning after every single use is mandatory. I recommend using a vacuum during the cut (if the tool allows) to prevent the dust from ever entering the motor housing in the first place.
(This article was written by one of our staff writers, Steven Brooks. Visit our Meet the Team page to learn more about the author and their expertise.)