How to Calculate Interference Fits for Bearings (DIY Guide)
I have spent 15 years in shops where the difference between a machine that runs for a decade and one that dies in a week comes down to a few ten-thousandths of an inch. There is a specific kind of frustration that sets in when you finish a custom build, hit the power switch, and hear a high-pitched whine or feel a rhythmic vibration through the floor. Usually, we look at the motor or the belt tension first. However, more often than not, the culprit is a bearing that was either hammered into a hole that was too small or slipped into a bore that was just a hair too large.
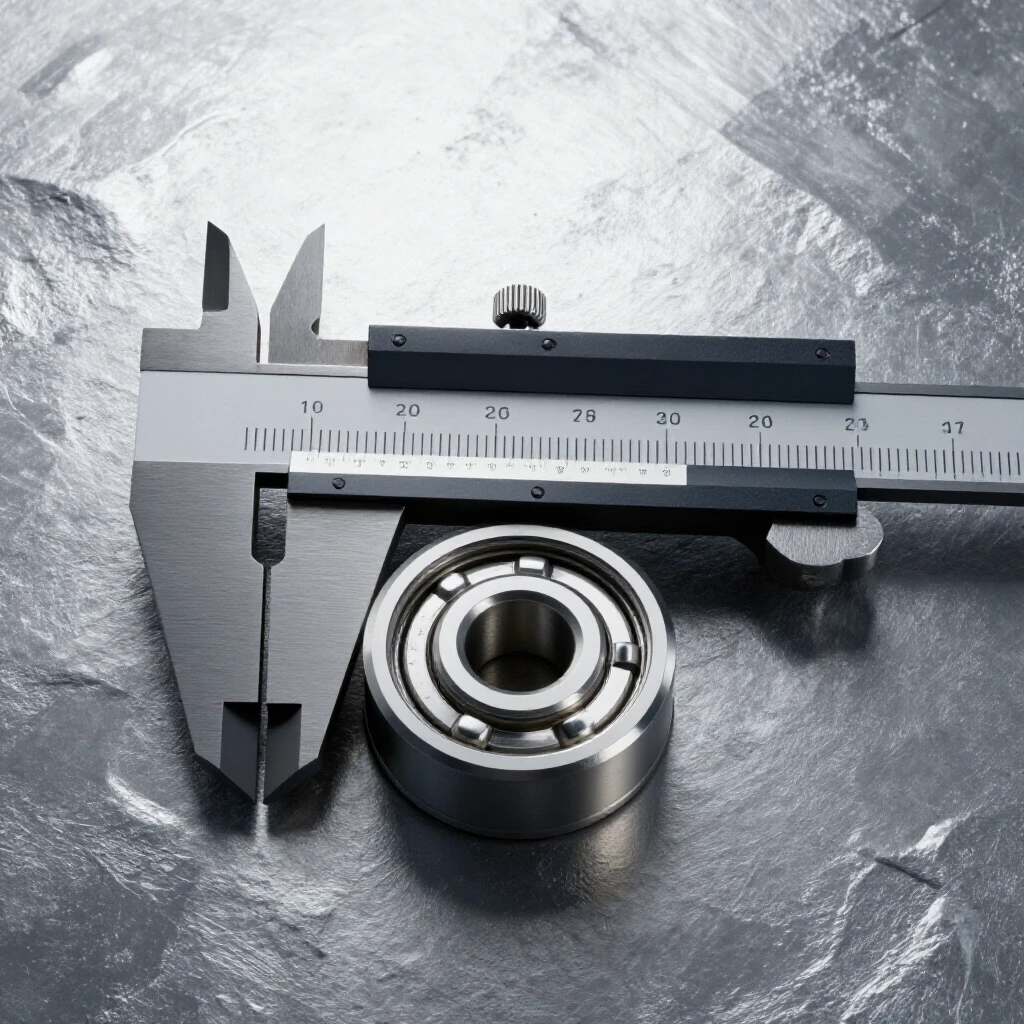
In my early days as a millwright, I worked on a large-scale timber mill where we were constantly replacing spindle bearings. We couldn’t figure out why the new bearings were overheating within hours. We checked the lubrication and the alignment, but the problem persisted. It wasn’t until I sat down with a micrometer and actually mapped the shaft-to-bore relationship that I realized we were over-compressing the inner races. We were “calculating” our fits by feel rather than by the numbers. That experience taught me that in the world of mechanical troubleshooting, your eyes can lie, but the micrometer never does.
Why Precision Press Fits Prevent Machine Vibration
An interference fit occurs when the internal component is slightly larger than the hole it is meant to occupy, ensuring the two pieces act as a single unit. This mechanical bond is what prevents a bearing from “walking” or spinning within its housing, which is a primary cause of tool chatter and heat buildup.
When a bearing is not secured with the correct amount of tension, it creates a micro-gap. Under load, this gap allows the bearing to shift, leading to resonant harmonics that can ruin a surface finish or cause a weldment to vibrate out of alignment. If you have ever struggled with tool chatter solutions on a lathe, the first place I recommend looking is the spindle bearing seat. A loose fit here will translate into visible ripples on your workpiece, no matter how sharp your carbide is.
- Interference Fit: The shaft is larger than the bore.
- Clearance Fit: The bore is larger than the shaft.
- Transition Fit: A “line-to-line” fit where there is zero or very little gap.
| Symptom | Probable Fit Issue | Diagnostic Check |
|---|---|---|
| High-pitched whining | Too much interference | Check for race distortion |
| Excessive tool chatter | Too much clearance | Measure bore for “egging” |
| Rapid heat buildup | Over-compressed internal clearance | Verify shaft diameter |
| Bearing “walking” out | Loose interference | Check for bore wear |
Essential Tools for Measuring Shaft and Housing Dimensions
To get the numbers right, you cannot rely on a standard tape measure or even a basic set of hardware-store calipers. For reliable mechanical troubleshooting steps, you need tools that can resolve measurements down to 0.0001 inches, commonly referred to in the shop as “tenths.”
I always keep a set of outside micrometers and a bore gauge or “telescoping gauges” (snap gauges) on my bench. When you are diagnosing a machine failure, you must measure the shaft and the housing at multiple points. Shafts can become tapered over time, and housings can become “egged” or oval-shaped due to uneven loading. If you find more than 0.0005 inches of variation in your measurements, your fit calculation will be flawed from the start.
- Outside Micrometers (0-1″ and 1-2″): Used for measuring the shaft diameter with high precision.
- Telescoping Gauges: Used to transfer the internal diameter of a bore to a micrometer.
- Dial Bore Gauge: The gold standard for checking if a hole is perfectly round.
- Digital Dial Indicator: Essential for checking “runout” or wobble once the bearing is installed.
- Calibrated Standards: Small metal rods used to ensure your micrometers are reading zero correctly.
The Math Behind Shaft and Housing Tolerances
Calculating the required amount of “squeeze” is a matter of simple subtraction, but the stakes are high. To find your interference, you take the actual measured diameter of your shaft and subtract the actual measured diameter of your housing bore. The resulting number is your interference value.
For most DIY fabrication and general machinery repair, we look for a “light press” or “medium press.” A light press usually involves an interference of 0.0002 to 0.0005 inches per inch of diameter. If you are working with a 1-inch bearing, and your shaft measures 1.0007 inches while your bearing bore is exactly 1.0000 inches, you have 0.0007 inches of interference. This is generally considered a solid press fit for a standard workshop application.
- Shaft Diameter – Bore Diameter = Interference
- Target for Small Bearings (under 1″): 0.0002″ to 0.0005″
- Target for Medium Bearings (1″ to 2″): 0.0005″ to 0.0015″
- Target for Heavy Loads: Up to 0.002″ (requires significant force)
Building on this, you must also consider the internal clearance of the bearing itself. Bearings are manufactured with a small amount of “play” inside to allow the balls to roll freely. When you press a bearing onto a shaft, the inner race expands slightly. If your interference is too high—say, 0.003 inches on a small bearing—you can actually use up all that internal play. This causes the balls to bind, leading to the “electrical gremlin” symptoms of a motor that hums but won’t start or a spindle that gets too hot to touch.
Troubleshooting Symptoms of Incorrect Bearing Tension
Identifying a bad fit after the machine is assembled requires a systematic approach. I often use a metalworking diagnostic guide that starts with the simplest observations. Start by rotating the shaft by hand. It should feel smooth, not “notchy.” If it feels like there is sand in the races, you likely have too much interference, and the balls are being crushed against the races.
Interestingly, a fit that is too loose often mimics the symptoms of a bent shaft or a motor controller fault. If the bearing is spinning on the shaft, it will create a high-frequency vibration that can be felt through the machine frame. I once spent three days troubleshooting weld porosity on an automated rotisserie welder, only to find that the drive bearing was loose in its housing. The tiny vibrations were shaking the shielding gas nozzle, causing turbulence that sucked in oxygen. Fixing the press fit solved the “welding problem” instantly.
- Vibration Analysis: Use a smartphone app to check for resonant peaks.
- Heat Mapping: Use an infrared thermometer. A bearing housing should rarely exceed 140°F (60°C).
- Sound Check: Use a screwdriver as a stethoscope. A healthy bearing purrs; a bad fit screams or grinds.
A Step-by-Step Guide to Recording Your Fit Data
Before you reach for the hydraulic press, you should have a written log of your measurements. This prevents the “did I measure that right?” second-guessing that happens mid-assembly. I use a simple template for every machine repair I perform. This data is invaluable if the machine fails again in six months, as it allows you to see if the housing bore has stretched or worn.
- Clean the surfaces: Use a lint-free cloth and a degreaser. Even a speck of dust can change a measurement by 0.0005 inches.
- Measure the shaft at 0, 45, and 90 degrees: This checks for roundness. Record the average.
- Measure the bore at the front, middle, and back: This checks for taper. Record the smallest diameter found.
- Compare to the bearing manufacturer’s table: Most bearings come with a “tolerance class” (like ABEC 1 or 3). Match your measurements to their suggested fit.
- Calculate the Delta: Subtract the bore from the shaft. If the number is negative, you have a clearance fit (too loose). If it is positive, you have interference.
Common Pitfalls in Workshop Bearing Installation
One of the biggest mistakes I see intermediate fabricators make is assuming that “tight is always better.” I recall a project where a friend was building a custom belt grinder. He machined his shaft 0.005 inches oversized, thinking it would be “extra secure.” He had to use a 20-ton press to get the bearing on. Within ten minutes of running, the bearing turned blue from heat and seized solid. He had literally squeezed the internal clearance out of the assembly.
Another common error is failing to account for the material of the housing. If you are pressing a steel bearing into an aluminum housing, you need more interference than you would for a steel-on-steel fit. Aluminum is softer and expands more when it gets warm. If you use a light steel-grade press fit in aluminum, the bearing will likely come loose the first time the machine reaches operating temperature.
- Rookie Mistake 1: Using a hammer directly on the bearing race (always use a press or a sleeve).
- Rookie Mistake 2: Not deburring the shaft (a tiny burr can score the bore and ruin the fit).
- Rookie Mistake 3: Measuring parts while they are hot from the lathe (metal expands; always wait for it to reach room temperature).
Diagnostic Checklist for Bearing Fit Issues
When a machine comes into my shop with “mystery” vibrations or noise, I follow this checklist to isolate the bearing fit as the root cause. This helps avoid the trap of replacing expensive motors or controllers when the fix is a simple mechanical adjustment.
- Radial Play Test: With the machine off, try to wiggle the shaft up and down. Any detectable movement usually indicates a clearance fit where there should be interference.
- Axial Play Test: Push and pull the shaft in and out. Excessive movement might mean the bearing is sliding inside the housing.
- The “Spin” Test: Disconnect the drive belt and spin the spindle. It should coast to a stop gradually. If it stops abruptly, the fit is likely too tight.
- Visual Inspection: Look for “fretting” (a reddish-brown powder) around the bearing seat. This is a sign of micro-movement caused by a loose fit.
- Temperature Differential: Use an IR temp gun on the inner race and the outer housing. A large gap in temperature often points to a fit that is preventing proper heat transfer.
Mastering the “Tenths” for Long-Term Reliability
Developing the skill to calculate and execute these fits is what separates a hobbyist from a master fabricator. It requires patience and a willingness to stop the work when the numbers don’t add up. If you find your shaft is 0.001 inches too small, don’t just “knurl it” or use a center punch to dimple the surface. These are temporary fixes that introduce vibration. Instead, use the data you’ve gathered to decide if you need to sleeve the bore or machine a new shaft.
By moving away from guesswork and toward a systematic, measurement-based approach, you reduce your shop’s downtime significantly. You won’t be the guy chasing “electrical gremlins” that are actually mechanical vibrations. You will be the one who builds machines that run quietly, stay cool, and produce perfect parts every time.
Frequently Asked Questions
How much interference is too much for a standard ball bearing? For most bearings under two inches in diameter, anything over 0.002 inches of interference is risky. Excessive interference can “take up” the internal radial clearance of the bearing, causing it to bind, overheat, and fail prematurely. Always aim for the manufacturer’s suggested fit, which is usually between 0.0002 and 0.001 inches for shop-scale equipment.
Can I use a pair of digital calipers to calculate my press fit? No, I do not recommend it. Most digital calipers are only accurate to +/- 0.001 inches, and their repeatability is often worse. Since a proper bearing fit relies on “tenths” (0.0001″), you need a micrometer. Using calipers for this task is a leading cause of fits that end up too loose or dangerously tight.
What should I do if my housing bore is slightly oversized? If the bore is only 0.001 to 0.002 inches oversized, you might consider a specialized retaining compound. However, for a true mechanical fix in a high-load application, the bore should be machined larger and a “sleeve” or “bushing” should be pressed in to return the hole to the correct dimension.
Why does my bearing feel “notchy” after I press it onto the shaft? A “notchy” feel usually means the inner race has expanded so much that it is crushing the balls against the outer race. This happens when the shaft is too large. You must remove the bearing and check your measurements again. If you keep running a notchy bearing, it will fail rapidly.
Does the material of the housing change how I calculate the fit? Yes. Softer materials like aluminum or brass require a slightly tighter interference fit than steel or cast iron. This is because these materials have a lower modulus of elasticity and will “give” more under the pressure of the press fit. They also expand more when the machine warms up.
How do I know if the bearing is spinning inside the housing? Look for “fretting corrosion,” which looks like a fine, rusty powder around the bearing seat. You may also see a polished or “blued” appearance on the outside of the bearing race or the inside of the bore. This indicates that the friction from spinning has generated significant heat.
What is the “rule of thumb” for a light press fit? A good starting point for DIY fabricators is 0.0005 inches of interference for every inch of shaft diameter. This provides enough grip to prevent the bearing from spinning under normal loads without requiring specialized industrial presses or risking race distortion.
Should I lubricate the surfaces before pressing them together? Yes, a very light film of clean machine oil or a dedicated pressing lubricant helps prevent “galling.” Galling occurs when the two metal surfaces friction-weld themselves together during the press, which can ruin both the shaft and the bearing.
Is it normal for a bearing to get warm during its first run? It is normal for a bearing to reach a stable operating temperature, usually between 100°F and 140°F. However, if the temperature continues to climb past 160°F or if it reaches that temperature within minutes of starting, your fit is likely too tight.
How can I measure a bore if I don’t own a dial bore gauge? You can use telescoping “snap” gauges. You expand the gauge inside the bore, lock it, and then measure the gauge with your outside micrometer. It takes some practice to get a “feel” for it, but it is a very accurate way to transfer an internal dimension to a precision tool.
What is the difference between a shaft fit and a housing fit? Usually, the “rotating” component gets the interference fit. If the shaft spins, the bearing should be pressed onto the shaft. If the housing spins (like a wheel hub), the bearing should be pressed into the housing. The stationary side can often be a “transition” or very light slip fit.
Can I reuse a bearing after pressing it off a shaft? Generally, I advise against it for critical machinery. The process of removing a pressed bearing often puts force through the balls and races, which can cause “brinelling” (tiny dents). If it’s for a non-critical shop project, you might risk it, but for a spindle or motor, always use a new bearing.
(This article was written by one of our staff writers, Paul Whitaker. Visit our Meet the Team page to learn more about the author and their expertise.)