How to Grind Stainless Steel Welds Without Burning (DIY Fix)
I have spent nearly two decades in industrial fabrication shops, and if there is one thing that can ruin a perfect day, it is watching a beautiful stainless steel weld turn a deep, muddy purple during the final cleanup. You have spent hours on fit-up and execution, only to have the finishing process introduce a flaw that looks like a bruise on the metal. In my 18 years as a millwright and diagnostic specialist, I have learned that surface issues are rarely “bad luck.” They are almost always a result of a breakdown in the systematic control of heat, friction, and tool speed.
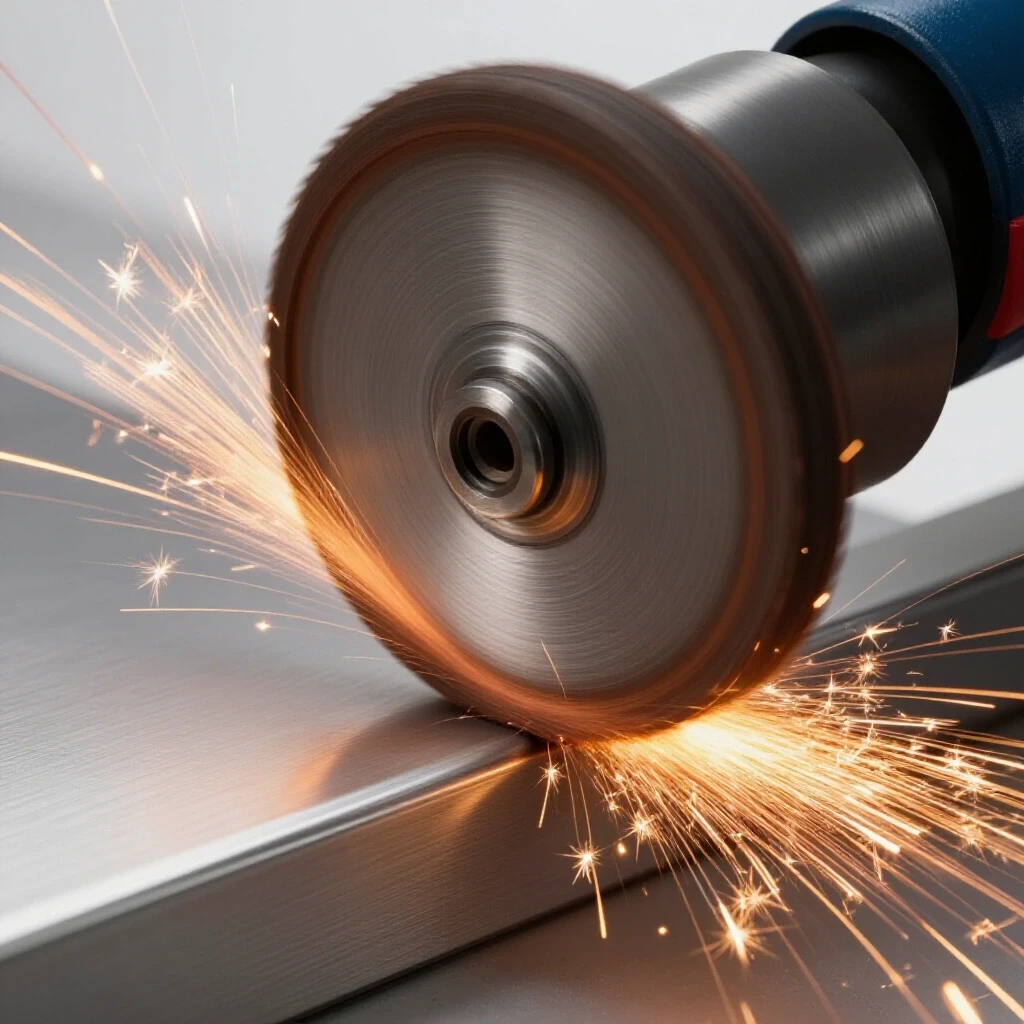
When I first started troubleshooting fabrication errors, I treated every problem like a nail that needed a bigger hammer. I quickly realized that stainless steel is a different beast entirely. It has low thermal conductivity, meaning it does not like to move heat away from the work area. Instead, that heat stays right where you are grinding, leading to “blueing” or thermal tint. My approach shifted from brute force to a diagnostic framework: observe the discoloration, isolate the variable—whether it is the abrasive type, the tool RPM, or the operator’s pressure—and then test the solution.
This guide is designed for the fabricator who is tired of guessing. We are going to break down the mechanics of finishing stainless welds using a structured, diagnostic mindset. We will look at why tools chatter, how to measure heat input without a lab, and how to calibrate your handheld equipment to ensure the metal stays bright and the structural integrity remains intact.
Understanding the Mechanics of Thermal Surface Damage
Thermal surface damage occurs when the friction from an abrasive tool generates heat faster than the stainless steel can dissipate it. Unlike carbon steel, stainless traps heat in a localized zone, causing the chromium to react with oxygen and form a thick oxide layer. This layer appears as a spectrum of colors, from pale straw to deep dark blue.
In my experience, the first step in any diagnostic process is understanding the “why” behind the failure. Stainless steel (specifically the 300-series like 304 or 316) has about half the thermal conductivity of mild steel. When you press a grinding disc into a weld, the energy has nowhere to go. If the surface temperature exceeds 400°F (204°C), you will see a light straw color. Once you hit 800°F (427°C), the surface turns a dark blue or purple. This is not just an aesthetic issue; it is a sign that you have depleted the chromium at the surface, which can lead to localized corrosion later on.
To diagnose why your finishing process is failing, you must look at the heat tint as a data point. A consistent straw color across the entire length of the weld suggests your tool speed (RPM) is slightly too high or your abrasive is too fine for the initial pass. Conversely, splotchy dark blue patches usually indicate “dwelling,” where the tool was held in one spot for too long or the pressure was inconsistent.
| Heat Tint Color | Estimated Surface Temp (°F) | Diagnostic Implication |
|---|---|---|
| Pale Straw | 400°F – 450°F | Minor friction; acceptable for some, but indicates heat buildup. |
| Deep Gold/Brown | 500°F – 600°F | High friction; check for abrasive loading or excessive pressure. |
| Purple/Blue | 700°F – 900°F | Severe overheating; stop immediately. Tool speed or grit is incorrect. |
| Dull Grey/Black | 1000°F+ | Material “burning”; potential for warping and grain structure damage. |
Key Takeaway
Treat discoloration as a diagnostic signal. The color tells you exactly how much heat energy you are pumping into the workpiece, allowing you to adjust your variables before the damage becomes permanent.
Systematic Selection of Abrasive Media
Selecting the right abrasive is the foundation of a heat-controlled finishing process. Using the wrong grain type or a worn-out disc forces the operator to apply more pressure, which increases friction and leads to rapid thermal expansion. In a systematic diagnostic approach, the abrasive is the first variable we isolate and test.
I once worked on a custom dairy manifold where the finisher was struggling with “smearing” on the surface. We found he was using a standard Aluminum Oxide disc. While Aluminum Oxide is great for carbon steel, it dulls quickly on stainless, generates massive heat, and can even contaminate the surface. For stainless, I always recommend Ceramic or Zirconia grains. Ceramic grains are “friable,” meaning they break down into sharp new edges as they wear. This keeps the cut cool because the tool is actually cutting the metal rather than rubbing against it.
When troubleshooting a finish that is turning dark, check your grit sequence. A common mistake is jumping from a 36-grit grind to a 120-grit finish too quickly. This forces the 120-grit disc to work too hard to remove the deep scratches, which generates heat. A proper diagnostic sequence should follow a logical progression: 36 or 40 grit for bulk removal, 60 or 80 grit for blending, and 120+ for the final satin finish.
- Ceramic Grain: The top choice for heat-sensitive work. It requires less pressure and stays sharp longer.
- Zirconia Alumina: A solid middle-ground. It is tougher than Aluminum Oxide but requires more pressure than Ceramic to “self-sharpen.”
- Aluminum Oxide: Avoid for stainless finishing. It tends to “load” (clog with metal), leading to friction instead of cutting.
Key Takeaway
If you have to lean into the tool to make it cut, your abrasive is either the wrong type or it is spent. A sharp, high-quality Ceramic disc should do the work with minimal downward force.
Calibrating Tool Speed and Operator Pressure
Tool speed, measured in Revolutions Per Minute (RPM), is a critical variable that many fabricators overlook. Most standard 4.5-inch grinders run at a fixed 10,000 to 11,000 RPM, which is often far too fast for finishing stainless steel without introducing excessive heat.
In my diagnostic logs, I have noted that reducing RPM is often the “silver bullet” for stopping thermal discoloration. High speeds create a high frequency of abrasive contact, which builds heat exponentially. If you are using a variable-speed grinder, aim for a range between 3,000 and 6,000 RPM for stainless finishing. This slower speed allows the air to circulate around the disc and gives the metal a micro-second to cool between abrasive strikes.
Operator pressure is the second half of this equation. I use a “calibrated touch” method. If you were to place your workpiece on a scale, you should ideally be applying between 5 and 10 lbs of force. Anything more than that increases the friction coefficient beyond what the material can handle. If you find yourself pushing harder, go back to the previous section: your abrasive is likely dull.
- Check Tool RPM: Use a tachometer or check the tool’s data plate. If it’s fixed at 11,000 RPM, you must use a very light touch and faster travel speeds.
- Monitor Feed Rate: Move the tool at a consistent speed of about 1 to 2 inches per second. Lingering in one spot is a guaranteed way to cause a “burn.”
- Evaluate Angle of Attack: Keep the disc at a low angle, roughly 15 to 25 degrees. A steeper angle concentrates all the friction into a tiny point, spiking the temperature.
Key Takeaway
Lower RPM and lighter pressure are the keys to a cool finish. If your grinder doesn’t have speed control, you must compensate with faster hand movement and shorter contact times.
Identifying and Isolating Tool Chatter and Vibration
Tool chatter is more than just an annoying sound; it creates “micro-gouges” that trap heat and ruin surface consistency. In a diagnostic framework, chatter is usually a sign of a mechanical imbalance or a lack of rigidity in the setup.
When I am troubleshooting a vibration issue in the shop, I look at three things: the tool’s spindle play, the mounting of the abrasive, and the “resonance” of the workpiece. If the workpiece is a thin sheet of stainless, it can act like a drum head, vibrating in sympathy with the grinder. This creates a rhythmic bouncing of the disc, which leads to uneven heating and a “washboard” finish.
To isolate this, try clamping a heavy piece of scrap metal or a dedicated “heat sink” (like a copper or aluminum block) to the back of the weld area. This adds mass and changes the resonant frequency, often killing the chatter instantly. Also, check your grinder’s spindle for backlash. If you can wiggle the spindle more than 0.002 to 0.005 inches, the bearings are likely shot, and no amount of technique will give you a smooth finish.
- Spindle Backlash: Excessive play in the tool’s head causes the disc to skip.
- Disc Centering: Ensure the abrasive is perfectly centered on the backing pad. Even a 1/16-inch offset creates massive centrifugal imbalance.
- Workpiece Rigidity: Use “C” clamps and solid backing to prevent the metal from fluttering under the tool.
Key Takeaway
Vibration is a symptom of instability. By increasing the mass of the workpiece or replacing worn tool bearings, you eliminate the mechanical “noise” that leads to surface defects.
Implementing Cooling Strategies and Intermittent Contact
Systematic heat management often requires “breaking the cycle” of temperature buildup. This involves using physical cooling aids and modifying the way the tool interacts with the metal surface.
One of the most effective “DIY fixes” I have used is the “intermittent pass” technique. Instead of grinding the entire length of a 12-inch weld in one go, break it into 3-inch segments. Move from segment 1 to segment 3, then back to segment 2. This “skip-grinding” allows each area to shed heat before you hit it again. It is the same logic we use when welding to prevent warping, and it applies equally to finishing.
Another diagnostic tool in my kit is the use of “cooling sticks” or waxes designed for stainless. These lubricants reduce the friction at the point of contact. However, be careful—some waxes can leave residues that are hard to clean. A simpler method is using a clean, compressed air line. Having a helper blow air directly onto the grind path as you work can drop the surface temperature by 50°F to 100°F, which is often the difference between a clean finish and a purple smear.
| Cooling Method | Benefit | Potential Drawback |
|---|---|---|
| Skip-Grinding | Natural heat dissipation. | Takes longer to complete the pass. |
| Compressed Air | Constant thermal removal. | Requires a second person or a fixed nozzle. |
| Copper Backing | Acts as a massive heat sink. | Can be difficult to clamp on complex shapes. |
| Grinding Wax | Reduces friction coefficient. | Can contaminate the surface if not cleaned. |
Key Takeaway
Don’t let the heat accumulate. Use physical heat sinks or “skip” your tool path to keep the base metal temperature well below the oxidation threshold.
Diagnostic Pathways for Surface Defects
When a finish goes wrong, you need a roadmap to find the root cause. This prevents the “guess-and-check” cycle that wastes time and material. I use a fault-tree approach to narrow down the problem based on the visual evidence left on the stainless.
If the surface has deep, irregular scratches, the issue is likely “grit contamination” or a “rogue grain” from a coarser disc. If the surface is discolored but smooth, the issue is thermal (RPM or pressure). If the metal shows warping or “oil-canning,” the heat has penetrated deep into the material, indicating that the dwell time was far too high.
Let’s look at a common scenario: you are finishing a 16-gauge stainless panel, and it starts to warp. 1. Observation: The panel is bowing away from the grind. 2. Variable Control: Is the disc new? Yes. Is the pressure light? Yes. 3. Isolation: The problem is likely the lack of a heat sink. 4. Solution: Clamp a 1/2-inch aluminum plate behind the weld. The aluminum will “pull” the heat out of the stainless, keeping it flat.
Checklist for Surface Defect Isolation
- Color Check: Straw (low heat), Blue (high heat), Black (extreme heat).
- Texture Check: Scratched (grit issue), Smeared (loading/clogged disc), Wavy (chatter).
- Structural Check: Warping (total heat input), Cracking (rare, but indicates embrittlement).
Key Takeaway
Stop and analyze the defect before you try to fix it. The metal is giving you a report of what went wrong; you just have to know how to read the signs.
Case Study: Resolving Thermal Tint on a Custom Exhaust Manifold
A few years ago, I was called into a shop that was struggling with finishing 304 stainless exhaust manifolds. Every time they tried to blend the flange welds, the metal turned a dark, burnt purple. They were using high-end grinders and brand-new discs, but the results were inconsistent.
We started by measuring the tool speed. Their grinders were fixed at 11,000 RPM. We swapped one out for a variable-speed unit set to 4,500 RPM. Immediately, the purple tint turned to a light straw. Next, we looked at their abrasives. They were using 60-grit Zirconia. We switched to a Ceramic-grain “cool-cut” disc which had a top-coat of grinding aid (a dry lubricant).
The final piece of the puzzle was the technique. The operator was “scrubbing” the metal—moving back and forth in small areas. I showed them how to use long, sweeping passes that covered the entire weld in one motion. By spreading the friction over a larger surface area, we prevented any single spot from hitting that critical 800°F mark. The result was a consistent, bright finish that required zero rework.
- Initial Problem: Excessive heat tint (purple/blue).
- Root Causes: High RPM (11,000), “scrubbing” technique, lack of cooling aids.
- The Fix: Lowered RPM to 4,500, switched to Ceramic discs with grinding aids, implemented long-sweep passes.
Key Takeaway
The solution is rarely just one thing. It is the combination of the right tool speed, the right abrasive chemistry, and a refined physical technique.
Conclusion and Next Steps
Mastering the finishing process on stainless steel is a journey of precision and observation. It requires moving away from the “grind until it’s flat” mentality and toward a “manage the energy” philosophy. By systematically controlling your RPM, selecting abrasives that cut rather than rub, and monitoring the metal’s color for diagnostic feedback, you can produce professional-grade results every time.
If you are currently struggling with burnt welds, your next step should be a “variable audit.” Start with your tool speed—if you don’t have a variable speed grinder, that is your first upgrade. Then, look at your abrasives. Toss out the old Aluminum Oxide discs and invest in a few high-quality Ceramic flap discs. Finally, practice your “touch.” Aim for that 5-10 lbs of pressure and keep the tool moving.
Fabrication is as much about the “fix” as it is about the “build.” When you can diagnose and resolve these surface issues, you’re not just a grinder; you’re a craftsman.
Frequently Asked Questions
Why does my stainless steel turn blue as soon as I start grinding?
This is usually caused by excessive RPM or using a dull abrasive. Stainless steel has low thermal conductivity, so the heat from the friction stays on the surface. If your grinder is spinning at 11,000 RPM, it generates heat faster than the metal can dissipate it. Try lowering your speed to 4,000-5,000 RPM and using a fresh Ceramic disc.
Can I just sand off the blue/purple discoloration?
Yes, you can remove the “heat tint” by going over it again with a finer grit or a specialized finishing pad. However, the goal is to avoid it in the first place, as the discoloration indicates that the chromium-rich oxide layer has been compromised, which can lead to rust if not properly cleaned or passivated.
What is the best grit to start with when blending a stainless weld?
For most manual welds, a 40 or 60 grit Ceramic flap disc is the best starting point. It is coarse enough to remove the weld bead quickly (reducing the time heat is applied) but fine enough that it doesn’t leave deep gouges that are hard to remove later.
Does the angle of the grinder matter for heat buildup?
Absolutely. Keeping the disc at a flat angle (15-25 degrees) spreads the friction over a larger area. If you tilt the grinder up to 45 degrees or more, you are concentrating all that energy into a tiny “point contact,” which will cause the metal to reach “burn” temperatures almost instantly.
How do I know if I’m pushing too hard on the grinder?
A good rule of thumb is to let the weight of the grinder do most of the work. If you see the tool’s RPM start to “bog down” or hear the motor straining, you are applying way too much pressure. This extra force creates massive friction and heat without actually speeding up the metal removal.
Is it better to use a grinding wheel or a flap disc for stainless?
Flap discs are generally superior for stainless finishing. Because they are made of overlapping strips of sandpaper, they have a natural “cushion” and allow for better airflow, which helps keep the workpiece cooler than a rigid, solid grinding wheel.
What is “loading,” and how does it affect my finish?
Loading occurs when bits of the soft stainless steel get stuck in the gaps of the abrasive disc. Instead of the disc cutting the metal, the “loaded” metal on the disc rubs against the workpiece, creating immense friction and heat. Using Ceramic grains or discs with “grinding aids” (stearates) helps prevent this.
Can I use water to cool the stainless while grinding?
While water is a great coolant, it is generally unsafe to use with standard electric handheld grinders due to the risk of electric shock. Instead, use “skip-grinding” techniques or a dedicated compressed air line to manage temperatures safely.
Why did my stainless panel warp even though it didn’t turn blue?
Warping is a result of total heat input over time, not just surface temperature. Even if you didn’t “burn” the surface, if you spent a long time grinding in one area, the internal stresses of the metal caused it to move. Use a copper or aluminum backing plate to act as a heat sink and pull that energy away from the panel.
What should I do if the metal turns a dull grey or black?
Dull grey or black indicates “burning,” where the metal has been severely overheated. This can change the grain structure and make the stainless brittle. You will need to grind away the damaged material entirely until you reach “bright” metal and then carefully refinish the area with better heat control.
(This article was written by one of our staff writers, Paul Whitaker. Visit our Meet the Team page to learn more about the author and their expertise.)