How to Heat Treat Tool Steel Safely in a Home Shop (Guide)
I have spent over a decade in the thick of metal fabrication, moving from the precision of a machine shop to the heavy-duty world of industrial steel inspection. In my early years, I viewed tool steel as an invincible material, only to watch a high-carbon bracket I had spent ten hours machining snap like a glass rod because I didn’t understand the hidden forces of internal stress. That failure wasn’t just a waste of material; it was a wake-up call regarding the physics of thermal cycles.
When you transition from simply cutting and welding to changing the molecular structure of your workpieces, the stakes change. You are no longer just joining parts; you are manipulating the very DNA of the metal. In a home shop, this process requires a deep respect for heat, chemistry, and safety. This guide focuses on the practical steps to harden and temper common carbon steels while keeping your workspace and your projects structurally sound.
Understanding Internal Metal Stress and Thermal Limits
Internal stress is the hidden pressure trapped within a piece of steel, often caused by the aggressive removal of material during machining or the uneven cooling of a previous weld. If these stresses aren’t managed before you apply high heat, they can cause the part to warp or even crack during the cooling phase.
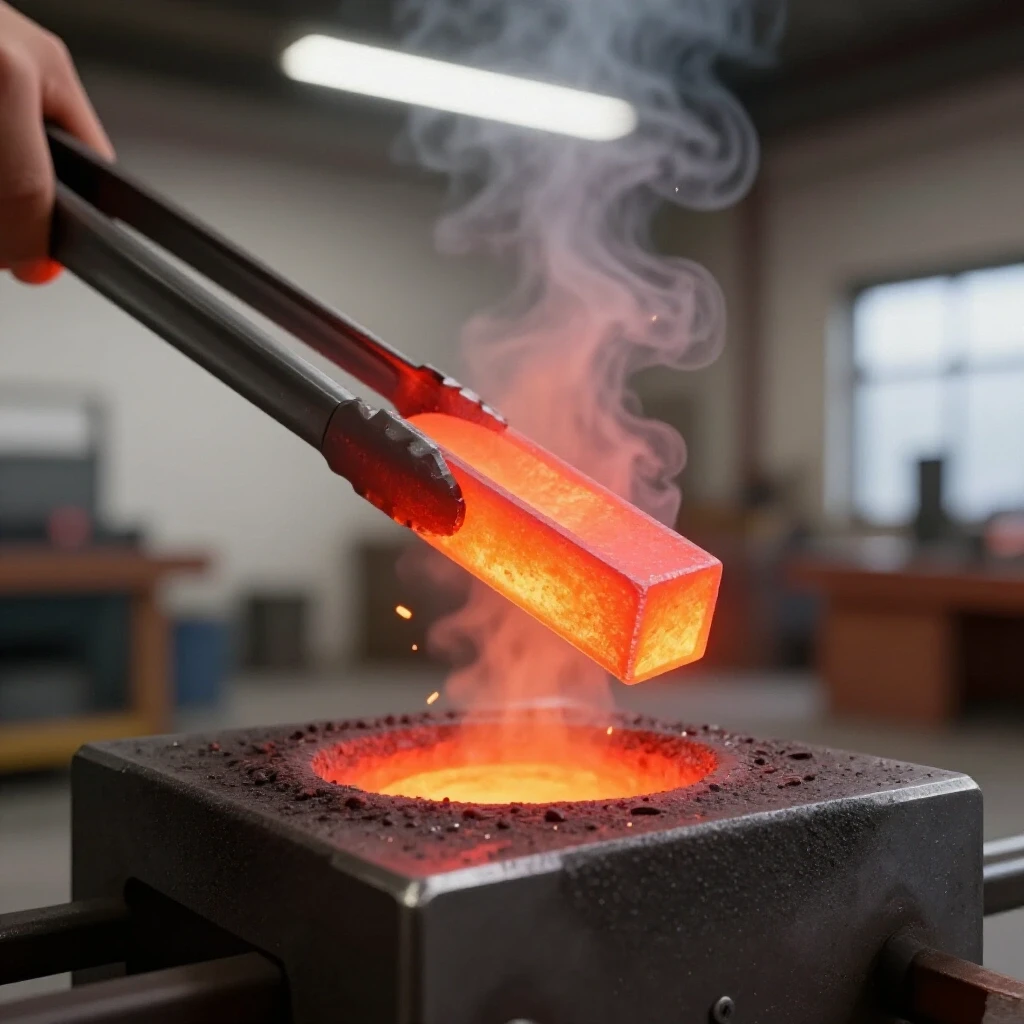
In the world of mechanical engineering, we look at the “critical temperature.” This is the point where the steel’s internal structure changes from a stable state into a form called austenite. For most common tool steels used in home shops, like O1 or W1, this happens between 1,450°F and 1,500°F. If you don’t reach this point, the metal won’t harden. If you exceed it by too much, you risk “grain growth,” which makes the final product weak and prone to brittle fracture.
- Tensile Strength: The maximum stress a material can withstand while being stretched or pulled before breaking.
- Brittle Fracture: A sudden, very fast failure where the material snaps without bending first.
- Heat-Affected Zone (HAZ): The area of metal that hasn’t melted but has had its properties changed by the heat of a torch or forge.
Understanding these terms helps you visualize what is happening inside the metal. When we heat a piece of steel to its critical point, we are essentially “unlocking” its structure so we can freeze it into a harder state later.
Setting Up a Secure Thermal Processing Zone
A dedicated thermal zone is a specific area in your shop designed to handle open flames, extreme radiant heat, and the potential for oil fires. It must be clear of sawdust, rags, and pressurized cans, creating a buffer between the heat source and the rest of your tools.
Garage fabrication safety starts with the floor. I always recommend working over a concrete surface or a dedicated welding table. Never perform these operations over wood or epoxy-coated floors that can catch fire or off-gas toxic fumes when a hot part is dropped. Your layout should allow you to move a red-hot piece of steel from the forge to the quench tank in a single, unobstructed motion.
Workshop Safety Checklist for Heat Cycles
- Verify that a Class B fire extinguisher is within three steps of the quench tank.
- Clear a 5-foot radius of all flammable materials.
- Ensure your ventilation system can move at least 200-300 CFM of air to clear oil smoke.
- Check that your quench tank has a tight-fitting metal lid to smother potential flare-ups.
- Inspect all gas connections on your forge or torch using a soapy water leak test.
Selecting the Right Carbon Steel for Home Hardening
Choosing the right material is the first step in preventing structural metal load capacity issues. For home shops, O1 (oil-hardening) and W1 (water-hardening) are the gold standards because they have a wide “forgiveness” range regarding temperature and timing.
O1 tool steel is particularly popular because it hardens relatively slowly, which reduces the risk of the metal warping or cracking during the quench. W1 is more aggressive and requires a very fast cooling rate, which can be stressful for complex geometries. I generally advise against using “mystery metal” or scrap steel for critical structural components because you cannot accurately predict its carbon content or its reaction to heat.
| Steel Type | Quench Media | Hardening Temp (°F) | Common Uses |
|---|---|---|---|
| O1 | Light Oil | 1,450 – 1,500 | Punches, dies, knives |
| W1 | Brine/Water | 1,400 – 1,475 | Hammers, simple blades |
| A2 | Still Air | 1,750 – 1,800 | Intricate parts (high risk) |
| 1080 | Oil/Water | 1,475 – 1,500 | Agricultural tools |
The Hardening Phase: Managing High Temperatures and Soak Times
Hardening is the process of heating the steel to its critical temperature and “soaking” it there to ensure the heat has penetrated the core of the material. In a home shop, this is usually done with a small propane forge or an oxy-acetylene torch.
The “soak time” is vital. For every inch of thickness, I recommend a soak time of about 10 to 15 minutes once the steel has reached its target color. This ensures that the entire cross-section has transformed. If you only heat the surface, the core will remain soft, leading to a project that fails under load because the hard exterior “shell” has no structural support from within.
Temperature Identification by Color
Since most hobbyists don’t have industrial pyrometers, we rely on the visible light spectrum of the metal. Note that these colors should be viewed in a dimly lit shop for accuracy.
- Dull Red: ~1,200°F (Too low for hardening)
- Cherry Red: ~1,400°F (Approaching critical for W1)
- Bright Cherry Red: ~1,500°F (Ideal for O1 and W1)
- Orange: ~1,600°F (Danger of grain growth)
- Yellow/White: ~2,000°F+ (Material is being damaged)
Interestingly, a common trick is to use a strong magnet. When steel reaches its critical temperature, it becomes non-magnetic. This is a reliable physical benchmark that doesn’t depend on your eyesight or shop lighting.
Quenching Protocols to Prevent Structural Cracking
Quenching is the most violent part of the process, where the steel is plunged into a liquid to cool it instantly. This “freezes” the carbon atoms in a stressed state, creating a very hard structure called martensite.
The danger here is thermal shock. If you quench a part unevenly, one side will contract faster than the other, causing the part to bend or snap. I once watched a beautiful custom-made gear crack into three pieces because the fabricator dropped it into the oil flat-side down instead of edge-first. The flat surface created a vapor barrier on the bottom, while the top cooled rapidly, creating massive internal shear stress.
Quench Media Characteristics
- Water/Brine: Provides the fastest cooling. High risk of cracking. Adding salt (brine) helps break up steam bubbles for a more even quench.
- Engineered Quench Oil: Designed to have a specific flash point and cooling rate. This is the safest bet for O1 steel.
- Canola/Vegetable Oil: A common home-shop substitute. It works well but can go rancid and has a lower flash point than industrial oils.
When you quench, move the part in an “up and down” motion or a figure-eight. Never move it side-to-side, as this creates a pressure differential that can warp the metal.
Tempering for Durability and Toughness
Tempering is the act of reheating the hardened (but brittle) steel to a much lower temperature to “relax” the structure. Without tempering, a hardened tool is as fragile as a ceramic plate.
For most shop projects, a kitchen oven or a small toaster oven is sufficient. You want to aim for temperatures between 350°F and 450°F. The goal is to trade a little bit of hardness for a significant increase in toughness. Toughness is the material’s ability to absorb energy and deform without breaking—essential for any tool that will see impact or heavy loads.
Tempering Color Guide
As you heat the cleaned, shiny steel, an oxide layer forms, changing color as the temperature rises. 1. Pale Straw (425°F): Very hard, used for razors and scrapers. 2. Dark Straw (465°F): Good balance for wood chisels and punches. 3. Brown/Purple (510°F): Tough, used for axes and hammers. 4. Blue (575°F): Spring-tempered, will bend and return to shape.
Verifying Results with Shop-Floor Diagnostic Tools
You don’t need a $5,000 Rockwell hardness tester to know if your heat treat was successful. The “file test” is a time-honored method for verifying the hardness of a component.
Take a new, high-quality metal file and attempt to cut into the edge of your quenched part. If the file “skates” off the surface without leaving a mark, the steel is successfully hardened. If the file bites into the metal and removes material, the steel is still soft. This usually means the part wasn’t hot enough before the quench, or the quench wasn’t fast enough.
Common Failure Analysis
- Soft Spots: Caused by steam bubbles during the quench. Solution: Agitate the part more vigorously.
- Cracking: Caused by quenching too fast or using the wrong media. Solution: Switch from water to oil.
- Warping: Caused by uneven heating or crooked entry into the quench. Solution: Ensure even heat and vertical entry.
PPE and Safety Equipment for High-Heat Work
Standard welding PPE is a good start, but thermal processing has specific requirements. You are dealing with radiant heat that can cause “flash burns” to the skin even without direct contact.
- Gloves: Use heavy-duty, gauntlet-style leather welding gloves. Ensure they are dry; moisture in a glove can turn to steam instantly when grabbing a hot tool.
- Eye Protection: A Shade 5 cutting face shield is ideal when looking into a forge to prevent “glassblower’s cataract” from infrared radiation.
- Apron: A leather blacksmith’s apron protects your torso from oil splatters during the quench.
- Respirator: If you are using used motor oil for quenching (which I don’t recommend), a respirator with organic vapor cartridges is mandatory to avoid inhaling toxic smoke.
Strategic Checklist for a Successful Heat Treat
To ensure a structurally sound project, follow this sequence every time you process a critical component.
- Normalize the Part: Heat the steel to just below critical and let it cool slowly in still air. This relieves machining stresses.
- Clean the Surface: Remove all oils and scales so you can see the color changes clearly.
- Prepare the Quench: Pre-heat your oil to about 120°F. Warm oil is actually “thinner” and cools the part more effectively than ice-cold oil.
- Heat Slowly: Avoid “thermal shock” by bringing the part up to temperature gradually.
- The Magnet Check: Confirm the part is non-magnetic.
- The Quench: Plunge vertically and agitate.
- Immediate Temper: Do not let the part sit in its hardened state for more than a few minutes. Internal stresses are at their peak, and the part could crack spontaneously.
- Final Inspection: Perform the file test and check for straightness.
Actionable Benchmarks for Home Shop Success
When I inspect industrial components, we look for consistency. In your home shop, you can achieve professional results by sticking to these specific metrics.
- Oil-to-Steel Ratio: Use at least 1 gallon of oil for every 1 pound of steel to ensure the oil doesn’t overheat during the quench.
- Distance to Quench: The “travel time” from the forge to the oil should be less than 2 seconds.
- Tempering Duration: Always temper for at least two cycles of 2 hours each, allowing the part to cool to room temperature in between.
- Safety Margin: If a part is intended for a load-bearing structural application, always design with a 4:1 safety factor to account for potential variations in home-shop heat treating.
By following these protocols, you move away from the “guess and pray” method of metalworking. You begin to treat heat as a tool, just like your mill or your welder. The result is a project that isn’t just hard on the surface, but structurally reliable and safe for its intended use.
Frequently Asked Questions
Can I use a standard propane torch for heat treating? A standard propane torch is usually only sufficient for very small parts, like a screwdriver tip or a small punch. For anything larger than a 1/2-inch rod, the torch cannot supply enough BTUs to overcome the “heat sink” effect of the metal. A MAPP gas torch or a small gas forge is a better choice for larger components.
Why did my part crack after it had already cooled down? This is a classic “delayed fracture.” It happens when a part is hardened but not tempered immediately. The internal stresses are so high that the metal literally pulls itself apart. Always put your parts in the tempering oven while they are still slightly warm to the touch (about 125°F-150°F).
Is used motor oil okay for quenching? I strongly advise against it. Used motor oil contains heavy metals, fuel residues, and acids that produce toxic smoke when burned. It also has an unpredictable flash point, making it a significant fire hazard. Clean vegetable oil or dedicated quenching oil is much safer and more effective.
How do I prevent “scale” from forming on my steel? Scale is the crusty black oxidation that forms when hot steel meets oxygen. You can minimize this by keeping a “rich” (oxygen-poor) flame in your forge or by coating the part in a specialized high-temp anti-scale compound before heating.
What is the difference between annealing and tempering? Annealing is heating the steel and cooling it very slowly (often in a bucket of sand or vermiculite) to make it as soft as possible for machining. Tempering is the process of slightly softening already-hardened steel to make it tough and durable.
Can I heat treat stainless steel in a home forge? Generally, no. Most stainless steels require very precise temperature control and an oxygen-free environment (vacuum or inert gas) to prevent the chromium from burning out. Stick to carbon steels like O1, W1, and 1080 for home shop success.
How do I know if I’ve over-tempered a tool? If you heat the tool and it turns a dark blue or grey, you have likely removed too much hardness for a cutting edge. You will need to re-harden the part (start the process over) and temper it at a lower temperature.
Why is my quench oil catching fire? This happens when the surface of the oil reaches its flash point. Usually, it’s because the part is too large for the volume of oil, or the part isn’t fully submerged quickly enough. Always have a metal lid ready to slide over the tank to cut off the oxygen and extinguish the flame.
Does the direction of the grain in the steel matter? Yes. Steel has a “grain” similar to wood, created during the rolling process at the mill. For maximum strength, try to orient your part so that the primary stress isn’t pulling the grain apart. This is a subtle but important factor in structural metal load capacity.
Can I use a microwave for tempering? Absolutely not. Metal should never go in a microwave. Use a conventional electric toaster oven or your kitchen oven (if the odors aren’t a concern for your household). Be sure to use an independent thermometer to verify the oven’s accuracy, as many household dials are off by 25°F or more.
(This article was written by one of our staff writers, James Harlan. Visit our Meet the Team page to learn more about the author and their expertise.)