How to Organize and Arrange Your Shop Tools for Speed (Fix)
I have spent 17 years in industrial maintenance, much of it spent tearing down machines to see why they failed. One thing I have learned is that the most expensive lathe or welder in the world is useless if you spend twenty minutes looking for the right wrench to adjust it. In my shop, I do not look at a tool as just a piece of hardware. I look at it as a component of a larger system. If the system is cluttered, the machine’s performance suffers because the operator is frustrated.
Marketing hype often focuses on the color of the paint or the digital display on a control box. In reality, the speed of your work depends on the physical layout of your equipment and the accessibility of your consumables. When I evaluate a new piece of machinery, I am not just looking at the spindle runout or the motor’s horsepower. I am looking at how that machine integrates into a high-speed workflow.
A well-organized shop is not about aesthetics. It is about reducing the time between a thought and an action. If you have to walk across the room to get a deburring tool after every cut, you are losing hours of your life every month. This guide is built on my experience managing high-output maintenance bays where every second of downtime costs money. We will focus on how to set up your metalworking environment so that your tools are always where your hands expect them to be.
Optimizing Shop Layout for Metalworking Efficiency
A functional shop layout involves arranging equipment and storage based on the sequence of fabrication tasks to reduce movement. By placing tools in logical “cells,” a fabricator can complete a project without unnecessary walking or searching.
When I first started in maintenance, I worked in a shop where the bandsaw was fifty feet from the welding table. Every time we needed to trim a piece of box tube, we spent two minutes walking. In a professional setting, that is unacceptable. I now organize shops into “work cells.” A work cell is a self-contained area where all tools for a specific process live.
For example, your welding cell should not just have the welder. It needs the clamps, the wire brushes, the anti-spatter spray, and the squares within arm’s reach. If you are moving more than two steps to find a tool, your layout is failing you. I recommend mapping your shop on paper first. Trace the path of a typical project—from the raw material rack to the saw, then to the welder, and finally to the grinder. If that path looks like a bowl of tangled spaghetti, it is time to rearrange.
Evaluating Machine Frameworks to Inform Tool Placement
The physical construction of your machinery, such as the thickness of cast iron or the rigidity of the frame, dictates where you can safely mount storage solutions. Heavy, vibration-dampening materials provide a stable base for tool racks and magnetic rails.
In my teardowns, I often compare the structural integrity of different machine bases. A machine with a Grade 25 cast iron bed has excellent dampening properties. This means you can often mount tool trays or magnetic strips directly to the non-moving parts of the casting without worrying about vibration shaking the tools off. On the other hand, machines made from thin, stamped sheet steel will vibrate significantly. If you hang a rack of precision files on a vibrating sheet-metal stand, those files will chatter against each other and dull the teeth.
I always look for “dead space” on heavy castings. The back of a lathe headstock or the side of a milling machine column are prime real estate. Because these components are heavy and rigid, they stay still while the machine is running. I use these areas to hold the specific wrenches and hex keys needed for that machine’s adjustments.
| Material Type | Vibration Dampening | Mounting Suitability | Best Use Case |
|---|---|---|---|
| Grade 25 Cast Iron | High | Excellent | Direct mounting for precision tools |
| Grade 30 Cast Iron | Very High | Superior | Heavy tool racks and measuring gear |
| Stamped Sheet Steel | Low | Poor | Lightweight items only; avoid precision tools |
| Aluminum Extrusion | Moderate | Good | Modular shelving and T-slot accessories |
Implementing Workflow Zoning for Cutting and Grinding
Zoning is the practice of separating different types of metalworking tasks to prevent debris from interfering with precision work. Dedicated zones for high-debris tasks like grinding keep the rest of the shop clean and tools easy to find.
Grinding is the enemy of a fast shop. It creates fine metallic dust that gets into everything—including the ways of your lathe and the bearings of your mill. I keep my grinding station as far away from my precision machinery as possible. In this zone, I use open-faced storage like pegboards or shadow boards.
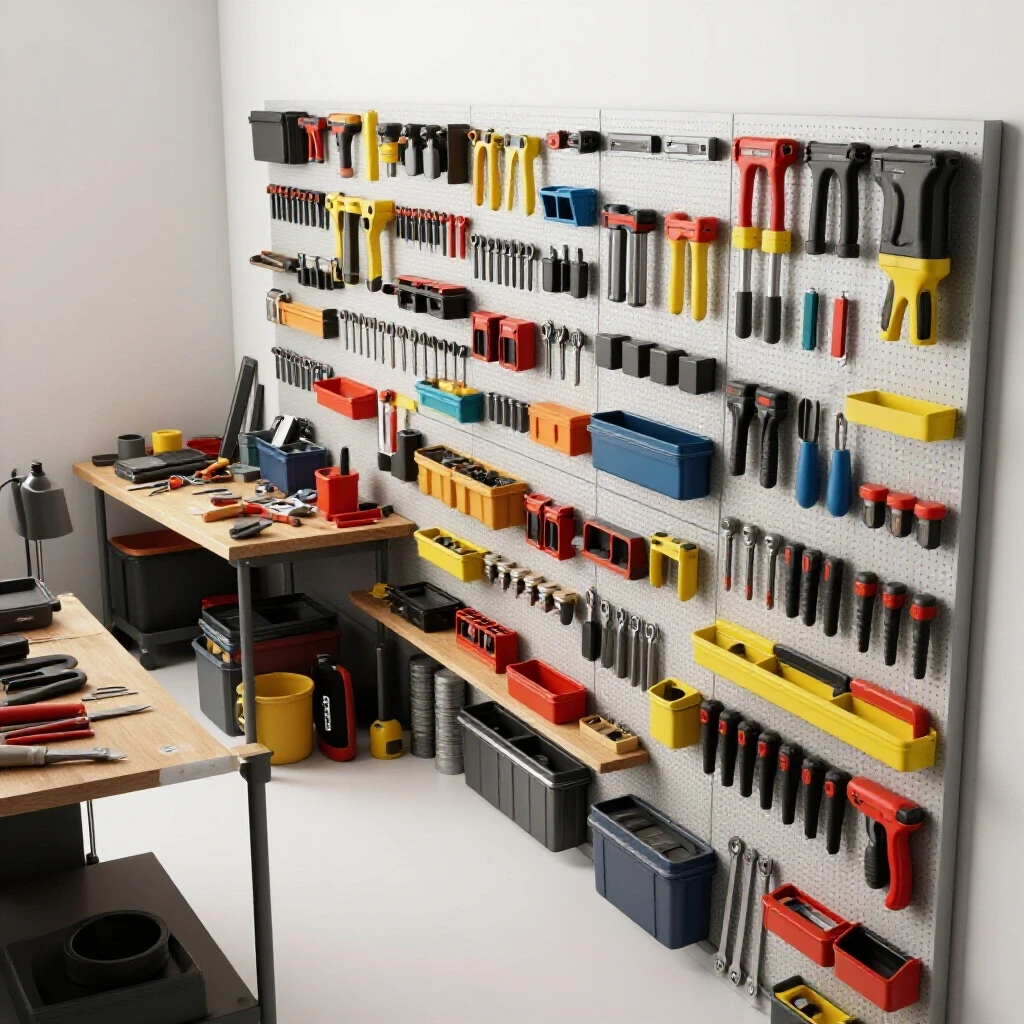
Why shadow boards? Because in a high-speed environment, you don’t want to dig through a drawer with greasy gloves. A shadow board allows you to see exactly which grinding wheel or flap disc is missing at a glance. I also keep a dedicated set of hex keys for the grinder right next to the tool. This prevents the “tool drift” that happens when you borrow a wrench from the welding table and forget to put it back.
- Cutting Zone: Keep your bandsaw, cold saw, and marking tools together.
- Fabrication Zone: Welding table, clamps, and jigging tools.
- Machining Zone: Lathe, mill, and precision measuring instruments.
- Finishing Zone: Grinders, sanders, and wire wheels.
Selecting High-Access Storage Systems for Fabrication Tools
High-access storage refers to physical systems like shadow boards, magnetic rails, and open bins that allow for instant tool identification. These systems eliminate the “search time” associated with tool chests and closed drawers.
I have spent a lot of time measuring “cycle times” in maintenance tasks. The biggest time-waster is the “drawer shuffle.” This is when a technician opens three different drawers looking for a 14mm socket. To fix this, I moved all high-frequency tools to magnetic rails and shadow boards.
Magnetic rails are particularly effective for metalworkers. You can stick them to the side of a machine or a steel workbench. They hold everything from pliers to screwdrivers securely, but you can grab them in half a second. For my precision tools, like micrometers and calipers, I still use drawers to protect them from dust, but I use foam cutouts. If a slot is empty, I know a tool is missing before I even start the job.
- Shadow Boards: Best for wrenches, hammers, and large pliers.
- Magnetic Rails: Excellent for small hand tools and hex keys near machines.
- Vertical Bins: Ideal for consumables like welding tips, nuts, and bolts.
- Foam Inserts: Mandatory for precision measuring tools to prevent damage.
Measuring and Reducing Tool Retrieval Intervals
Retrieval intervals are the measured seconds it takes to locate and return a tool. By benchmarking these times, a shop owner can objectively determine if their organization system is actually improving speed.
In my shop, I use a simple “five-second rule.” If I can’t have the tool in my hand within five seconds of realizing I need it, the storage system is broken. When I evaluate a new shop layout, I actually time myself performing common tasks, like changing a lathe insert or swapping a welding gas bottle.
If it takes thirty seconds to find the insert key, that is a failure. I will then move the key to a magnetic spot right on the tool post. This reduces the retrieval time to zero. This kind of objective testing cuts through the marketing fluff of “fancy” tool cabinets. You don’t need a $5,000 chest; you need a $10 magnetic strip in the right place.
- Identify a frequent task (e.g., changing a drill bit).
- Time how long it takes to find the tool and the accessory.
- Move the storage closer to the machine.
- Retest and record the time savings.
Why Heavy Castings Dampen Harmonics and Support Storage
The mass of a machine tool affects more than just its cutting ability; it also determines how well it can support integrated storage. Understanding the relationship between mass, vibration, and tool placement is key to a fast setup.
When a machine is cutting metal, it creates vibrations called harmonics. A lightweight machine will vibrate at a high frequency, which can cause tools stored nearby to walk off surfaces or vibrate against each other. This is why I prefer heavy cast iron bases. The high carbon content in cast iron acts like a sponge for vibration.
Because of this dampening, I can use the machine’s own structure as a storage hub. For example, on a heavy milling machine, I often bolt a rack for R8 collets directly to the side of the column. On a lighter, benchtop mill, I would never do this because the vibration would eventually loosen the mounting bolts or cause the collets to rattle.
| Feature | Industrial Casting | Budget Sheet Metal |
|---|---|---|
| Weight | 500+ lbs | 50-150 lbs |
| Torsional Stiffness | High | Low |
| Vibration Absorption | Excellent | Poor |
| Storage Potential | High (Direct Mount) | Low (External Stand Needed) |
Precision Alignment and Tool Accessibility
Maintaining a machine’s accuracy, such as its Total Indicated Runout (TIR), requires regular adjustment. Having the necessary alignment tools stored in a dedicated “precision station” ensures these checks happen quickly and often.
TIR is the measurement of how much a rotating part wobbles. If your lathe spindle has a runout of 0.001 inches, your parts will be out of round. To keep a machine in spec, you need to check it often. However, if your dial indicator and magnetic base are buried in a box under a pile of rags, you will skip the check.
I keep a “Precision Station” right between my lathe and mill. This is a clean, dust-free area where my indicators, test bars, and micrometers live. They are stored in foam-lined cases that stay on an eye-level shelf. Because they are easy to grab, I find myself checking my machine alignments every Monday morning. It takes me five minutes because the tools are ready. If they were unorganized, it would take twenty.
Managing Consumables for Uninterrupted Workflow
Consumables like drill bits, inserts, and welding wire are the fuel of a metal shop. Organizing these by size and type in open-access bins prevents project delays caused by running out of supplies.
There is nothing that kills shop speed faster than breaking your last 1/4″ drill bit and not knowing you were out of spares. I use a “two-bin” system for consumables. I have a primary bin where I pull the tool from, and a backup bin behind it. When the primary bin is empty, I move the backup bin forward and immediately add the item to my “to-buy” list.
For lathe inserts, I use clear-top organizers labeled with the insert geometry (e.g., CCMT 32.51). I store these right next to the lathe. I don’t care about the brand of the box; I care that I can see through the lid to know how many corners I have left. This prevents the “stop-and-search” that happens when a tool fails mid-cut.
- Drill Bits: Store in a dedicated index, sorted by fractional, letter, and number sizes.
- Lathe Inserts: Keep in clear, labeled drawers near the tool post.
- Welding Wire: Store spare spools in a dry, elevated area near the welder.
- Abrasives: Sort flap discs and grinding wheels by grit in vertical racks.
Electrical Layout and Power Tool Readiness
The way you manage power cords and air lines is just as important as where you put your wrenches. A shop with tangled cords is a slow shop and a dangerous one.
I am a big fan of overhead drops for power and air. In my maintenance bays, we never had cords running across the floor. Not only does this keep the floor clear for moving heavy machinery, but it also means your power tools are always “ready.”
If I need my 4.5-inch grinder, I grab it from its hook, and the cord is already plugged into an overhead reel. I don’t have to hunt for an outlet or untangle a knot. When I am done, the reel pulls the cord back up. This setup might cost a bit more upfront, but the speed it adds to every single task is worth the investment.
Analyzing Motor Styles and Their Impact on Tool Proximity
The type of motor on your machinery—whether it is a traditional induction motor or a modern brushless DC motor—affects the heat and electromagnetic interference in the area. This influences where you should store sensitive electronic tools.
Older induction motors can get quite hot during extended use. If you have a plastic tool rack mounted too close to a hot motor housing, it can warp or melt. Furthermore, some large motors create a magnetic field that can mess with digital calipers or magnetic bases.
When I set up a machine, I feel the motor after an hour of work. If it’s hot, I make sure there is at least six inches of clearance between the motor and any tool storage. For modern machines with Variable Frequency Drives (VFDs), I keep the control electronics away from the “dirty” power lines of the motor to prevent interference. Organizing your shop with an eye on “heat zones” and “electrical zones” protects your tool investment.
The Role of Spare Parts Pipelines in Maintaining Speed
Speed isn’t just about how fast you work; it’s about how fast you can get back to work after a breakdown. Keeping a small inventory of critical mechanical components prevents long periods of downtime.
In my 17 years of maintenance, I have seen many projects grind to a halt because a $5 drive belt snapped. I keep a “Critical Spares” cabinet for every major machine. This includes: 1. Drive belts and pulleys. 2. Shear pins for the lead screw. 3. Replacement fuses and capacitors for the control board. 4. Commonly worn bearings.
I don’t wait for the part to fail to buy a spare. When I buy a new machine, the first thing I do is look at the manual and order the most common wear items. I store these in labeled bins right under the machine. If a belt breaks, I am back up and running in ten minutes instead of ten days.
Case Study: The 30-Minute Lathe Setup
I once consulted for a shop where it took the operator 30 minutes to set up a simple turning job. They had a high-end lathe, but their tools were scattered. We implemented a “Lathe Station” strategy.
We moved all the tool holders to a rack mounted on the backsplash of the lathe. We put the chuck keys on a spring-loaded tether so they could never leave the machine. We placed the micrometer and the digital readout (DRO) at eye level.
The result? Setup time dropped from 30 minutes to under 5 minutes. We didn’t buy a faster machine; we just fixed the way the tools were organized. This is the difference between looking at specs and looking at reality.
Actionable Inspection Checklist for Shop Organization
Use this checklist to evaluate your current setup. If you answer “no” to more than three, your shop is costing you time.
- [ ] Can I find any hand tool in my shop in under 5 seconds?
- [ ] Are my most-used tools stored between waist and eye level?
- [ ] Is my grinding station at least 10 feet away from my precision lathe?
- [ ] Do I have a “Critical Spares” bin for my primary machinery?
- [ ] Are my precision measuring tools protected from dust but still accessible?
- [ ] Can I see which consumables are low without opening multiple boxes?
- [ ] Are all my power cords and air lines off the floor?
- [ ] Does every machine have its own dedicated set of adjustment wrenches?
By following these steps, you stop being a collector of tools and start being a producer of work. The goal is to make the shop an extension of your hands. When the environment is organized for speed, the quality of your work naturally follows because you are focused on the metal, not the mess.
FAQ
What is the most efficient way to store metalworking wrenches?
The most efficient way is a vertical shadow board or a magnetic rail. This allows you to see the size of the wrench immediately and grab it with one hand. Avoid keeping them in a cluttered drawer where you have to dig through multiple layers to find the right size.
How does machine vibration affect tool storage?
High-frequency vibration from lightweight or poorly balanced machines can cause tools to fall off racks or dull each other by rubbing together. Heavy cast iron machines dampen these vibrations, making them safer for integrated tool storage. If your machine vibrates heavily, use wall-mounted storage instead of machine-mounted storage.
Why should I separate my grinding and machining zones?
Grinding produces abrasive dust that can act like sandpaper on the precision-ground surfaces (ways) of a lathe or mill. By separating these zones, you protect your expensive machinery from premature wear and keep your precision tools clean and accurate.
Is a shadow board better than a tool chest for speed?
Yes, for high-frequency tools. A shadow board provides an instant visual inventory. You can see what you have and what is missing without opening a single drawer. Tool chests are better for low-frequency tools or items that need protection from the environment.
What is “Tool Drift” and how do I stop it?
Tool drift occurs when a tool dedicated to one machine is moved to another and not returned. You can stop this by color-coding your tools (e.g., a small dab of red paint for welding tools, blue for lathe tools) or by having dedicated sets of common wrenches for every major machine.
How do I organize small consumables like lathe inserts?
Use clear-lidded, multi-compartment bins. Label each compartment with the specific insert code and the material it is designed to cut (e.g., “Aluminum” or “Stainless”). Place these bins as close to the machine’s tool post as possible.
Should I mount tool racks directly to my lathe or mill?
Only if the machine has a heavy, cast iron frame that can handle the additional mounting points without affecting structural integrity. Avoid drilling into the precision-machined “ways” or the headstock. Use existing bolt holes or non-critical areas of the casting.
How often should I re-evaluate my shop layout?
I recommend a “workflow audit” every six months. As you take on different types of projects, you may find that your tool needs have changed. If you find yourself walking back and forth more than usual, it’s time to move some equipment.
What are the best storage solutions for precision measuring tools?
Precision tools like micrometers and calipers should be stored in foam-lined cases or drawers. This protects them from physical impact and dust. However, these cases should be kept in a dedicated “clean zone” at eye level so they are easy to reach during a job.
Can overhead power drops really save that much time?
Yes. They eliminate the time spent untangling cords, searching for outlets, and tripping over cables. In a busy shop, an overhead reel can save several minutes on every task that requires a power tool. Over a year, this adds up to dozens of hours of increased productivity.
(This article was written by one of our staff writers, Steven Brooks. Visit our Meet the Team page to learn more about the author and their expertise.)