How to Organize and Store Spray Paint Cans on a Cart (Tips)
I’ve spent over a decade in prototype shops and my own backyard garage, and if there is one thing I’ve learned, it’s that a project is only as good as its finishing stage. There is nothing more frustrating than spending forty hours TIG welding a custom chassis, only to have the final coat ruined because you were digging through a cluttered pile of aerosol cans, losing your “wet edge” while the nozzle on a half-clogged can sputtered out. Early in my career, I built a heavy-duty welding cart that was a tank, but I neglected the storage for my finishing supplies. Every time I rolled that cart over a stray piece of MIG wire or a floor joint, three cans of primer would vibrate off the shelf and clatter across the concrete.

That experience taught me that organizing finishing supplies on a mobile platform isn’t just about tidiness; it is about structural integrity and workflow efficiency. When you are planning a custom fabrication project, you have to account for the weight distribution and the vibration of the cart. A poorly designed rack will warp your frame during the welding process or, worse, fail when fully loaded with twenty pounds of pressurized cans. In this guide, I’m going to break down how to design, cut, and weld a professional-grade aerosol management system directly into your mobile workshop fixtures. We will focus on the physics of heat distortion and the precision required to keep your storage racks square and functional.
Blueprinting Layouts for Aerosol Can Storage
Effective planning starts with understanding the physical footprint of your consumables and how they integrate into a larger mobile structure. You must account for the standard diameter of a 12-ounce to 16-ounce aerosol unit, typically ranging from 2.6 to 2.7 inches, while allowing for “finger room” to grab the cans during a fast-paced painting session.
Designing a storage system requires more than just a rough sketch on a napkin. I start by calculating the total linear inches needed for my most-used primers, paints, and clear coats. If you are building a rack for twelve cans, you aren’t just looking at 32 inches of space. You have to factor in the thickness of your divider materials and the “wiggle room” or tolerance needed for the cans to slide in and out without binding. I generally aim for a +/- 1/16th inch tolerance on my internal dimensions. This ensures that even if a can has a slightly thicker label or a bit of overspray on the outside, it won’t get stuck in the rack.
Calculating Kerf and Material Allowances
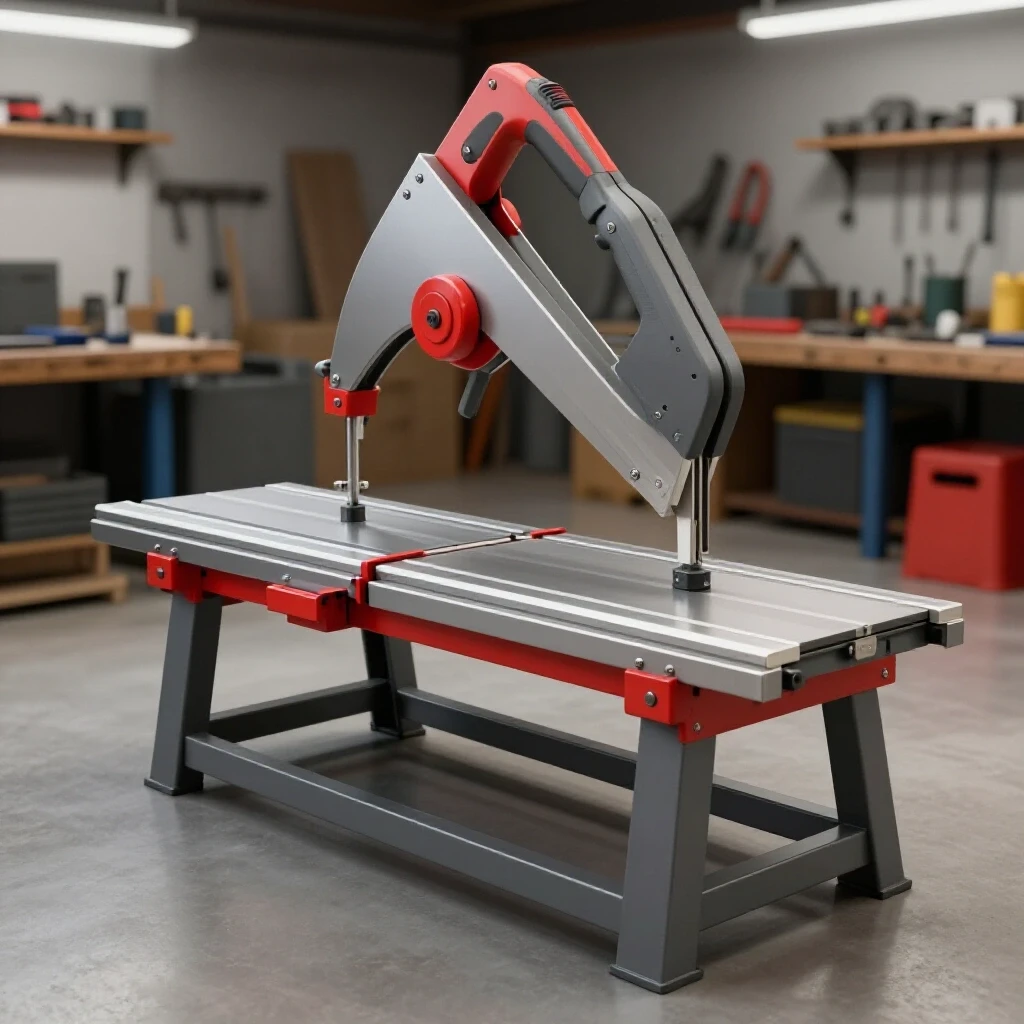
Before you pull the trigger on your cold saw or plasma cutter, you must understand kerf. Kerf is the width of the material removed by the cutting tool. If you are using a standard 14-inch abrasive chop saw, your kerf might be as wide as 1/8 of an inch. If you ignore this, and you have ten cuts to make for a divider system, your final rack will be over an inch shorter than planned.
- Abrasive Chop Saw: 0.125″ (1/8″) kerf. Best for rough framing but requires more cleanup.
- Cold Saw: 0.080″ to 0.100″ kerf. Provides a cleaner, more accurate cut with less heat.
- Bandsaw: 0.035″ to 0.045″ kerf. Excellent for precision and minimizing material waste.
- Plasma Cutter: 0.040″ to 0.060″ kerf. Fast, but requires a steady hand or a guide to maintain squareness.
I always mark my “keep” side of the line. This means the blade should eat into the scrap side of my measurement. When I’m building a rack for finishing supplies, I use a scribe instead of a soapstone. A soapstone line is about 1/16th of an inch thick itself, which is too imprecise for tight-fitting storage slots. A scribe line allows me to see exactly where the blade needs to track.
Workshop Jigs for Consistent Divider Spacing
Using dedicated fixtures ensures that every storage slot is identical, which is critical for both aesthetics and functionality in a custom-built cart. When you are welding multiple dividers into a frame, the heat will naturally want to pull the metal toward the weld, causing the slots to narrow or widen as you progress down the line.
To combat this, I build a simple “spacer jig” out of scrap aluminum or hardwood. Aluminum is great because it acts as a heat sink, drawing thermal energy away from the weld zone and reducing the Heat Affected Zone (HAZ). If I want a 3-inch opening for my cans, I cut a block of aluminum to exactly 3.00 inches. As I move down the rack, I clamp this block between the divider I just tacked and the next one I’m about to fit. This physical restraint prevents the “walking” effect that happens when you rely solely on tape measure marks.
Why Physical Restraints Trump Layout Marks
Layout marks tell you where the metal should be, but clamps and jigs tell the metal where it must stay. Steel has a high coefficient of thermal expansion. As you apply a weld bead, the liquid metal occupies more volume than the solid metal. As it cools, it contracts, creating an angular pull. If you are welding a divider to a flat base plate without a jig, that divider will tilt toward the weld by several degrees.
- Place your base plate on a flat welding table.
- Position your first divider and check for squareness using a machinist’s square.
- Place your 3-inch spacer block against the first divider.
- Slide the second divider against the block.
- Clamp the entire “sandwich” to the table before throwing your first tack weld.
Material Selection for Mobile Finishing Racks
Choosing the right gauge of steel or aluminum for your aerosol storage involves balancing weight against durability and weldability. For a cart that will see heavy shop use, I prefer 14-gauge or 16-gauge cold-rolled steel sheet or 1/2-inch square tubing for the frame of the rack.
Thin-gauge materials are notorious for warping. If you use 11-gauge (1/8 inch) steel, it’s easier to weld without burning through, but it adds significant weight to your cart. If you go too thin, like 20-gauge, you’ll struggle with “oil-canning,” where the metal pops in and out due to internal stresses. 16-gauge is the “Goldilocks” zone for me—it’s rigid enough to hold a full load of paint but light enough that it doesn’t make the cart top-heavy.
| Material Gauge | Thickness (Inches) | Weight (lbs/sq ft) | Recommended Use |
|---|---|---|---|
| 11 Gauge | 0.1196″ | 4.88 | Main cart frame and heavy shelving |
| 14 Gauge | 0.0747″ | 3.12 | Structural dividers and rack supports |
| 16 Gauge | 0.0598″ | 2.50 | Individual can sleeves and light trays |
| 18 Gauge | 0.0478″ | 2.00 | Non-structural backing plates |
Weld Sequencing to Combat Heat Distortion
The order in which you lay your beads determines whether your storage rack stays square or turns into a pretzel. Weld sequencing is the practice of strategically placing welds in a pattern that balances the pulling forces of the cooling metal.
When I’m attaching a series of dividers to a long rail for a paint rack, I never start at one end and work my way to the other. This “zipper” method accumulates all the shrinkage force in one direction, eventually bowing the entire rail. Instead, I use a “center-out” or “staggered” sequence. I tack everything first, then I weld the center divider, jump to the far left, then to the far right, and then fill in the gaps.
The Science of Angular Weld Shrinkage
Every time you lay a bead, the metal pulls toward the side of the joint that was welded last. If you weld only the top side of a shelf support, the shelf will tip upward. To keep a rack for finishing cans level, you must use “balanced welding.” This means placing small, equal-sized tacks on opposite sides of the joint before doing any final passes.
- Tack Weld Sizing: For 16-gauge steel, your tacks should be no larger than 1/8 inch in diameter.
- Tack Spacing: On a 4-inch divider, I place one tack at each corner.
- Cooling Time: I allow the tacks to change from “cherry red” to “dull gray” before I even think about laying a full bead. This allows the initial stresses to settle.
Designing for Stability and Motion Control
A mobile cart is a dynamic environment, and your storage solution must account for centrifugal force and vibration. If your aerosol cans are sitting on a flat shelf with no “lip,” they will migrate toward the edges as you move the cart across the shop.
I prefer an angled “gravity-fed” design or a deep-pocket sleeve. By tilting the storage rack back at a 15-degree angle, the center of gravity of the cans stays pinned against the back of the rack. This simple geometry trick prevents cans from tipping over when you hit a bump. Additionally, I often line the bottom of the rack with a thin layer of rubberized tool box liner. This dampens the vibrations that can cause the internal mixing balls of the paint cans to rattle incessantly, which is a small detail that makes a big difference in a quiet shop.
Fixturing for Angled Racks
Building an angled rack is more complex than a square one because you are dealing with compound miters or angled joints. I use an adjustable magnetic protractor to set my angles.
- Set the protractor to 75 degrees (the complement of my 15-degree tilt).
- Align the side supports of the rack using the protractor against the cart’s vertical frame.
- Use a “strongback”—a heavy piece of straight angle iron—clamped across the supports to keep them in the same plane while you tack them.
- Verify that the distance between the supports is consistent at both the top and the bottom to ensure the can trays will slide in perfectly.
Fire Safety and Ventilation in Mobile Storage
Aerosol cans are pressurized vessels containing flammable propellants. When you integrate them into a welding cart, you are placing them in close proximity to sparks, slag, and heat. Safety is not an afterthought; it is a design requirement.
I always build a “spark shield” or a closed-back cabinet if the paint rack is located near the welding area of the cart. This is usually a piece of 18-gauge sheet metal that prevents grinding sparks from hitting the cans directly. Furthermore, I never design a completely airtight storage box. If a can were to leak, you don’t want a buildup of flammable vapors. I drill 1/2-inch ventilation holes in the bottom and top of the storage area to allow for natural airflow.
- Spacing: Keep at least 1/2 inch of air space between cans to allow for heat dissipation if the cart is sitting in the sun or near a heater.
- Proximity: Ensure the rack is at least 18 inches away from the primary welding ground or the “hot zone” of your workbench.
- Material: Never use wood for a rack that is attached to a welding cart. A single stray spark can smolder in a wood joint for hours before igniting.
Case Study: The “Proto-Rack” Build Log
A few years ago, I built a custom finishing station for a chassis shop. The goal was to hold 24 cans of various paints and cleaners on a cart that could be wheeled into a paint booth. I used 1-inch x 1/8-inch flat bar for the main frame and 16-gauge sheet for the “pockets.”
The biggest challenge was the “bowing” of the flat bar. After welding the first six pockets, I noticed the flat bar had a 1/4-inch curve in it. I had to stop, cut the tacks, and start over. This time, I clamped the flat bar to a 2-inch thick steel layout table. I also “pre-bent” the bar slightly in the opposite direction of the weld pull. When the welds cooled, they pulled the bar perfectly straight. This is a technique called “preset,” and it’s a lifesaver when you can’t avoid heavy welding on one side of a thin member.
Step-by-Step Assembly Sequence
- Cut List: 2 side rails (flat bar), 24 dividers (16-gauge sheet), 1 back plate (18-gauge).
- Prep: Degrease all metal with acetone. Mill scale will cause weld defects and erratic heat.
- Layout: Scribe lines every 3.125 inches on the side rails.
- Tacking: Clamp the rails to the table. Use the 3-inch spacer block. Tack the four corners of each divider.
- Sequencing: Weld divider 1, 12, 24, 6, 18. This spreads the heat load across the entire 72-inch length.
- Inspection: Check for squareness after every four dividers. If it starts to pull, stop and let it cool completely.
Finishing and Quick Retrieval Systems
Once the structure is sound, the final step is making it usable. In a prototype environment, speed is key. I don’t want to read every label to find my “Self-Etching Primer.”
I use a color-coding system on the rack itself. I weld small “ID tags” (1-inch squares of sheet metal) to the front of each slot. I then paint the tag to match the color of the can that belongs there. This creates a visual “home” for every consumable. Even if the can is missing, I know exactly what needs to be reordered. For cans that look similar—like different shades of gray primer—I use a label maker to put a large, bold number on the cap and a corresponding number on the rack.
Actionable Benchmarks for Your Build
- Dimensional Tolerance: Aim for +/- 1/16″ on all internal openings.
- Squareness: The rack should be square within 1/32″ over a 12-inch span.
- Weld Strength: For 16-gauge, a 1/2-inch long bead every 2 inches is more than enough structural strength; you don’t need continuous beads.
- Load Test: Once finished, load the rack with double the intended weight (use sand-filled cans) to check for any flex or weld cracking before painting the cart.
Troubleshooting Common Construction Pitfalls
Even with a perfect plan, things can go wrong. The most common issue I see is “burn-through” when welding thin dividers to a thicker frame. This happens because the thin metal reaches its melting point much faster than the thick frame.
If you find yourself blowing holes in your 16-gauge dividers, try “aiming” your arc more toward the thicker frame. Let the puddle flow over onto the thin metal rather than hitting the thin edge directly. You can also use a “pulse” technique if your welder supports it, which alternates between high and low amperage to keep the overall heat input low while still getting good penetration into the thicker base.
Another common mistake is forgetting to account for the “radius” of the tubing. If you are welding dividers into square tubing, the corners of the tubing are rounded. If your dividers are cut with perfectly sharp 90-degree corners, they won’t sit flush against the tube. You’ll need to grind a small chamfer on the corners of your dividers to clear that radius and get a tight fit.
Frequently Asked Questions
How do I prevent the spray cans from rattling while moving the cart? The best way is to use a dampening material. I recommend adhesive-backed neoprene foam or a standard rubber toolbox liner glued to the bottom of the rack. Additionally, designing the rack with a slight 15-degree rearward tilt uses gravity to keep the cans seated firmly against the back wall, which significantly reduces movement.
What is the best welding process for building these storage racks? TIG (Tungsten Inert Gas) welding is the gold standard for thin-gauge storage projects because it offers the most control over heat input. However, a MIG welder with .023 or .030 wire and a 75/25 Argon/CO2 gas mix is much faster and perfectly adequate for most DIY builders. Avoid flux-core wire for this, as the high heat and spatter make it difficult to get clean welds on thin material.
How much space should I leave between the cans and the rack walls? I recommend a total gap of 1/8 inch to 1/4 inch larger than the diameter of the can. If a standard can is 2.65 inches, make your slot 2.8 or 2.9 inches. This allows you to easily grab the can with gloves on and prevents the can from getting stuck if the label peels or if there is a minor amount of dirt in the rack.
Can I use magnets to hold the cans on the cart instead of a rack? While magnetic holders exist, I don’t recommend them for a primary storage solution on a mobile cart. Aerosol cans are made of thin tin-plated steel, and the magnetic bond isn’t always strong enough to withstand the “shock” of rolling over a threshold or a cord. A mechanical rack or pocket is much more secure.
How do I fix a rack that has warped after welding? If the rack has bowed, you can sometimes “cold-straighten” it using a large vise or a hydraulic press, but be careful not to crack the welds. A better method is “flame straightening,” where you apply heat to the opposite side of the warp to pull it back. However, for thin 16-gauge material, it is usually easier to cut the tacks and re-weld with better clamping.
Is it safe to store aerosol cans near my welding machine? Yes, provided there is a physical barrier. You should never have an open rack of cans facing your welding arc. Build the rack on the side or back of the cart, and ensure there is a sheet metal “shroud” or “spark shield” between the welding leads and the cans.
What material should I use for the bottom of the rack to prevent rust? Aerosol cans often have a raw steel rim on the bottom that can rust if it sits in moisture. I suggest using a perforated metal sheet for the bottom of the rack. This allows any moisture or spilled liquid to drain out and provides excellent ventilation.
How do I ensure the rack doesn’t make the cart top-heavy? Always mount your heaviest items, like the welder and gas bottle, as low as possible on the cart. The aerosol rack should ideally be mounted at waist height or lower. If you must mount it high for ergonomics, keep the number of cans limited to 6-10 to keep the center of gravity low.
Should I paint the inside of the storage slots? Yes, but use a thin, durable coating like a spray-on bedliner or a high-quality enamel. Avoid thick coatings that might reduce your internal tolerances. If you are worried about the paint chipping, you can leave the interior raw and apply a light coat of paste wax to the metal to prevent corrosion.
How do I calculate the weight capacity for my cart’s casters? Total the weight of your welder, gas cylinder, cart frame, and all tools, then add about 30 pounds for a full rack of finishing cans. Divide this total by the number of casters (usually 4) and choose casters rated for at least 1.5 times that weight to account for dynamic loads when moving.
(This article was written by one of our staff writers, Robert Kline. Visit our Meet the Team page to learn more about the author and their expertise.)