How to Remove Heavy Rust From Steel Before Welding (DIY Fix)
I have spent nearly two decades in industrial fabrication shops, often standing over a machine that refuses to cooperate or a weld that looks like Swiss cheese. One of the most frustrating moments for any fabricator is when a project stalls not because of a complex mechanical failure, but because the base material itself is fighting back. I recall a specific contract involving the restoration of heavy-duty trailer frames that had sat in a coastal field for five years. The steel was so deeply oxidized that my initial passes were riddled with wormhole porosity and erratic arc behavior.
In that situation, I couldn’t just “grind it a bit” and hope for the best. I had to treat the surface preparation as a diagnostic challenge. When we deal with heavy oxidation, we aren’t just looking at a cosmetic issue; we are looking at a chemical and mechanical barrier to a sound structural bond. My approach changed from simple cleaning to a systematic isolation of contaminants. By understanding how deep-seated oxides interact with the welding arc, we can eliminate the guesswork that leads to failed inspections and wasted consumables.
The Diagnostic Approach to Surface Oxidation Management
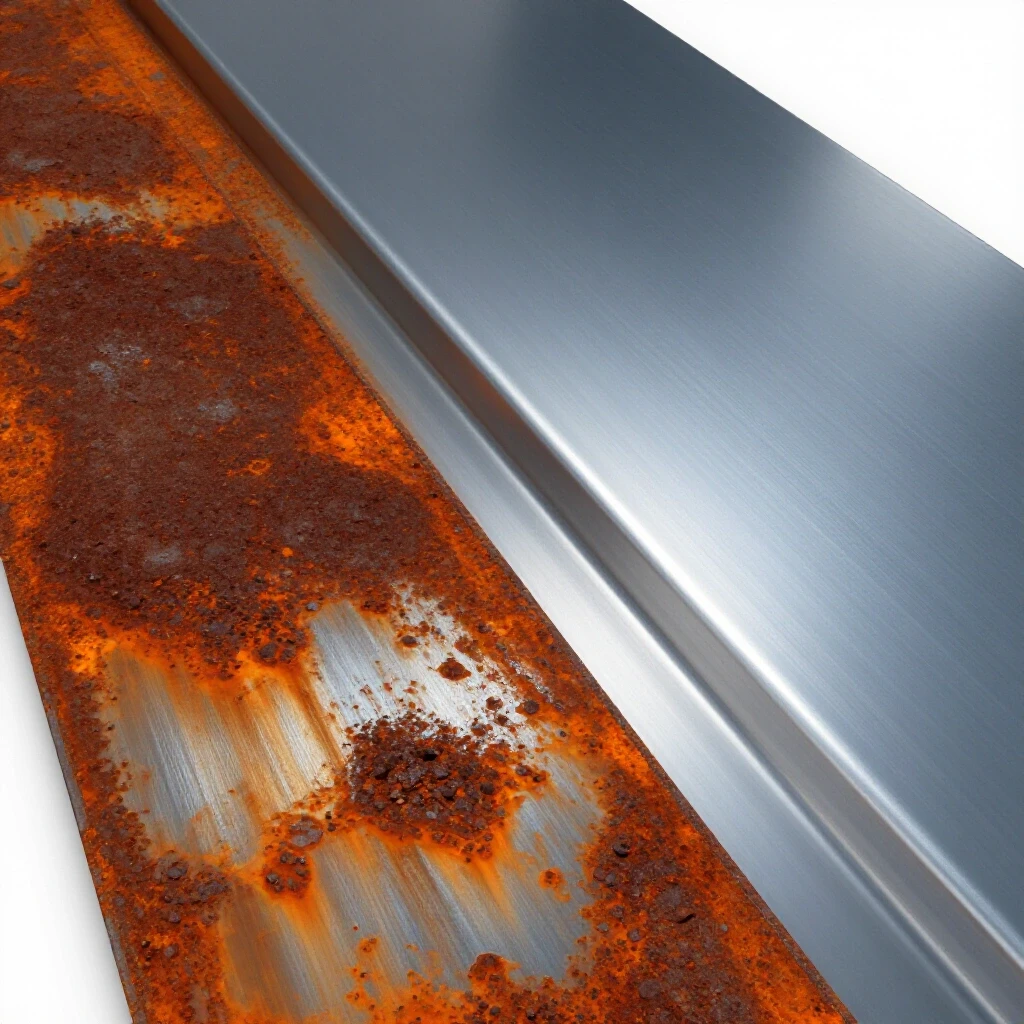
Surface oxidation management is the systematic process of identifying, isolating, and removing layers of iron oxide and environmental contaminants to reveal a chemically pure metallic surface. This stage is critical because any residual moisture or oxygen trapped in the rust will dissociate in the welding arc, leading to hydrogen embrittlement or gas pockets.
Before I ever strike an arc, I perform a visual and tactile audit of the steel. I look for the difference between “tight” mill scale and “loose” flaky rust. Tight scale is a thin, dark layer of magnetite that forms during the hot-rolling process. Heavy rust, or hydrated iron oxide, is more insidious because it is porous and holds onto moisture. If you don’t diagnose the depth of this corrosion correctly, you might leave behind microscopic pits that harbor the very elements that ruin a weld. I use a simple “white rag” test after my initial cleaning: if I wipe the area with a solvent-soaked white cloth and it comes back orange or brown, the diagnostic phase isn’t over.
Identifying Depth of Corrosion and Material Integrity
Material integrity refers to the structural soundness of the steel after it has been subjected to environmental degradation. We must determine if the “meat” of the metal is still thick enough to meet the original design tolerances after the cleaning process is complete.
When I’m troubleshooting a piece of salvaged steel, I start by measuring the material thickness with a calibrated digital caliper or a pair of micrometers. If a 0.250-inch plate has lost 0.040 inches to heavy pitting, I have to ask if the remaining 0.210 inches is sufficient for the load. Pitting is particularly dangerous because it creates “stress risers”—tiny notches where cracks can start. During my years in the mill, I learned that ignoring a pit is the fastest way to a structural failure. I use a needle scaler to “knock” the tops off the rust to see the true floor of the pits. If the pitting is deeper than 10% of the material thickness, I often flag it for replacement rather than repair.
Mechanical Remediation: Breaking Down Heavy Scale and Pitting
Mechanical remediation involves using physical force—abrasion, impact, or friction—to strip away layers of oxidized material. This is the frontline of metal fabrication fixes, but it requires a disciplined approach to avoid introducing new problems like surface smearing or tool vibration.
I prefer a tiered approach to mechanical cleaning. I start with a heavy-duty needle scaler or a slag hammer to remove the “crust.” This prevents my more expensive abrasives from loading up with debris immediately. Once the loose material is gone, I move to a 4.5-inch angle grinder equipped with a high-quality ceramic flap disc. I’ve found that 40-grit or 60-grit discs are the sweet spot for heavy rust. They provide enough “bite” to reach the bottom of the pits without removing excessive amounts of the base metal.
The Risks of Surface Smearing and Tool Chatters
Surface smearing occurs when a dull abrasive or a high-speed wire wheel heats the rust to the point where it becomes plastic and is “pushed” into the pores of the steel rather than being removed. This creates a deceptive, shiny finish that looks clean but actually hides a layer of oxide underneath.
Tool chatter in this context often stems from an imbalanced grinding wheel or a worn-out spindle bearing in your angle grinder. If you feel a rhythmic vibration—a harmonic—traveling up your arm, your tool is likely bouncing off the surface. This prevents a consistent “cut” and leads to uneven preparation. I always check my grinder’s spindle for backlash; any movement more than 0.005 inches usually means it’s time for a rebuild. A smooth-running tool ensures that the abrasive stays in contact with the metal, giving you the uniform, bright finish required for high-quality fusion.
Chemical Solutions for Deep-Seated Oxide Removal
Chemical dissolution is the use of mild acids or chelating agents to break the chemical bond between the iron and the oxygen in the rust. This is often the most effective metalworking diagnostic guide for complex shapes or heavily pitted areas where a grinder cannot reach.
When I encounter a piece of steel with intricate corners or internal threads, I turn to common household or workshop chemicals. Phosphoric acid is a staple in my shop. It works by converting iron oxide (rust) into iron phosphate, which is a stable, black coating. However, for welding prep, we want to go beyond conversion to full removal. I’ve found that a 24-hour soak in white vinegar (acetic acid) or a citric acid solution is remarkably effective. The acid penetrates the pits and dissolves the rust from the inside out.
Managing Residue and Neutralization for Clean Arcs
Neutralization is the process of stopping the chemical reaction of the acid and removing any leftover salts that could contaminate the weld pool. Failure to neutralize is a common mistake that leads to “hidden” porosity that only shows up under X-ray.
After a chemical soak, I always rinse the part thoroughly with clean water, followed by a neutralizing wash of baking soda and water (about 1 cup per gallon). This brings the pH of the surface back to neutral. I then follow up with a fast-evaporating solvent like acetone or 91% isopropyl alcohol. This removes the water—the enemy of a good weld—and ensures that the surface is chemically inert. If you skip this, the residual acid can react with the shielding gas or the filler metal, creating a “boiling” effect in the puddle.
Troubleshooting Weld Defects Rooted in Surface Prep
When a weld fails, we have to look at the “forensics” of the bead. Troubleshooting weld porosity is essentially a process of elimination. If your machine settings are correct and your gas flow is steady at 20-25 CFH (cubic feet per hour), the culprit is almost certainly the surface prep.
I once spent three hours diagnosing a “bubbling” arc on a simple lap joint. I checked the regulator, the liner, and the diffuser. Everything was perfect. It wasn’t until I cut the joint apart that I saw the issue: I had cleaned the top of the plate, but the underside—where the plates overlapped—was still covered in heavy rust. The heat of the arc was drawing the moisture out from between the plates, injecting it right into the molten pool. This was a hard lesson in “total surface” preparation.
| Defect Type | Likely Surface Cause | Diagnostic Test |
|---|---|---|
| Pinholes (Surface) | Residual moisture or solvent | Heat the metal to 200°F; look for “sweat” |
| Wormhole Porosity | Deep-seated oxides in pits | Increase grinding depth by 0.010″ |
| Lack of Fusion | “Smeared” oxide layer | Use a fresh 60-grit disc at a 15-degree angle |
| Erratic Arc | Poor ground contact on rusted area | Check resistance (Ohms) between ground and work |
Porosity Diagnosis Pathways and Corrective Actions
To master systematic diagnostic methodologies, we must follow a path from the most likely cause to the least likely. In my shop, we use a fault-tree approach. If the weld is porous, we first check for external air drafts. If the environment is still, we look at the gas delivery. If the gas is flowing, we look at the metal.
- Check for Moisture: Use an infrared thermometer to check the temperature of the steel. If it is below the dew point, moisture will condense on the rust. Preheat the steel to 150°F to drive off any “hidden” water.
- Verify Oxide Removal: Use a magnifying glass (10x) to inspect the pits. If you see black or orange flecks at the bottom of the crater, you haven’t reached “bright metal.”
- Test the Ground: A common mechanical troubleshooting step is checking the electrical path. If your ground clamp is on a rusted section, you’ll get a voltage drop. I always grind a “bright spot” specifically for the ground clamp to ensure a resistance of less than 0.5 Ohms.
Actionable Tracking Frameworks and Calibration Checklists
A professional fabricator doesn’t rely on memory; we rely on systems. I keep a log for every major restoration project to ensure consistency. This is especially important when you are working on a piece of equipment over several days, as flash rust can form overnight.
- Initial Inspection: Measure thickness at five points. Record the minimum.
- Mechanical Phase: Use a needle scaler to remove 100% of loose scale.
- Abrasive Phase: Grind to a “Near-White Metal” finish (SSPC-SP 10 standard).
- Chemical Phase (Optional): Soak for 12 hours if pitting is deeper than 0.020 inches.
- Neutralization: Rinse, neutralize, and solvent wipe.
- Pre-Weld Audit: Perform the “white rag” test and verify ground contact.
The Role of Modern Diagnostic Tools in the Workshop
While the basics of rust removal haven’t changed much in 50 years, the tools we use to verify our work have improved significantly. I now use a smartphone-based vibration spectrum analyzer to check my bench grinder. If I see a spike in the 60Hz range, I know my wheels are out of balance, which could be marring my steel surfaces.
Digital dial indicators are also invaluable for checking the “flatness” of a surface after heavy grinding. If I’ve had to grind out a deep section of rust, I want to make sure I haven’t created a “valley” that will cause fit-up issues. A quick sweep with a dial indicator can tell me if I’m within the 0.005-inch tolerance required for a tight joint.
Conclusion: Establishing a Baseline for Success
Removing heavy oxidation is not a chore to be rushed; it is the foundational step of a successful repair. By treating the surface of the steel as a component of a larger mechanical system, we can diagnose potential failures before they happen. My 18 years in the field have taught me that the most complex “electrical gremlins” or “metallurgical cracks” are often just the result of a dirty starting point.
When you take the time to measure your material thickness, balance your tools, and chemically neutralize your prep area, you aren’t just cleaning metal—you are ensuring the integrity of your work. The next time you face a piece of steel that looks more like a topographical map than a structural member, remember to slow down, isolate the variables, and work systematically until you reach the bright, clean steel that lies beneath.
FAQ: Troubleshooting Surface Preparation for Welding
How can I tell if I’ve removed enough rust for a structural weld? You should aim for what the industry calls “Bright Metal.” This means the surface is uniform in color, has a metallic luster, and shows no signs of orange, brown, or black flecks, even in the deepest pits. If you see any dark spots, those are oxides that can gas off during welding.
Why does my weld still have porosity even after I ground the steel shiny? You likely have “surface smearing” or trapped moisture. If you used a dull disc or a wire wheel, you might have just polished the rust. Try using a fresh, coarse flap disc (40 or 60 grit) and see if the “shiny” surface disappears to reveal more rust underneath. Also, try preheating the metal to 200°F to drive out trapped moisture.
Is it safe to weld steel that has been cleaned with vinegar or citric acid? Yes, but only if it has been properly neutralized. Residual acid will react with the heat of the arc and cause severe porosity and potentially toxic fumes. Always rinse with a baking soda solution (1 cup per gallon) and follow with a solvent wipe like acetone.
Can I use a wire wheel on a drill instead of an angle grinder? A wire wheel is excellent for removing loose “flaky” rust, but it is poor at removing tight scale or cleaning out deep pits. It also tends to “burnish” the rust rather than remove it. For a weld-ready surface, a grinding disc or flap disc is much more reliable.
What should I do if the rust has created deep pits in the steel? If the pits are deeper than 10% of the material thickness, the structural integrity may be compromised. If you decide to proceed, you must grind down into the pits until you see bright metal at the bottom. A pointed “stone” or a small carbide burr on a die grinder is useful for reaching into these small craters.
How do I prevent “flash rust” from forming after I’ve cleaned the steel? Flash rust can form in minutes in humid environments. If you aren’t welding immediately, wipe the surface with a light coat of acetone and store it in a dry area. Some fabricators use a “weld-through primer,” but for the best results, I prefer to clean the metal immediately before I start the welding process.
Why is my angle grinder vibrating so much when I’m cleaning the steel? This is usually due to “tool chatter” caused by an imbalanced disc or a worn spindle. Check that the disc is centered perfectly on the arbor and that the retaining nut is tight. If the vibration persists, your grinder’s bearings may be failing, which can lead to an uneven surface profile.
Does the “white rag test” really work for rust? It is one of the most effective low-tech diagnostic tools. After your final solvent wipe, use a clean white cloth. If any color (orange, brown, or black) appears on the rag, there are still loose oxides or contaminants on the surface. A truly clean surface will leave the rag white.
How does rust affect the grounding of my welding machine? Rust is an insulator. If your ground clamp is attached to a rusted area, it creates high electrical resistance. This leads to a “cold” arc, poor penetration, and can even damage your welder’s internal components due to voltage spikes. Always grind a bright spot for your ground clamp.
Can I use a pressure washer to remove heavy rust? A pressure washer will remove loose dirt and some flaky rust, but it won’t touch the tight scale or the deep-seated oxides. Furthermore, it introduces a massive amount of moisture into the porous rust, which can take a long time to dry out. Mechanical abrasion is much more effective for welding prep.
(This article was written by one of our staff writers, Paul Whitaker. Visit our Meet the Team page to learn more about the author and their expertise.)