How to Sharpen Metal Cutting Drill Bits by Hand (DIY Guide)
In my sixteen years of running a metalworking business, I have learned that the difference between a profitable shop and one that barely breaks even often comes down to the smallest details. When I first started, I viewed drill bits as disposable items. I would buy them in bulk, use them until they smoked, and toss them in the scrap bin. It took a particularly lean year for me to realize that I was throwing away hundreds of dollars in potential profit every month.
Managing a side-hustle or a small fabrication shop requires a shift in mindset. You are no longer just a maker; you are a technician and a cost accountant. Every time a bit goes dull and you reach for a new one, you are chipping away at your hourly shop rate. Mastering the ability to manually restore a cutting edge on a high-speed steel (HSS) bit is more than a handy skill. it is a foundational strategy for reducing your consumable burden and improving your project ROI.
Understanding Your True Shop Rate and Overhead Costs
A shop rate is the total dollar amount you must charge per hour to cover all expenses and generate a desired profit. This figure includes both direct labor and the indirect costs of keeping your doors open.
When I talk to shop owners about pricing, they often pick a number out of the air, like $50 or $75 an hour. However, without a formal calculation, you are flying blind. To find your true rate, you must add your monthly rent, utilities, insurance, and software subscriptions. Then, you divide that by the number of billable hours you actually work. If your overhead is $1,000 a month and you only work 20 billable hours on your side-hustle, your overhead cost is already $50 per hour before you even pay yourself.
Allocating Overhead to Small Shop Operations
Overhead allocation is the process of spreading your fixed business costs across the specific jobs you perform for clients. This ensures that every project contributes its fair share toward paying for the roof over your head.
In a small shop, overhead often includes items you might overlook. For example, the electricity used by your bench grinder and the water used for cooling tools are part of this pool. I recommend using a simple percentage-based allocation. If your fixed costs are 30% of your total monthly expenses, you should add a 30% “overhead burden” to your labor and material costs on every quote. This protects your margins when unexpected costs arise.
Mapping Machinery Amortization for Tool Maintenance
Amortization is an accounting method used to spread the cost of a physical asset over its useful life. It helps you understand how much a piece of equipment costs you every time you turn it on.
Take a standard bench grinder used for manual tool restoration. If the grinder costs $200 and you expect it to last five years, the annual cost is $40. If you use it for 100 hours a year, the machine cost is $0.40 per hour. While this seems small, tracking these numbers across all your equipment—welders, saws, and presses—allows you to set a realistic equipment replacement fund. You aren’t just spending money; you are managing a rotating investment.
| Equipment Item | Purchase Price | Expected Life (Years) | Annual Depreciation |
|---|---|---|---|
| Bench Grinder | $180 | 8 | $22.50 |
| Drill Press | $1,200 | 10 | $120.00 |
| MIG Welder | $2,500 | 7 | $357.14 |
| Hand Tools | $500 | 3 | $166.67 |
Building a Custom Job Quote with Consumable Tracking
A job quote is a formal estimate provided to a client that breaks down the costs of materials, labor, and shop fees. It serves as a financial roadmap for the project.
One of the biggest “leaks” in fabrication job costing is failing to track consumables. These are the items that get used up during a job, such as welding gas, sanding discs, and drill bits. If a project requires drilling 50 holes in thick plate, you will likely dull several bits. If you don’t account for the time spent restoring those edges or the cost of replacing the bits, your profit disappears. I always include a 5% to 10% “consumable burden” on my quotes to cover these hidden expenses.
Tracking Consumable Usage in Metalworking Projects
Consumable tracking involves recording the quantity and cost of items consumed during a specific fabrication task. This data allows for more accurate bidding on future projects.
I suggest keeping a simple logbook or spreadsheet near your workbench. Mark down how many holes a standard HSS bit can drill in specific materials like A36 steel before it needs attention. Over time, you will see patterns. If you know a $10 bit lasts for 20 holes and takes five minutes to manually sharpen, you can price that into your labor. This level of detail prevents you from underestimating the “wear and tear” costs of a job.
Why Hidden Consumables Bleed Small Shop Profits
Hidden consumables are the small, often forgotten items like shop rags, cutting fluids, and the wear on your grinding wheels. While they seem cheap individually, their cumulative cost can be significant.
In my experience, many side-hustlers lose money because they only charge for the “big” materials like the steel tubing or plate. They ignore the fact that they used half a bottle of cutting oil and dulled three bits. By learning to restore your own tools by hand, you turn a recurring expense into a one-time investment of time. This increases your “in-pocket” profit because you aren’t sending that money back to the hardware store for replacements.
Manual Edge Restoration Techniques for HSS Bits
Manual edge restoration is the process of using a bench grinder or file to reshape the cutting surfaces of a tool without the help of mechanical jigs. It relies on hand-eye coordination and an understanding of tool geometry.
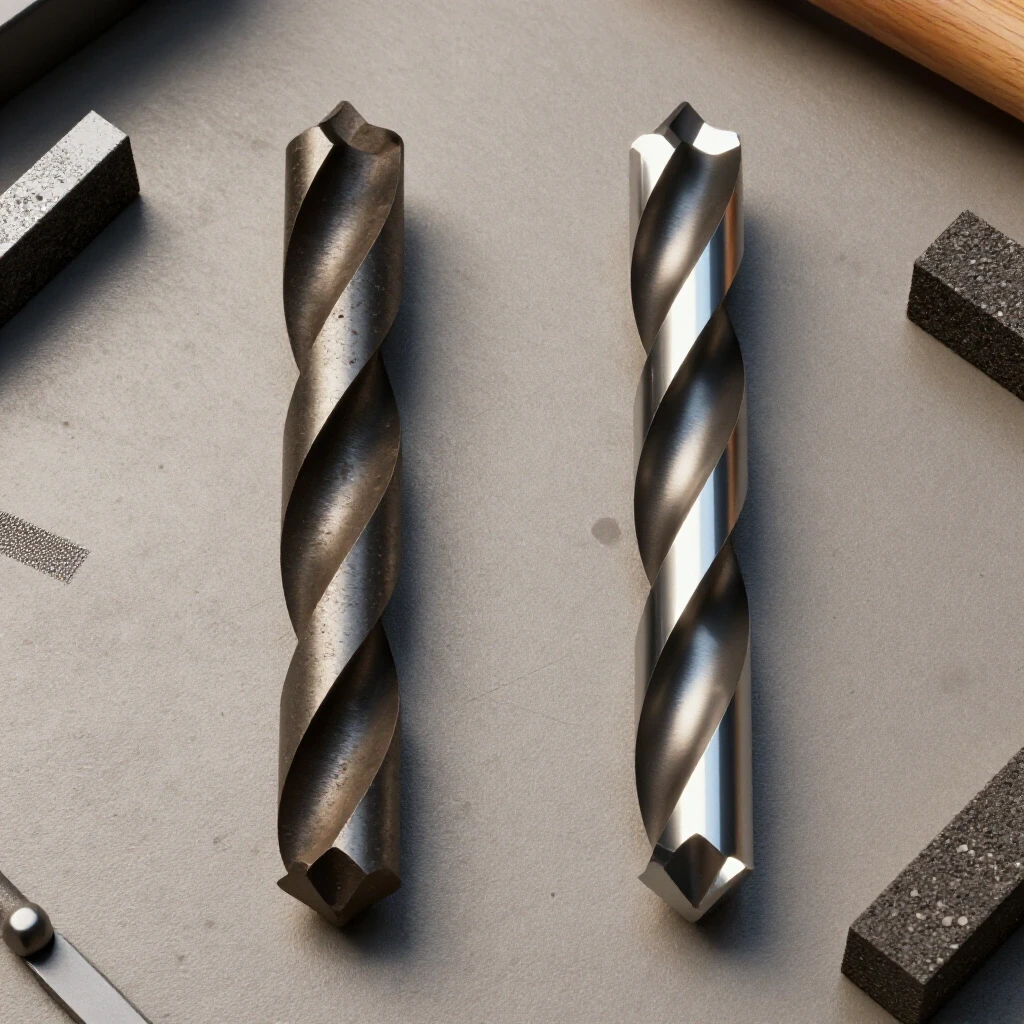
To begin, you need a steady hand and a clean grinding wheel. The goal is to remove just enough material to reach fresh, sharp steel while maintaining the original factory angles. For most metalwork, we use a 118-degree point angle. This angle provides a good balance between cutting speed and tool durability. I always keep a small protractor or a dedicated drill gauge nearby to verify my progress as I work.
Maintaining the 118-Degree Point Angle
The point angle is the angle formed by the two cutting edges at the very tip of the bit. It determines how the bit centers itself and how it distributes the cutting force.
When you press the bit against the stone, you must ensure that both sides, or “flutes,” are ground to the same length and angle. If one side is longer or steeper, the bit will wobble, creating an oversized hole and putting uneven stress on your drill press. I use a “touch and check” method. I grind for two seconds, rotate the bit 180 degrees, grind the other side for two seconds, and then check the symmetry against my gauge. Consistency is more important than speed.
Creating Proper Lip Relief and Clearance
Lip relief, also known as heel clearance, is the downward slope behind the cutting edge. It allows the cutting edge to bite into the metal without the rest of the bit rubbing against the work surface.
Without proper relief, the bit will simply spin on top of the metal, creating friction and heat but no hole. To achieve this by hand, I use a slight “drop” motion. As the cutting edge touches the wheel, I slowly lower the back of the bit. This creates a curved surface that falls away from the edge. You only need about 12 to 15 degrees of relief. Too much will make the edge weak and prone to chipping; too little will cause the bit to glow red from friction.
Thermal Management During the Grinding Process
Thermal management refers to the practice of controlling the temperature of the tool steel during sharpening to prevent it from losing its “temper” or hardness.
If the tip of your bit turns blue or straw-colored while you are grinding, you have overheated the steel. This softens the metal, meaning it will go dull almost instantly the next time you use it. To prevent this, keep a container of water right next to your grinder. Dip the bit into the water every few seconds. If the bit feels hot to your bare hand, it is time to cool it down. This simple step preserves the structural integrity of the HSS and ensures the new edge stays sharp.
- Always wear eye protection and a face shield when using a bench grinder.
- Ensure the tool rest is adjusted to within 1/8 inch of the wheel.
- Use a light touch; let the abrasive do the work rather than forcing the bit.
- Frequently check the “web” or the center point to ensure it remains centered.
Sourcing Strategies and Material Markups
Material sourcing is the strategic process of finding and purchasing raw materials and tools at the best possible price to maximize business margins.
For a small shop, buying bits one at a time is a financial mistake. I recommend buying HSS bits in “jobber” lengths in bulk packs of 10 or 12. Even though you are learning to restore them, bits eventually get too short to use or break. By sourcing in bulk and then maintaining those tools manually, you drive your cost per hole down to nearly zero. This gives you a competitive advantage when bidding against shops that have higher consumable overhead.
Formulating a Real Material Markup
A material markup is a percentage added to the cost of raw materials to cover the time spent sourcing, handling, and storing them. It also provides a buffer for waste.
I typically apply a 20% to 30% markup on all materials and consumables. If I buy a pack of bits for $50, I charge the client based on a $65 value. This isn’t just about profit; it covers the time I spent researching the best supplier and the space they take up in my cabinet. When you restore a bit by hand, you are essentially “creating” value. You can still charge a small consumable fee on your invoice, which now goes directly toward your labor rather than a replacement tool.
| Project Phase | Estimated Cost | Markup (25%) | Total Charged |
|---|---|---|---|
| Raw Steel Stock | $400.00 | $100.00 | $500.00 |
| Fasteners/Hardware | $45.00 | $11.25 | $56.25 |
| Consumables (Bits/Gas) | $30.00 | $7.50 | $37.50 |
| Total Material | $475.00 | $118.75 | $593.75 |
Analyzing Post-Job Profits and Efficiency
Post-job profit analysis is the process of reviewing a completed project to see if the actual costs matched the estimated costs. This is where you learn how to improve your business.
After a big project, I sit down and look at my “actuals.” How many bits did I have to fix? How long did it take me? If I spent 30 minutes at the grinder but saved $60 in new tool costs, my “maintenance labor” was worth $120 an hour. That is a highly efficient use of time. If you find that you are spending too much time fixing tools, it might be a sign that you are pushing your bits too hard or using the wrong cutting speeds.
Identifying Low-Margin Traps in Fabrication
A low-margin trap is a type of job that looks profitable on paper but ends up costing the shop money due to unforeseen complexities or high consumable use.
I once took a job drilling hundreds of holes in hardened stainless steel. I didn’t factor in the frequency of tool maintenance. I spent more time at the bench grinder than I did at the drill press. Because I had quoted a flat rate, my hourly earnings dropped to below minimum wage. By tracking your restoration time and bit lifespan, you can identify these traps early. Now, I charge a “tooling surcharge” for difficult materials to ensure my time is always compensated.
Digital Tools for Shop Management and Estimation
Modern shop management involves using software to track time, expenses, and client communications. These tools replace the “napkin math” that often leads to financial loss.
- Quickbooks or FreshBooks: These are excellent for tracking overhead and generating professional invoices that include your material markups.
- Excel or Google Sheets: I use custom spreadsheets to calculate my shop rate and track the ROI of my equipment upgrades.
- Toggl Track: A simple, free app that allows you to time how long you spend on specific tasks, including tool maintenance.
- Wave Accounting: A great free option for side-hustlers to keep business expenses separate from personal finances for tax purposes.
Practical Benchmarks for Shop Success
To keep your shop healthy, you need targets to aim for. In my experience, a successful small metal shop should aim for a gross profit margin of at least 40% on fabrication jobs. Your consumable costs should ideally stay below 5% of your total project cost. If you are manually restoring your tools, you should be able to get at least 15 to 20 “lives” out of a single HSS bit before it becomes too short for the flutes to clear chips effectively.
By focusing on these metrics, you move from being a hobbyist who happens to get paid to a business owner who understands the levers of profitability. The time you spend at the bench grinder isn’t just about a sharp edge; it is about protecting your bottom line and ensuring your side-hustle can eventually grow into a full-time career.
Next Steps for Improving Workshop Economics
The first step toward better shop economics is to stop treating your tools as disposable. Spend an hour this weekend practicing your hand-grinding technique on a few old, dull bits. Once you feel confident, start a “Consumable Log” for your next three jobs. Note every time you sharpen a bit and how long it takes. At the end of the month, calculate how much money you kept in your pocket by not buying replacements. This data will give you the confidence to raise your rates and bid on more complex, profitable work.
Frequently Asked Questions
What is the most common mistake when restoring an edge by hand?
The most frequent error is neglecting symmetry. If one cutting lip is longer than the other, the bit will “walk” and create an imbalanced hole. This also puts excessive side-load on your drill press bearings. Always use a gauge or a protractor to ensure both sides are identical in length and angle.
Why does my drill bit stop cutting even though it looks sharp?
This usually happens because there is no lip relief. If the metal behind the cutting edge is higher than the edge itself, the bit cannot penetrate the material. You must grind a downward slope starting from the cutting edge toward the back of the flute to allow for clearance.
Can I use a hand file instead of a bench grinder?
Yes, for HSS bits, a high-quality mill file can work, though it is much slower. This is often a good way for beginners to learn the geometry because you are less likely to remove too much metal or overheat the steel. However, for a production environment, a bench grinder is the standard tool.
How do I know if I have ruined the temper of the steel?
Look for color changes. If the steel turns blue, purple, or dark straw, it has reached a temperature that alters its molecular structure. This makes the steel soft. If this happens, you must grind past the discolored area until you reach “clean” steel that has not been compromised by heat.
What is the ideal angle for general-purpose metal drilling?
A 118-degree point angle is the standard for most mild steels and common workshop metals. It is steep enough to center easily but flat enough to provide a strong cutting edge. For very hard materials, some professionals use 135 degrees, but 118 is the best starting point for hand restoration.
How much money can manual tool maintenance really save a small shop?
It depends on your volume, but for a typical side-hustle, it can save $200 to $500 per year in replacement costs. More importantly, it saves “down-time” spent driving to the store. In a professional shop, time is your most expensive commodity.
How do I factor the time spent sharpening into a job bid?
I treat tool maintenance as part of the “Consumable Burden.” Instead of billing for it separately, I add a 5-10% markup to the labor or material cost. This ensures I am getting paid for the time I spend keeping my equipment in top shape.
Is it worth sharpening small bits, like 1/8 inch or smaller?
Generally, no. Bits smaller than 1/8 inch are very difficult to see and handle by hand. The time it takes to restore them usually exceeds the cost of a new bit. I focus my manual restoration efforts on bits 1/4 inch and larger, where the cost savings are more significant.
What kind of grinding wheel is best for HSS bits?
A fine-grit aluminum oxide wheel (usually white or grey) is ideal. Avoid coarse wheels, as they remove too much material too quickly and generate excessive heat. A 60 or 80-grit wheel provides a smooth finish that requires very little “honing” afterward.
Should I use a cooling lubricant while drilling to save the edge?
Absolutely. Using a dedicated cutting fluid or even a light 3-in-1 oil reduces friction and carries heat away from the tip. This extends the time between sharpenings significantly. In my shop, I consider cutting fluid a mandatory consumable for any hole over 1/4 inch.
(This article was written by one of our staff writers, Michael Hargrove. Visit our Meet the Team page to learn more about the author and their expertise.)