How to Calibrate Precision Measuring Tools Affordably (Fix)
I remember standing in my first shop, staring at a pile of scrapped aluminum spacers that were all .004 inches undersized. I had spent six hours machining them for a local client, and at my then-rate of $65 an hour, that mistake cost me $390 in labor plus $120 in material. The culprit wasn’t my technique; it was a pair of digital calipers that had drifted after being dropped and never checked. For a side-hustle metalworker, those kinds of errors don’t just hurt your pride—they eat the profit you need to keep the lights on and the machines running.
Establishing a Baseline for Workshop Accuracy and Profit
Establishing a baseline for workshop accuracy and profit refers to the process of ensuring your instruments provide reliable data. This foundation prevents costly rework and material waste. By maintaining tool precision in-house, you protect your hourly shop rate and ensure that your quoted dimensions match the final physical parts delivered to customers.
Measurement errors are silent killers of small shop profitability. When you are balancing a full-time job with a side-hustle, your time is your most valuable asset. If you spend your Saturday fixing parts that didn’t fit because your tools were lying to you, your effective hourly rate plummets. I have found that spending thirty minutes a month on instrument verification can save dozens of hours in rework.
In my 16 years of fabrication, I have seen shops go under because they couldn’t hit tolerances consistently. They would bid on jobs, fail to meet specs, and then lose the client or spend their entire profit margin on “make-good” work. A reliable shop isn’t just one with expensive machines; it is one where the owner knows exactly how their tools are performing.
Calculating Your True Shop Rate and Overhead Burden
Calculating your true shop rate involves totaling all annual expenses, including rent, utilities, insurance, and equipment depreciation, then dividing by your billable hours. This ensures every minute spent in the shop contributes to the business’s survival. Understanding this number allows you to see how measurement errors directly impact your bottom line.
Most side-hustlers guess their shop rate based on what the guy down the street charges. This is a mistake that leads to “low-margin traps.” If you charge $50 an hour but your overhead is $40, you are only making $10 an hour for your skill. You must factor in the cost of electricity, the wear and tear on your bandsaw, and the depreciation of your precision tools.
I use a simple formula: (Total Annual Overhead + Desired Annual Profit) / Billable Hours = Shop Rate. If your overhead is $5,000 a year and you want to make $10,000 in profit working 10 hours a week (500 hours a year), your rate must be at least $30 an hour. However, this doesn’t account for “unbillable” time spent on maintenance or tool adjustments, which is why most successful small shops land between $65 and $120 per hour.
Mapping Machinery Amortization and Tool ROI
Mapping machinery amortization and tool ROI is the practice of spreading the cost of a piece of equipment over its useful life. This helps you determine if an upgrade will actually pay for itself through increased speed or accuracy. By tracking how a tool performs over time, you can justify the investment based on documented productivity gains.
When I consider buying a new tool, I look at the payback period. If a $500 micrometer set saves me two hours of rework a month at an $85 shop rate, it pays for itself in about three months. This is a much better approach than buying tools just because they look nice in the drawer.
| Tool Investment | Purchase Cost | Estimated Life (Years) | Monthly Amortization | ROI (Hours Saved/Mo) |
|---|---|---|---|---|
| Used 0-6″ Mic Set | $150 | 10 | $1.25 | 1.0 |
| Budget Gauge Blocks | $85 | 15 | $0.47 | 0.5 |
| Digital Height Gauge | $220 | 5 | $3.66 | 2.0 |
| Dial Indicator Set | $65 | 5 | $1.08 | 1.5 |
Implementing Low-Cost Verification Standards in a Small Shop
Implementing low-cost verification standards involves using accessible reference objects to check the accuracy of your measuring tools. This process does not require expensive laboratory certification. Instead, it relies on repeatable techniques and affordable masters to ensure your shop stays within acceptable tolerances for the work you perform.
You do not need a climate-controlled metrology lab to be accurate. For most fabrication and general machining, being within .001 inches is the gold standard. You can achieve this by creating a “master reference” system in your shop using a few key items that don’t cost a fortune.
The secret to affordable instrument checking is consistency. I keep a small wooden box with my “master” references, and I never use them for actual layout or fabrication. They are only for checking the tools that do the work. This keeps them pristine and ensures they remain a reliable source of truth for years.
Using Budget Gauge Blocks as Your Shop Master
Using budget gauge blocks as your shop master provides a physical standard for checking calipers and micrometers. These blocks are manufactured to specific thicknesses and are much more reliable than using a random piece of cold-rolled steel. A Grade B set is usually sufficient for small shops and side-hustles.
You can often find imported Grade B gauge block sets for under $100. While they aren’t certified for aerospace work, they are perfect for a side-hustle metalworking business. When you receive them, check them against each other or a known high-quality tool to ensure they are consistent.
To use them, simply select a block that matches a common dimension you work with, such as 1.000 inch. Clean the block and your tool thoroughly. If your micrometer reads 1.000 on that block, you know your tool is zeroed correctly at that range. This is much more accurate than just checking the tool at zero, as errors often hide in the middle of the tool’s travel.
Leveraging Steel Parallels and Master Lengths
Leveraging steel parallels and master lengths involves using precision-ground workshop accessories as secondary reference points. While not as precise as gauge blocks, high-quality parallels are often ground to within .0005 inches. They serve as excellent, multi-purpose tools for checking larger spans or verifying the squareness of your setups.
In my shop, I use a pair of 6-inch parallels to check my larger calipers. If I place two 1-inch gauge blocks between the parallels, I can create a custom “master” for checking a 2-inch gap. This kind of creative thinking allows you to verify your tools across their entire range without buying a massive set of expensive standards.
- Clean the parallels with a lint-free cloth and a drop of light oil.
- Check for burrs or nicks that could throw off your measurement.
- Store them in a dedicated case to prevent damage from other tools.
- Verify their height against a known gauge block to confirm their accuracy.
Practical Steps for Verifying Handheld Measuring Instruments
Practical steps for verifying handheld measuring instruments include cleaning, zeroing, and testing tools against known standards. These actions ensure that the measurements you take during a job are correct. By following a standard procedure, you eliminate variables like dirt or mechanical play that can lead to inaccurate readings.
Most measurement errors are caused by dirt, not mechanical failure. A single speck of dust on a micrometer anvil can throw off a reading by .001 inches. Before you ever adjust a tool, you must ensure it is surgically clean. I use a simple piece of clean notebook paper to “lap” the anvils of my micrometers.
Once clean, the verification process should be rhythmic. I check my tools at the start of every job. If I am bidding on a high-precision project, I check them twice. This habit builds confidence and ensures that when I tell a customer a part is “on the money,” I have the data to back it up.
Maintaining Micrometer Accuracy Without Professional Lab Fees
Maintaining micrometer accuracy without professional lab fees is done by using the included adjustment wrench and a standard reference rod. Most micrometers come with a small rod of a specific length. By checking the tool against this rod and adjusting the barrel, you can keep the tool accurate for the cost of your time.
If your micrometer is off, don’t panic. Most have a small hole in the barrel where a spanner wrench fits. You can gently rotate the barrel to align the zero mark. If the error is large, check the “thimble” adjustment. This usually involves loosening a cap and resetting the internal mechanism.
- Always check at the specific temperature where you will be working.
- Use a light touch; over-tightening a micrometer can spring the frame.
- Check the tool at 25%, 50%, and 75% of its range using gauge blocks.
- Record the deviation in a small logbook kept in the tool’s case.
Correcting Caliper Drift and Jaw Alignment
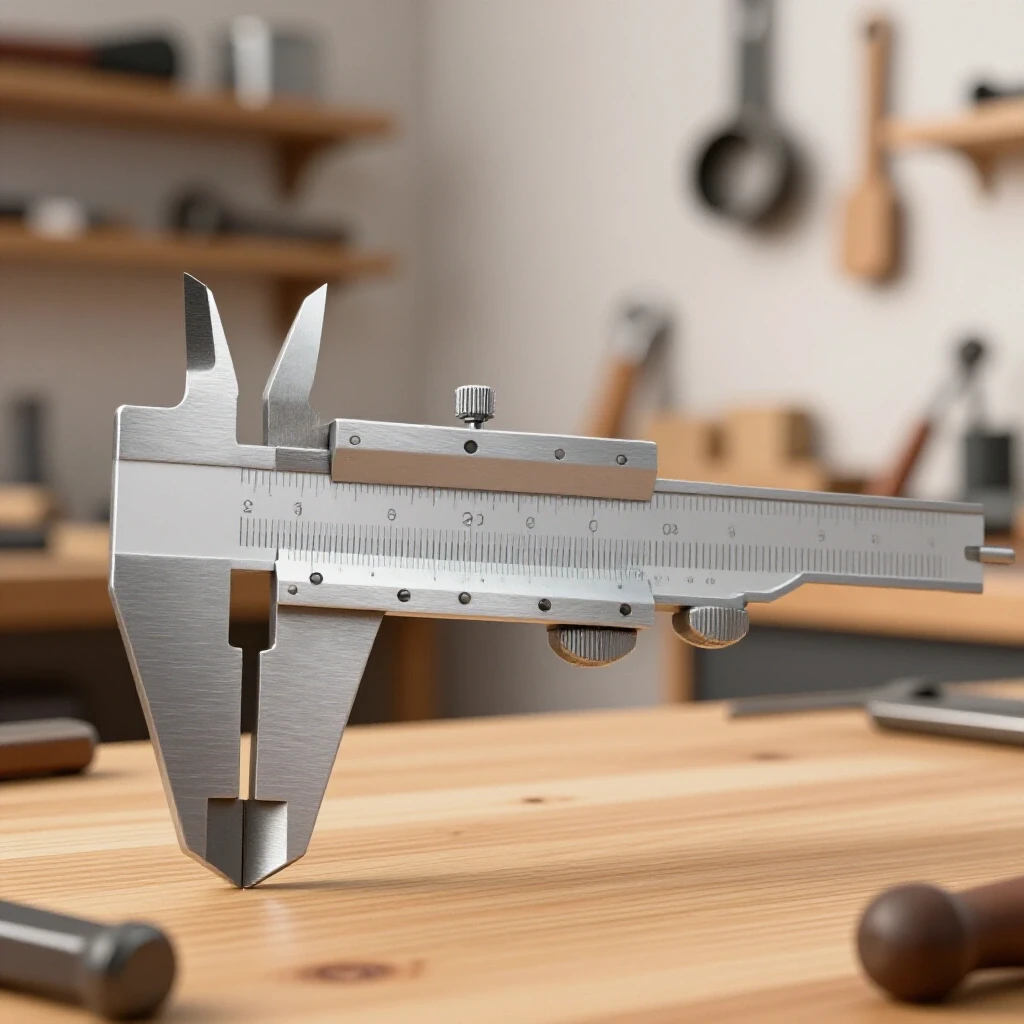
Correcting caliper drift and jaw alignment involves checking for light gaps between the jaws and ensuring the digital or dial readout returns to zero consistently. Calipers are the workhorses of the shop, but they are also the most prone to wear and misalignment due to their sliding nature.
Hold your calipers up to a bright light with the jaws closed. If you see light peeking through, the jaws are worn or have a burr. You can often “fix” this by very lightly stoning the high spots with a fine Arkansas stone. Be extremely careful, as removing too much material will ruin the tool.
For digital calipers, “drift” often happens because of a low battery or oil on the encoder scale. Clean the scale with isopropyl alcohol and replace the battery before assuming the tool is broken. If the tool still won’t repeat, it may be time to retire it to “roughing” duties and buy a new one for finish work.
The Hidden Costs of Measurement Errors in Fabrication Bidding
The hidden costs of measurement errors in fabrication bidding include the price of wasted materials, the loss of billable hours, and the damage to your professional reputation. When you provide an inaccurate quote because you mismeasured a sample part, you are essentially paying the customer to let you work for them.
I once quoted a job for 50 stainless steel pins. I measured the customer’s sample with a set of calipers that were worn at the tips. I was off by .010 inches. I machined all 50 pins, only to have the customer call and say they wouldn’t fit the mating part. I had to buy new material and redo the work for free. My “profit” on that job was negative $200.
This is why fabrication job costing must include a “buffer” for measurement and setup. Even with calibrated tools, things go wrong. A 10% to 15% buffer on your labor estimate can protect you from these small errors and keep your business solvent during the learning curve of a side-hustle.
Tracking Consumables and Tool Maintenance for Better ROI
Tracking consumables and tool maintenance for better ROI means monitoring the use of items like cleaning supplies, batteries, and oils used to keep tools in top shape. By knowing these costs, you can include a “consumable burden” in your shop rate, ensuring that the business pays for its own upkeep.
I track every battery, every can of WD-40, and every lint-free rag I use. It sounds tedious, but these costs add up. In a typical year, a small shop might spend $200 on these “invisible” items. If you don’t track them, that money comes straight out of your pocket.
| Consumable Item | Annual Usage | Unit Cost | Total Annual Cost |
|---|---|---|---|
| Isopropyl Alcohol | 2 Bottles | $4.00 | $8.00 |
| Lint-Free Wipes | 1 Box | $15.00 | $15.00 |
| Button Batteries | 5 Pack | $10.00 | $10.00 |
| Light Machine Oil | 1 Can | $12.00 | $12.00 |
| Total Burden | $45.00 |
Why Accurate Quotes Depend on Reliable Instruments
Why accurate quotes depend on reliable instruments is rooted in the relationship between tolerance and time. Tighter tolerances require more time, better tools, and more frequent checks. If your tools are unreliable, you might bid a “tight” job as if it were a “loose” one, leading to a massive underestimation of the labor required.
When a client asks for a part with a +/- .001 tolerance, I know I need to spend more time checking my tools and my setups. I charge a premium for this. If I didn’t trust my instruments, I wouldn’t know if I could even hit that spec, which makes bidding a gamble rather than a business decision.
- Review the drawing or sample for the tightest tolerance.
- Verify the tool needed for that measurement against your shop master.
- Add 20% more labor time for any measurement tighter than .002 inches.
- Include the cost of any specialized verification (like a new gauge block) in the quote.
Analyzing Post-Job Profits and Tool Performance
Analyzing post-job profits and tool performance involves looking back at a completed project to see if you actually made money. This “post-mortem” helps you identify where measurements went wrong or where a specific tool slowed you down. It is the best way to refine your small metal shop pricing over time.
After every major job, I sit down with my time logs and material receipts. I look at the “estimated” versus “actual” costs. If I consistently go over on time, I look for the reason. Often, it’s because I spent too much time “fiddling” with an old tool that should have been adjusted or replaced months ago.
This data-driven approach removes the emotion from business decisions. If a $40 used micrometer is costing you $100 a month in extra measurement time, it is not a “bargain.” It is a liability. Replacing it with a reliable tool is a smart financial move that increases your long-term ROI.
Building a Custom Job Quote Checklist
Building a custom job quote checklist ensures that you don’t miss any costs when talking to a customer. This list should include material, labor, consumables, and a “precision factor” for difficult measurements. Having a standardized process makes your side-hustle feel like a professional business and protects your margins.
- Material cost (including shipping and 10% waste).
- Total estimated labor hours at your full shop rate.
- Consumable burden (welding gas, sandpaper, tool cleaning).
- Precision requirements (does this job require extra tool verification?).
- Overhead allocation (a portion of your monthly shop rent/utilities).
- Profit margin (usually 10-20% on top of all costs).
Sourcing Materials and Tools for Maximum Efficiency
Sourcing materials and tools for maximum efficiency involves finding reliable suppliers who offer fair prices and consistent quality. For the side-hustler, this often means balancing the convenience of a local hardware store with the cost savings of an industrial supplier. Buying in bulk or finding “drops” (remnants) can significantly lower your material costs.
I rarely buy new tools at full retail price. I look for high-quality used brands like Starrett, Mitutoyo, or Brown & Sharpe at estate sales or online auctions. These tools were built to be adjusted. A used $50 micrometer that you have verified against a gauge block is often better than a brand-new $30 “no-name” tool from a big-box store.
For metal, I establish relationships with local scrap yards and small machine shops. They often have “drops” that are too small for them but perfect for my side-hustle projects. By paying 50 cents on the dollar for material, I can either lower my bid to win the job or keep the extra profit for myself.
Practical Next Steps for the Small Shop Owner
To optimize your shop’s financial health, start by creating a tool verification log today. You don’t need fancy software; a simple notebook will do. List every precision tool you own and the date you last checked it against a known standard. This simple act of tracking will change how you view your equipment and your work.
Next, invest in a basic set of Grade B gauge blocks. This is the single most important “fix” for a shop on a budget. It transforms your measurements from “guesses” to “documented facts.” Once you have a master reference, you can stop worrying about your tools and start focusing on growing your business.
Finally, take an honest look at your shop rate. If you haven’t raised your prices in two years, you are likely losing money to inflation and hidden overhead. Use the formulas provided to recalculate your rate and ensure that every hour you spend in the shop is moving you closer to your financial goals. Precision in measurement leads to precision in business.
Frequently Asked Questions
How often should I check my measuring tools in a part-time shop? For a side-hustle, I recommend a “Tiered Check” system. Check your calipers and micrometers against a zero point every time you use them. Do a full verification against gauge blocks once a month or at the start of any high-value project. This ensures drift is caught before it ruins a part.
Are cheap digital calipers worth using for paid fabrication work? They can be, but you must verify them more frequently. Cheap electronics are prone to “jumping” or losing their zero if the battery is low. I use them for rough layout, but I always switch to a mechanical micrometer or a high-quality dial caliper for final dimensions.
What is the best way to clean tools without damaging them? Use 91% isopropyl alcohol and a lint-free microfiber cloth. For micrometer anvils, close the tool lightly on a clean piece of white paper and pull the paper through. This removes oils and microscopic dust that can throw off your readings. Avoid using harsh shop degreasers.
Can I use a high-quality bolt as a reference master? No. Even “high-quality” hardware has tolerances that are far too wide for tool verification. A standard bolt might vary by .005 inches or more. Always use a dedicated reference like a gauge block or a precision-ground parallel that has a known, documented size.
What should I do if my tool is consistently off by the same amount? This is called a “linear error.” If it’s a digital tool, you can often just zero it at that point. For mechanical tools, you should use the adjustment wrench to reset the barrel. If the error changes at different points in the tool’s travel, the tool is likely worn and should be replaced.
How do I factor the cost of tool maintenance into my job bids? Include it in your “overhead burden.” Add up what you spend on batteries, cleaning supplies, and the time you spend verifying tools each year. Divide that by your total billable hours and add that small amount (usually $1-$3) to your hourly shop rate.
Is it better to buy a new budget tool or a used premium tool? In my experience, a used premium tool (like a Starrett) is the better investment. These tools were designed to be serviced and adjusted. A budget tool is often “disposable,” and once it loses accuracy, there is no way to mechanically fix it.
What is the “Consumable Burden Factor” in metalworking? This is a percentage added to your material cost to cover items that are used up but not easily measured, like welding wire, shielding gas, and grinding disks. Most small shops use a factor of 10% to 15% of the raw material cost to ensure these expenses are covered.
How do I handle a customer who says my shop rate is too high? Show them your process. Explain that your rate includes the use of calibrated instruments, professional-grade consumables, and a guarantee of accuracy. Most customers are willing to pay more for the “peace of mind” that their parts will fit the first time.
What is the most common mistake in small shop job costing? Underestimating “non-cutting” time. This includes material handling, tool setup, measuring, and cleaning the shop. If a job takes two hours of actual machining, it likely takes four hours of total shop time. If you only bill for two, you are cutting your profit in half.
How can I track my shop expenses without expensive accounting software? A simple spreadsheet is all you need. Create columns for the date, vendor, item, and cost. Categorize them into “Materials,” “Consumables,” and “Equipment.” At the end of the month, you can see exactly where your money is going and adjust your quotes accordingly.
Does temperature really affect my measurements in a garage shop? Yes, significantly. Steel expands and contracts with heat. If you measure a part in a 40-degree garage and your customer checks it in a 70-degree office, the dimensions will be different. Try to verify your tools and measure your parts at a consistent “room temperature” whenever possible.
(This article was written by one of our staff writers, Michael Hargrove. Visit our Meet the Team page to learn more about the author and their expertise.)