How to Store and Sort MIG Welding Tips and Nozzles (Guide)
I have spent over a decade in the shop, and if there is one thing I have learned while building custom chassis and utility trailers, it is that the smallest parts often cause the biggest headaches. You are in the middle of a complex frame layout, your clamps are set, and your measurements are dialed in to within 1/16th of an inch. Suddenly, you realize your contact tip is shot. You go to your workbench, start digging through a junk drawer filled with loose bolts and grinding discs, and five minutes later, you are still searching for a .030 tip. That break in focus is where mistakes happen. When you lose your “flow,” you start missing layout marks or rushing your tack welds.
In my early years as a prototype technician, I watched a carefully planned workbench frame pull out of square because I spent twenty minutes hunting for a fresh gas nozzle. By the time I found it, I was frustrated and rushed the next sequence. Proper organization of these small copper and brass components is not just about being tidy; it is about maintaining the precision of your fabrication project. A well-sorted system ensures that the right parts are always at arm’s length, clean, and ready for use.
The High Cost of Disorganized Workshop Small Parts
This refers to the hidden expenses and time delays that occur when small fabrication components are not properly managed.
When you are managing a custom fabrication project, time is your most valuable resource. If you spend ten minutes looking for a specific contact tip three times a day, you lose thirty minutes of build time. Over a month of weekend projects, that is four hours wasted. Beyond time, there is a financial cost. Copper tips and brass nozzles are prone to oxidation and physical damage when left rolling around in a drawer. If the threads get nicked or the orifice gets clogged with shop dust, the part is essentially useless.
I track every cent in my build logs. I found that before I implemented a dedicated storage system, I was buying 20% more consumables than I actually needed. I would buy a new pack because I couldn’t find the ones I already had. By creating a structured sorting method, I reduced my “lost part” rate to nearly zero. This allows me to allocate those funds toward better layout tools or higher-quality steel for my next trailer build.
Sorting Strategies for Contact Tips and Nozzles
This involves the methodical grouping of welding components based on their physical dimensions and intended use.
Sorting is the foundation of any storage system. You cannot just throw everything into one big bin and call it organized. I categorize my inventory based on three main factors: wire diameter, thread size, and nozzle shape. In a typical garage shop, you likely use a few common wire sizes, such as .023, .030, and .035. Mixing these up is a recipe for feed issues and project delays.
- Wire Diameter: Group contact tips by the specific wire size they are machined for.
- Thread Pitch: Ensure tips with different thread types (like M6 vs. 1/4-20) are kept in separate compartments.
- Nozzle Style: Separate standard nozzles from tapered or long-reach versions used for tight corner joints.
| Consumable Type | Sorting Priority | Storage Method |
|---|---|---|
| Contact Tips | Wire Size (.030, .035, etc.) | Divided clear bins or labeled tubes |
| Gas Nozzles | Shape (Standard, Tapered, Spot) | Vertical pegboard or deep bins |
| Diffusers | Model Compatibility | Small labeled drawers |
| Insulation Sleeves | Material Type | Original moisture-sealed bags |
DIY Storage Hardware and Workshop Layout Fixtures
This describes the physical containers and mounting systems used to hold and display small fabrication parts.
You do not need to spend a fortune on professional storage cabinets. In fact, some of the best systems I have used are DIY fixtures made from scrap materials found around the shop. The goal is visibility and accessibility. If you have to open three drawers to see what you have, the system is too slow. I prefer “open-face” storage where I can see my inventory levels at a glance.
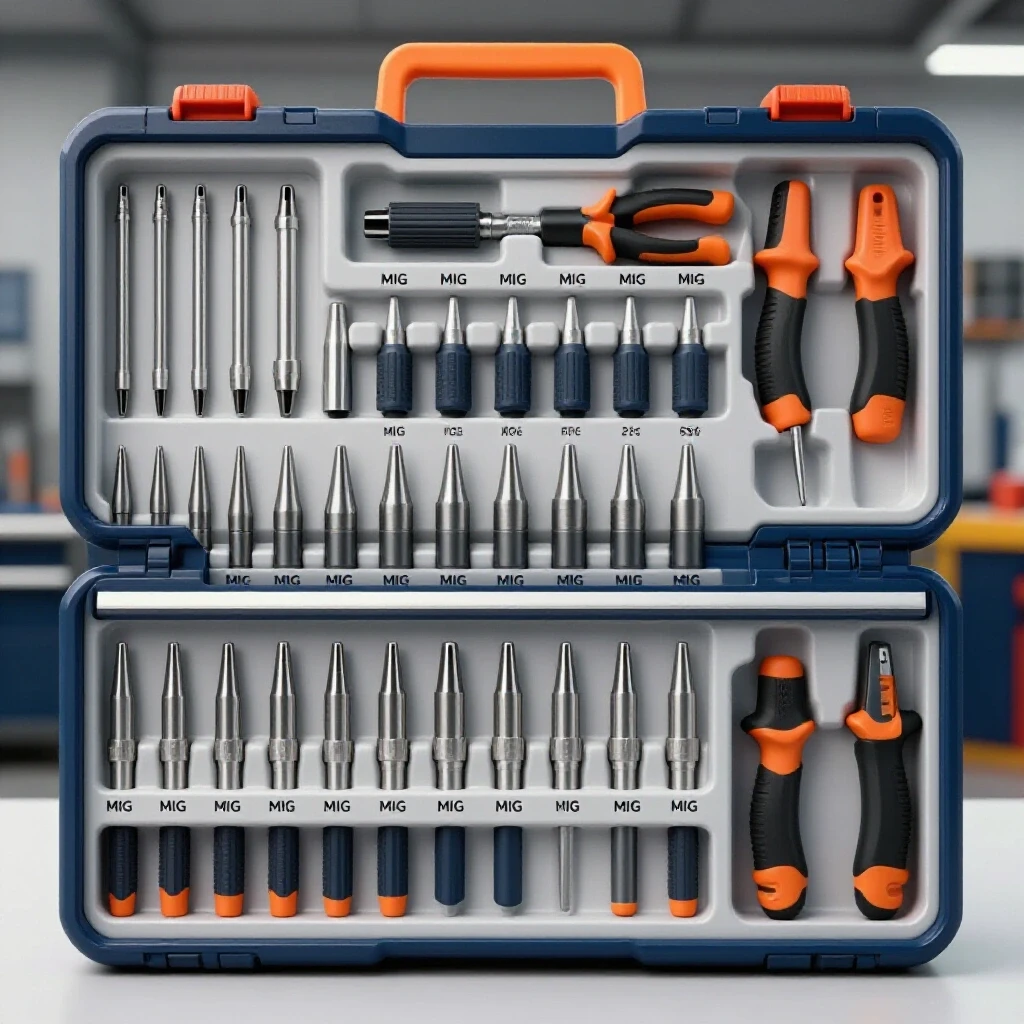
One effective method is using clear acrylic or plastic tubes. These can be mounted to a piece of plywood or a metal sheet and labeled on the front. This keeps the tips vertical, preventing them from rubbing against each other and damaging the threads. For nozzles, I often use a “nozzle tree.” This is a simple fixture made from a base plate with vertical studs (like long bolts or dowels) that the nozzles can slide over. It keeps them upright and prevents them from rolling off the bench.
Magnetic Organizer Trays
These are shallow metal or plastic trays equipped with magnets to hold small metallic parts in place.
Magnetic trays are excellent for active projects but can be dangerous for long-term storage of copper parts. Since copper is non-magnetic, the tray won’t hold the tips themselves, but it will hold the steel debris and grinding dust that can contaminate them. If you use magnetic trays, I recommend using them only for the steel tools you use to change the tips, like welpers or small wrenches. Keep your copper and brass parts in non-magnetic, lidded containers to avoid attracting metal shavings that could cause a short or clog the gas flow.
Modular Bin Systems
These are interlocking or stackable containers that allow for a customizable and expandable storage layout.
I am a big fan of modular bins that can be mounted on a French cleat wall or a louvered panel. These allow you to take the specific bin you need over to your fabrication table and then return it when you are done. When choosing bins, look for ones with clear lids. In a dusty shop environment, an open bin is a magnet for grinding dust. That dust can get inside the contact tip and cause friction issues with your wire, leading to “bird-nesting” at the drive rolls.
Labeling for Rapid Identification
This is the process of using visual markers, colors, or text to quickly distinguish between similar-looking components.
In the heat of a build, everything looks the same. A .030 tip and a .035 tip are nearly identical to the naked eye. I use a high-contrast labeling system to prevent mistakes. Large, bold numbers are essential. I prefer using a label maker with black text on a yellow background for maximum visibility in low-light shop conditions.
Another trick I use is color-coding. I might put a small dab of blue paint on the bin for .030 parts and red for .035. This creates a “visual shorthand” that your brain processes much faster than reading text. When you are focused on maintaining a tight +/- 1/16th inch tolerance on a frame, you want your brain to spend as little energy as possible on finding parts.
- Bold Text Labels: Use at least 24-point font for bin headers.
- Color Coding: Assign a color to each wire diameter you commonly use.
- Inventory Minimums: Write the “reorder point” on the label (e.g., “Reorder when 5 left”).
Environmental Protection for Copper and Brass
This refers to the methods used to shield consumables from oxidation, moisture, and workshop debris.
Copper and brass are sensitive to the environment. If you live in a humid climate, you might notice your contact tips turning green or dull over time. This oxidation can increase electrical resistance and affect the quality of your work. I treat my consumables like precision instruments. I keep them in a dry area, away from the floor where moisture tends to collect.
Furthermore, grinding dust is the enemy of a clean shop. If you are prepping a chassis for welding, you are likely generating a lot of metallic dust. If this dust settles inside your gas nozzles, it can cause the shielding gas to turbulence, leading to porosity in your welds. I always store my nozzles upside down on a rack or inside a closed drawer to keep the interior bore clean.
Building a Dedicated Consumable Station: A Build Log
This is a step-by-step account of constructing a custom storage fixture designed to hold and organize small welding parts.
I recently decided to upgrade my shop by building a “Consumable Command Center.” My goal was to have everything I needed for my MIG gun in one 12-inch by 12-inch space on the side of my welding cart. I documented the process to show how a little planning can save hours of frustration later.
1. Planning and Material Sourcing
I started by listing everything I needed to store: 20 contact tips, 4 nozzles, 2 diffusers, and my nozzle gel. I chose to use a piece of 14-gauge cold-rolled steel for the backplate because it is easy to drill and stiff enough to hold the weight.
- Material Cost: $12.00 (Scrap steel and hardware).
- Time Estimate: 2 hours.
- Tools Needed: Drill press, step bit, center punch, and a labeling tool.
2. Layout and Fabrication Steps
I used a layout fluid to mark my hole centers. For the contact tips, I decided to drill a series of 1/4-inch holes. This allows the tips to sit partially in the hole without falling through. For the nozzles, I welded four 3-inch lengths of 1/2-inch round bar to the plate. The nozzles slide right over these “stubs.”
Interestingly, I encountered a small obstacle during the layout. I initially spaced the holes too close together, making it hard to grab a single tip with my gloved hand. I adjusted the spacing to 1.5 inches between centers to ensure enough “finger room.” This is a classic example of why prototyping your layout is important before you commit to final assembly.
3. Finishing and Labeling
After cleaning the steel with acetone, I gave it a coat of high-visibility grey paint. Once dry, I applied my labels. I placed the .030 tips on the top row and the .035 tips on the bottom row. I also added a small magnetic strip at the bottom to hold my tip cleaner tool.
The result was a compact, rugged station that keeps my parts clean and organized. I no longer have to stop my fabrication sequence to hunt for parts. Everything is right there, and I can see exactly how many tips I have left before I start a big project like a utility trailer.
Tracking Inventory and Costs
This involves maintaining a log of parts used and their associated expenses to ensure the shop remains stocked and within budget.
I highly recommend keeping a “Consumable Log” near your welding station. This doesn’t have to be complicated. A simple clipboard with a sheet of paper will work. Every time you open a new pack of tips, mark it down. This data is invaluable for budgeting your custom fabrication projects.
When I am bidding on a job or planning a personal build, I look at my logs to see how many consumables I typically go through. For a standard 5×8 utility trailer, I usually factor in the cost of two contact tips and half a jar of nozzle gel. Knowing these metrics helps me provide more accurate cost estimates and prevents the “sticker shock” of a project that ends up costing way more than planned.
- Date of Purchase: Track when you bought the items to identify shelf-life issues.
- Unit Cost: Record the price per tip to see if buying in bulk (packs of 50 vs. 5) is saving you money.
- Usage Rate: Note how many tips you use per project type.
- Supplier Info: Keep the part numbers and supplier names handy for quick reordering.
Common Pitfalls in Part Management
These are frequent mistakes that lead to lost parts, damaged inventory, or inefficient shop workflows.
One of the biggest mistakes I see in garage shops is “over-stocking.” It is tempting to buy a massive bulk pack of nozzles because they are on sale. However, if you don’t have a storage system, these parts will end up scattered, buried, or corroded before you can use them. Only buy what you have the space to store properly.
Another issue is failing to clean used nozzles before putting them back. If you have a nozzle with some light spatter inside, don’t just toss it back into the bin with the clean ones. The spatter can break off and contaminate the other parts. I keep a “To Be Cleaned” bin for nozzles that need a quick scrape. This ensures that when I reach for a part in the “Clean” bin, it is truly ready for high-quality fabrication work.
- Mixing Brands: Different manufacturers often have slightly different thread tolerances. Keep brands separated to avoid stripping the threads on your diffuser.
- Ignoring the O-Rings: Some nozzles and diffusers use small rubber O-rings. If these are stored in a hot area, they can dry out and crack, leading to gas leaks.
- Loose Storage: Allowing tips to rattle around in a metal box can dull the precision-machined orifice, affecting your wire contact and arc stability.
Actionable Benchmarks for Your Storage System
These are specific standards and goals you can use to measure the effectiveness of your organization’s efforts.
To know if your system is working, you need some benchmarks. A good storage system should allow you to find any part within 10 seconds. If it takes longer, your categorization is likely the problem. You should also be able to perform a full inventory count in under two minutes.
I also recommend a “cleanliness check” once a month. Pull a random contact tip from your storage and look through the orifice. If you see dust or debris, you need to improve the sealing of your containers. In my shop, I aim for a 100% “Ready Rate.” This means every part in my storage is clean, undamaged, and ready to be installed on the gun immediately.
- Search Time: Under 10 seconds.
- Inventory Time: Under 2 minutes.
- Contamination Rate: 0% visible dust on parts.
- Waste Reduction: 15-20% lower consumable costs year-over-year.
Final Steps for a Better Organized Shop
Building a system for your small parts is a low-barrier way to instantly improve your fabrication quality. It reduces stress, saves money, and keeps you focused on the critical aspects of your build, like controlling heat warp and maintaining squareness. Start small. Even a few labeled plastic jars are better than a pile of loose parts on a workbench.
As you progress in your DIY journey, you will find that these organizational habits translate to every other part of your shop. You will start sorting your fasteners, your grinding discs, and even your scrap metal. This discipline is what separates a “backyard builder” from a high-end fabricator. Take the time this weekend to sort your tips and nozzles; your future self—and your next project—will thank you.
Frequently Asked Questions
How do I clean oily or dirty contact tips before storing them? I recommend using a quick spray of electronics cleaner or high-purity acetone. Avoid using heavy degreasers that might leave a residue. Once clean, dry them thoroughly with compressed air before placing them in their designated storage bin.
Should I keep my consumables in their original plastic packaging? If the packaging is a re-sealable bag, then yes. It provides an extra layer of protection against moisture. However, if it is a blister pack that you have to tear open, it is better to move the parts to a dedicated, labeled bin for easier access.
Can I store contact tips and nozzles in the same bin? It is not ideal. Contact tips are small and can easily get stuck inside a gas nozzle. This makes them hard to find and can lead to scratches on the interior of the nozzle. Use separate compartments for each.
What is the best way to label small bins in a greasy environment? Standard paper labels will peel off quickly. I use a thermal label maker with “extra strength” adhesive tape. For added protection, I place a piece of clear packing tape over the label to make it wipeable.
How many spare nozzles should I realistically keep on hand? For a hobbyist, keeping 2 to 3 spare nozzles is usually sufficient. This gives you enough of a buffer if one gets damaged, without requiring a massive amount of storage space.
Is it okay to store my welding parts in a cold garage over winter? The cold itself won’t hurt copper or brass, but temperature swings can cause condensation. If your shop isn’t climate-controlled, use airtight containers and consider adding a small silica gel desiccant pack to each bin to absorb moisture.
How do I distinguish between M6 and 1/4-20 thread contact tips? They look almost identical. The best way is to use a thread gauge or have two “test” diffusers mounted to your storage rack. If the tip doesn’t thread easily by hand into the test diffuser, it belongs in the other bin. Never force a tip into a diffuser.
What should I do with “slightly used” tips? I keep a “Used but Good” bin. These are tips that aren’t new but still have life left for non-critical tasks like tack-welding scrap or practicing. I save my brand-new tips for final assembly on my main projects.
Does the color of the copper matter for storage? If you see tips that are bright orange versus ones that are dull brown, the dull ones have oxidized. While they still work, they may have slightly higher electrical resistance. Store them in a dry, airtight container to prevent further dulling.
What is the best height to mount a consumable rack? Mount it at eye level, right next to where you hang your welding gun. This minimizes movement and allows you to check your inventory levels without bending over or reaching high.
How do I organize different lengths of contact tips? Some tips are standard length, while others are “long” for reaching into deep joints. Label these clearly as “Standard” and “Extended.” Mixing them up will change your wire stick-out and can mess up your gas coverage.
Can I use a tackle box for my welding consumables? Yes, tackle boxes are excellent. They are portable, have many small compartments, and usually have a secure latch. They are a great “starter” system before you build a permanent wall-mounted fixture.
(This article was written by one of our staff writers, Robert Kline. Visit our Meet the Team page to learn more about the author and their expertise.)