Low-Cost Insulation Tips for Garage Workshops (DIY Guide)
When I first opened my manufacturing business in a modest two-car garage, I spent most of my time focused on the big numbers. I tracked the cost of my Miller welder, the price of 4130 tubing, and the monthly payment on my lathe. However, during my first winter, I realized I was bleeding money through the thin metal skin of my garage door. My hands were too cold to maintain a steady TIG bead, and my shielding gas was flowing faster just to compensate for the drafty environment.
I quickly learned that a shop’s physical environment is a silent partner in your business. If the space is too cold or too hot, your productivity drops, your consumables usage spikes, and your equipment suffers from condensation and rust. For a side-hustle metalworker, every minute spent shivering or wiping down rusty table saws is a minute you aren’t billing. To build a profitable business, you have to treat your workspace like a machine that requires its own maintenance and optimization.
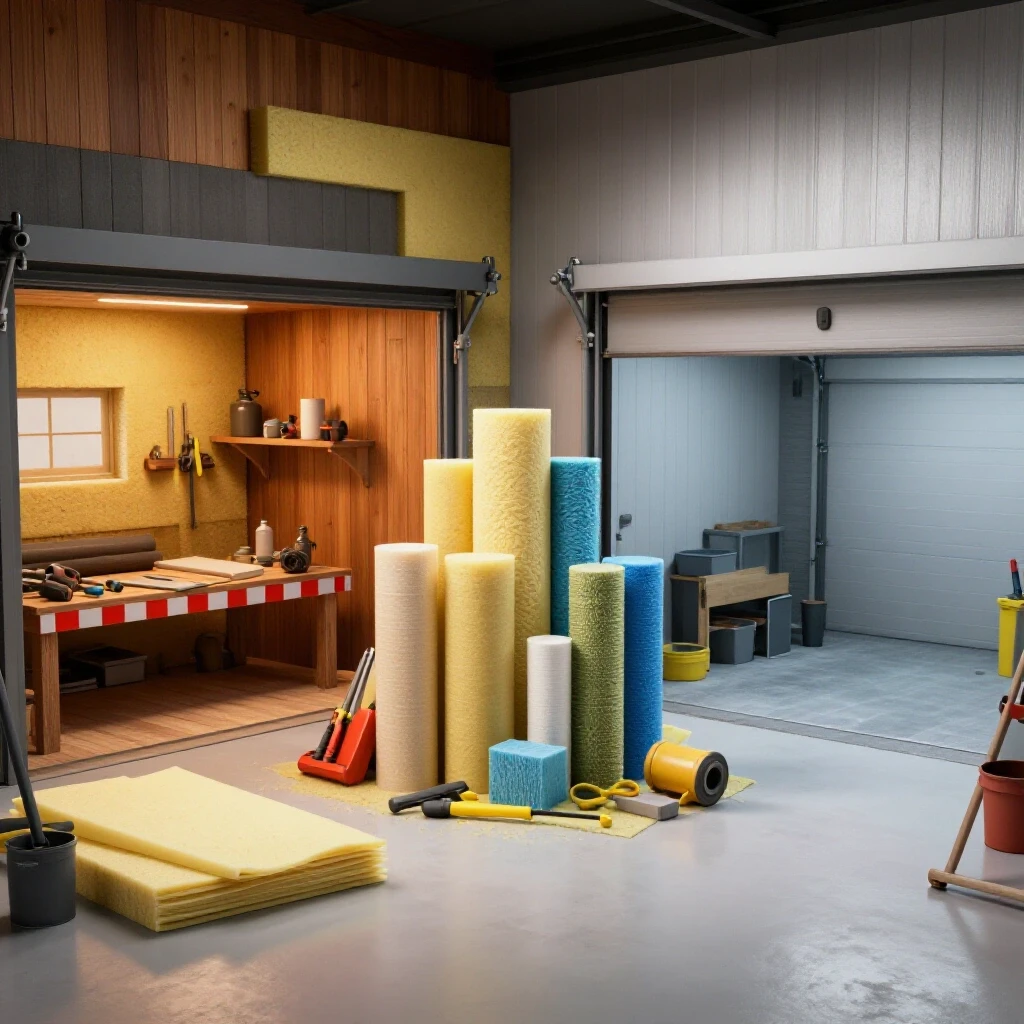
This guide focuses on high-impact, budget-conscious methods to stabilize your shop’s temperature. We will look at how to use basic sheet goods and reflective films to keep your overhead low. More importantly, we will connect these physical upgrades to your shop’s financial health, helping you calculate a more accurate hourly rate and ensure your equipment investments actually pay off.
Establishing a True Shop Rate in a Climate-Controlled Space
A shop rate is the total hourly cost required to keep your business running, including profit. It accounts for fixed costs like rent and insurance, variable costs like electricity, and the labor required to complete a job. Understanding this rate allows you to quote fabrication jobs with confidence rather than guessing and losing money.
When you work in an uninsulated garage, your shop rate is often higher than you think. You might spend an extra 15 minutes every morning just waiting for your machines to warm up or for your hands to regain feeling. In the summer, heat exhaustion can slow your welding pace by 20%. These “hidden” time sucks are overhead burdens. By installing basic thermal barriers, you are essentially lowering your overhead by increasing your personal efficiency.
If you are aiming for a shop rate of $75 per hour, every hour lost to a poor environment costs you $75 in potential revenue. If a $150 investment in basic foam panels saves you just two hours of lost time per month, the project pays for itself in 60 days. This is the kind of shop math that separates hobbyists from professional fabricators.
Defining Your Fixed and Variable Overhead
Overhead represents all the expenses you pay regardless of whether you are currently welding a bracket or cutting a plate. Fixed overhead includes things like tool depreciation and shop insurance, while variable overhead covers electricity and heating fuel. Tracking these costs monthly is essential for accurate fabrication job costing.
In a garage setting, the biggest variable overhead is often the utility bill. An unsealed space forces your heater or fans to work twice as hard. When you track your energy usage alongside your billable hours, you can see exactly how much the weather impacts your bottom line. I recommend keeping a simple spreadsheet to monitor these fluctuations and adjust your quotes accordingly during extreme seasons.
The Impact of Ambient Temperature on Tool ROI
Tool ROI, or Return on Investment, measures how quickly a piece of equipment pays for itself through the revenue it generates. High-end machinery, like a CNC plasma table or a precision mill, is sensitive to temperature swings. Extreme cold can thicken lubricants, while high humidity leads to surface rust on precision-ground surfaces.
If a $5,000 machine has a five-year depreciation cycle, you need it to perform reliably every day to hit your financial targets. If rust damage from condensation requires $500 in repairs or reduces the machine’s lifespan by a year, your ROI timeline is ruined. Simple DIY thermal upgrades protect these assets, ensuring that your capital investments continue to generate profit without unexpected maintenance costs.
Selecting Economical Materials for Thermal Barriers
Thermal barriers are materials designed to slow the transfer of heat between the inside of your shop and the outside world. For a small fabrication shop, these materials must be inexpensive, easy to install, and durable enough to withstand a work environment. Common choices include expanded polystyrene (EPS) foam, reflective foil films, and basic weatherstripping.
For a budget under $200, you cannot afford professional spray foam or high-end fiberglass batts for a whole building. Instead, focus on the “weakest links” in your garage: the door, the windows, and the gaps around the threshold. By using rigid foam sheets and reflective barriers, you can create a significant thermal break for a fraction of the cost of industrial solutions.
Using Rigid Foam Sheets for High-Impact Areas
Rigid foam sheets, often made of EPS or XPS, provide excellent thermal resistance for their thickness and are sold in 4×8 foot panels at most hardware stores. These panels are lightweight and can be cut with a simple utility knife, making them ideal for DIY shop upgrades. They are particularly effective for lining the interior of thin metal garage doors.
When I was starting out, I bought three sheets of 1-inch thick foam for about $60. I cut them to fit the recessed panels of my garage door and secured them with a basic construction adhesive. This simple move stopped the “radiator effect” where the sun would bake the metal door and turn my shop into an oven by noon.
Reflective Films and Radiant Barriers
Reflective films are thin layers of material, often looking like aluminum foil, that reflect radiant heat rather than absorbing it. They are incredibly effective at keeping a shop cool in the summer by bouncing sunlight away from the structure. These films are also useful for reflecting heat back into the shop during the winter months.
A roll of reflective “bubble” wrap is one of the most cost-effective tools in a side-hustler’s arsenal. You can staple it to the underside of rafters or tape it over windows that receive direct sunlight. In my experience, this is the fastest way to drop the temperature in a metal-sided building without spending a fortune on air conditioning.
| Material Type | Estimated Cost (per 32 sq ft) | Primary Benefit | Ease of Installation |
|---|---|---|---|
| Rigid EPS Foam | $20 – $25 | High R-value for doors | Moderate (Requires cutting) |
| Reflective Film | $15 – $20 | Blocks radiant heat | Easy (Staple or tape) |
| Weatherstripping | $10 – $15 | Stops drafts and dust | Very Easy (Self-adhesive) |
| Foam Sealant | $8 per can | Fills large gaps | Easy (Spray and trim) |
Maximizing Efficiency with Garage Door Sealing Strategies
The garage door is typically the largest opening in a workshop and the primary source of heat loss and gain. Because it is a moving part, it often has large gaps around the edges that allow wind, dust, and moisture to enter the workspace. Sealing these gaps is a critical step in stabilizing your shop’s environment.
Improving the seal on your door involves two steps: adding mass to the door panels and closing the air gaps at the perimeter. For under $100, you can drastically reduce the amount of outside air entering your shop. This not only keeps you comfortable but also keeps your metal stock cleaner by reducing the amount of moisture-laden air that causes surface oxidation.
Installing Panel Inserts for Metal Doors
Most standard garage doors are made of thin-gauge steel which offers almost zero thermal protection. By inserting foam panels into the sections of the door, you create a sandwich that traps air and slows heat transfer. It is important to measure each panel individually, as they are often slightly different sizes due to the door’s hardware.
- Measure the inside dimensions of each door panel section.
- Cut the rigid foam sheets about 1/8-inch smaller than the opening.
- Use a high-tack adhesive or simple double-sided tape to hold them in place.
- Ensure the foam does not interfere with the door’s hinges or rollers.
Closing the Perimeter Gaps
Air leaks around the top, sides, and bottom of a garage door can negate the benefits of panel insulation. Side and top seals are usually made of vinyl and are screwed into the door frame, while the bottom seal is a rubber “U” shape that slides into a track. Replacing a worn-out bottom seal is one of the most effective ways to stop cold drafts.
I once spent an entire Saturday chasing a draft that was making my MIG welds porous. I finally realized it was coming from a 1/4-inch gap at the bottom of my door. A $15 replacement seal fixed the issue and immediately improved the quality of my work. For a side-hustle metalworking business, these small fixes prevent the rework that eats into your profit margins.
Protecting Machinery ROI through Moisture Control
Moisture control is the process of managing humidity and condensation to prevent water from damaging tools and materials. In a garage shop, temperature swings often cause moisture to condense on cold metal surfaces, such as cast-iron saw tables or steel tubing. This leads to rust, which can ruin a project or devalue your equipment.
When you add thermal barriers to your shop, you aren’t just managing heat; you are also managing the dew point. By keeping the air inside the shop slightly warmer than the outside air, you reduce the likelihood of condensation forming on your tools. This is vital for maintaining the accuracy and resale value of your machinery, which is a key part of your business’s capital assets.
Preventing Condensation on Precision Surfaces
Condensation occurs when warm, moist air hits a cold surface. In a metal shop, your anvil, welding table, and lathe are all massive “heat sinks” that stay cold long after the air warms up. If you don’t have a barrier to keep that moist air out, your tools will literally “sweat,” leading to pitting and rust.
- Wipe down precision surfaces with a thin coat of paste wax or light oil.
- Use a small fan to keep air moving, which prevents stagnant moist air from settling.
- Keep your metal stock off the concrete floor, as concrete wicks moisture upward.
- Seal gaps around windows and doors to keep humidity levels consistent.
Managing the “Sweating” Concrete Floor
Concrete floors in garages are notorious for releasing moisture, especially in the spring and fall. This moisture can ruin the bottom of your welding carts and contribute to a damp environment that makes it hard for paint or coatings to dry. While a full epoxy floor might be out of your budget, a simple plastic vapor barrier under your storage racks can make a big difference.
In my consulting work, I’ve seen many small shops struggle with “mystery rust” on their finished parts. Often, it’s because they were storing finished fabrication jobs directly on a concrete floor. I always recommend using low-cost wooden pallets or rubber mats to create an air gap. This simple step protects your work and ensures your customers receive a high-quality, rust-free product.
Analyzing the Payback Period for Shop Environment Upgrades
A payback period is the amount of time it takes for an investment to pay for itself through cost savings or increased revenue. For shop improvements, this is calculated by comparing the cost of materials to the money saved on utilities and the value of time gained through increased productivity. This data-driven approach helps you decide which shop upgrades are worth your limited time and money.
If you spend $200 on materials and it saves you $20 a month on your heating bill, the material payback is 10 months. However, if those upgrades also allow you to work an extra 5 billable hours per month because you aren’t fighting the cold, the payback period drops to just a few weeks. This is how you should evaluate every purchase in your shop, from a new grinder to a roll of reflective film.
Calculating Your Hourly Productivity Gains
To find your productivity gain, track how many units of work you produce in a “bad” environment versus a “good” one. For example, if you can weld four brackets an hour when it’s 65 degrees, but only three when it’s 40 degrees, your productivity has dropped by 25%. If your shop rate is $80/hour, that cold weather is costing you $20 for every hour you work.
- Track your output for one week in an unconditioned space.
- Implement your low-cost thermal upgrades.
- Track your output for one week in the improved space.
- Multiply the difference in output by your hourly rate to find your monthly “comfort bonus.”
The Hidden Cost of Consumable Waste
Temperature also affects your welding consumable tracking. In cold weather, shielding gas regulators can freeze or flow inconsistently, leading you to turn up the flow rate and waste gas. Adhesives, paints, and lubricants also have specific operating temperatures. If you use these products in a cold shop, they may fail or require extra coats, increasing your material costs.
By stabilizing your shop’s temperature, you get more predictable results from your consumables. This means fewer trips to the welding supply store and more accurate job estimates. When you can tell a client exactly how much wire and gas a job will take, your profit margins become much more reliable.
Building a Custom Job Quote with Environmental Factors
Fabrication job costing should always include a “burden factor” for your shop’s operating environment. This is a small percentage added to the labor or material cost to cover the overhead of maintaining the workspace. If you have successfully implemented low-cost thermal barriers, your burden factor will be lower, making your quotes more competitive.
When I quote a job, I don’t just look at the metal and the hours. I look at the time of year and the complexity of the work. If a job requires high-precision TIG welding that I know will be difficult in a 95-degree shop, I adjust my labor estimate to account for the slower pace. Being honest about these factors ensures that I never finish a job and realize I actually worked for free.
Creating a Consumable Burden Factor
A consumable burden factor is a percentage (usually 5-15%) added to the material cost of a job to cover things like welding gas, grinding discs, and electricity. If your shop is well-insulated, your electricity and gas usage will be lower, allowing you to keep this factor on the lower end of the scale.
- Small, simple jobs: 5% burden factor.
- General fabrication: 10% burden factor.
- Heavy structural or precision work: 15% burden factor.
Adjusting for Seasonal Variability
It is a good practice to review your shop rate every six months. Your winter utility bills will differ from your summer ones, and your material sourcing costs may fluctuate. By keeping a close eye on these numbers, you can adjust your pricing to stay profitable year-round. Don’t be afraid to tell a customer that your rates have changed slightly due to rising overhead; most professional clients understand that business costs are not static.
| Season | Primary Overhead Concern | Mitigation Strategy | Price Adjustment |
|---|---|---|---|
| Winter | Heating costs/Slow starts | Foam panel insulation | +3-5% on labor |
| Spring | Condensation/Rust | Moisture barriers/Airflow | Standard Rate |
| Summer | Heat exhaustion/Fan power | Reflective films | +2-4% on labor |
| Fall | Consistent environment | Weatherstripping | Standard Rate |
Analyzing Post-Job Profits to Refine Your Strategy
Post-job profit analysis is the process of looking back at a completed project to see if your estimated costs matched your actual costs. This is the most important step in growing a side-hustle into a successful business. It tells you if your pricing model is working and if your shop upgrades are actually saving you money.
If you find that you are consistently finishing jobs faster than you estimated after installing your thermal barriers, you have two choices. You can keep your prices the same and enjoy a higher profit margin, or you can lower your prices to win more work. This kind of data gives you the power to make strategic decisions rather than just reacting to the market.
Tracking Material and Labor Variance
Variance is the difference between what you thought a job would cost and what it actually cost. If you estimated $100 for steel but spent $120, you have a $20 negative variance. If you estimated 5 hours of labor but finished in 4, you have a 1-hour positive variance.
- Keep a simple log for every job: Estimated vs. Actual.
- Note why variances occurred (e.g., “Shop was too hot, took more breaks”).
- Use these notes to refine your next quote.
- Look for patterns; if you always underestimate grinding time, increase that part of your quote.
Using Digital Tools for Better Bookkeeping
Even a small shop can benefit from digital tracking. There are many free or low-cost apps that allow you to track your time and expenses on your phone. This is much more effective than trying to remember how many welding rods you used at the end of the week.
- QuickBooks or FreshBooks: Great for professional invoicing and tracking overhead.
- Toggle Track: A simple, free app for timing your labor on specific tasks.
- Google Sheets: Perfect for building your own custom ROI calculators and material trackers.
- Wave Accounting: A free option for small businesses to track income and expenses.
Conclusion: Small Steps to a More Profitable Workshop
Optimizing your shop’s environment is not about making it a luxury lounge. It is about removing the friction that slows down your production and eats your profits. By spending less than $200 on basic foam panels, reflective films, and weatherstripping, you can create a space that supports your business goals rather than hindering them.
Remember that every dollar you save on utilities or wasted consumables is a dollar that stays in your pocket. As you transition from a hobbyist to a side-hustle owner, your ability to manage these small costs will determine your long-term success. Start with the biggest air leaks, track your results, and use the savings to reinvest in the tools that will take your fabrication work to the next level.
Frequently Asked Questions
How do I know if my shop needs thermal upgrades?
If you notice condensation on your tools, find it difficult to stay in the shop for more than an hour due to temperature, or see your utility bills spiking during extreme weather, you need to address your environment. A simple way to test is to use an infrared thermometer on your garage door; if it’s significantly hotter or colder than the interior air, it’s a major source of heat transfer.
What is the most cost-effective material for a metal garage door?
Rigid expanded polystyrene (EPS) foam sheets are generally the best balance of cost and performance. They are inexpensive, easy to cut with a utility knife, and provide a solid thermal break that stops the metal door from acting like a giant radiator.
Will adding insulation to my door make it too heavy for the opener?
Standard 1-inch foam panels are very lightweight and usually do not require adjusting the garage door springs. However, if you use heavier materials or multiple layers, you should test the door’s balance. A properly balanced door should stay in place when opened halfway by hand.
How does shop temperature affect my welding quality?
Extreme cold can lead to cold-lapping or poor penetration because the base metal acts as a massive heat sink, sucking the heat out of the weld puddle too quickly. High humidity can introduce moisture into the arc, leading to porosity. A stable, room-temperature environment (around 60-70°F) is ideal for consistent welding results.
Can I use regular duct tape for sealing my shop?
Duct tape tends to dry out and fail when exposed to the temperature swings of a garage. It is much better to use foil-faced “mylar” tape or high-quality construction adhesive for permanent thermal barriers. These materials are designed to handle the expansion and contraction of the building.
How much can I realistically save on my shop rate?
While it varies, many small shop owners see a 10-15% increase in productivity after stabilizing their shop’s temperature. If your shop rate is $100/hour, that’s an extra $10-$15 of value created every hour you work, which quickly adds up over the course of a month.
Is moisture control really that important for a side-hustle?
Yes. If you are selling your work, you cannot afford to deliver a product with surface rust. Furthermore, your tools are your livelihood. Replacing a $300 drill press table because it’s pitted with rust is a completely avoidable expense that directly reduces your business’s net profit.
Should I insulate the walls or the door first?
In most garages, the door is the largest uninsulated surface area and the source of the most significant air leaks. I always recommend starting with the door and the perimeter seals. Once the “big hole” is plugged, you can move on to windows and wall sections as your budget allows.
Does reflective film work in the winter?
Yes, but its primary job changes. In the summer, it reflects outside heat away. In the winter, if installed with a small air gap behind it, it can help reflect the radiant heat from your shop heater back into the workspace rather than letting it escape through the walls or roof.
How do I track the ROI of these shop improvements?
The easiest way is to compare your utility bills and your “parts produced per hour” from the previous year. If you are spending less on heat and finishing jobs faster, the upgrades are working. Keep a “Shop Improvement Log” to note the date of the upgrade and the changes you observe in your monthly overhead.
(This article was written by one of our staff writers, Michael Hargrove. Visit our Meet the Team page to learn more about the author and their expertise.)