Choosing Heavy Rolling Casters for Shop Workbenches (Guide)
I have spent nearly two decades in industrial fabrication mills and custom machine shops. During that time, I have learned that the foundation of a project is rarely the steel on the table. Instead, it is the table itself. I recall a specific project involving a series of high-precision stainless steel frames for a food processing plant. We were seeing intermittent weld porosity and strange alignment shifts that defied logic. After three days of checking shielding gas flow rates and recalibrating our TIG power sources, I realized the problem was much simpler. The “heavy-duty” mobile supports under our 1,500-pound workbench were flexing. Every time the operator leaned into a weld, the bench shifted 0.030 inches, pulling the torch away from the joint and dragging in atmospheric contamination.
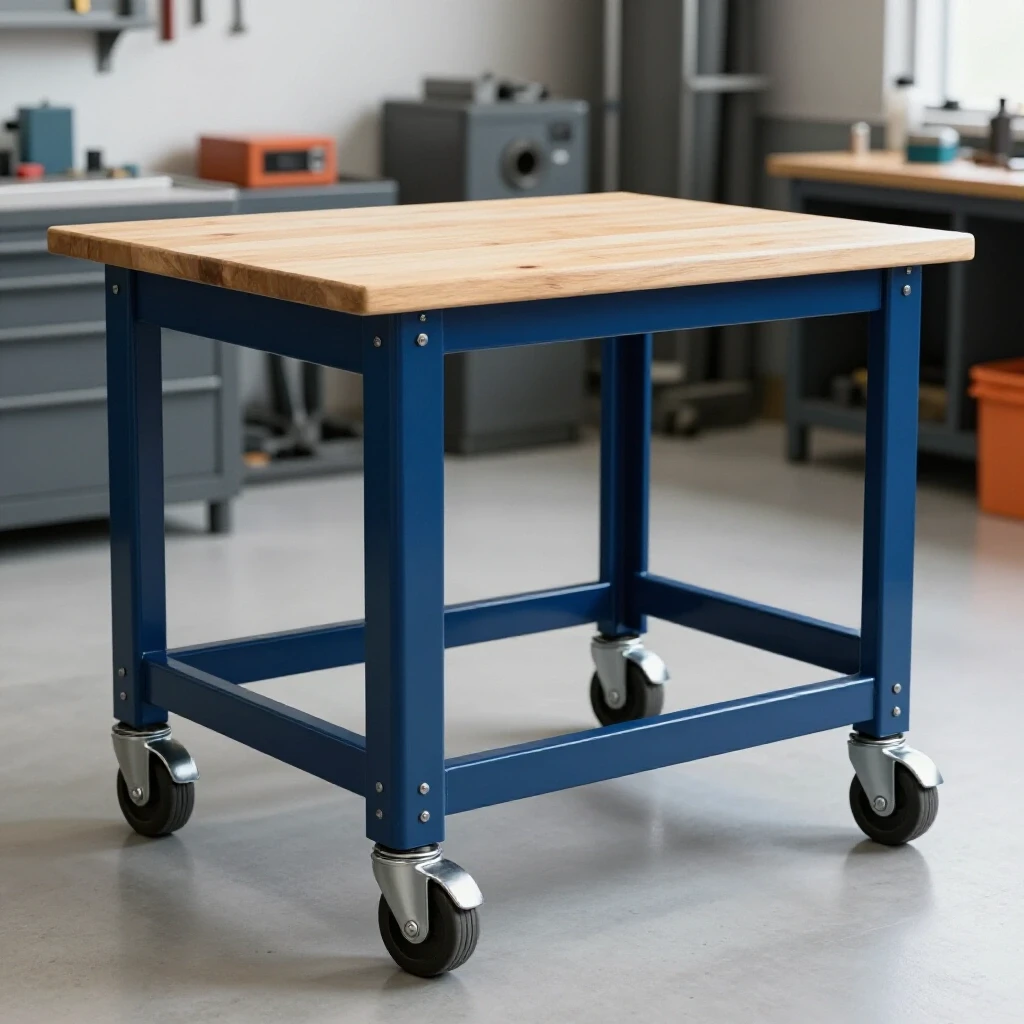
This experience taught me that mobile fabrication surfaces are not just about convenience. They are a critical component of the machine’s mechanical ecosystem. When you choose wheeled supports for a heavy workbench, you are selecting a dampening system, a structural anchor, and a precision leveling device all at once. If you treat this choice as an afterthought, you invite tool chatter, layout errors, and safety hazards into your workflow. Systematic troubleshooting begins by looking at the interface between your equipment and the shop floor.
Quantifying Total System Weight and Dynamic Stress
Determining the load capacity for mobile workbench supports requires calculating the maximum possible weight the system will encounter. This includes the dry weight of the bench, the heaviest expected workpiece, and the downward force of clamping or hammering. Selecting a rating that only covers the bench weight leads to premature bearing failure and wheel deformation.
In my diagnostic logs, I often see “flat-spotting” on wheels. This happens when the static load exceeds the material’s recovery threshold. If a bench weighs 800 pounds and you plan to weld a 1,000-pound engine block on it, your total static load is 1,800 pounds. However, you must also account for dynamic loading. When you push that bench over a floor joint or a stray piece of welding wire, the instantaneous force on a single wheel can triple.
I use a safety factor of at least 1.5 for static loads and 2.0 for dynamic environments. For a four-wheel configuration, I never assume the weight is distributed equally. If your floor is even slightly uneven, there will be moments where only three wheels are making contact. Therefore, I calculate the required capacity per wheel by dividing the total expected weight by three, not four. This provides a buffer that prevents the internal ball bearings from “brinelling”—a term for when the hard steel balls dent the bearing race under extreme pressure.
| Load Component | Estimated Weight (lbs) | Dynamic Multiplier | Total Required Capacity |
|---|---|---|---|
| Workbench Structure | 600 | 1.0 | 600 |
| Vises and Fixed Tools | 150 | 1.0 | 150 |
| Maximum Workpiece | 1,200 | 1.5 | 1,800 |
| Total System Load | 1,950 | – | 2,550 |
| Per Wheel Rating (Total / 3) | – | – | 850 lbs |
Material Science of Wheel Tread and Floor Interaction
The composition of the wheel tread determines how the workbench interacts with the shop floor and how much vibration it absorbs. Harder materials offer lower rolling resistance but transfer every floor imperfection into the workpiece. Softer materials provide dampening but can become difficult to move under heavy loads.
In metalworking, we often deal with “tool chatter,” which is essentially a resonant harmonic vibration. If you are running a bridgeport or a heavy lathe on a mobile bench, the wheel material acts as a frequency filter. I once diagnosed a surface finish issue on a small benchtop mill. The operator was getting a 0.005-inch ripple in his cuts. By swapping the hard phenolic wheels for a high-durometer polyurethane, we changed the resonant frequency of the bench, effectively “tuning out” the chatter.
Shore hardness is the metric we use to measure this. A Shore 90A polyurethane wheel is firm enough to roll easily but soft enough to absorb the micro-vibrations of a grinding operation. Conversely, a Shore 70D phenolic wheel is nearly as hard as bone. It is excellent for heavy static loads but will transmit every vibration from the shop floor directly into your precision layout tools.
- Polyurethane on Iron: Best for general fabrication. It resists metal chips and provides moderate vibration dampening.
- Phenolic Resin: High weight capacity and heat resistance, but prone to chipping and very loud on concrete.
- Cast Iron or Steel: Maximum durability but zero dampening. These can damage epoxy floor coatings over time.
- Thermoplastic Rubber: Excellent for light-duty dampening but will develop flat spots under heavy, long-term loads.
Identifying Mechanical Play in Mobile Support Bearings
Mechanical play, or “slop,” in the swivel and axle bearings of a wheel assembly can ruin the structural alignment of a workbench. When you are trying to square a frame to within 0.010 inches, any lateral movement in the base makes the task nearly impossible.
I diagnose this by using a dial indicator mounted to the floor, with the tip resting on the workbench leg. If I can move the bench more than 0.005 inches by hand while the wheels are locked, the bearings are the culprit. High-quality industrial supports use tapered roller bearings or precision-ground ball bearings in the swivel head to eliminate this play.
Axle play is another common failure point. If the axle bolt is not sized correctly to the inner race of the bearing, the wheel will “cant” or lean. This creates an uneven contact patch, leading to accelerated wear and unpredictable bench movement. When I inspect a mobile setup, I look for “radial play” (side-to-side) and “axial play” (up-and-down). In a precision shop, these values should be as close to zero as possible.
- Swivel Head Inspection: Check for grease leakage, which indicates seal failure and impending bearing wear.
- Raceway Integrity: Rotate the swivel manually; any “crunchy” feeling suggests the ball bearings have flattened or the race is pitted.
- Axle Tolerance: Ensure the axle bolt is grade 5 or higher to prevent bending under sheer stress.
- Brake Engagement: Test if the brake locks both the wheel rotation and the swivel movement. A wheel-only lock still allows the bench to “drift” during heavy pushing or pulling.
Eliminating Harmonic Resonance through Wheel Selection
Harmonic resonance occurs when the vibration frequency of a tool matches the natural frequency of the workbench. This can lead to “vibrational creep,” where the bench slowly walks across the floor, or worse, ruins the surface finish of a machined part. Choosing the right mobile support is a primary method for dampening these harmonics.
When I work on lathes or milling machines mounted to mobile benches, I look at the “damping coefficient” of the wheel material. Harder materials like steel have a very low damping coefficient, meaning they allow vibrations to ring through the system like a bell. Polyurethane and specialized rubber compounds have high damping coefficients; they convert vibrational energy into low-level heat, stopping the “ring.”
I often use an infrared heat tracker to see if wheels are absorbing energy. During a heavy milling operation, if the wheel treads show a slight temperature rise, they are doing their job of absorbing the tool’s kinetic energy. If the vibration is still excessive, I check the “footprint” of the wheel. A wider wheel spreads the load and increases the surface area for dampening, which can significantly reduce tool chatter.
- Vibration Source: Is it the spindle, the motor, or the floor?
- Isolation: Use a smartphone vibration spectrum analyzer to find the peak frequency (measured in Hz).
- Damping: Select a wheel material that does not resonate at that specific frequency.
- Rigidity: Ensure the locking mechanism creates a metal-to-metal contact to ground the vibration when the bench is stationary.
Failure Modes of Industrial Swivel Assemblies
Understanding why a wheeled support fails is the key to preventing the next breakdown. In my 15 years of troubleshooting, I have found that most failures are not “sudden.” They are the result of gradual degradation that went unnoticed until a critical lift or move.
One common issue is “kingpin failure.” The kingpin is the bolt or rivet that holds the swivel assembly together. Under heavy lateral loads—like when you hit a floor transition—the kingpin can stretch or snap. This is especially dangerous because the bench can collapse instantly. I always look for “kingpinless” designs for benches exceeding 2,000 pounds. These use a larger diameter ball race to distribute the load, eliminating the single point of failure.
Another frequent failure is “debris ingestion.” In a metal shop, the floor is covered in steel shavings, grinding dust, and weld spatter. If a wheel bearing is not shielded or sealed, this grit acts like sandpaper, grinding down the bearings and the race. I specify sealed precision bearings (often marked as 2RS for two rubber seals) to ensure that the lubrication stays in and the metal dust stays out.
Structural Alignment and Leveling Challenges
A workbench that is not level is a liability in a fabrication shop. Most shop floors are sloped for drainage, which means your mobile bench will be at a different angle every time you move it. This makes it impossible to use a master precision level for setup.
To solve this, I look for mobile supports that integrate leveling pads. These “leveling casters” allow you to roll the bench into position and then lower a solid rubber or nylon foot. This lifts the wheel off the ground and provides a stable, adjustable base. I have used these to align 3,000-pound welding platens to within 0.002 inches across a four-foot span.
When diagnosing alignment issues, I first check if the bench frame itself is twisting. If one wheel is higher than the others, the entire frame can rack, throwing your vise or your jig out of square. A systematic approach involves: 1. Moving the bench to its final work location. 2. Deploying the leveling feet until the wheels are just clear of the floor. 3. Using a machinist’s level to check the X and Y axes. 4. Adjusting the feet in small increments (1/4 turn of the nut) until the bubble is centered.
Troubleshooting Common Mobile Bench Issues
When a fabricator tells me their bench “doesn’t feel right,” I go through a mental checklist. Usually, the issue is a combination of environmental factors and mechanical wear. For example, “hard starting”—where it takes a massive effort to get the bench moving—is often caused by wheels that have developed flat spots from sitting in one place too long under a heavy load.
If the bench “shudders” when moving, I check for “eccentric wear.” This happens when a brake is partially engaged or a bearing is seized, causing one side of the wheel to wear faster than the other. The wheel is no longer a perfect circle, creating a rhythmic vibration as it rolls.
| Symptom | Probable Root Cause | Diagnostic Test | Permanent Fix |
|---|---|---|---|
| Bench Wobble | Uneven floor or mismatched wheel height | Use feeler gauges under wheels | Install leveling supports |
| Excessive Chatter | Wheel material too hard (Resonance) | Change tool RPM; observe change | Switch to polyurethane treads |
| Hard Steering | Seized swivel bearings | Check for grease/debris in race | Replace with sealed bearings |
| Unintended Drifting | Single-lock brakes (swivel still moves) | Apply brakes and push laterally | Upgrade to total-lock brakes |
Maintaining Precision in a Mobile Environment
Maintenance is the final piece of the diagnostic puzzle. A mobile workbench is a mechanical system that requires regular inspection. I recommend a quarterly “walk-around” for any bench that sees daily use. This isn’t just about greasing bearings; it’s about checking the integrity of the entire mounting system.
I look for “bolt stretch” on the mounting plates. If the bolts holding the support to the bench leg are loose, the bench will vibrate, regardless of how good the wheels are. I use a torque wrench to ensure every mounting bolt is tightened to the manufacturer’s spec, usually around 30-40 ft-lbs for a 1/2-inch Grade 5 bolt.
I also keep a “vibration log” for my most critical benches. If I notice a change in the surface finish of parts coming off a benchtop grinder, I check the wheels. Often, a small piece of weld spatter has embedded itself in the polyurethane tread, creating a “bump” that translates into the workpiece. Cleaning the treads with a stiff wire brush can often resolve “mystery” vibration issues.
- Clean Treads: Remove embedded metal chips and weld spatter.
- Lubricate Swivels: Use a high-pressure lithium grease if the assembly has Zerk fittings.
- Check Torque: Ensure mounting hardware hasn’t vibrated loose.
- Inspect Seals: Look for torn dust caps or leaking grease.
- Test Brakes: Ensure the locking force is still sufficient to prevent rotation.
Summary of Diagnostic Benchmarks
To maintain a high-functioning fabrication environment, you must hold your mobile equipment to specific benchmarks. These numbers provide a baseline for “normal” operation, making it easier to spot when something is failing.
- Radial Play: Should be less than 0.010 inches in the swivel head.
- Starting Resistance: A 1,000-lb bench should require no more than 30-40 lbs of force to begin moving on a clean floor.
- Leveling Accuracy: Leveling feet should allow for adjustment within 0.001 inches per foot.
- Brake Hold: A locked bench should not move when subjected to 100 lbs of lateral force.
- Temperature Rise: Wheel bearings should not exceed 20°F above ambient temperature after a long move.
By treating the selection and maintenance of these supports as a rigorous engineering task, you eliminate a major variable in your fabrication process. You stop fighting the bench and start focusing on the metal. This systematic approach reduces downtime, saves your back, and—most importantly—ensures that the precision you put into your work isn’t lost before it even hits the floor.
Frequently Asked Questions
Why does my workbench vibrate when I’m using a grinder, even though the wheels are locked?
This usually happens because the wheels are made of a hard material like phenolic or steel, which has no vibration-dampening qualities. The “ring” from the grinder travels through the bench and bounces off the hard floor. Switching to a high-durometer polyurethane wheel can absorb these high-frequency vibrations. Additionally, ensure you are using “total-lock” brakes that stop both the wheel and the swivel; otherwise, the swivel head can act like a spring, amplifying the vibration.
How do I know if my workbench is too heavy for the current wheels?
Look for “flat-spotting” or permanent deformation of the tread. If you move the bench and hear a rhythmic “thump-thump-thump,” the material has reached its plastic limit and failed to spring back. Another sign is “hard steering,” where the swivel bearings are so compressed that they can no longer rotate freely. If you see the metal mounting plate bowing or curving, you are dangerously over the load limit.
What is the difference between a swivel lock and a total lock?
A swivel lock only prevents the wheel from rotating around its vertical axis but allows the wheel itself to still roll forward or backward. A total lock (or double lock) engages two mechanisms: one that stops the wheel’s rotation and one that locks the swivel head. For shop workbenches, total-lock is mandatory. Without it, the bench can still “swing” or pivot around the locked point when you apply pressure, such as when using a large wrench in a vise.
Can metal chips on the floor damage my workbench wheels?
Yes, significantly. Hard chips can embed themselves in softer rubber or low-quality plastic wheels. Once embedded, they act like a lathe tool, scarring your floor and creating vibrations. High-quality polyurethane is designed to reject chips, meaning the chip is pushed away rather than being pressed into the material. If you work in a high-chip environment, avoid soft rubber and stick to 90A-95A durometer polyurethane.
Why is my bench no longer level after I move it to a different part of the shop?
Most concrete floors are not perfectly flat; they are pitched for drainage or have settled over time. Even a move of five feet can change the floor height by 1/8 inch or more. If precision leveling is required for your work, you must use supports that feature integrated leveling pads. These allow you to compensate for floor irregularities at every new location.
How often should I grease the swivel bearings?
In a standard fabrication environment, once every six months is usually sufficient. However, if you are doing a lot of grinding or “wet” work (like using a cold saw nearby), you should grease them every three months. The grease doesn’t just lubricate; it acts as a seal to push out metal dust and contaminants. Use a high-pressure grease that won’t squeeze out under the heavy static load of the bench.
Is it better to have four swivel wheels or two swivel and two fixed?
For a workbench, four swivel wheels provide the best maneuverability in tight shop spaces. However, it makes the bench harder to steer in a straight line over long distances. If your shop is large and you move the bench frequently across the floor, two fixed (rigid) wheels on one end and two swivel wheels on the other make it steer like a cart. For most stationary-heavy fabrication, four swivels with total-lock brakes are the preferred setup.
What causes a wheel to “flutter” or wobble when I’m pushing the bench?
This is called “caster shimmy.” It happens when the swivel lead (the distance between the swivel kingpin and the wheel axle) is incorrect for the speed or weight, or if the swivel bearings are too loose. In most shop environments, it’s a sign that the swivel bearings are worn out or the mounting plate is not level. Check the tightness of the kingpin nut if the assembly allows for adjustment.
(This article was written by one of our staff writers, Paul Whitaker. Visit our Meet the Team page to learn more about the author and their expertise.)