Hot Rolled vs Cold Rolled Steel for DIY Projects (Guide)
I have spent 14 years standing on shop floors and inspecting industrial frames. I have seen what happens when a builder chooses the wrong material for a high-stress joint. Early in my career, I watched a heavy equipment rack buckle because the fabricator didn’t account for the internal stresses of the steel they used. It wasn’t a lack of weld strength that caused the failure. It was a misunderstanding of how the metal would react to the heat of the torch and the weight of the load.
In the world of home fabrication, the stakes feel even higher. You are often working alone in a garage or a small shop. You don’t have a team of engineers to double-check your math. My goal is to share the hard-won data I’ve gathered from load tests and failed inspections. We will look at why some steel is better for structural frames while other types are better for precision tools. By understanding the physical limits of your materials, you can build projects that stay straight, strong, and safe.
Understanding the Physical Differences in Common Steel Stocks
Steel stock is generally categorized by how it was finished at the mill, which dictates its surface texture, strength, and straightness. These factors determine how the metal behaves when you cut it, weld it, or put it under a heavy load.
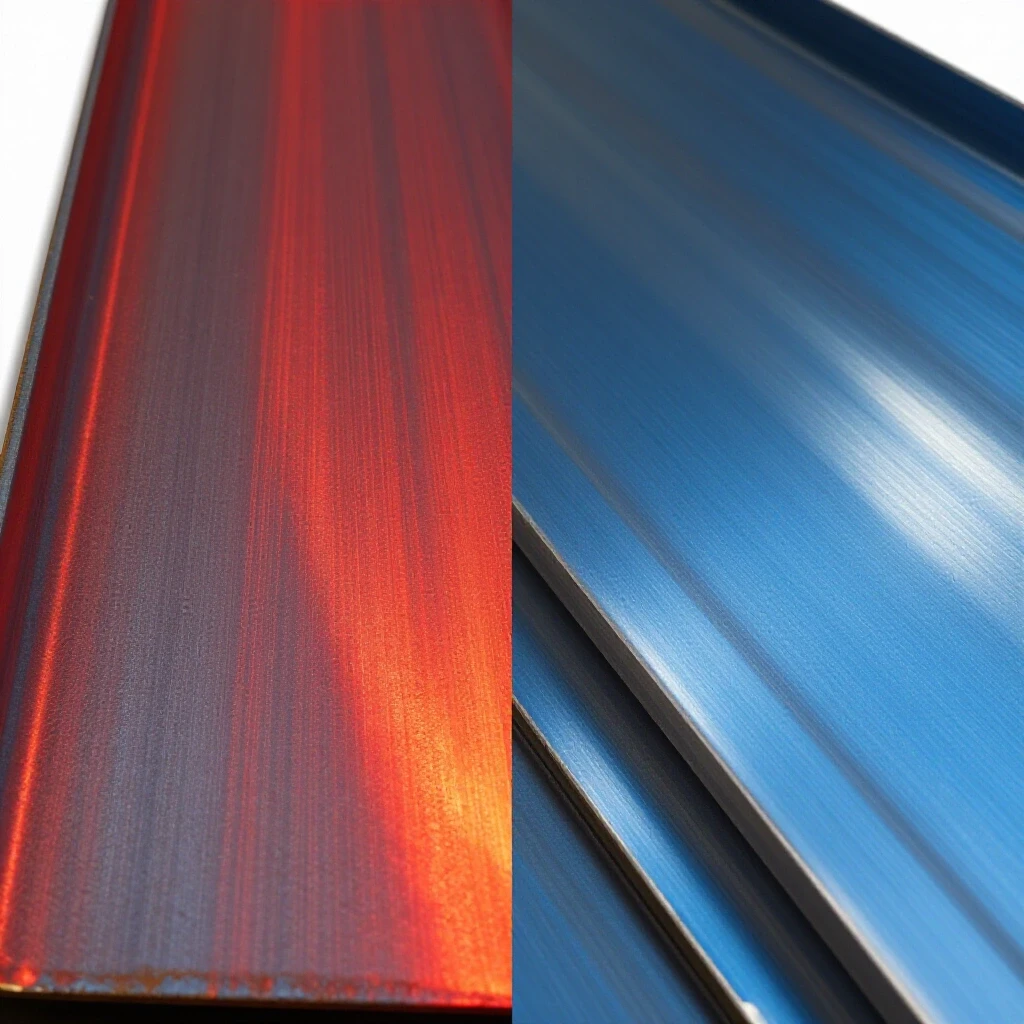
When steel is processed at very high temperatures, it is easy to shape but develops a rough outer layer. When it is finished at room temperature, it becomes harder and more precise. For a fabricator, this choice affects everything from how much prep work you do to how accurately your parts will fit together during final assembly.
The Characteristics of Hot-Finished Structural Steel
This material is shaped while the metal is red-hot, making it the workhorse for large-scale structural projects where extreme precision is less critical than bulk strength.
- Surface Texture: It features a dark, flaky coating known as mill scale.
- Dimensional Accuracy: Measurements can vary slightly across the length of the piece.
- Internal Stress: It has low internal tension, meaning it is less likely to warp when you cut it.
The Properties of Cold-Finished Precision Steel
This metal undergoes extra processing at room temperature to achieve a smooth finish and very tight dimensional tolerances.
- Surface Texture: It has a shiny, oily finish with no scale.
- Strength: The extra processing increases the yield strength, making it harder to bend.
- Internal Stress: It contains higher internal tension, which can cause the metal to “spring” or bow when it is cut or machined.
Why Surface Preparation Dictates Joint Reliability
In my inspection work, the most common cause of weld failure is poor surface preparation. If you are working with hot-finished steel, that flaky gray layer of mill scale is your biggest enemy. Mill scale is an oxide layer that acts as an insulator. If you try to weld over it, you will likely encounter arc instability and trapped impurities.
I once inspected a series of heavy-duty gate hinges that had snapped off. The builder had welded directly onto the mill scale. Under the microscope, the weld looked like a sponge. The scale had melted into the weld pool, causing massive internal voids. To avoid this, you must grind the metal down to shiny silver “bright metal” at least one inch away from any area you plan to weld.
Removing Mill Scale for Better Penetration
Mill scale has a higher melting point than the base steel, which can lead to a defect called “lack of fusion.”
- Use a flapper disc or a grinding wheel to remove all dark coating.
- Clean the area with a residue-free solvent like acetone.
- Ensure your ground clamp is attached to clean, bare metal to maintain a stable electrical circuit.
Comparing Material Performance and Load Limits
Choosing the right material requires looking at its yield strength. This is the amount of stress the metal can take before it permanently deforms. For most structural projects, we use a safety factor of at least 2:1, meaning the project is built to handle twice the expected weight.
| Property | Hot-Finished (A36) | Cold-Finished (1018) |
|---|---|---|
| Yield Strength | ~36,000 PSI | ~54,000 PSI |
| Surface Finish | Rough, Scaled | Smooth, Polished |
| Tolerance | Looser (+/- .020″) | Tight (+/- .002″) |
| Best Use | Heavy frames, brackets | Jigs, shafts, pins |
| Weldability | Excellent (after cleaning) | Good (watch for warping) |
Understanding Structural Metal Load Capacity
Yield strength is the benchmark for safety. If you are building a shop press or a vehicle trailer, the 36,000 PSI yield of standard hot-finished steel is usually plenty, provided your joint designs are sound. Cold-finished steel offers higher strength (54,000 PSI), but its higher cost and tendency to warp during welding make it less ideal for large frames.
Managing the Heat Affected Zone (HAZ) Weakness
Every time you strike an arc, you create a Heat Affected Zone. This is the area of the base metal that didn’t melt but was heated enough to change its physical properties. In cold-finished steel, the heat of welding can actually “undo” the strengthening it received at the mill, making the area around the weld softer and weaker than the rest of the bar.
I have seen structural failures occur not in the weld itself, but exactly one-quarter inch away from it. This is where the HAZ is most vulnerable. To manage this, I always recommend keeping your heat input as low as possible while still achieving full penetration. If you are working on a critical load-bearing part, consider using thicker hot-finished steel rather than thinner cold-finished steel to maintain a higher margin of safety.
Workshop Safety Checklist for Material Handling
Safety starts before the first spark. Handling heavy steel stock requires respect for the weight and the sharp edges produced by the mill.
- Foot Protection: Always wear steel-toed boots; a 20-foot stick of 2×2 tubing can easily crush a foot.
- Hand Protection: Use leather gloves to prevent “mill scale splinters” and cuts from sheared edges.
- Lifting: Use a cart or a roller stand for anything over 50 pounds to prevent back strain.
- Storage: Store steel horizontally on a rack. Vertical storage can lead to tipping accidents or bowed material.
Why Weld Porosity Destroys Structural Integrity
Porosity is essentially a cluster of tiny bubbles trapped inside your weld. It is often caused by improper shielding gas flow or contaminants on the metal surface. In my years as an inspector, I’ve found that porosity is the silent killer of DIY projects because it can be hidden under a beautiful-looking weld bead.
If you are using a MIG welder, your shielding gas flow rate should typically be between 15 and 20 CFH (Cubic Feet per Hour). If the flow is too low, oxygen enters the weld. If it is too high, it creates turbulence that pulls air into the puddle. Both result in a weak, porous joint that can fail without warning under a load.
Welding Defect Troubleshooting Table
| Defect | Visual Sign | Root Cause | Solution |
|---|---|---|---|
| Porosity | Tiny holes on surface | Gas draft or dirty metal | Increase gas to 20 CFH; clean metal |
| Undercut | Groove at weld edge | Too much heat/voltage | Lower wire speed or voltage |
| Lack of Fusion | Weld sits “on top” | Not enough heat | Increase voltage; slow down |
| Cracking | Line through center | Brittle metal or fast cooling | Pre-heat thick sections; cool slowly |
PPE and Garage Fabrication Safety
Working in a home shop presents unique risks, especially regarding ventilation and eye protection. Unlike industrial shops with massive air handlers, a garage can quickly fill with toxic fumes, especially when welding through the oils found on cold-finished steel.
Essential Protection Ratings
- Welding Helmet: Use a modern auto-darkening lens with a Shade 10-13 rating. I prefer a “True Color” lens to better see the weld pool and identify defects in real-time.
- Respiratory Safety: Use a P100 rated respirator under your hood. Even “clean” steel produces fumes that can cause long-term lung issues.
- Fire Prevention: Keep a 10lb ABC fire extinguisher within reach. Clear all sawdust and cardboard from a 35-foot radius of your welding area.
Structural Joint Failure Analysis: A Real-World Lesson
A few years ago, I helped a friend diagnose a failure on a custom motorcycle lift he had built. He used cold-finished square tubing for the main uprights because he liked the smooth look. However, he didn’t account for the internal stresses. When he welded the cross-members, the heat caused the uprights to bow inward by nearly half an inch.
When he placed the motorcycle on the lift, the bowing created an “eccentric load.” Instead of the weight pushing straight down through the steel, it was pushing at an angle. The lift collapsed because the material was already under tension from the welding warp. We rebuilt it using hot-finished steel. Even though the surface was rougher, the material stayed straighter after welding, and the lift has been in use for five years without a single sign of fatigue.
Joint Verification Checklist
Before you call a project “finished,” run through these verification steps:
- Visual Inspection: Look for any visible holes (porosity) or cracks.
- Squareness Check: Use a precision square to ensure welding heat didn’t pull the project out of alignment.
- Weld Profile: Ensure the weld is slightly convex (bulging out). A concave (sunken) weld is often too thin and prone to cracking.
- Stress Relief: For heavy builds, let the metal cool naturally. Never quench a structural weld in water, as this makes the steel brittle.
Practical Load Testing for Home Projects
You should never wait for a project to fail while it is in use. I advocate for a “controlled load test” on anything designed to hold weight. This involves applying a weight greater than the intended load in a safe environment where a failure won’t cause injury.
For a workbench or a shelving unit, I might load it with 1.5 times its rated capacity using sandbags or water jugs. While the load is applied, I use a flashlight to look for “yielding” or bending in the joints. If the metal doesn’t return to its original shape after the weight is removed, the design is insufficient. This data-driven approach removes the guesswork and gives you confidence in your fabrication.
Establishing a Safe Shop Layout
A disorganized shop is a dangerous shop. When working with long sticks of steel, you need clear “travel paths.” I recommend marking your floor with tape to define the “Hot Zone” where sparks fly and the “Material Zone” where stock is stored.
- Gas Cylinder Safety: Secure your shielding gas tanks to a wall or a heavy cart using chains. A knocked-over cylinder can become a rocket if the valve shears off.
- Lighting: Use high-output LED shop lights. You cannot inspect what you cannot see. I aim for at least 100 foot-candles of light at the workbench level.
- Power Management: Ensure your welder is on a dedicated circuit. Voltage drops can cause the arc to stutter, leading to poor weld penetration and structural weakness.
Final Steps for the Risk-Averse Fabricator
Building with steel is incredibly rewarding, but it requires a disciplined approach to material selection and joint preparation. By choosing hot-finished steel for your heavy frames and cold-finished steel for your precision parts, you are already ahead of the curve.
Your next step is to practice your “prep-and-inspect” routine. Don’t just weld; analyze the results. Use a magnifying glass to look at your beads. Check your gas flow. Grind off that mill scale every single time. These small, repeatable habits are what separate a hobbyist from a master fabricator.
Frequently Asked Questions
Which steel is easier to weld for a beginner? Hot-finished steel (like A36) is generally more forgiving for beginners because it has lower internal stress and is less likely to warp. However, you must be diligent about grinding off the mill scale. Cold-finished steel is cleaner, but the higher internal tension can cause the project to twist and pull during the welding process.
Do I really need to remove mill scale? Yes. Mill scale is an oxide that does not conduct electricity as well as the steel itself. It also has a different melting point. Leaving it on leads to “cold rolls,” where the weld sits on top of the metal instead of melting into it. For any structural project, grinding to bright metal is a non-negotiable safety step.
Why did my project warp even though I clamped it down? Steel expands when heated and contracts when cooled. If you weld a long continuous bead, the cooling metal pulls with immense force. To prevent this, use “stitch welding” (small 1-inch beads spaced apart) and allow the metal to cool between passes. Clamps help, but they cannot overcome the laws of thermal expansion.
Is cold-finished steel stronger than hot-finished steel? Yes, in terms of yield strength. The cold-rolling process “work-hardens” the metal. A standard cold-finished 1018 bar has a yield strength of about 54,000 PSI, while a hot-finished A36 bar is around 36,000 PSI. However, the heat of welding can reduce that strength advantage in the areas surrounding the joint.
What is the best way to clean cold-finished steel? Since cold-finished steel doesn’t have scale, it is usually coated in a light protective oil to prevent rust. Use a degreaser or acetone and a clean rag to remove this oil before welding. If the oil is left on, it can vaporize and cause porosity or contaminate your weld pool.
Can I mix hot-finished and cold-finished steel in one project? Yes, this is very common. You might use hot-finished tubing for the main frame of a machine and cold-finished rod for the hinge pins or sliding parts. Just remember to treat each material according to its needs—grind the scale off the frame and degrease the pins.
How do I know if my weld has good penetration? On a butt joint, you should ideally see a small “heat tint” or a slight bulge on the backside of the metal. For lap joints, look at the “toe” of the weld (the edge where it meets the base metal). It should transition smoothly into the base metal rather than looking like a rounded bead sitting on top.
What shielding gas should I use for these steels? For most DIY MIG welding on carbon steel, a mix of 75% Argon and 25% CO2 (often called C25) is the industry standard. It provides a stable arc and good penetration with minimal splatter. Set your flow rate to 15-20 CFH for indoor shop work.
How thick should my steel be for a heavy workbench? For a serious structural workbench, 1/8 inch (11 gauge) or 3/16 inch wall thickness is standard. While 1/16 inch might seem strong, it is much harder to weld without burning through, and it offers less rigidity under a heavy vise or an anvil.
What is the most dangerous mistake in home fabrication? The most dangerous mistake is overconfidence in a “pretty” weld. A weld can look smooth and shiny on the outside while having zero fusion to the base metal on the inside. Always prioritize proper cleaning, correct heat settings, and verifying your penetration over the visual appearance of the bead.
(This article was written by one of our staff writers, James Harlan. Visit our Meet the Team page to learn more about the author and their expertise.)