How to Clean Oxide From Aluminum Before TIG Welding (DIY Fix)
When I first started TIG welding aluminum twelve years ago, I thought my erratic arc and lumpy beads were purely a result of my poor hand-eye coordination. I spent hours trying to steady my torch hand and modulate the foot pedal, yet the metal seemed to fight me at every turn. It wasn’t until I began tracking my preparation steps in a shop log that I realized the problem wasn’t just my hands. It was the invisible, high-melting-point skin covering the metal.
In this metal welding practice guide, we will focus on the fundamental physical skills required to strip away that surface interference. Mastering the preparation of your workpiece is just as vital as mastering the torch itself. If you don’t clear the path for the arc, no amount of travel speed control will save the joint. We are going to look at the mechanics of surface decontamination and how to measure your progress as you build this essential habit.
Understanding the Invisible Barrier on Aluminum Surfaces
The surface of aluminum is home to a thin, tenacious layer of aluminum oxide that forms almost instantly when the metal meets air. While the core aluminum melts at about 1,220 degrees Fahrenheit, this oxide layer requires nearly 3,700 degrees to liquefy. This massive temperature gap is why your arc might wander or why your puddle looks “peppery” or dirty.
In my early practice logs, I noted that ignoring this layer led to a “skin” effect where the molten metal stayed trapped underneath a solid film. This prevents the filler rod from flowing into the base metal, often resulting in “grapes” or balls of filler sitting on top of the plate. To fix this, we must use mechanical and chemical methods to ensure the arc only has to deal with the base material.
Why Surface Integrity Dictates Puddle Control
When the surface is contaminated, the arc force has to work twice as hard to penetrate the metal. This extra heat often leads to “burn-through” or a puddle that suddenly collapses because the base metal was ready to melt long before the surface skin broke. By removing the oxide, you allow the puddle to form at a lower, more predictable temperature.
This predictability is the key to mastering torch control. When the metal reacts the same way every time you step on the pedal, your brain can finally start building reliable muscle memory. You stop reacting to chaos and start directing the flow of the weld.
Mechanical Removal of the Oxide Layer
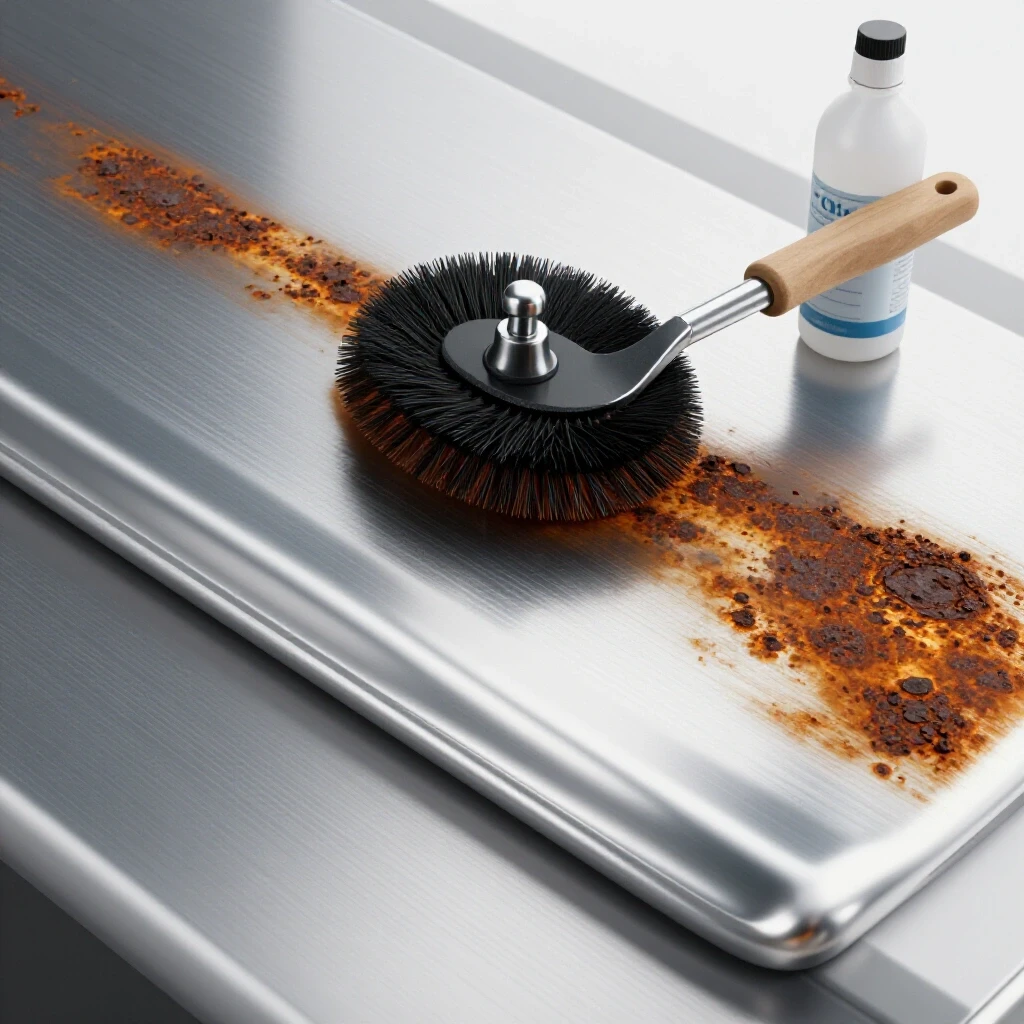
Mechanical cleaning involves physically scrubbing the surface to break through the hard oxide skin. This is not about making the metal look shiny; it is about exposing the raw aluminum underneath. For a beginner, this is the most impactful step in reducing arc wander and achieving a consistent bead profile.
I recommend using a dedicated stainless-steel wire brush. It must be “dedicated,” meaning it has never touched steel, copper, or any other material. Using a cross-contaminated brush will push tiny particles of other metals into the soft aluminum, leading to porosity and weld failure.
Physical Cues for Effective Brushing
When you brush, use firm, one-directional strokes. Avoid scrubbing back and forth, as this can trap contaminants deeper into the grain of the metal. You are looking for a dull, satin finish rather than a mirror polish. In my vocational training materials, I often tell students to look for the “frosted” appearance that indicates the oxide has been disturbed.
| Step | Action | Physical Cue | Goal |
|---|---|---|---|
| 1 | Secure Workpiece | No movement under hand pressure | Safety and precision |
| 2 | Initial Scrub | Firm, long strokes in one direction | Break the oxide skin |
| 3 | Edge Cleaning | Brush the 90-degree corners | Prevent edge contamination |
| 4 | Visual Check | Uniform satin or “frosted” look | Verify coverage |
Common Mechanical Errors to Avoid
A common mistake I see in trade school practice drills is using a power grinder with a standard stone wheel. These wheels often contain lubricants or binders that smear into the aluminum, making the surface even harder to weld. If you must use a power tool, stick to a dedicated stainless-steel wire wheel or a non-woven abrasive pad specifically rated for non-ferrous metals.
Solvent Degreasing and Chemical Preparation
Once the oxide is mechanically loosened, the next step is removing oils, greases, and fingerprints. Aluminum is porous, and even the natural oils from your skin can cause “hydrogen porosity,” which looks like tiny bubbles or pinholes in your finished weld. This stage is about chemical purity.
I use acetone or denatured alcohol for this process. These solvents evaporate quickly and leave no residue behind. However, they are highly flammable. Never keep an open container of solvent near your welding bench, and always ensure your workpiece is completely dry before you strike an arc.
The Lint-Free Wipe Technique
Use a clean, lint-free cloth or a high-quality paper towel. Apply the solvent to the rag, not the metal. Wipe the joint area thoroughly, then flip the rag to a clean side and wipe again. If the rag comes away gray or black, the metal is still dirty. Continue until the rag remains clean after a firm wipe.
- Use only lint-free materials to avoid leaving fibers behind.
- Always wipe the filler rod with solvent as well.
- Focus on the “clean zone,” which should extend at least one inch from the weld path.
- Dispose of used rags in a fire-safe container immediately.
Defining the Material Clean Zone
The “clean zone” is the specific area around the joint that must be prepared. Many beginners only clean the exact spot where the bead will sit. However, the heat of the arc draws contaminants from the surrounding area into the puddle. This is a major cause of inconsistent metal penetration.
In my own shop, I mark a one-inch boundary on either side of the joint. This ensures that as the heat spreads, it only encounters clean metal. This habit transformed my learning metal fabrication journey by eliminating the “mystery” of why some welds looked great while others were covered in black soot.
Measuring Preparation Efficiency
To track your progress, I suggest timing your preparation versus your actual arc time. In the beginning, your prep might take twice as long as the weld. As your technique improves, you will become faster and more efficient. Use the following metrics to evaluate your prep quality:
- Arc Initiation Time: Does the arc start immediately and stay stable?
- Puddle Clarity: Is the molten pool clear and reflective, or cloudy?
- Bead Consistency: Does the bead maintain a uniform width without “peppery” spots?
- Post-Weld Soot: Is there a heavy black film around the weld, or is it clean?
Structured Practice Drills for Surface Preparation
Building muscle memory isn’t just about the torch; it’s about the entire workflow. I want you to treat preparation as a timed drill. This helps you overcome the temptation to rush through the “boring” parts of the job. Consistency in prep leads to consistency in the puddle.
Start with five small coupons of aluminum. Your goal is to prepare all five to the same standard. Use your shop log to record how long the prep took and then rate the “weldability” of each piece on a scale of 1 to 10. You will quickly see a correlation between the effort spent cleaning and the ease of the weld.
The Five-Coupon Prep Drill
- Coupon 1: No prep (Control). Observe the arc wander and dirty puddle.
- Coupon 2: Solvent wipe only. Note if the oxide still blocks the flow.
- Coupon 3: Stainless brush only. Look for improvements in arc stability.
- Coupon 4: Brush and solvent. This should be your baseline for quality.
- Coupon 5: Brush, solvent, and cleaned filler rod. This is the professional standard.
Troubleshooting Preparation Failures in the Puddle
Even with good intentions, things can go wrong. Part of welding technique progression is learning to read the puddle and diagnose prep errors in real-time. If you see the metal “skinning over” or the arc jumping from side to side, stop immediately.
Interestingly, if you see small black flakes floating in your puddle, you likely didn’t brush deep enough or you used a contaminated brush. If the arc has a green or orange tint, there is likely a chemical contaminant like oil or paint nearby. Recognizing these signs early saves you from having to grind out a failed weld later.
Visual Defect Evaluation Chart
| Observation | Likely Cause | Fix |
|---|---|---|
| Black “Pepper” in Puddle | Residual Oxide | Re-brush with stainless steel |
| Tiny Bubbles (Porosity) | Hydrogen/Oil Contamination | Degrease with acetone |
| Arc Wanders Erratically | Heavy Oxide Layer | Increase brushing pressure |
| Filler Rod Balls Up | Surface Tension/Oxide Skin | Clean filler rod and base metal |
Establishing a Systematic Prep Workflow
To achieve professional-grade results, you need a repeatable system. I have found that a “checklist” approach reduces the mental load and allows you to focus on the physical act of welding. When your environment and materials are ready, your hands can do their best work.
- Safety First: Wear gloves even during prep to avoid skin oils.
- Mechanical Scrub: Use the dedicated brush on all mating surfaces.
- Chemical Wipe: Clean the base metal and the filler wire.
- Immediate Welding: Aim to weld within 15-30 minutes of cleaning.
- Log the Results: Note the material thickness and prep time in your tracker.
Tracking Your Skill Progression
I use a simple spreadsheet to track my practice sessions. By recording the preparation steps alongside my machine settings (like AC balance and frequency), I can isolate variables. If I have a bad day in the shop, I can look at my log and see if I skipped a cleaning step or used a different solvent.
| Date | Material | Prep Method | Amps | AC Balance | Result (1-10) |
|---|---|---|---|---|---|
| 10/12 | 1/8″ Alum | Brush + Acetone | 125 | 70% | 8 |
| 10/13 | 1/8″ Alum | Wipe Only | 125 | 70% | 4 |
| 10/14 | 1/8″ Alum | Full Prep + Rod | 130 | 75% | 9 |
Mastering the Physical Mechanics of Cleaning
The way you hold your tools matters. When brushing, use your shoulder and elbow for long, steady strokes. If you only use your wrist, you will create uneven pressure and miss spots. This is a great way to warm up your muscles before you pick up the TIG torch.
Think of preparation as the “foundation” of your weld. You wouldn’t build a house on sand, and you shouldn’t try to build a weld on oxide. Taking the time to physically engage with the metal during the cleaning phase helps you develop a “feel” for the material’s hardness and grain.
Ergonomic Tips for Shop Prep
- Stand with your feet shoulder-width apart for stability during heavy brushing.
- Use a vice to hold small parts so you can apply maximum pressure.
- Keep your cleaning station separate from your welding station to avoid dust.
- Use a bright LED light to inspect the surface for any remaining dull spots.
Advancing to Complex Joint Preparation
Once you can consistently clean flat plates, it’s time to move to more difficult joints like T-joints and lap joints. These areas are magnets for trapped oxide and oil. You must pay special attention to the “root” or the very bottom of the joint where the two pieces meet.
In these cases, I often use a smaller, narrow stainless-steel brush to reach into the corners. If you don’t clean the root, the weld might look good on the surface but lack the internal fusion required for a strong joint. This is a common plateau for intermediate fabricators, and the fix is almost always better preparation.
Fillet Joint Prep Milestones
- Can you clean the inside corner without rounding the edges?
- Is the solvent reaching the very back of the joint?
- Are you cleaning both the vertical and horizontal members equally?
- Does the arc stay centered in the root during the first pass?
Analyzing Your Results with Video and Photos
One of the best modern tools for a self-taught fabricator is the smartphone camera. I encourage my students to take a photo of their prepared joint before they weld, and then a photo of the finished bead. By comparing the two, you can see exactly how your prep influenced the final result.
If you have the ability, record a slow-motion video of your arc. You can actually see the “cleaning action” of the AC TIG arc as it tries to blast away any remaining oxide. If you see it struggling or “dancing” around a specific spot, you know exactly where your preparation fell short.
Conclusion and Next Steps
Mastering the removal of the oxide layer is a non-negotiable skill for anyone serious about TIG welding aluminum. It is the difference between a frustrating afternoon of “gray grapes” and a satisfying session of laying down clean, “wet” beads. By treating your preparation with the same rigor as your torch technique, you remove the variables that cause skill plateaus.
Your next step is to head into the shop and perform the Five-Coupon Prep Drill. Don’t worry about the perfect weld yet; just focus on the physical sensation of the brush and the visual clarity of the cleaned metal. Record your times and your results. Over the next few weeks, you will find that as your preparation becomes more consistent, your muscle memory for the torch will develop much faster.
Frequently Asked Questions
Why can’t I just use a regular steel brush?
Steel brushes are made of carbon steel. Small particles of this steel will break off and embed themselves in the soft aluminum. This causes the aluminum to rust (galvonic corrosion) and introduces impurities that will make your TIG arc pop and sputter. Always use a dedicated stainless-steel brush.
Is it okay to use brake cleaner for degreasing?
No. Never use chlorinated brake cleaner. When exposed to the UV light of a welding arc, the chemicals in some brake cleaners can turn into phosgene gas, which is highly toxic and potentially fatal. Stick to pure acetone or denatured alcohol.
How long can I wait after cleaning before I weld?
Aluminum begins to re-oxidize immediately. For the best results, you should weld within 30 minutes of cleaning. If the metal sits overnight, you must at least give it another quick brush and solvent wipe to ensure the surface is ready.
Do I really need to clean the filler rod?
Yes. Filler rods are often coated in drawing lubricants from the manufacturing process. If you don’t wipe them down with acetone, you are feeding contaminants directly into your clean puddle with every dip.
What does “cleaning action” on my TIG welder do?
When welding aluminum on AC (Alternating Current), the “electrode positive” part of the cycle actually blasts the oxide off the surface. However, this is only meant to handle the microscopic layer that forms instantly. It cannot “eat” through heavy oxide, oil, or thick scale. You must do the heavy lifting manually.
How do I know if my brush is contaminated?
If you see sparks while brushing your aluminum, or if the metal starts to look dark or smeared rather than “frosted,” your brush likely has steel or other debris in it. It’s time to replace it with a fresh, dedicated stainless-steel brush.
Can I use sandpaper instead of a wire brush?
You can use certain types of sandpaper, but be careful. Many sandpapers use adhesives that can melt and contaminate the weld. If you use an abrasive, ensure it is a high-quality, non-loading type specifically designed for aluminum, and always follow up with a solvent wipe.
Why is my aluminum weld turning black?
A black, sooty deposit usually means one of three things: poor shielding gas coverage, the torch is too far away (long-arc), or the metal wasn’t cleaned properly. If your gas and distance are correct, the soot is likely the arc “burning” off contaminants you missed during prep.
Should I clean the back side of the metal too?
Yes, especially on thinner gauges. The heat of the weld will pull contaminants from the back side of the plate through the joint. A quick brush and wipe on the back ensures a much cleaner root pass.
Does the thickness of the aluminum change how I clean it?
The fundamental steps remain the same, but thicker plates may require more aggressive brushing because they hold more heat and can draw more contaminants to the surface. Always maintain your one-inch “clean zone” regardless of thickness.
(This article was written by one of our staff writers, Thomas Langley. Visit our Meet the Team page to learn more about the author and their expertise.)