How to Mount Magnetic Tool Organizer Strips on Wall (Guide)
I have spent thirteen years in prototype shops and backyard garages, and if there is one thing I have learned, it is that a disorganized workspace is a dangerous one. I’ve built everything from custom utility trailers to intricate chassis frames, and the most frustrating part of any build isn’t the complex geometry—it’s losing my 9/16-inch box-end wrench right when I need to tighten a jig bolt. When you are in the middle of a critical weld sequence, you cannot afford to go hunting for tools.
That is why I treat the organization of my shop with the same level of precision as I do a layout for a suspension mount. Installing magnetic tool retention rails might seem like a simple task, but if you want them to hold heavy pipe wrenches and hammers without sagging or pulling off the wall, you have to approach it with a fabricator’s mindset. I’ve seen too many guys slap these up with cheap plastic anchors only to have the whole system come crashing down when the door slams.
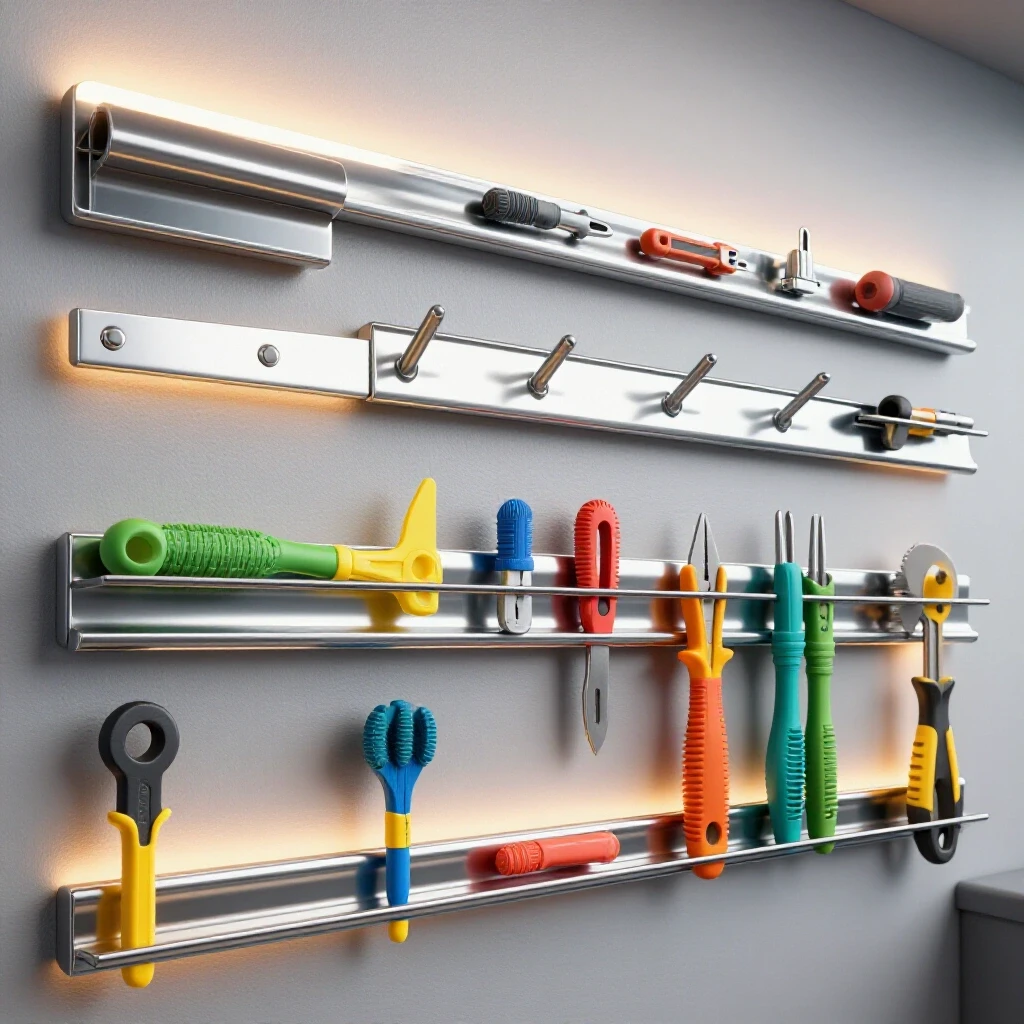
In this guide, I will walk you through the process of securing these magnetic organizers to your shop walls. We will cover everything from finding structural studs to fabricating custom backer plates for metal-sided shops. I’ll share the lessons I learned the hard way—like the time I mounted a rail to thin drywall and watched my heavy adjustable wrenches pull the fasteners right through the gypsum.
Planning the Workshop Layout for Magnetic Tool Storage
Planning the layout involves determining the vertical and horizontal placement of magnetic rails based on ergonomic reach and the location of structural wall members. This stage ensures that the tools are accessible during fabrication while remaining securely anchored to the building’s frame.
Before you drill a single hole, you need to think about your workflow. In my shop, I group tools by the stage of the project. I want my layout tools—squares, scribes, and markers—right above my main welding table. I want my heavy wrenches near the vise. I usually aim for a height of 48 to 52 inches from the floor. This keeps the tools at eye level but out of the way of the actual work surface.
One mistake I often see is mounting rails too close together. If you have two rows of magnets, leave at least 10 to 12 inches of vertical space between them. This prevents the handles of the tools in the top row from overlapping the tools in the bottom row. It also gives you enough room to get a solid grip on a tool without knocking three others off the wall.
Locating Structural Studs and Load Points
Identifying the framing members behind the wall is the most critical step for ensuring the magnets can support the weight of heavy steel tools. Solid wood or steel studs provide the necessary shear strength to prevent the rail from sagging over time.
In a standard garage, studs are usually spaced 16 inches or 24 inches apart on center. I use a high-quality stud finder, but I always verify the edges by using a small drill bit to “feel” the wood. If you are working in a metal building with hat channels or girts, your spacing might be different. I always mark the center of the stud with a vertical line using a carpenter’s pencil.
If your magnetic rail is 18 inches long and your studs are 16 inches apart, you are only going to hit one stud with the factory mounting holes. This is a common design flaw in many retail magnetic strips. In these cases, I don’t rely on drywall anchors. Instead, I fabricate a “load spreader” or a secondary mounting plate that bridges the gap between two studs.
Selecting the Right Fasteners for Shop Walls
Choosing the correct hardware is based on the specific wall material—whether it is drywall, plywood, or masonry—to prevent pull-out failures. The fastener must handle the constant “tug” of the magnet every time you pull a tool away from the rail.
When you pull a heavy tool off a magnet, you are applying a prying force to the fasteners. A standard #8 wood screw might hold the weight, but the repeated stress can loosen it over time. I prefer using #10 or #12 pan-head screws for wood studs. The flat underside of the pan-head provides better clamping force against the rail’s mounting holes than a countersunk bugle-head screw.
| Wall Material | Recommended Fastener | Minimum Engagement |
|---|---|---|
| Wood Studs (2×4) | #10 Wood Screw (Pan Head) | 1.5 Inches |
| Plywood (3/4″) | #12 Wood Screw or Tee-Nuts | Full Thickness |
| Concrete Block | Tapcon or Expansion Anchor | 1.25 Inches |
| Steel Girts | Self-Tapping Tek Screws | 3 Threads Past Metal |
| Drywall Only | Toggle Bolts (Not Recommended) | N/A |
Why Standard Drywall Anchors Often Fail
Drywall is a brittle material made of gypsum sandwiched between paper. While a plastic plug anchor might be rated for 20 pounds, it is not designed for the dynamic load of a magnetic tool holder. Every time you “snap” a tool onto the magnet, you are sending a shockwave through that anchor. Eventually, the hole in the drywall will enlarge, and the rail will start to wobble.
If I absolutely must mount to drywall without a stud, I use 3/16-inch toggle bolts. However, my preferred method is to mount a 3/4-inch piece of ACX plywood to the studs first, then mount the magnetic rails to the plywood. This gives me a “fabrication zone” where I can move magnets around whenever I get new tools without having to find new studs.
Precise Layout and Leveling Techniques
Using layout tools like spirit levels and laser lines ensures that tools hang vertically and the setup remains professional. Accurate alignment prevents tools from sliding sideways on the rail due to gravity, which can happen if the rail is significantly out of level.
When I’m setting up a row of magnets, I don’t just “eye it.” I use a 4-foot box level to snap a chalk line across the work area. This gives me a reference point for all my rails. If you are installing multiple rails in a grid, the chalk line ensures they all sit on the same horizontal plane.
I also pay attention to the “offset” of the magnets. Some rails have the magnets recessed into a steel U-channel. If your wall is not perfectly flat—which most shop walls aren’t—the U-channel can twist when you tighten the screws. This twist can cause the magnets to lose full contact with your tools. I use small stainless steel washers as shims behind the mounting holes to keep the rail perfectly straight.
Calculating Spacing for Tool Clearance
Determining the distance between tools on the rail is essential for maintaining an organized and functional workspace. Proper spacing prevents tool heads from clashing and ensures that you can grab a single item without disturbing the rest.
I generally follow a +/- 1/16th inch tolerance for my mounting holes. For the tools themselves, I leave about 1 inch of clearance between the widest part of each tool. For example, if I am hanging a set of 1/2-inch drive ratchets, I measure the width of the ratchet head and add an inch. This prevents the handles from tangling.
- Small Screwdrivers: 1.5 inches apart.
- Wrenches (up to 1 inch): 2 inches apart.
- Hammers/Mallets: 4 to 5 inches apart.
- Pliers/Side-cutters: 2.5 inches apart.
Fabricating Custom Backer Plates for Heavy Loads
A backer plate is a secondary piece of material—usually wood or steel—fastened to the wall studs to provide a continuous mounting surface. This is a common solution in shops where stud spacing does not align with the pre-drilled holes in the magnetic strips.
If I am mounting a series of these rails in a high-traffic area, I often fabricate a custom 11-gauge steel plate. I’ll cut the steel to 4 inches wide and long enough to span three studs (usually 32 or 48 inches). I drill and countersink holes in the steel plate to match the stud locations. Then, I can drill and tap holes in the steel plate specifically for the magnetic rails.
This approach eliminates the “stud-finding” headache for each individual rail. It also adds a layer of protection to the wall. In a welding environment, having a steel backer plate prevents sparks or heat from damaging the drywall behind your tool storage.
Managing Thermal Expansion in Metal Shops
In shops that are not climate-controlled, metal components will expand and contract with temperature swings. While this is a major factor in weld sequencing for large frames, it also affects long runs of tool storage.
Steel has a thermal expansion coefficient of approximately 0.00000645 inches per inch per degree Fahrenheit. Over a 10-foot run of tool storage, a 50-degree temperature swing can move the metal about 0.04 inches. That’s nearly 3/64ths of an inch. If your rails are butted tightly against each other, they can “buckle” or bow out from the wall. I always leave a 1/8-inch gap between the ends of adjacent rails to allow for this movement.
The Installation Sequence: Step-by-Step
The installation sequence is the physical order of operations, from drilling pilot holes to the final torque of the fasteners. Following a logical order prevents the rail from shifting and ensures the fasteners are centered in the structural members.
Once I have my layout lines and my stud locations marked, I follow a strict sequence. This is the same way I approach a tack-welding sequence: start from the center and work out, or work from one fixed point to ensure alignment.
- Mark the first hole: Hold the rail against your level line and mark the center of the first mounting hole, preferably over a stud.
- Drill a pilot hole: For a #10 wood screw, use a 1/8-inch drill bit. This prevents the wood stud from splitting and ensures the screw drives straight.
- Secure one end: Drive the first screw until it is snug but not fully tight. This allows you to pivot the rail.
- Level the rail: Place your level on top of the rail and pivot it until it is perfectly horizontal.
- Mark and drill the second hole: While holding the rail level, mark the second hole. If it doesn’t hit a stud, this is where you will need to use a heavy-duty anchor or a backer plate.
- Install the remaining fasteners: Drive the rest of the screws.
- Final Torque: Tighten all screws firmly. Do not over-torque, or you may strip the wood fibers or crush the rail’s housing.
Avoiding “Bit Walk” During Drilling
When drilling into steel studs or backer plates, the drill bit often wants to “walk” or slide away from your mark. This ruins your alignment and leaves ugly scratches on your wall.
I always use a spring-loaded center punch to create a physical dimple at my mark. This gives the tip of the drill bit a place to “seat.” For larger holes, I start with a small 1/8-inch pilot bit before moving up to the final size. This ensures the hole stays exactly where I planned it, maintaining my +/- 1/16th inch tolerance.
Testing Load Capacity and Magnetic Strength
Post-installation testing involves verifying that the rail can handle the intended weight and that the magnetic pull is sufficient for the specific tools being stored. Not all magnets are created equal, and some tools have less surface area for the magnet to “grab.”
Once the rail is mounted, I perform a “pull test.” I start with light tools and gradually move to my heaviest items, like an 18-inch pipe wrench or a 3-pound dead-blow hammer. I watch the rail closely for any signs of deflection or “pulling” away from the wall.
| Tool Type | Average Weight | Required Magnetic Surface Area |
|---|---|---|
| 12″ Adjustable Wrench | 1.5 lbs | 2 Square Inches |
| 24oz Ball Peen Hammer | 2.0 lbs | 1.5 Square Inches |
| 1/2″ Drive Ratchet | 1.2 lbs | 1.0 Square Inch |
| Set of 5 Screwdrivers | 1.0 lbs | 0.5 Square Inch (each) |
If a tool feels “loose” on the magnet, it’s usually because the tool’s surface is rounded or textured, reducing the contact patch. In these cases, I don’t trust the magnet. I’ll either move that tool to a drawer or add a second magnetic strip below the first one to provide two points of contact.
Correcting Common Installation Errors
Addressing issues like stripped screw holes, uneven walls, or magnetic interference ensures the longevity of the storage system. Even with careful planning, real-world materials like warped studs or crumbling masonry can cause problems.
If you strip out a hole in a wood stud, don’t just try a bigger screw. I usually take a wooden matchstick or a toothpick, dip it in wood glue, and jam it into the hole. Once it dries, I trim it flush and re-drill the pilot hole. This gives the screw fresh “meat” to bite into.
If your wall is significantly bowed, the magnetic rail will follow that curve when you tighten the screws. This puts internal stress on the magnets and can even cause them to crack. I use plastic horseshoe shims (the kind used for windows and doors) behind the rail to fill the gaps. This keeps the rail straight even if the wall is a “dog’s hind leg.”
Dealing with Magnet Interference
Interestingly, if you mount magnetic rails too close to electronic equipment or precision measuring tools, you can cause problems. I keep my magnetic storage at least 24 inches away from my digital calipers and my welding machine’s control panel.
The magnetic field can also “magnetize” your tools over time. This is usually fine for wrenches, but it’s a nightmare for drill bits or saw blades because they will start to attract metal chips and swarf. If this happens, you can use a “demagnetizer” tool, or simply store your cutting tools on a non-magnetic rack.
Final Review of the Tool Wall
After the installation is complete, I step back and evaluate the project just like I would a finished weldment. Is it square? Is it structural? Does it serve the intended purpose?
A well-installed tool wall should feel like an extension of your workbench. There should be no “wiggle” when you grab a tool. The spacing should allow you to work quickly without thinking. If I find myself struggling to pull a tool off or if one keeps falling, I go back to the layout phase and adjust.
Remember, the goal of any shop project—whether it’s a custom chassis or a simple tool rack—is to improve your ability to build. By taking the time to find the studs, select the right fasteners, and level your layout, you are creating a foundation for every project that follows.
- Always hit the studs: Never rely on drywall alone for heavy tools.
- Use a level: Gravity is constant; a tilted rail leads to sliding tools.
- Pilot holes are mandatory: Avoid splitting wood or walking bits on metal.
- Shim for flatness: Don’t let a warped wall bend your magnetic rail.
- Leave room for your hands: Space tools so you can actually grab them.
Frequently Asked Questions
Can I mount magnetic strips directly to a metal pegboard?
Yes, but you should use machine screws and nuts rather than sheet metal screws. Sheet metal screws can vibrate loose over time. I recommend using 1/4-20 bolts with nylon-insert lock nuts on the back of the pegboard for a permanent, vibration-resistant connection.
How much weight can a typical 18-inch magnetic rail actually hold?
Most consumer-grade magnetic rails are rated for 20 to 30 pounds total. However, this depends on the surface area of the tools. A 10-pound weight with a small contact point might fall, while 20 pounds of flat wrenches will stay put. Always test your heaviest tools individually.
Will the magnets lose their strength over time?
Rare-earth magnets (Neodymium) lose about 1% of their strength every ten years if they aren’t subjected to high heat. In a standard shop environment, they will likely outlast the wall they are mounted on. Ceramic magnets are also very stable but can be more brittle.
What is the best height to mount these for a person of average height?
I find that 48 inches to 54 inches from the floor is the “sweet spot.” This allows you to reach tools while standing at a standard 36-inch high workbench without having to reach too high or bend over.
Can I cut a magnetic tool strip to a shorter length?
It depends on the design. If it is a solid steel bar with magnets glued inside a channel, you can usually cut it with a hacksaw or a bandsaw. However, be careful not to overheat the magnets, as high temperatures (above 176°F for some Neodymium) can permanently demagnetize them.
How do I mount these to a concrete or brick wall?
Use a hammer drill and masonry bits to install 3/16-inch or 1/4-inch Tapcon screws. Ensure you drill the hole at least 1/2-inch deeper than the screw will reach to allow for dust clearance. Alternatively, you can use plastic expansion anchors, but Tapcons are much more reliable for heavy tools.
My magnetic strip didn’t come with mounting holes that match my 16-inch studs. What do I do?
The best solution is to mount a “stringer” (a piece of 1×4 wood or a strip of 1/8-inch steel) to the studs first. Then, mount your magnetic strip to that stringer. This is much safer than trying to drill new holes through the magnets themselves, which can shatter them.
Will these magnets interfere with my TIG welder or plasma cutter?
Generally, no. The magnetic field from these strips is very localized. Unless you are welding within a few inches of the magnets, the arc won’t be affected. However, keep your welding ground clamp and cables away from the magnets to prevent any unexpected arc blow.
How do I clean the magnets when they get covered in metal shavings?
This is a common issue in fabrication shops. The easiest way is to use a piece of heavy-duty masking tape or a stronger magnet wrapped in a rag. Press the tape onto the shavings and peel them off. Never try to wipe them off with your bare hand, as small metal slivers can easily puncture your skin.
Can I mount these vertically instead of horizontally?
You can, but it is less effective. Tools are more likely to slide down a vertical rail due to gravity. If you must mount vertically, only use it for very light tools or tools with a “shelf” (like the head of a hammer) that can rest on the top of a magnet.
(This article was written by one of our staff writers, Robert Kline. Visit our Meet the Team page to learn more about the author and their expertise.)