How to Build a Mobile Welding Consumable Organizer (DIY Plan)
There is a specific kind of sinking feeling that happens in a workshop when you finish a beautiful set of welds, unclamp your project, and watch the steel frame spring into a trapezoid. I spent my early years as a prototype technician learning this lesson the hard way. I once built a heavy-duty utility trailer frame that looked straight on the table, but because I rushed the weld sequence, the main rails pulled into a three-quarter-inch bow. That “banana” frame taught me that steel is a living thing that moves, breathes, and pulls as it heats and cools.
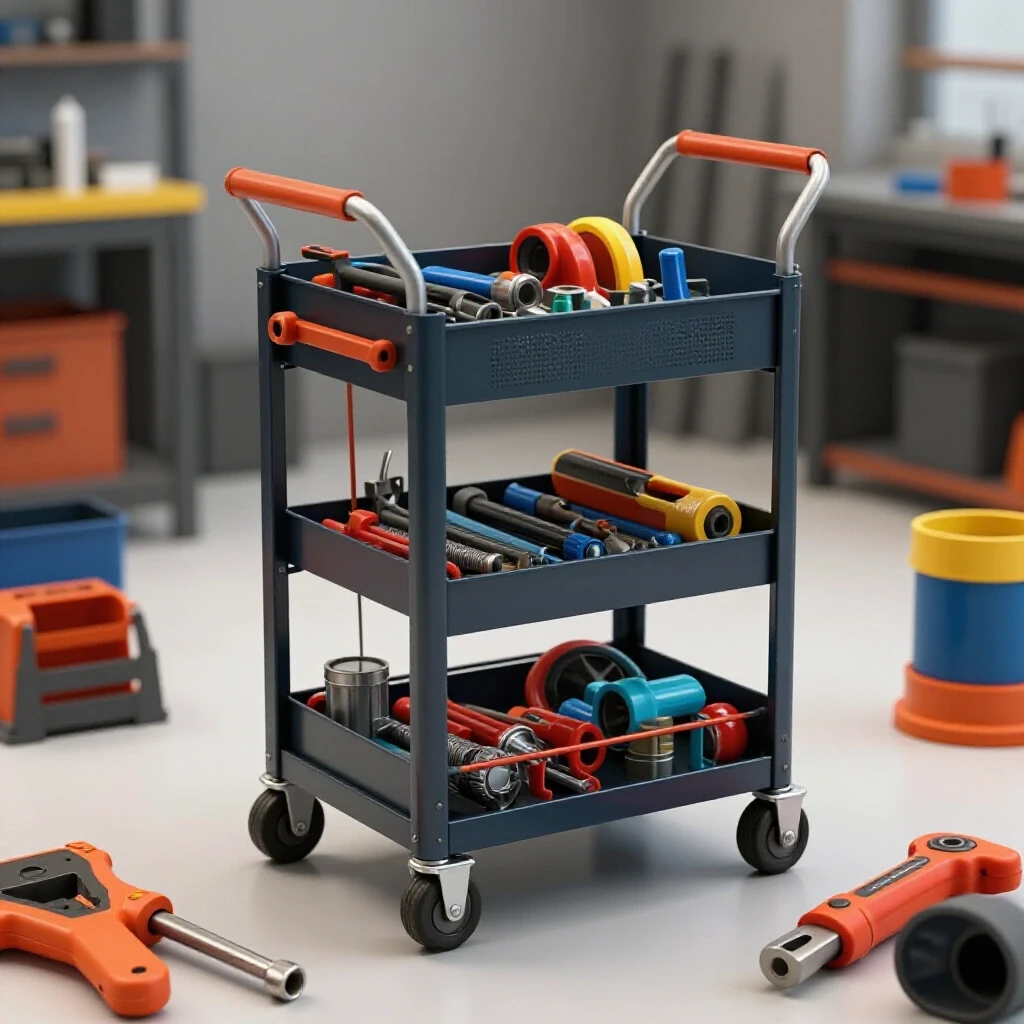
When you are building a rolling workstation for your welding supplies, the stakes are high because precision matters for drawer slides and square shelving. A rolling cart that wobbles or has drawers that bind because the frame is 1/8-inch out of square is a daily reminder of a layout failure. To avoid this, we have to look at the physics of metal behavior. Every weld is a cooling force that wants to shrink the joint. If you don’t plan for that shrinkage, your custom fabrication projects will never sit flat on the floor.
Designing the Blueprint and Material List for a Rolling Supply Station
Designing a project involves more than just drawing a box; it requires a deep understanding of how material thickness and joint types affect your final dimensions.
Before you strike an arc, you need a cut list that accounts for the “stack-up” of your materials. For a rolling storage unit, I prefer using 1-inch square tubing with a 14-gauge wall thickness (0.083 inches). It provides a great balance between structural rigidity and weight. If you plan for a 24-inch wide cart and you place your horizontal tubes between your vertical uprights, you must subtract the width of both vertical tubes from your horizontal cut. Failing to do this simple math is the primary reason projects end up wider than intended.
Material Selection and Dimensional Planning
- Main Frame: 1″ x 1″ x 14ga Square Steel Tubing. This is easy to square up and provides flat surfaces for mounting sheet metal.
- Shelving and Dividers: 16-gauge Cold Rolled Sheet. Cold-rolled is preferred over hot-rolled because it lacks the mill scale that interferes with clean TIG or MIG welds.
- Casters: 4-inch Swivel Casters with locks. Always over-spec your weight capacity; a fully loaded cart with rod tubes and wire spools can easily exceed 200 pounds.
- Fasteners: Grade 5 zinc-plated bolts for the casters to prevent the heat of welding from warping the caster mounting plates.
Calculating Kerf and Preparing Square Stock for Accurate Layouts
Kerf is the width of the material removed by your cutting tool, and ignoring it is the fastest way to lose 1/4-inch over a series of four cuts.
When I plan my cuts, I use a “zero-side” marking technique. I mark the exact length I need and ensure the saw blade stays on the waste side of that line. An abrasive chop saw might have a kerf of 1/8-inch, while a portable bandsaw is closer to 0.035-inch. If you make ten cuts without accounting for a 1/8-inch kerf, you’ve lost over an inch of material from your stock.
Metal Kerf Allowances by Cutter Type
| Tool Type | Average Kerf Width | Precision Tolerance | Best Use Case |
|---|---|---|---|
| Abrasive Chop Saw | 0.125″ (1/8″) | +/- 1/16″ | Rough framing |
| Portable Bandsaw | 0.042″ | +/- 1/32″ | Clean, square tube cuts |
| Cold Saw | 0.090″ | +/- 1/64″ | High-precision assembly |
| Handheld Grinder (Cut-off) | 0.045″ – 0.060″ | +/- 1/8″ | Notching and small adjustments |
After cutting, deburring is not just for safety. A small burr on the inside of a tube can prevent a joint from sitting flush, which throws off your square alignment. I use a flap disc or a dedicated deburring tool to ensure every mating surface is perfectly flat.
Building Workshop Jigs for Frame Alignment
A jig is a temporary structure or fixture used to hold parts in the correct position during the joining process.
In a home garage, your welding table is your most important jig. If your table isn’t flat, your cart won’t be flat. I often use “F-style” clamps and heavy steel blocks to create a perimeter on my table. By clamping my base frame against these blocks, I force the tubing to stay at a 90-degree angle while I apply my initial tacks. If you don’t have a dedicated fixture table, you can use the “3-4-5 rule” (Pythagorean theorem) to check for square: measure 3 inches on one side, 4 inches on the other, and the diagonal must be exactly 5 inches.
Fixturing Span and Clamp Spacing
For 1-inch tubing, I recommend placing a clamp or a fixture point every 12 inches. This prevents the tube from bowing in the middle when you apply heat. When building the partitions for welding rods or wire spools, use spacers—blocks of wood or metal cut to the exact width of the opening—to ensure every bay is identical. This is a standard workshop jig technique that saves you from measuring every single divider individually.
Structural Tacking and the Science of Weld Sequencing
A tack weld is a small, temporary weld used to hold components in place; it must be strong enough to resist shrinkage but small enough to be easily removed if an error is found.
One of the biggest mistakes I see is “welding around the clock”—starting at one corner and going all the way around the frame. This concentrates all the heat on one side, causing the metal to expand and then pull the frame into a diamond shape as it cools. Instead, I use a staggered tacking strategy. I place 1/4-inch tacks on the inside corners first, check for square, and then tack the outside corners.
Weld Sequencing Layout for Distortion Control
| Joint Sequence | Action | Purpose |
|---|---|---|
| Step 1: Diagonal Tacks | Tack top-left, then bottom-right | Balances initial pull |
| Step 2: Opposing Sides | Weld outside corners of opposite joints | Distributes heat evenly |
| Step 3: Interior Fillets | Weld short beads (1″) on inside corners | Locks the geometry |
| Step 4: Final Wrap | Complete the vertical welds | Finalizes structural integrity |
By following this sequence, you are essentially fighting fire with fire. The pull from the second weld helps counteract the pull from the first. I aim for a dimensional tolerance of +/- 1/16-inch across the diagonals of the frame. If the diagonals are equal, the frame is square.
Installing Dividers and Sheet Metal Components
Sheet metal behaves differently than tubing because it has a much higher surface-area-to-thickness ratio, making it prone to “oil-canning” or warping.
When installing the shelves for your tips, nozzles, and gas bottle mounts, avoid long continuous beads. For 16-gauge sheet metal, I use “stitch welding.” This involves making a 1/2-inch weld, moving to a different part of the cart, and making another 1/2-inch weld. This gives the first weld time to dissipate heat. If you get the sheet metal too hot, it will warp, and your storage bins will never sit level.
Managing Heat in Thin Sections
- Heat Sinks: Place a heavy block of copper or aluminum behind your weld area to soak up excess heat.
- Tack Spacing: For sheet metal dividers, space your tacks every 2 to 3 inches.
- Weld Size: Keep your fillet welds small. A 1/8-inch leg length is more than enough for a supply cart; anything larger just adds unnecessary heat and distortion.
Organizing Storage for Rods, Wires, and Small Parts
The goal of this build is functionality. I like to incorporate vertical tubes for welding rods (6010, 7018, and TIG fillers) and a dedicated shelf for MIG wire spools.
For the rod storage, I use 2-inch PVC pipe sleeves dropped into the steel frame. This prevents the steel from scratching the rod coatings and allows for easy labeling. For small consumables like contact tips and gas diffusers, I fabricate small “gravity bins” out of sheet metal. These bins have a slanted bottom so that parts always slide to the front.
Weight Distribution and Caster Mounting
A common error is mounting the casters too far inboard. This makes the cart tippy when the top drawers are pulled out. I always mount my caster plates as close to the outer corners of the frame as possible. Use a 1/4-inch thick mounting plate for the casters to ensure they don’t bend the thinner frame tubing over time. I prefer bolting the casters rather than welding them directly; this allows for easy replacement if a bearing fails or if you decide to upgrade to larger wheels later.
Final Straightening and Finishing Techniques
Even with the best sequencing, some movement is inevitable. If a shelf has pulled slightly, you can often “cold straight” it using a heavy hammer and a block of wood to protect the metal.
If the distortion is more severe, you can use “flame straightening.” This involves heating the side opposite the weld to expand the metal, which then pulls the piece back into alignment as it cools. However, for a workshop project like this, mechanical straightening is usually sufficient. Once the frame is straight, I use a 60-grit flap disc to smooth the welds, followed by a thorough degreasing with acetone before applying a durable enamel paint.
Case Study: The 40-Hour Supply Station Build Log
In a recent build, I tracked every minute and every dollar to see where the “hidden” costs were.
- Planning and Layout (4 hours): Creating the cut list and verifying the dimensions of my largest wire spools and rod tubes.
- Cutting and Deburring (6 hours): Using a bandsaw for all 42 individual pieces of tubing and sheet metal.
- Frame Assembly and Tacking (8 hours): The most critical phase. I spent 2 hours just ensuring the base frame was square within 1/32-inch.
- Finish Welding (10 hours): Using a staggered sequence to prevent the 16-gauge shelves from warping.
- Detail Work (8 hours): Fabricating the rod holders, tip bins, and mounting the handle.
- Finishing (4 hours): Grinding, cleaning, and painting.
The total material cost was $215, including the casters and paint. By doing the labor myself and focusing on accurate square cuts, I ended up with a unit that is significantly more robust than anything available at a big-box store.
Actionable Framework for Your Build
To keep your project on track, use this checklist during your next workshop session:
- Verify Square: Check diagonals after every four tacks.
- Touch Test: If the metal is too hot to touch comfortably (around 140°F), stop and let it cool before continuing the weld.
- Clamp Pressure: Ensure clamps are tight enough to prevent movement but not so tight they bow the tubing before you weld.
- Weld Direction: Always weld from the “open” end of a joint toward the “closed” or constrained end to minimize internal stress.
Conclusion
Building your own workshop fixtures is the best way to sharpen your fabrication skills. It forces you to deal with the realities of metal behavior—the heat, the pull, and the precision required for moving parts. By focusing on smart weld sequencing and rigid fixturing, you can turn a pile of raw steel into a professional-grade storage solution. Start by perfecting your cut list, respect the kerf, and always remember that a project is won or lost in the layout phase, long before the first spark flies.
FAQ: Mastering Workshop Fabrication and Layout
How do I prevent my frame from becoming a “diamond” shape? This happens when one side of the frame is longer than the other or when the welds pull unevenly. Always measure your diagonals. If one diagonal is 30 inches and the other is 30 1/4 inches, your frame is a diamond. Use a ratcheting strap to pull the long diagonal into place before you finish welding.
What is the best way to tack thin-wall tubing? Use a higher amperage for a very short duration (a “zap” tack). This ensures good penetration without building up too much heat. Aim for a tack that is about twice the thickness of the metal.
Should I MIG or TIG my supply cart? MIG is faster and better for filling small gaps if your cuts aren’t perfect. TIG offers better heat control and cleaner welds, which is ideal for the 16-gauge sheet metal components. If you are a beginner, MIG is the more practical choice for this project.
How do I account for the thickness of the paint in my tolerances? Standard enamel paint adds about 0.003 to 0.005 inches. For drawers or sliding parts, I always leave a 1/16-inch “air gap” on each side to account for paint and slight metal movement.
Why did my sheet metal shelf warp even though I used tacks? You likely placed the tacks too close together in a single pass. Space your tacks out and let the metal cool to room temperature between sets. Also, ensure the sheet is clamped flat against a thick metal surface to act as a heat sink.
Can I use wood for the dividers instead of steel? You can, but bolting wood to a steel frame can be tricky as the materials expand at different rates. Steel dividers welded in place add to the structural rigidity of the entire cart.
What is the best way to ensure the casters are level? Weld your frame on a known flat surface. Once the frame is complete, flip it over and use shims to level the caster mounting plates before tacking them. This ensures the cart won’t wobble on a flat shop floor.
How much gap should I leave for a butt weld? For 14-gauge tubing, a “light-tight” fit (no gap) is usually best for MIG welding. If you are TIG welding, a 1/32-inch gap can help with full penetration, but it increases the risk of the joint pulling together.
How do I clean mill scale off hot-rolled steel? Use a phosphoric acid-based cleaner or a “strip disc” on an angle grinder. Removing the scale is essential for a strong weld and a long-lasting paint finish.
What should I do if my frame is slightly twisted after welding? Secure one end of the frame to your heavy workbench and use a long lever (like a piece of 2×4 or a stout pipe) to gently twist it back. Steel has an elastic limit; you have to bend it just past that limit for it to take a “set” in the new, straight position.
(This article was written by one of our staff writers, Robert Kline. Visit our Meet the Team page to learn more about the author and their expertise.)