How to Prevent Corrosion and Rust on Raw Mild Steel (Guide)
I have spent the last 14 years in various fabrication shops, from high-pressure industrial environments to my own personal garage. In that time, I have seen beautiful projects ruined not by poor design, but by the slow, silent creep of oxidation. For those of us who build structural frames or custom equipment, raw mild steel is our primary language. However, this material has a fundamental weakness: it wants to return to the earth as iron oxide the moment it is exposed to air and moisture.
Early in my career, I inspected a heavy-duty storage rack that a colleague had built. It looked solid, but he had neglected to treat the internal surfaces of the square tubing before sealing the ends. Within two years, the structural integrity was compromised from the inside out. This experience taught me that protecting your work is not just about looks; it is a critical safety step. If you are worried about your projects failing or warping over time, understanding how to manage surface decay is essential for long-term structural stability.
Why Surface Oxidation Threatens Structural Integrity
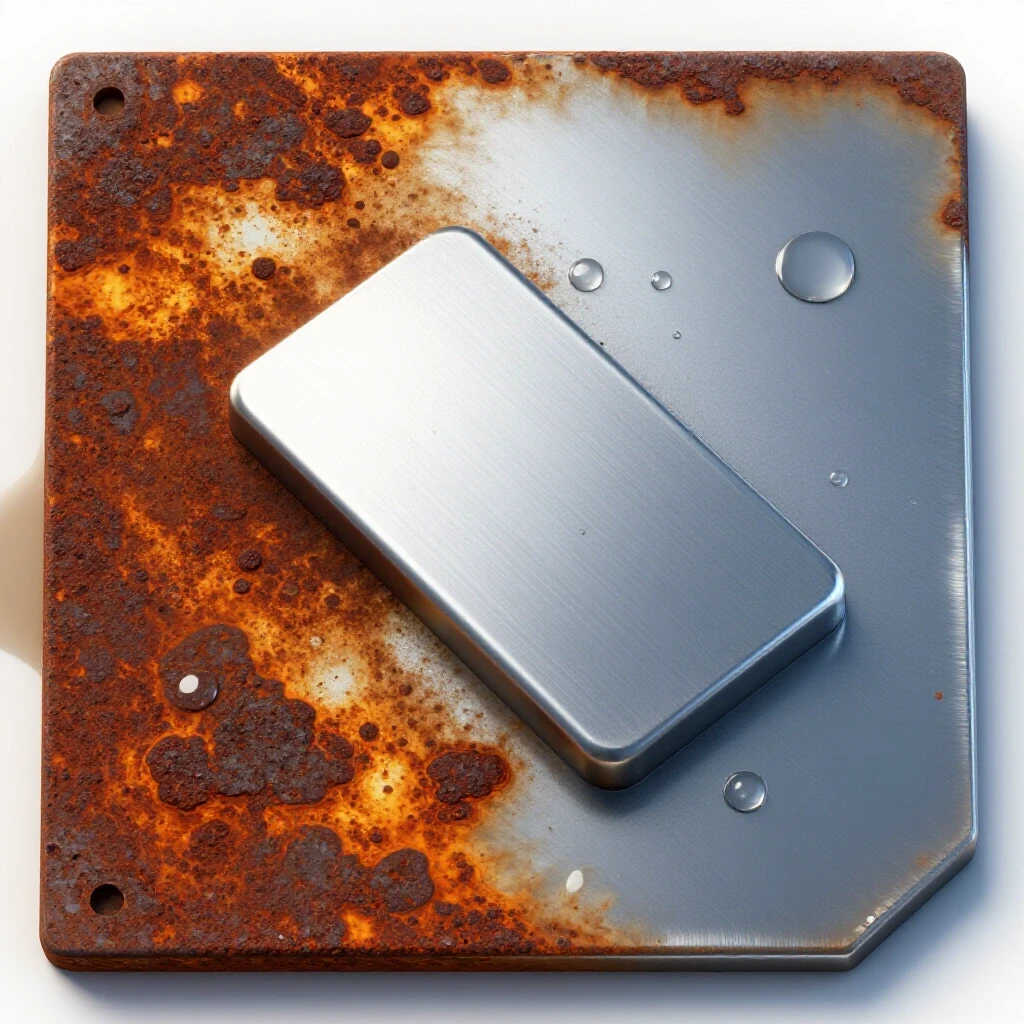
Surface oxidation, commonly known as rust, is a chemical reaction where iron atoms in the steel bond with oxygen in the presence of moisture. This creates a brittle, flaky layer that does not adhere to the metal beneath it.
When rust forms on a structural member, it does more than change the color. It physically consumes the base metal, effectively reducing the thickness of the material. In engineering terms, this reduces the cross-sectional area of your part. If you designed a bracket to hold 500 pounds based on a 1/4-inch thickness, and rust eats away 1/32 of an inch, your safety margin has just shrunk. For intermediate fabricators, this is where “structural design uncertainty” becomes a real danger.
Understanding the Impact on Load Capacity
When steel begins to pit or flake, the surface is no longer smooth. These pits act as “stress risers,” which are points where mechanical stress concentrates. Under a load, a crack is far more likely to start at a rust pit than on a clean, smooth surface.
| Steel Condition | Estimated Yield Strength Retention | Structural Risk Level |
|---|---|---|
| Clean, Polished Mild Steel | 100% | Low (Baseline) |
| Light Surface “Flash” Rust | 98-99% | Minimal / Cosmetic |
| Deep Pitting (0.5mm depth) | 85-90% | Moderate (Stress Risers) |
| Heavy Flaking/Scaling | 60-70% | High (Imminent Failure) |
Note: These are approximations for general workshop awareness. Always use a 2:1 or 4:1 safety factor in your designs to account for material degradation.
Preparing the Surface: The Battle Against Mill Scale
Mill scale is the dark, flaky bluish-grey layer found on new hot-rolled steel. It forms during the manufacturing process as the hot metal cools. Many beginners make the mistake of painting or welding directly over it, thinking it acts as a protective layer.
In reality, mill scale is brittle and will eventually pop off the steel, taking your paint or primer with it. Furthermore, welding over mill scale traps impurities in the weld pool, leading to internal defects. To ensure a project lasts, you must remove this layer. I recommend using a flap disc (60 to 80 grit) or a chemical stripper. Once the scale is gone, you are left with “bright metal,” which is the ideal surface for both welding and applying protective barriers.
Workshop Safety Checklist for Surface Preparation
- Wear a P100 respirator to avoid inhaling fine metallic dust and mill scale particles.
- Use a full-face shield over your safety glasses when using grinding wheels.
- Ensure your work area is clear of flammable liquids, as grinding sparks can travel up to 20 feet.
- Check that your angle grinder guard is positioned to deflect sparks away from your body.
How Oxidation Causes Welding Defects and Structural Failure
If you attempt to weld steel that has already begun to oxidize, you are inviting disaster into your joints. Rust contains oxygen and hydrogen. When the welding arc hits a rusted surface, these elements are released into the molten weld pool.
As the weld cools, these gases try to escape, creating tiny bubbles. This is known as “porosity.” A porous weld is like a piece of Swiss cheese; it looks solid on the outside but is full of holes on the inside. This significantly reduces the “tensile strength” (the ability of the weld to be pulled apart) and “shear strength” (the ability to resist sliding forces).
Troubleshooting Common Weld Defects Related to Surface Quality
- Porosity: Caused by moisture or rust on the metal. Solution: Grind to bright metal before striking an arc.
- Lack of Fusion: The arc cannot penetrate the oxide layer. Solution: Increase heat or improve cleaning.
- Inclusions: Bits of mill scale or rust trapped inside the weld bead. Solution: Use a wire brush between passes.
- Brittle Heat Affected Zone (HAZ): The area immediately next to the weld. If this area is contaminated, it becomes a prime spot for “brittle fracture,” where the metal snaps without bending.
Implementing Temporary Barriers During the Fabrication Process
While you are working on a project, it may take days or weeks to finish. During this time, raw steel is vulnerable to “flash rust,” especially in humid garage environments. I have found that managing the environment is just as important as the coatings you choose.
For temporary protection, a light coat of WD-40 or a dedicated “weld-through” primer is effective. Weld-through primers usually contain zinc, which helps protect the steel while allowing you to maintain a clean arc. However, be cautious: some oils can interfere with your shielding gas flow rate. If your gas flow is set to the standard 15–20 CFH (Cubic Feet per Hour), but the surface is greasy, the gas won’t be able to properly shield the puddle, leading to more porosity.
Comparison of Temporary Protection Methods
- Light Machine Oil: Excellent for short-term storage but must be completely removed with acetone before welding.
- Paste Wax: Good for finished tools or surfaces that won’t be welded, providing a thick moisture barrier.
- Zinc-Rich Primer: Can be welded through, though it may produce more fumes and requires extra ventilation.
- Dry Storage: Using a dehumidifier in your shop to keep relative humidity below 50% significantly slows oxidation.
Long-Term Shielding Strategies for Structural Stability
Once the fabrication is complete and the welds have been inspected, you need a permanent barrier. For the intermediate fabricator, the most common choices are paint, powder coating, or specialized oils.
If you choose to paint, the primer is the most important layer. A high-quality “etching primer” chemically bonds to the raw steel, creating a surface that paint can stick to. Without this bond, moisture will eventually find its way under the paint, causing it to bubble and peel—a process known as “under-film corrosion.”
Steps for a Professional-Grade Protective Coating
- Final Clean: Use a lint-free rag soaked in acetone to remove all fingerprints and oils.
- Mechanical Scuffing: Use a red Scotch-Brite pad to give the metal “tooth” so the primer can grip.
- Primer Application: Apply two thin coats rather than one thick coat to avoid runs and ensure even coverage.
- Top Coat: Use a UV-resistant paint to prevent the sun from breaking down the barrier over time.
Analyzing Load Paths and Stress in Rusted Frames
When I perform a structural load-testing analysis on older equipment, I look specifically at the joints. In a well-designed structure, the “load path” is the route that force takes through the assembly to the ground. If a joint is weakened by rust, that path is interrupted.
In my experience, the “Heat Affected Zone” (HAZ) is the most common failure point. This is the area around the weld that was heated but not melted. The heat changes the grain structure of the steel, often making it slightly softer or more prone to rusting than the rest of the bar. If you see rust concentrated specifically around your weld beads, it is a sign that the HAZ is being attacked, and the joint’s “fatigue life” is being shortened.
Metrics for Structural Safety Margins
- Yield Strength of Mild Steel (A36): Typically around 36,000 PSI.
- Safety Factor for Static Loads: 2:1 (Design for twice the expected weight).
- Safety Factor for Dynamic Loads: 4:1 (Design for four times the weight if the object moves or vibrates).
- Recommended Gas Flow: 15–20 CFH for MIG/TIG to ensure the weld pool stays clean of oxides.
Workshop Organization and Safety Layouts
Preventing material failure starts with how you organize your shop. Storing steel on a concrete floor is a recipe for disaster. Concrete “sweats” moisture, which will be sucked up by the steel through capillary action.
I recommend building a vertical or horizontal rack that keeps the metal at least six inches off the floor. This allows for airflow and prevents moisture traps. Additionally, keep your “clean” area (painting and assembly) separate from your “dirty” area (grinding and welding). Metallic dust from grinding is highly reactive and will actually accelerate the rusting of nearby finished projects if it settles on them.
Essential Tools for Maintaining Raw Steel
- Digital Hygrometer: To monitor shop humidity (keep it below 50%).
- Angle Grinder with Wire Cup/Flap Discs: For mechanical cleaning.
- Acetone or Denatured Alcohol: For chemical degreasing.
- Infrared Thermometer: To check metal temperature before painting (avoid painting if the metal is too cold, as condensation can form).
- Weld Fillet Gauge: To ensure your weld size is sufficient even if some surface loss occurs over time.
Lessons from the Field: A Near-Miss Case Study
A few years ago, I worked on a project involving a heavy engine hoist. The builder had used raw square tubing that had sat outside for a month. He “cleaned” the outside but ignored the heavy scale and light rust inside the tubes.
During a test lift, the main boom didn’t snap, but it began to deform significantly at a lower weight than calculated. Upon inspection, the internal oxidation had created a “brittle fracture” point near the pivot bolt hole. The rust had acted as a wedge, helping a small stress crack propagate through the tube wall. We caught it before it dropped the engine, but it was a stark reminder: what you can’t see can still kill you. Always inspect the internal surfaces of your tubing with a flashlight before welding the end caps on.
Summary of Preventive Actions
To ensure your projects remain structurally sound and free from decay, follow these core principles:
- Remove all mill scale and rust until you see bright, shiny metal before you ever strike an arc.
- Clean surfaces with acetone to remove oils that cause weld porosity and paint failure.
- Use a high-quality primer to create a chemical bond with the steel.
- Maintain shop humidity and store metal off the floor to prevent moisture contact.
- Inspect your welds for porosity, as these holes are the perfect breeding ground for internal rust.
By treating the prevention of oxidation as a structural requirement rather than a cosmetic choice, you protect not only your time and money but also the safety of anyone using what you build.
Frequently Asked Questions
Does “flash rust” really matter if I am just going to paint over it? Yes, it matters significantly. Painting over even a light layer of orange dust traps moisture and oxygen against the metal. This allows the oxidation process to continue under the paint, eventually leading to the paint delaminating and the structural metal thinning. Always wipe down the metal with a solvent or use a wire brush immediately before coating.
Can I use phosphoric acid to treat rust on my projects? Phosphoric acid “converts” iron oxide into iron phosphate, which is a more stable, black coating. While this is useful for non-structural parts, I am cautious about using it on critical load-bearing joints. The acid can get trapped in tight crevices or weld pores, potentially causing long-term chemical issues. Mechanical cleaning is almost always safer for structural work.
How does humidity in a garage affect my welding quality? High humidity can introduce moisture into your welding shielding gas or onto your welding wire. This moisture breaks down in the welding arc, releasing hydrogen. Hydrogen is the primary cause of “underbead cracking,” where the weld looks fine but snaps under load. Keeping your welding wire in a dry box or a climate-controlled room is a best practice for safety.
Is it safe to weld through “weld-through” primer? While these primers are designed for this purpose, they are not “invisible” to the arc. They can create more spatter and produce zinc oxide fumes, which can cause “metal fume fever” if inhaled. Always use proper ventilation or a respirator, and recognize that a weld on clean, bare steel will always be structurally superior to one done through a coating.
What is the best way to protect the inside of square tubing? For structural frames, you can use an “internal frame coating” spray, which comes with a long hose and a 360-degree nozzle. This allows you to coat the hidden inside surfaces. Alternatively, ensuring that your end caps are fully welded and airtight can “starve” the interior of oxygen, though this is difficult to verify without pressure testing.
How often should I inspect my outdoor steel projects for decay? I recommend a thorough inspection at least once a year. Look specifically at the “stress points,” such as corners, bolt holes, and weld toes. Use a small pick or a screwdriver to poke at any bubbling paint; if it flakes off to reveal orange dust, you need to grind it back to bare metal and repair the spot immediately.
Does thicker steel rust slower than thin steel? The rate of chemical oxidation is generally the same, but the “consequence” is different. A 1/16-inch loss on a 1/2-inch plate might only reduce its strength by a small fraction. That same 1/16-inch loss on a 1/8-inch tube represents a 50% loss in thickness, which is a catastrophic failure of the structural design.
What PPE is best for removing heavy rust and scale? Standard safety glasses are not enough. High-velocity wires from a wire wheel can pierce skin and eyes. I require a full-face shield, heavy leather gloves, and a long-sleeve flame-resistant shirt. Additionally, a P100 respirator is mandatory because old rust and mill scale can contain various impurities you do not want in your lungs.
(This article was written by one of our staff writers, James Harlan. Visit our Meet the Team page to learn more about the author and their expertise.)