How to Prevent Stainless Steel Thread Galling (DIY Guide)
I remember one Tuesday afternoon in my third year as a millwright. I was working on a custom bracket for a high-vibration motor mount. I had spent six hours TIG welding the assembly, ensuring every bead was perfect and the alignment was within 0.010 inches. When it came time for the final assembly, I grabbed a 1/2-13 stainless steel bolt and nut. I started threading them by hand, then switched to a ratchet. Halfway down, the nut simply stopped. It didn’t bottom out; it just froze. I tried to back it off, but it wouldn’t budge. I ended up having to cut the bolt, ruining the finish on my bracket. That was my first real lesson in how friction and heat can turn two pieces of metal into one solid mass.
Over the last 15 years, I have learned that mechanical failures are rarely “accidents.” They are the result of specific variables colliding. In the world of fabrication, few things are as frustrating as a fastener that cold-welds itself during assembly. This phenomenon, often seen in stainless fasteners, can halt a project and lead to costly downtime. My goal is to help you understand why this happens and how to use a systematic diagnostic approach to keep your threads moving smoothly.
Understanding the Mechanics of Fastener Seizure
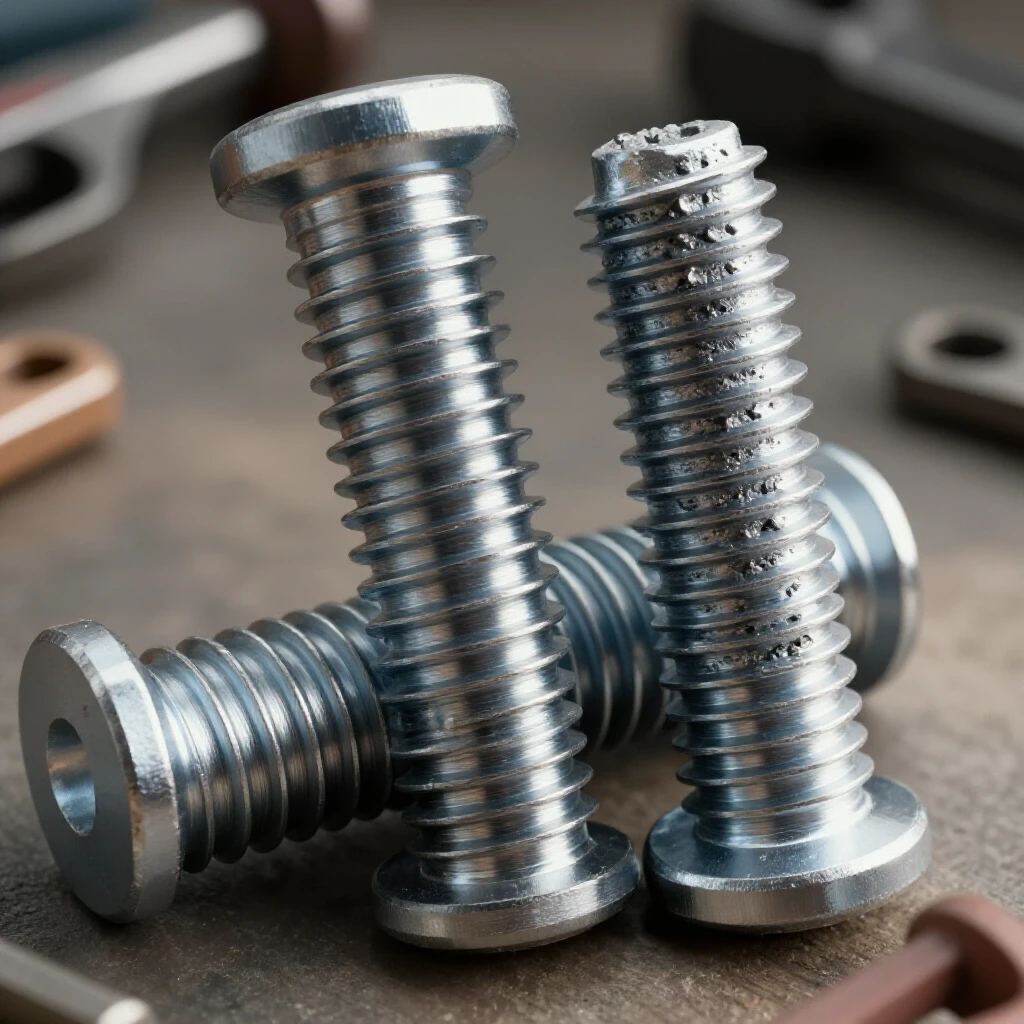
Fastener seizure occurs when the protective oxide layer on stainless steel is rubbed away by friction, causing the microscopic high points of the metal to “weld” together. This process, often called cold welding, happens almost instantly under pressure. Once the surfaces bond, further movement tears the metal, leading to a total mechanical lock.
When we talk about stainless steel, we are dealing with a material that is relatively soft and prone to friction-induced heat. Unlike carbon steel, which has a different molecular structure, stainless relies on a chromium oxide layer for corrosion resistance. When you tighten a nut onto a bolt, the pressure at the thread interface is immense. If the threads are dry or dirty, that oxide layer shears off. Building on this, the exposed “raw” metal is highly reactive. Without the oxide barrier, the atoms of the bolt and the nut want to share electrons, effectively becoming a single piece of metal.
The Role of Friction and Heat in Metal Bonding
Friction is the primary enemy when assembling threaded components made of corrosion-resistant alloys. As two surfaces rub together, kinetic energy converts into thermal energy, causing the metal to expand slightly. This expansion increases the pressure on the threads, which in turn creates more friction and more heat.
Interestingly, this becomes a runaway cycle. As the temperature rises, the yield strength of the material decreases slightly, making the microscopic peaks on the thread surface more likely to deform and smear. This smearing is what we call “galling.” In my experience, if you can feel the heat radiating from a fastener as you tighten it, you are already in the danger zone. Keeping the assembly temperature low is a critical part of any metalworking diagnostic guide.
Systematic Inspection of Thread Geometry
Before you ever put a nut on a bolt, you must verify the physical integrity of the components. Thread geometry refers to the shape, angle, and pitch of the threads, which must match perfectly to distribute the load evenly across the fastener.
I always start my diagnostic process with a visual inspection. I look for “nicks” or flat spots on the crests of the threads. If a bolt was dropped on a concrete floor, the impact could have deformed a single thread by as little as 0.002 inches. While that seems small, it creates a high-pressure point. As the nut hits that spot, the friction spikes, the oxide layer fails, and the seizure begins. Using a thread pitch gauge is a simple way to ensure you aren’t trying to force a metric nut onto a standard bolt, which is a common cause of immediate failure.
Checking for Debris and Manufacturing Defects
Small particles of grit, metal shavings, or even leftover polishing compound can act as an abrasive in the thread interface. These contaminants increase friction and provide the initial “spark” for the cold-welding process to begin.
- Visual Check: Use a magnifying glass to look for burrs or rolled threads.
- Cleaning: Always blow out female threads with compressed air and wipe down male threads with a lint-free cloth.
- Tolerance Testing: If the nut feels “crunchy” or tight before you even apply torque, the tolerances may be too tight.
| Thread Condition | Diagnostic Observation | Risk Level |
|---|---|---|
| Clean and Smooth | Nut spins freely by hand | Low |
| Visible Burrs | Nut catches or feels “gritty” | High |
| Rolled Crests | Nut requires a wrench immediately | Extreme |
| Contaminated | Visible oil or metal dust | Medium |
Lubrication Strategies to Prevent Metal Bonding
Lubrication provides a physical barrier between the metal surfaces of the bolt and the nut, preventing the oxide layer from being stripped away. Choosing the right compound is the most effective way to ensure a smooth assembly and future disassembly.
In my shop, I never assemble stainless fasteners “dry.” It is a recipe for disaster. A high-quality anti-seize compound acts as a microscopic layer of “ball bearings.” These compounds usually contain flakes of soft metals like copper or nickel, or solid lubricants like graphite or molybdenum disulfide. These flakes fill the valleys of the thread surface, ensuring that the high points of the bolt and nut never actually touch. As a result, the friction remains low, and the heat stays within manageable limits.
Selecting the Right Anti-Seize Compound
Not all lubricants are created equal. For most fabrication tasks, a nickel-based anti-seize is the gold standard because it can withstand high temperatures and doesn’t react with the stainless steel.
- Nickel-Based: Excellent for high-heat applications and prevents galvanic corrosion.
- Copper-Based: Good for general use, but some find it less effective on certain stainless grades.
- Graphite-Free: Necessary in specific environments where graphite might cause structural issues in the metal.
- PTFE Tapes: Can be used on pipe threads but are often too thick for standard machine threads and can cause “over-stuffing” which leads to seizing.
Building on this, the application method matters. I see many fabricators just put a dab on the end of the bolt. For the best results, you should apply the lubricant to the first three or four threads of the bolt, ensuring it gets into the roots (the bottom of the “V”). As the nut travels down, it will carry the lubricant with it, coating the entire interface.
Controlling Assembly Speed and Torque
The speed at which you tighten a fastener directly impacts the amount of heat generated by friction. High-speed assembly is one of the most common reasons for thread failure in professional workshops.
When you use an impact wrench on a stainless bolt, the rapid RPMs generate heat faster than the metal can dissipate it. I’ve seen bolts reach temperatures over 300 degrees Fahrenheit in seconds. This heat causes the bolt to expand, tightening the fit and stripping the protective layer. If you are troubleshooting a series of failed fasteners, look at the tools being used. Switching from a power tool to a hand wrench is often the simplest fix for recurring seizure issues.
The Importance of Hand-Tightening First
I follow a strict rule: always start the nut by hand and run it down as far as possible before picking up a tool. This allows you to feel any resistance.
- RPM Limits: If you must use a power tool, keep the speed below 100 RPM.
- Torque Accuracy: Use a calibrated torque wrench. Remember that lubrication reduces friction, so you may need to reduce your target torque by 20% to 30% to avoid over-stretching the bolt.
- Pause and Cool: If you are tightening a large-diameter bolt (over 1 inch), pause every few turns to let the heat dissipate.
Material Selection and Hardness Mismatching
Using two different grades of stainless steel for the bolt and the nut can significantly reduce the risk of the metals bonding. This is because different alloys have different hardness levels and molecular structures.
In many of my diagnostic case studies, I found that using a Grade 304 bolt with a Grade 316 nut (or vice versa) creates enough of a difference in the “gallability” of the surfaces to prevent a total lock. The slightly different chemical compositions mean the microscopic peaks don’t “fit” together as perfectly, making them less likely to weld. If you are designing a critical machine part, this mismatching is a professional secret that saves a lot of headaches during maintenance.
Hardness Differentials in Fasteners
A common tactic is to use a nut that is slightly harder or softer than the bolt. This ensures that if any deformation occurs, it happens on only one surface, preventing the interlocking “smear” that causes a seizure.
- Grade 304: Standard “18-8” stainless, very common, high risk of seizing.
- Grade 316: Higher molybdenum content, slightly better corrosion resistance, still prone to seizing but behaves differently under load.
- Nitronic 60: A specialized stainless alloy designed specifically to resist galling. It is more expensive but often worth it for moving parts.
| Bolt Material | Nut Material | Seizure Risk |
|---|---|---|
| 304 Stainless | 304 Stainless | Very High |
| 316 Stainless | 316 Stainless | High |
| 304 Stainless | 316 Stainless | Moderate |
| 304 Stainless | Nitronic 60 | Very Low |
Case Study: The Seized Flange Bolt
In 2015, I was called to a facility where a large pump housing was being assembled. They were using 3/4-inch 316 stainless steel studs. Out of the 24 studs, six had seized completely before they reached the required torque. The crew was frustrated, blaming the quality of the bolts.
I started my investigation by checking their tools. They were using a high-torque pneumatic impact wrench. I then checked the studs; they were being pulled straight from the shipping box and installed “dry” to avoid contaminating the fluid in the pump. I measured the temperature of a seized stud with an infrared thermometer; it was 245 degrees Fahrenheit.
The solution was a three-step change in their process. First, we cleaned all threads with a solvent to remove shipping oils. Second, we applied a food-grade, metal-free anti-seize that was compatible with their system. Third, we switched to a manual torque wrench. We didn’t have a single seizure for the rest of the project. This case highlights that even with high-quality materials, a failure in the assembly process will lead to mechanical breakdown.
Troubleshooting a Seized Fastener
If you find yourself with a nut that has already started to seize, your options are limited, but there are a few diagnostic steps you can take before reaching for the torch.
First, stop immediately. If the nut moves a fraction and then gets harder, do not force it. Sometimes, applying a high-creep penetrating oil and letting it sit for 20 minutes can provide just enough lubrication to back the nut off. If that fails, you can try to apply heat to the nut with a propane torch. The goal is to expand the nut slightly more than the bolt, breaking the mechanical bond. However, be aware that heating stainless steel can change its corrosion resistance properties (sensitization).
Tools for Resolving Thread Issues
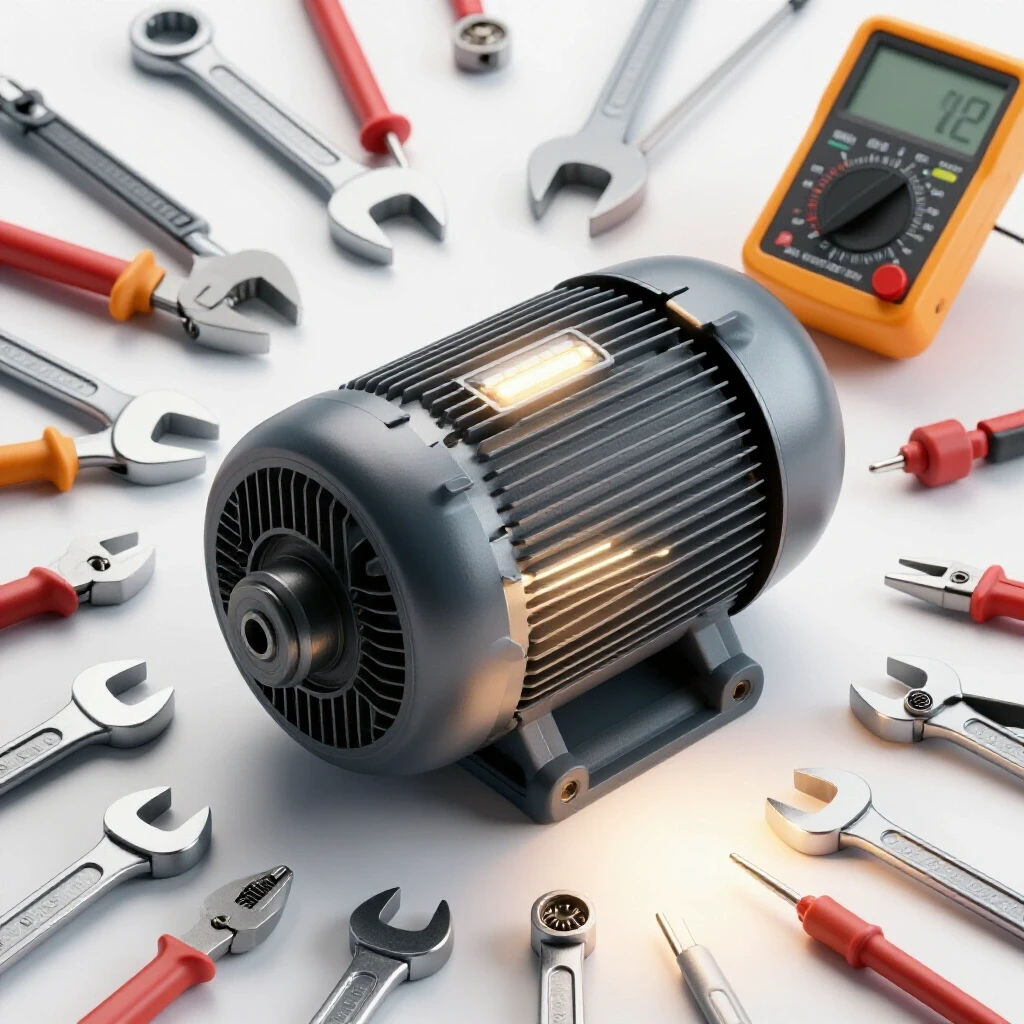
- Penetrating Oil: Look for “high-creep” formulas that can work into tight tolerances.
- Infrared Thermometer: Used to monitor heat buildup during tightening.
- Thread Chasers: These are different from taps and dies; they are designed to clean and reshape threads without removing metal.
- Nut Splitter: A tool that can crack a nut off a bolt without damaging the bolt threads, though this is a last resort.
Advanced Diagnostic Framework for Workshop Reliability
To master these issues, you need a framework that moves beyond guesswork. I use a “Variable Isolation” method. If a fastener fails, I ask: Was it the material? Was it the speed? Was it the lubrication? By changing only one variable at a time, you can find the root cause.
For example, if you suspect the bolts are poor quality, try a different brand but keep your lubrication and speed the same. If the problem persists, the issue is likely your process, not the hardware. This analytical approach is what separates a master fabricator from someone who just “gets lucky.”
Maintenance History and Tracking
I recommend keeping a simple log for complex assemblies. Note the torque values used, the type of lubricant applied, and any resistance felt during installation. This data becomes invaluable when you have to take the machine apart two years later.
- Date of Assembly: Helps track corrosion over time.
- Lubricant Brand: If a bolt is easy to remove later, you know that lubricant worked.
- Torque Value: Ensures consistency across all fasteners in a pattern.
Conclusion and Next Steps
Preventing the mechanical lock-up of stainless steel threads is about controlling the environment at the microscopic level. By using the right lubrication, managing your assembly speed, and ensuring your thread geometry is perfect, you can eliminate 95% of these failures.
Start by auditing your current fastener bin. Are you storing your stainless bolts where they can get “nicked” or dirty? Buy a small tub of high-quality nickel anti-seize and make it a habit to use it on every stainless fastener. Finally, put away the impact wrench for stainless work. These small changes in your workflow will lead to a significant increase in the reliability of your fabrications and a lot less frustration in the shop.
FAQ
What exactly is thread galling? It is a form of wear caused by adhesion between sliding surfaces. In stainless steel fasteners, the protective oxide layer is rubbed off, causing the bare metal surfaces to weld together under the pressure of the threads. This results in the nut and bolt becoming a single, inseparable piece.
Why is stainless steel more prone to this than regular steel? Stainless steel is more ductile (softer) and has a higher friction coefficient than carbon steel. It also generates heat more quickly. The chromium oxide layer that makes it “stainless” is very thin and easily stripped away during the high-pressure sliding motion of tightening a nut.
Can I use WD-40 to prevent my bolts from seizing? No. WD-40 is a penetrating oil and a water displacer, but it does not have the high-pressure additives or the metallic flakes found in a true anti-seize compound. It will not provide a sufficient barrier to prevent cold welding under high torque loads.
Is it better to use a fine thread or a coarse thread to avoid seizing? Coarse threads are generally less likely to seize than fine threads. Fine threads have a smaller pitch and more surface area in contact, which leads to higher friction and more heat buildup. Coarse threads also handle small amounts of debris or burrs better.
Does using a nylon lock nut (Nyloc) increase the risk of galling? Yes, it can. The nylon insert creates additional friction as it is threaded onto the bolt. This extra friction generates heat before the nut even reaches the mating surface. If you use Nylocs, it is even more important to use a high-quality lubricant and a slow assembly speed.
How much does anti-seize change the torque requirements? Lubricants reduce friction, which means more of the torque you apply goes into stretching the bolt rather than overcoming friction. Generally, you should reduce your “dry” torque values by about 20% to 25% when using a high-quality anti-seize to avoid over-tensioning the fastener.
Can I reuse a stainless bolt that has previously seized but was forced apart? Absolutely not. If a bolt has started to gall, the thread geometry is permanently damaged. The metal has been smeared and weakened. Reusing such a bolt will almost certainly lead to a total seizure the second time, or worse, a structural failure under load.
What is “Nitronic 60” and should I be using it? Nitronic 60 is a specialized alloy of stainless steel designed with high resistance to galling and wear. If you have a part that must be frequently assembled and disassembled without lubrication, using Nitronic 60 for one of the components is an excellent, though more expensive, solution.
Does the grade of stainless (304 vs 316) really make a difference? While both can seize, Grade 316 is slightly less prone to it than 304 due to its molybdenum content and different work-hardening characteristics. However, the best practice is to use one grade for the bolt and a different grade for the nut to create a hardness mismatch.
Should I use an impact wrench on stainless fasteners? In general, no. The high RPM of an impact wrench generates heat too quickly, which is the primary trigger for cold welding. For the most reliable results, stainless fasteners should be tightened by hand at a slow, steady pace.
How can I tell if a nut is starting to seize before it’s too late? If the resistance suddenly increases before the nut has bottomed out, or if you feel a “gritty” sensation through the wrench, stop immediately. You may also feel heat building up in the fastener. These are all signs that the metal surfaces are starting to bond.
What is the best way to clean threads before assembly? Use a clean, dry rag to wipe away any visible dirt. For critical applications, use a non-residue solvent like brake cleaner to remove oils. If the threads look dull or have burrs, run a thread chaser (not a cutting die) over them to smooth out the surface.
(This article was written by one of our staff writers, Paul Whitaker. Visit our Meet the Team page to learn more about the author and their expertise.)