How to Reduce Spatter When MIG Welding Mild Steel (DIY Fix)
When I first started my metalworking journey twelve years ago, my garage floor was covered in tiny, hardened metal balls. Every time I finished a bead on mild steel, I spent more time with a cold chisel and a grinder than I did actually welding. It was frustrating to see my projects looking like they had been caught in a hail storm of molten metal. I realized that my lack of consistency wasn’t just a “rookie phase” but a result of not understanding the physics of the arc. By tracking my progress and measuring my settings, I moved from messy, erratic beads to clean, professional results.
Learning metal fabrication is a physical discipline that requires both mental focus and muscle memory. It is common to feel overwhelmed by the sparks and the heat. However, once you learn to control the variables of your machine and your body, those frustrating metal droplets begin to disappear. This guide focuses on the systematic steps you can take to refine your technique and minimize the mess during your practice sessions.
Mastering the Mechanics of a Steady Arc
The quality of your work depends on how well you manage the relationship between your machine settings and your physical movements. Achieving a smooth metal transfer requires balancing electrical voltage with the speed of the wire being fed into the joint. When these are out of sync, the wire hits the plate and explodes into droplets rather than melting into a fluid puddle.
In my early practice logs, I noted that I often set my wire speed too high because I thought more wire meant a stronger weld. In reality, this just caused the wire to “stub” against the metal, creating a mess. To fix this, you must learn to listen to the arc. A steady, consistent hiss like sizzling bacon is your goal. Anything that sounds like erratic popping or loud crackling indicates that your parameters are off.
| Variable | Impact on Metal Transfer | Adjustment for Cleaner Results |
|---|---|---|
| Voltage | Controls the heat and arc length | Increase if the wire is stubbing; decrease if the arc is too long. |
| Wire Feed Speed | Controls the amperage and deposition | Decrease if you hear popping; increase if the arc is melting back to the tip. |
| Shielding Gas | Protects the puddle from air | Ensure a flow rate of 20-30 CFH for indoor shop work. |
| Stick-out (CTWD) | Affects the electrical resistance | Maintain a consistent 3/8″ to 1/2″ distance from the tip to the plate. |
Dialing in Machine Parameters for Smooth Metal Transfer
Setting your base parameters is the first step in any metal welding practice guide. Before you pull the trigger, you must match your machine’s power to the thickness of the mild steel you are using. Most machines have a chart under the door, but these are just starting points that require fine-tuning based on your specific shop environment and power supply.
To find your “sweet spot,” I recommend a “step-test” on a piece of scrap metal. Start with the manufacturer’s recommended settings. Run a three-inch bead and observe the behavior of the metal. If the wire is pushing your hand back, your wire speed is too high or your voltage is too low. If the arc is flickering and creating large, globby drops, your voltage is likely too high for the wire speed. Record these settings in a logbook so you can replicate your successes later.
Understanding the Contact Tip to Work Distance
The distance between your copper contact tip and the metal surface is known as the Contact Tip to Work Distance (CTWD). This gap is a critical part of mastering torch control because it changes the electrical resistance in the wire. If you pull the torch too far away, the arc becomes unstable and creates excessive debris around the weld.
I tell my students to aim for a 3/8″ stick-out. A simple way to practice this is to use a small piece of wood or a dedicated gauge to check your distance before you start the arc. As you move along the joint, keep your hand steady to maintain this gap. If you find your hand shaking, try to brace your elbow against the table or use your off-hand to support the neck of the torch.
The Role of Shielding Gas and Flow Dynamics
Shielding gas is the invisible shield that keeps oxygen and nitrogen out of your molten metal. For mild steel, a mix of 75% Argon and 25% CO2 is the industry standard for reducing mess and creating a smooth bead. If your gas flow is too low, or if there is a breeze in your shop, the arc will become turbulent and throw metal everywhere.
Interestingly, more gas is not always better. If you set your flow meter above 30 CFH, you can actually create turbulence at the nozzle, which sucks in atmospheric air. This leads to porosity—tiny holes in your weld—and a significant increase in spatter. Check your nozzle for any built-in “gunk” or debris, as this can also disrupt the gas flow and cause the arc to wander.
Surface Preparation and the Clean Zone Strategy
One of the most overlooked aspects of learning metal fabrication is the “clean zone.” Mild steel often comes with a dark grey coating called mill scale, which is an iron oxide formed during the manufacturing process. If you try to weld over this scale, or over rust and oil, the arc will struggle to penetrate, causing the metal to pop and splatter.
I follow a strict “two-inch rule” in my shop. I use a flap disc or a wire wheel to grind the metal until it is shiny and bright. This cleaning should extend at least one inch on either side of where the weld will be placed. Removing these contaminants ensures that the electricity flows smoothly from the wire to the base metal, which is the most effective way to keep your work area clean.
- Step 1: Use a 40-60 grit flap disc to remove mill scale.
- Step 2: Wipe the area with a degreaser if there is any oily residue.
- Step 3: Ensure your ground clamp is attached to clean, bare metal for a strong electrical circuit.
Mastering Torch Control and Physical Positioning
Your body is the most important tool in the shop. If you are uncomfortable or off-balance, your weld travel speed tips will not matter because your hand will be inconsistent. To achieve a clean, professional-grade result, you must position yourself so that you can see the weld puddle clearly while maintaining a steady movement.
I recommend the “tuck and roll” method. Tuck your elbows into your ribs to create a stable tripod with your body. Instead of moving just your wrist, move your entire upper body as you slide along the table. This helps you maintain a consistent 10 to 15-degree drag angle. If your torch is too upright or tilted too far back, the arc force will push the molten metal out of the puddle, creating the very mess you are trying to avoid.
Developing a Steady Travel Speed
Travel speed refers to how fast you move the torch along the joint. For most DIY projects on 1/8″ mild steel, a speed of 8 to 12 inches per minute (IPM) is ideal. If you move too slowly, the heat builds up and the puddle becomes too fluid, leading to drips. If you move too fast, the wire doesn’t have time to melt properly into the base metal.
To practice this, I suggest drawing a line on a scrap plate and timing yourself with a stopwatch. Try to reach the end of a six-inch line in exactly 30 to 40 seconds. This trade school practice drill helps build the internal rhythm needed for consistent beads. Over time, you will learn to “read” the puddle; it should look like a small, glowing oval that follows your torch at a steady pace.
DIY Fixes for Common Shop Challenges
Sometimes, even with good technique, you need a few extra tricks to keep your projects looking sharp. One simple DIY fix is using a light coating of a non-flammable anti-spatter spray on the work surface. If you don’t want to buy commercial products, a very thin layer of vegetable-based cooking spray can serve as a temporary barrier that prevents metal droplets from sticking to the plate.
Another common issue is the polarity of your machine. For standard MIG welding with solid wire and gas, your torch should be connected to the positive (+) terminal and your ground clamp to the negative (-) terminal. This is called DCEP (Direct Current Electrode Positive). If these are reversed, the arc will be incredibly violent and produce massive amounts of spatter. Always double-check your internal connections if the machine feels “angry” or uncontrollable.
Practice Drills and Progress Tracking
The only way to overcome technique plateaus is through structured practice. I have found that simply “doodling” on metal doesn’t lead to improvement as fast as specific drills do. By focusing on one variable at a time—such as torch angle or travel speed—you can isolate your mistakes and correct them.
Keep a dedicated welding technique progression log. For every hour you spend under the hood, spend five minutes writing down what you observed. Did the arc sound better when you increased the voltage? Did the spatter decrease when you cleaned the metal more thoroughly? These data points are the roadmap to your success.
Structured Practice Progression
- Bead-on-Plate: Practice running straight lines on a flat plate. Focus solely on maintaining a consistent stick-out and travel speed.
- Overlapping Beads: Run a second bead that overlaps the first by 50%. This teaches you how to manage heat and build a flat, even surface.
- The T-Joint (Fillet Weld): Move to joining two pieces of metal at a 90-degree angle. This requires more precise torch angles to ensure the metal bites into both pieces equally.
- Lap Joints: Practice welding the edge of one plate onto the surface of another. This is common in automotive and furniture work.
| Practice Step | Target Goal | Success Metric |
|---|---|---|
| Surface Prep | 100% mill scale removal | Shiny, reflective metal surface. |
| Parameter Tuning | Sizzling bacon sound | Minimal popping and no wire stubbing. |
| Travel Speed | 10 inches per minute | Uniform bead width and height. |
| Final Cleanup | Less than 1 minute of grinding | No visible metal droplets stuck to the plate. |
Self-Assessing Your Results
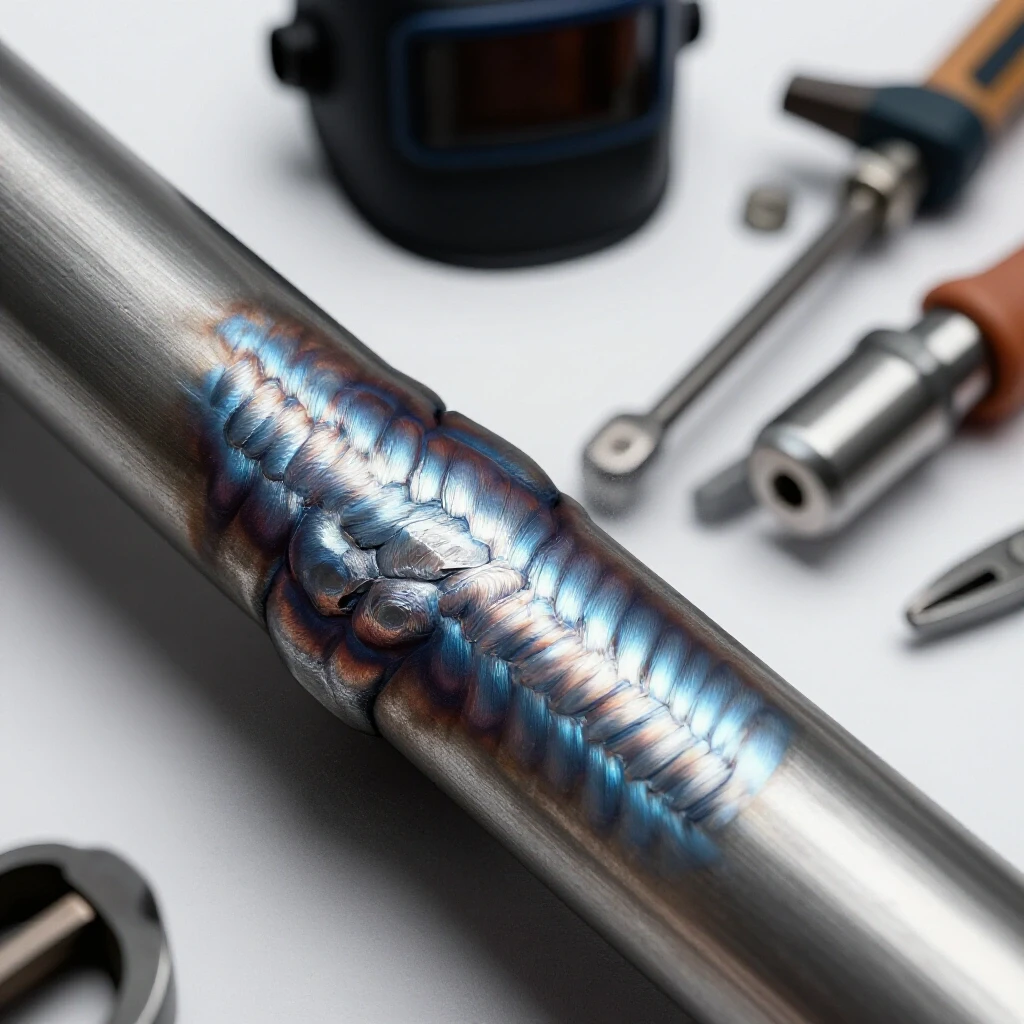
At the end of each session, take a moment to look at your work with a critical eye. A good weld should have a consistent ripple pattern, similar to a stack of coins tipped over. There should be no “undercut” (a groove melted into the base metal at the edge of the weld) and very little debris scattered around the joint.
If you see a lot of spatter, ask yourself the “Big Three” questions: Was the metal clean? Was my stick-out consistent? Were my machine settings balanced? Usually, the answer lies in one of these areas. By being your own toughest critic and tracking your metrics, you will find that those frustrating plateaus begin to crumble, replaced by the confidence of a skilled fabricator.
Actionable Practice Template
To help you get started, use this template for your next shop session. Consistency comes from repetition and observation.
- Date: [Insert Date]
- Material: 1/8″ Mild Steel
- Settings: [Volts] / [Wire Speed]
- Gas Flow: [CFH]
- Goal: Run 5 consistent beads with less than 5 spatter droplets per inch.
- Observations: (e.g., “Hand felt shaky at the end of the run,” or “Increased voltage by 0.5V and the popping stopped.”)
Building these habits now will save you hundreds of hours of cleanup time in the future. Fabrication is as much about the preparation and the “math” of the machine as it is about the physical act of welding. Stay patient, keep your metal clean, and trust the process of incremental improvement.
FAQ: Troubleshooting Your Arc and Reducing Mess
Why is my MIG welder making a loud popping sound? A loud popping sound usually indicates that your wire feed speed is too high for your voltage. The wire is hitting the cold base metal before it has a chance to melt, causing it to “stub” and explode. Try either increasing your voltage slightly or backing off your wire speed until you hear a consistent sizzle.
Can I use a regular household fan in my shop while welding? It is best to avoid fans directly near your work area. Even a light breeze can blow away your shielding gas. This leaves the molten metal exposed to the air, which causes massive amounts of spatter and a weak, porous weld. If you need ventilation, place the fan far away to pull smoke out of the room rather than blowing air across the bench.
How often should I change my contact tip? You should change your contact tip if you notice the arc becoming unstable or if the wire seems to be “dragging” inside the torch. Over time, the hole in the tip wears out and becomes oval-shaped. This prevents a good electrical connection and can lead to erratic metal transfer and more mess.
Does the type of wire I use matter for reducing spatter? Yes. For mild steel, using a high-quality ER70S-6 solid wire is generally best. This wire contains deoxidizers that help handle minor surface impurities. Lower-quality wires can have inconsistent diameters or coatings, which lead to a “jumpy” arc and more droplets on your workpiece.
What is the best way to remove spatter if it does stick? The best tool is a dedicated weld chipper or a sharp cold chisel. If the spatter is stubborn, a quick pass with a flap disc on an angle grinder will clean the surface. However, the goal of this guide is to help you reach a point where you only need a light brush with a wire hand-brush.
Is it necessary to clean the inside of the torch nozzle? Absolutely. Molten metal can jump up and stick inside the nozzle. If it builds up, it will block the flow of shielding gas. Use a pair of MIG pliers to scrape out the inside of the nozzle every few minutes of arc time to ensure your gas coverage remains perfect.
Why does my weld look like it’s sitting on top of the metal instead of sinking in? This is often a sign of “cold lap,” caused by low voltage or moving too fast. If the metal doesn’t get hot enough to flow, it just piles up. This lack of fusion often goes hand-in-hand with high spatter because the arc isn’t stable enough to create a deep, calm puddle.
How does the ground clamp location affect the arc? A poor ground is a leading cause of arc instability. If the clamp is on a painted or rusty surface, the electricity will struggle to complete the circuit. This results in a “stuttering” arc that throws sparks everywhere. Always grind a small spot to bare metal specifically for your ground clamp.
What is the difference between “push” and “pull” techniques? In MIG welding, “pulling” (or dragging) the torch generally provides deeper penetration and a cleaner bead on mild steel. “Pushing” the torch directs the heat away from the puddle, which can be useful for very thin metal but often results in more spatter for beginners because the gas coverage is harder to maintain.
How can I tell if my gas bottle is empty if the gauge still shows pressure? The pressure gauge shows how much gas is left in the tank, but the flow meter shows how much is coming out. If your welds suddenly start looking like grey sponges with lots of sparks, you have likely run out of gas or have a leak in your hose. Always close your tank valve when you are done for the day to prevent slow leaks.
(This article was written by one of our staff writers, Thomas Langley. Visit our Meet the Team page to learn more about the author and their expertise.)