Upgrading a CNC Plasma Table for Faster Lead Times (Review)
When I first started my fabrication shop, I spent most of my nights hunched over a spreadsheet, wondering where the money went. I was busy. The plasma table was humming, sparks were flying, and finished parts were stacking up. Yet, at the end of the month, my bank account didn’t reflect the effort I put in. I realized I was “buying a job” instead of running a business. My pricing was based on what the guy down the street charged, and I had no idea how much my consumables or electricity were actually costing me.
Over 16 years, I learned that the secret to a profitable workshop isn’t just about working harder. It is about understanding the math behind every spark. For side-hustlers and small shop owners, the transition from hobbyist to professional is often stalled by “hidden leaks.” These are the minutes lost to slow machine motion and the dollars wasted on prematurely burnt nozzles. To fix this, we have to look at the workshop as a financial engine where every upgrade must be justified by a measurable return on investment.
Calculating Your True Shop Hourly Rate for Metal Fabrication
A shop rate is the total cost of keeping your doors open, plus your desired profit, divided by billable hours. It ensures you aren’t just covering your materials but actually building a sustainable business that accounts for equipment wear and utility spikes. Many beginners pick a number like $50 an hour and hope for the best, but that rarely covers the reality of small-batch fabrication.
To find your true rate, you must list every monthly expense. This includes your shop rent (even if it is your own garage, consider the value), electricity, insurance, and software subscriptions. Do not forget the “invisible” costs like grinding disks, shop towels, and even the internet you use to download DXF files. Once you have a monthly total, divide it by the number of hours you actually spend cutting and welding for clients.
If your monthly overhead is $1,200 and you work 40 hours a month on side jobs, your overhead cost is $30 per hour. If you want to pay yourself $40 an hour for your labor, your base rate is $70. But we aren’t done. You must add a profit margin—usually 20% to 30%—to fund future equipment and cover the risk of mistakes. This brings a realistic shop rate for a small-scale operation to somewhere between $85 and $110 per hour.
- Fixed Costs: Rent, insurance, property taxes.
- Variable Costs: Electricity, shielding gas, heating/cooling.
- Labor: What you would pay someone else to do your job.
- Profit: The money the business keeps after everyone is paid.
Mapping Machinery Amortization and Depreciation
Amortization is the process of spreading the cost of a large tool over its expected lifespan. If you spend $6,000 on a new plasma system and expect it to last five years, that machine costs you $100 per month just to sit on the floor. Understanding this helps you see that every hour the machine is idle, it is technically losing money.
Depreciation is a similar concept that tracks how the value of your equipment drops over time. For tax purposes, you might use a five-year schedule, but for your internal pricing, you should look at “replacement cost.” If you know you will need a new power source in four years, you need to be collecting that money from your customers today. I always recommend adding a “machine burden” to your hourly rate. This is a small fee—usually $5 to $15 per hour—that goes into a separate savings account specifically for tool repairs and upgrades.
| Equipment Item | Purchase Price | Expected Life (Years) | Monthly Amortization |
|---|---|---|---|
| CNC Plasma Table | $5,500 | 5 | $91.67 |
| Plasma Power Supply | $2,800 | 4 | $58.33 |
| Air Compressor/Dryer | $1,500 | 7 | $17.86 |
| Total Monthly Burden | $9,800 | – | $167.86 |
Improving Table Motion and Acceleration to Cut Cycle Times
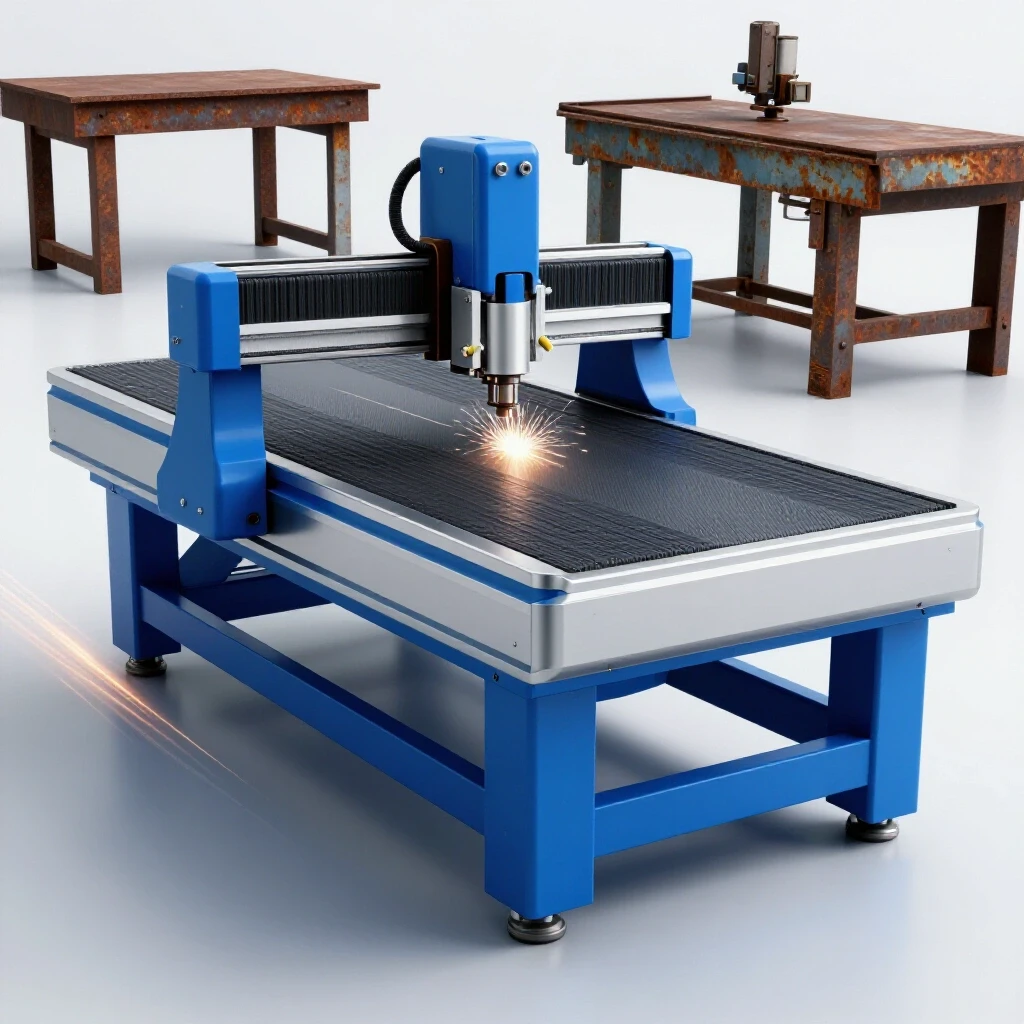
Motion efficiency refers to how quickly your machine moves between cuts and how fast it reaches its target speed. Upgrading drive components reduces “idle time,” which is the non-cutting movement that often eats up a large chunk of your job clock. In small shops, we often focus on “cut speed,” but the time the torch spends moving from one hole to the next is where profit is often lost.
If your table uses lead screws, you might be limited to slow travel speeds. Switching to a rack-and-pinion system or higher-torque stepper motors can double your rapid travel speeds. For example, moving from 150 inches per minute (IPM) to 300 IPM might only save five seconds per part. However, if you are cutting a decorative sign with 50 separate interior cuts, you just saved over four minutes of “air time.” Over a week of production, those minutes turn into billable hours you can use for another job.
- Acceleration: High acceleration reduces the “rounded corner” effect and allows the torch to reach full speed on short segments.
- Rapid Travel: This is the speed at which the torch moves when not cutting.
- Gear Reduction: Using belt reductions on motors can increase torque, allowing for smoother motion and better cut quality on thick plate.
The Role of Torch Height Control and Software in Reducing Lead Times
Torch Height Control (THC) automatically adjusts the distance between the tip and the metal during the cut. Fast-acting THC and optimized G-code software minimize pierce delays and prevent “tip-ups,” allowing the machine to run unattended with higher reliability. Without a reliable THC, you have to watch the machine every second, which means you can’t be deburring parts or prepping the next sheet while the table is running.
Modern software can also optimize the “cut path.” Instead of jumping randomly across a sheet, the software calculates the shortest path between cuts. It can also implement “chain cutting” or “bridge cutting,” where the torch stays lit between parts. This drastically reduces the number of pierces required. Since each pierce takes about 0.5 to 1.5 seconds and causes the most wear on your consumables, minimizing them is a direct win for both speed and cost.
- Pierce Delay: The time the torch stays in one spot to blow through the metal.
- Ohmic Sensing: A method for the torch to find the top of the plate accurately without pushing the metal down.
- Nesting Software: Tools that pack parts tightly on a sheet to save material and reduce travel distance.
Tracking Consumables and Air Quality to Protect Your Margins
Consumables are the electrodes and nozzles that wear out during the cutting process. Tracking their lifespan against linear feet cut helps you set accurate material markups and identifies when poor air quality is prematurely destroying your parts. In my consulting work, I often find that shops are losing 10% of their profit because they don’t realize their air is wet, which kills an electrode in 50 pierces instead of 300.
I suggest keeping a simple log next to the machine. Note when you put in a new set of consumables and when they fail. If you see a sudden drop in life, check your air filters. Moisture is the enemy of plasma cutting. Investing in a refrigerated air dryer is often one of the fastest ways to see a return on investment. If a dryer costs $500 but doubles your consumable life, it might pay for itself in just six months of moderate side-hustle work.
| Consumable Type | Unit Cost | Average Life (Pierces) | Cost Per Pierce |
|---|---|---|---|
| Electrode | $12.00 | 300 | $0.04 |
| Nozzle | $8.00 | 300 | $0.027 |
| Swirl Ring | $25.00 | 2,000 | $0.012 |
| Total Cost | – | – | $0.079 per pierce |
Why Material Sourcing and Handling Impact Your Bottom Line
Material handling involves the time and equipment used to load sheets and unload finished parts. Sourcing refers to how you buy your steel. Improving these workflows reduces the “hidden” labor hours that often go unbilled in small shop quotes. If it takes you 20 minutes to wrestle a 4×4 sheet of 3/16″ steel onto the table by yourself, you’ve already spent $30 of your shop rate before the first spark.
Buying in bulk can also change your profitability. Most steel yards give significant discounts for buying five or ten sheets at a time. If you can save $20 per sheet by buying five, that is $100 in straight profit. However, you must balance this with “carrying costs.” If that steel sits in your shop for six months, it is taking up valuable space and tying up your cash. Aim for a “just-in-time” approach where you keep only what you need for the next two weeks.
- Drop Management: Keep a clean rack for “drops” (leftover pieces). Using a scrap piece for a small bracket is 100% profit.
- Loading Aids: A simple jib crane or a set of heavy-duty rollers can save your back and cut loading time in half.
- Local Networking: Sometimes a larger shop nearby will sell you their “waste” at scrap prices, which is a goldmine for small parts.
Building a Realistic ROI Timeline for Equipment Improvements
A Return on Investment (ROI) timeline calculates how many months it will take for a new tool to pay for itself through increased efficiency. This helps side-hustlers decide if a $1,000 upgrade is a smart move or a vanity purchase. To calculate this, you need to know how much time or money the upgrade will save you per job.
Let’s say you buy a new water table for your plasma system to reduce the time spent cleaning parts. If the table costs $800 and saves you 15 minutes of grinding per job, and you do 10 jobs a month, you are saving 150 minutes (2.5 hours) monthly. If your labor rate is $40, you are saving $100 a month. The upgrade pays for itself in eight months. After that, that $100 a month is pure profit.
- Identify the cost of the upgrade (Price + Shipping + Install time).
- Estimate the monthly savings (Time saved x Labor rate + Material saved).
- Divide the cost by the savings to get the number of months to break even.
- Compare this to your machine’s remaining lifespan.
Common Rookie Mistakes in Fabrication Job Costing
One of the biggest mistakes I see is the “Flat Rate Trap.” A customer asks for a price on a custom bracket, and the owner says, “I’ll do it for $50.” They haven’t factored in the design time, the setup, the consumables, or the cleanup. By the time the part is done, they’ve worked for $10 an hour. Always quote based on a formula: (Material Cost x Markup) + (Shop Rate x Estimated Hours) + Consumable Fee.
Another mistake is ignoring “Quote Variance.” This is the difference between what you quoted and what the job actually cost you. If you estimated two hours but it took four because you had to troubleshoot the table, you didn’t make money. I recommend keeping a “Post-Job Reconciliation” sheet. Write down your estimated time and your actual time. If you are consistently over, it is time to either raise your rates or improve your machine’s speed.
- Underestimating Cleanup: Grinding dross takes time. If your table isn’t tuned, you’ll spend more time with a flapper disk than the torch.
- Free Design Work: If you spend two hours in CAD for a $100 part, you are losing money. Charge a “Design Fee” or “Setup Fee” for every new part.
- Ignoring Electricity: A plasma cutter and a large compressor pulling 50 amps will move your electric bill. Make sure your shop rate covers the “peak demand” charges.
Digital Tools for Modern Shop Management
Managing a side business on paper is a recipe for missed details. There are several digital tools that can help you track your fabrication job costing and metal business ROI calculators without needing a degree in accounting. Using these tools allows you to look at your business through data rather than gut feelings.
- QuickBooks or FreshBooks: Excellent for tracking every penny that enters and leaves the shop. They make tax time significantly less painful.
- SheetCam: A low-cost CAM software that provides very accurate estimates for cut time. Use this before you give a quote.
- Evernote or Trello: Use these to track project progress and store photos of “drops” so you know what material you have in stock.
- Google Sheets: I still use a custom spreadsheet for my ROI calculations. It allows me to plug in different “what-if” scenarios for new equipment.
Conclusion: Taking the First Step Toward Efficiency
Transitioning from a hobbyist to a profitable side-hustler requires a shift in mindset. You have to stop looking at your CNC table as a toy and start seeing it as a production asset. Every second that the torch is moving through the air instead of through metal is a second of lost potential. Every nozzle that burns out early because of wet air is a dent in your profit margin.
Start by tracking your next five jobs with extreme detail. Note every minute spent on CAD, every minute the machine is running, and every minute spent cleaning the parts. When you see the data, the path to improvement becomes clear. Maybe you need better software to nest parts, or perhaps a faster motor kit to reduce travel time. Whatever the path, let the numbers lead the way. A workshop that is financially healthy is a workshop that can afford to grow, innovate, and ultimately provide the freedom that every small business owner seeks.
FAQ
How do I determine my material markup percentage? Most small shops use a sliding scale. For small jobs (under $100), a 100% markup (2x cost) is common to cover the time spent sourcing and handling. For larger jobs with high material costs, the markup may drop to 20% or 30%. The goal is to cover the “cost of money” and the risk of a mistake ruining an expensive sheet.
Is it worth upgrading to a 240V air compressor? Yes. A 240V compressor typically has a higher duty cycle and can provide a more consistent CFM (cubic feet per minute) of air. Plasma cutters require a steady flow of dry air. If your compressor is struggling to keep up, your air pressure will drop, leading to poor cut quality and increased consumable wear.
What is a “Consumable Burden Factor”? This is a percentage or a flat fee added to a job to cover the wear and tear on the torch. A common method is to add 10% to 15% of the total cut cost. This ensures that when you need to buy a $100 box of electrodes, the money is already in the business account.
How can I reduce dross without buying a new table? Dross (slag) is usually caused by incorrect cut speed or height. Ensure your torch is at the exact height recommended by the manufacturer. If you are getting “high-speed dross,” slow down. If it is “low-speed dross,” speed up. Clean, dry air is also essential for a dross-free cut.
What is the fastest way to improve lead times on custom orders? Streamline your CAD/CAM process. Creating a library of common parts and settings allows you to go from a customer’s idea to a cutting torch in minutes. Reducing the “office time” is often just as effective as increasing the machine’s travel speed.
Should I charge for design time if the customer provides a drawing? Yes. You still have to “clean up” their drawing, convert it to G-code, and set up the nesting. Even a “ready-to-cut” file requires 10 to 15 minutes of prep. A standard “Setup Fee” of $25 to $50 per job is a fair way to cover this time.
How do I know if I’m ready to upgrade from a hobby-grade table? If your current machine is the “bottleneck” in your production—meaning you have more work than the machine can handle—it is time to upgrade. If you are spending more time fixing the table than cutting parts, the lost labor hours are likely costing you more than a new machine payment.
What is “Linear Foot Costing”? This is a pricing method where you charge a flat rate for every foot of metal the plasma torch cuts. For example, you might charge $1.50 per foot for 1/4″ steel. This is a quick way to estimate jobs, but it should still be checked against your hourly shop rate to ensure it’s profitable.
How does acceleration affect the lifespan of my machine? While high acceleration saves time, it also increases wear on belts, gears, and bearings. It is a balance. You want the machine to be snappy, but setting acceleration too high can cause “ringing” or vibrations that show up in the cut quality. Aim for the highest setting that still produces a smooth, clean edge.
Can I run a profitable shop with only 120V power? It is difficult for anything beyond very thin gauge material. Most 120V plasma cutters have a low duty cycle, meaning they can only cut for a few minutes before needing to cool down. For a professional side-hustle, a 240V circuit for both the cutter and the compressor is generally considered the baseline.
(This article was written by one of our staff writers, Michael Hargrove. Visit our Meet the Team page to learn more about the author and their expertise.)