How to Build a Safe Welding Booth on a Budget (DIY Plans)
When I first started taking on paid fabrication work sixteen years ago, I made the same mistake most hobbyists make. I assumed that if I had a welder and some floor space, I was ready to do business. I didn’t account for the fact that my garage wasn’t designed for high-volume production. I spent more time cleaning grinding dust off my wife’s car and worrying about stray sparks than I did actually melting metal. It took a near-miss fire and a very thin profit margin on a set of custom gates to realize that a dedicated, fire-safe workspace isn’t a luxury; it is a financial necessity for a serious side-hustle.
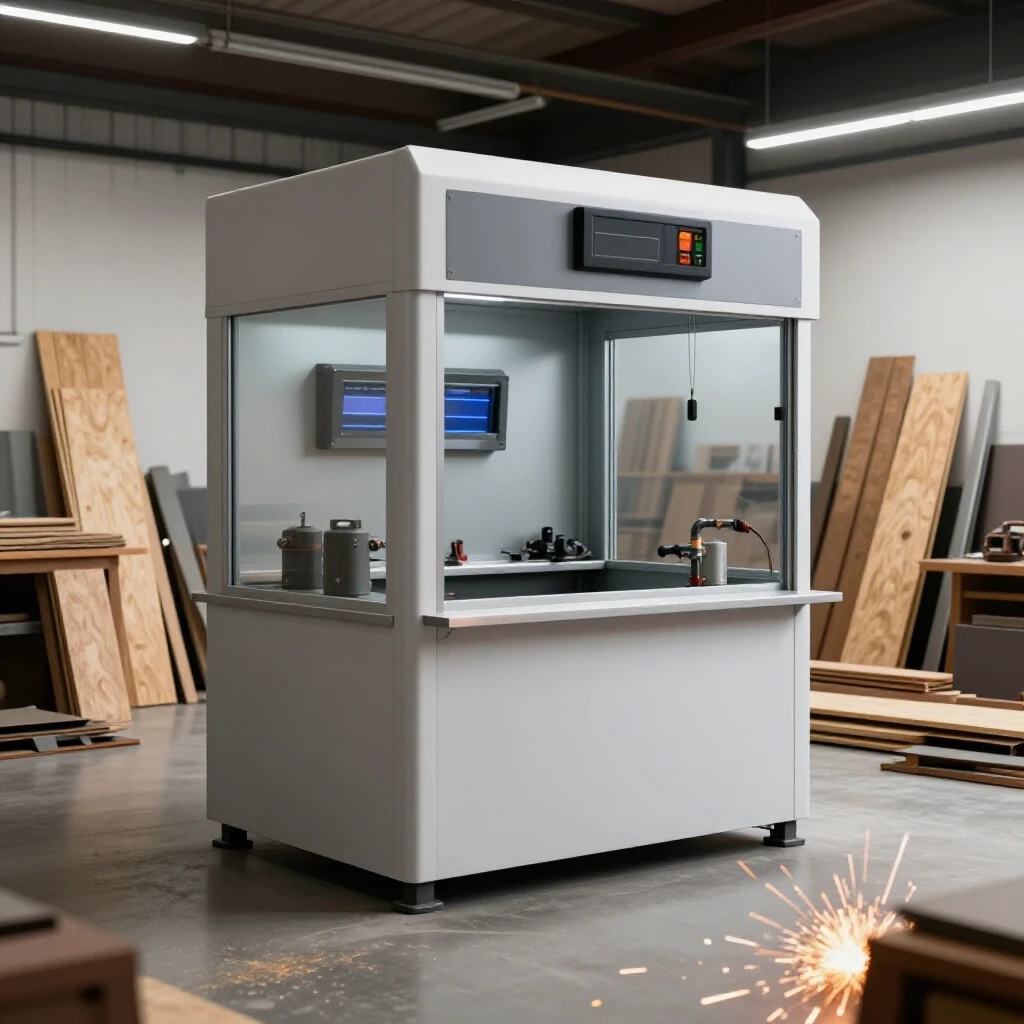
The transition from hobbyist to professional fabricator requires a shift in mindset. You are no longer just “making things.” You are managing a micro-manufacturing facility. Every square foot of your shop must generate revenue to cover its own costs. If you are working in an open garage, your “hidden costs” include the risk of fire, the time spent on excessive cleanup, and the inefficiency of moving tools around for every job. Building a dedicated, economical welding enclosure allows you to contain your mess, protect your equipment, and—most importantly—calculate your shop rate with much higher accuracy.
In this guide, we will look at how to construct a functional, low-cost welding bay while keeping a sharp eye on the bottom line. We will treat this project as a capital investment. By the end, you will understand how to track the costs of this build and how to use it to increase your fabrication job costing precision.
Establishing a Realistic Shop Rate for Your Fabrication Space
A shop rate is the total hourly cost of running your business, including profit, labor, and overhead. It ensures that every hour you spend under the hood contributes to paying off your equipment and growing your bank account.
Many side-hustlers pick a number out of thin air, often settling on $40 or $50 an hour because it “feels right.” However, once you factor in electricity, consumables, and the depreciation of your tools, that $50 can quickly vanish. For a small metal shop, a realistic rate usually falls between $65 and $120 per hour. If you are building out a dedicated welding area, you need to know exactly how that investment affects this number.
When I consult with small shop owners, I use a simple formula to determine the “burdened” shop rate. This includes your desired take-home pay plus your fixed and variable overhead.
| Expense Category | Monthly Cost (Example) | Hourly Impact (40 hrs/mo) |
|---|---|---|
| Shop Rent/Mortgage | $400 | $10.00 |
| Utilities (Power/Water) | $120 | $3.00 |
| Insurance & Licensing | $80 | $2.00 |
| Tool Depreciation | $150 | $3.75 |
| Consumables (Gas, Wire, Discs) | $200 | $5.00 |
| Total Overhead Burden | $950 | $23.75 |
If you want to earn $50 an hour for your labor, your shop rate must be at least $73.75. Building your own fire-resistant workspace helps lower the “Tool Depreciation” and “Consumables” lines by protecting your gear and making your workflow more efficient.
Mapping Capital Investment and Machinery Amortization
Amortization is the process of spreading the cost of an expensive asset over its useful life. Instead of viewing a $1,000 shop upgrade as a one-time loss, you see it as a small cost per hour of use.
When constructing an economical fabrication station, you are creating a long-term asset. Let’s say the materials for your enclosure cost you $800. If you expect that setup to last five years and you work 500 hours a year, the cost is only $0.32 per hour. This is a much easier pill to swallow than a flat $800 hit to your monthly profits.
By amortizing your build, you can accurately price your services. You aren’t just guessing; you are ensuring that the client is paying for a fraction of the infrastructure they are using. This is the difference between a hobbyist who is “breaking even” and a business owner who is building equity in their shop.
Why Fire-Safe Enclosures Improve Side-Hustle Metalworking ROI
A dedicated enclosure is a controlled environment that minimizes risks and maximizes output. It prevents sparks from damaging other inventory and keeps specialized tools clean.
When your welding area is clearly defined, your workflow becomes predictable. You don’t waste fifteen minutes looking for a grounding clamp or moving a lawnmower out of the way. In the world of side-hustle metalworking, time is your most valuable commodity. If a DIY enclosure saves you 30 minutes of setup and teardown per job, and your shop rate is $80/hr, that setup pays for itself in just 20 jobs.
Budget-Friendly Construction: Materials and Layout
Building a safe zone doesn’t require expensive industrial curtains or pre-fabricated steel cells. You can achieve professional-grade safety using common building materials if you understand the thermal properties of what you are using.
The goal is to create a non-combustible perimeter. I have found that a combination of cement board and light-gauge metal panels offers the best balance of cost and fire resistance. Cement board is an excellent heat shield and is significantly cheaper than heavy steel plate.
Selecting Non-Combustible Wall and Floor Surfaces
Non-combustible surfaces are materials that will not ignite or support combustion when exposed to fire or high heat. These are essential for any area where sparks, slag, or molten metal are present.
For the walls of your budget enclosure, I recommend using 1/2-inch cement backer board. You can mount these directly to a wood-framed wall, provided you use “stand-offs.” A stand-off is simply a 1-inch spacer (like a stack of washers or a short piece of conduit) that creates an air gap between the cement board and the wood studs. This air gap is a critical safety feature; it prevents heat from transferring through the board and charring the wood behind it.
- Cement Board: ~$15 – $20 per 4×8 sheet.
- Corrugated Metal Panels: ~$25 – $30 per sheet (great for reflecting light).
- Fire-Rated Caulk: Used to seal joints and prevent sparks from slipping into wall cavities.
Managing Air Quality with Economical Ventilation
Mechanical ventilation is the use of fans or blowers to move air in and out of a space to remove fumes and heat. In a welding environment, you need a system that pulls smoke away from your face.
A common mistake is using a standard household box fan. These don’t have the static pressure needed to move heavy welding fumes. Instead, look for a high-velocity exhaust fan. The industry standard for a single-welder station is a minimum of 100 Cubic Feet per Minute (CFM) of airflow.
I often suggest using a “utility blower” with flexible ducting. You can position the intake right next to your work surface. This is much more effective than a ceiling fan because it captures the fumes at the source before they disperse into the shop.
- Calculate Volume: A 4x4x8 area is 128 cubic feet.
- Target Air Changes: You want to refresh the air in that small zone at least once every minute.
- Fan Choice: A 200 CFM inline duct fan is usually sufficient and costs under $100.
Tracking Consumables and Hidden Shop Operational Costs
Consumables are items that are used up during the fabrication process, such as welding wire, shielding gas, and abrasive discs. These are often the “silent killers” of profitability in small shops.
If you don’t track how much gas and wire you use per project, you are essentially giving away money. In my consulting experience, most small shops underestimate their consumable burden by 15% to 20%. When you have a dedicated enclosure, it becomes much easier to monitor these expenses because your supplies stay in one place.
The Impact of Welding Consumable Tracking on Job Bids
Consumable tracking is the practice of recording exactly how much material is used on a specific job to ensure accurate billing. This involves noting the start and end levels of gas tanks and the weight of wire spools.
I recommend keeping a simple logbook or a digital spreadsheet attached to your welding cart. Record the “arc time” for a project and the number of grinding wheels used. Over time, you will develop a “consumable factor”—a percentage you add to every quote to cover these costs. For most MIG welding jobs, a 10% to 15% markup on the material cost is a safe baseline, but data-driven tracking will give you a more precise number.
| Consumable Item | Typical Unit Cost | Usage per Hour (Est.) | Hourly Cost |
|---|---|---|---|
| ER70S-6 Wire (2lb) | $12.00 | 0.5 lbs | $3.00 |
| C25 Shielding Gas | $60.00 (refill) | 20 CFH | $4.50 |
| 4.5″ Grinding Disc | $2.50 | 0.5 discs | $1.25 |
| Total Hourly Burden | $8.75 |
If you ignore this $8.75 per hour, you are losing $70 on every 8-hour project. That is the difference between a profitable weekend and working for free.
Formulating a Real Material Markup Strategy
A material markup is a percentage added to the raw cost of materials to cover the time spent sourcing, transporting, and storing them. It also accounts for the “scrap factor” or waste generated during cutting.
Many side-hustlers simply pass the cost of steel directly to the customer. This is a mistake. If you spend two hours driving to the steel yard and loading your truck, you have incurred a cost. I suggest a tiered markup system:
- Small Jobs (<$500): 30% to 50% markup.
- Medium Jobs ($500 – $2,000): 20% to 30% markup.
- Large Jobs (>$2,000): 10% to 15% markup.
This ensures that the “hassle factor” of sourcing metal for a small bracket doesn’t eat your entire profit.
Building a Custom Job Quote with Confidence
A fabrication job quote is a formal document that outlines the estimated costs, scope of work, and timeline for a project. It is your contract with the customer and your roadmap to profit.
When you have a dedicated, safe workspace, your quotes become more professional. You can confidently tell a client that your shop rate covers a fire-safe environment and professional-grade fume extraction. This justifies a higher rate than the guy welding on his driveway.
Step-by-Step Quote Construction
To build a quote that sticks, follow this sequence:
- Material Cost: Calculate every inch of steel, then add your markup.
- Labor Hours: Estimate the time for cutting, fitting, welding, and finishing. Be honest—don’t forget the cleanup.
- Shop Rate Application: Multiply your labor hours by your burdened shop rate.
- Consumable Burden: Add your hourly consumable cost (e.g., $8.75 x hours).
- Fixed Fees: Add any specialized costs like powder coating or delivery.
Analyzing Post-Job Profits to Refine Future Bids
Post-job profit analysis is the process of comparing your estimated costs against your actual spending once a job is finished. This is how you catch “profit leaks.”
Did the job take 10 hours instead of the estimated 6? Why? Was it because you spent 2 hours looking for tools? This is where the value of your organized enclosure proves itself. If your actual costs are consistently higher than your estimates, you either need to raise your shop rate or improve your shop’s efficiency.
Digital Tools for Small Metal Shop Pricing
In the modern shop, you don’t need a degree in accounting to stay profitable. Several digital tools can handle the heavy lifting of fabrication job costing and invoicing.
- QuickBooks or FreshBooks: Excellent for tracking overhead and sending professional invoices.
- Evernote or Google Keep: Perfect for snapping photos of material receipts and logging consumable usage on the fly.
- Custom Excel/Google Sheets: I still prefer a custom spreadsheet for project estimation. It allows you to plug in your specific shop rate and material markups.
- AirTable: A powerful tool for tracking inventory, such as how many feet of 1×1 square tubing you have left in the rack.
Using these tools removes the guesswork. When a customer asks why a project costs $1,200, you can show them a breakdown of materials, labor, and shop burden. This transparency builds trust and helps you stand your ground on pricing.
Common Rookie Mistakes to Avoid
Even with a great setup, there are financial traps that can sink a small shop.
- Underestimating Finish Work: Grinding and polishing often take as long as the welding itself. Always double your estimated “finishing” time.
- Ignoring Electricity Costs: High-amperage welding and heavy-duty grinders pull a lot of power. Make sure your shop rate reflects the bump in your utility bill.
- Failing to Charge for Design Time: If you spend three hours on a CAD drawing or a hand-sketch, that is billable labor.
- Buying Too Much “Just in Case” Material: Inventory is “dead money.” Unless you use it every week, don’t buy it until the job is booked.
Key Takeaways for the Growing Fabricator
Building a dedicated, safe fabrication zone is an investment in your business’s future. It allows you to move away from “garage prices” and toward professional fabrication rates.
- Safety is a Savings: A fire-resistant enclosure protects your assets and reduces insurance risks.
- Know Your Numbers: Never guess your shop rate. Use the overhead burden formula.
- Track Everything: Consumables and “minor” expenses add up to major losses if ignored.
- Amortize Your Build: Spread the cost of your shop improvements over time to keep your bids competitive.
By focusing on the economics of your workshop, you turn a hobby into a sustainable, profitable business. You stop being a “guy with a welder” and start being a manufacturing professional.
FAQ: Managing Shop Economics and Safety
How much should I spend on a DIY welding enclosure? For a side-hustle, a budget of $500 to $1,000 is usually the “sweet spot.” This covers cement board, a basic exhaust system, and lighting. Spending more than this requires a clear ROI plan based on your current job volume.
Is cement board really safe for welding? Yes, cement board is non-combustible and heat-resistant. However, it should not be the only line of defense. Always maintain an air gap between the board and any combustible framing to prevent heat transfer.
How do I calculate my electricity cost per job? Check your power bill for the “Price per kWh.” A 200-amp welder running at full tilt might use 10-12 kWh per hour of arc time. Usually, adding $1.00 to $2.00 per hour to your shop rate covers the power for the welder and lights.
Should I charge for the time I spend quoting a job? For small jobs, design and quoting time are usually rolled into the shop rate. For complex projects taking more than two hours to estimate, it is standard to charge a “Design Fee” that is credited back if they book the job.
What is the best way to track welding gas usage? The most accurate budget method is to note the PSI on your regulator at the start and end of a job. If a full tank is 2,000 PSI and you used 200 PSI, you used 10% of the tank’s refill cost.
How do I handle “scrap” in my job costing? Always charge the customer for the full stick of metal if you have to buy it specifically for their job. Any leftovers are “free” inventory for you, which increases your profit on the next small repair.
Can I use wood framing for my welding booth? Yes, but the wood must be completely shielded by non-combustible materials like cement board or sheet metal. Never leave exposed wood in the “spark zone.”
What is a “burdened” labor rate? It is your hourly wage plus the cost of all the things required to let you work (rent, power, insurance, taxes). If you want to make $40/hr, your burdened rate will likely be $65/hr or more.
When does it make sense to buy a pre-made welding screen? If you need portability within a large shop, a $100 welding curtain on a rolling frame is a good investment. However, for a permanent, fire-safe zone, a built-in enclosure with hard walls is superior.
How do I factor tool wear into my pricing? Use a depreciation schedule. If a $2,000 welder lasts 2,000 arc-hours, it costs you $1.00 per hour to operate. Add this to your shop rate.
What is the most common hidden cost in fabrication? Abrasives. Flap discs, cut-off wheels, and wire brushes are expensive and wear out fast. Many shops lose 5% of their profit by not charging enough for these “small” items.
How often should I review my shop rate? Review your numbers every six months or whenever a major expense changes (like a rent increase or a jump in steel prices). Continuous tracking ensures you don’t get stuck working at last year’s prices.
(This article was written by one of our staff writers, Michael Hargrove. Visit our Meet the Team page to learn more about the author and their expertise.)