How to Safely Transport Long Steel Stock on Trailers (Guide)
When I first started my fabrication business, I spent most of my time focused on the weld bead. I obsessed over the settings on my machine and the fit-up of my joints. However, I quickly learned that the real “profit killers” weren’t happening at the welding bench. They were happening in the driveway. I remember a specific Tuesday afternoon when I tried to save sixty dollars by hauling three hundred pounds of twenty-foot angle iron on a trailer that was far too short. I didn’t account for the physics of the load or the value of my own time. By the time I got back to the shop, I had blown a tire from poor weight distribution and wasted three hours of billable shop time.
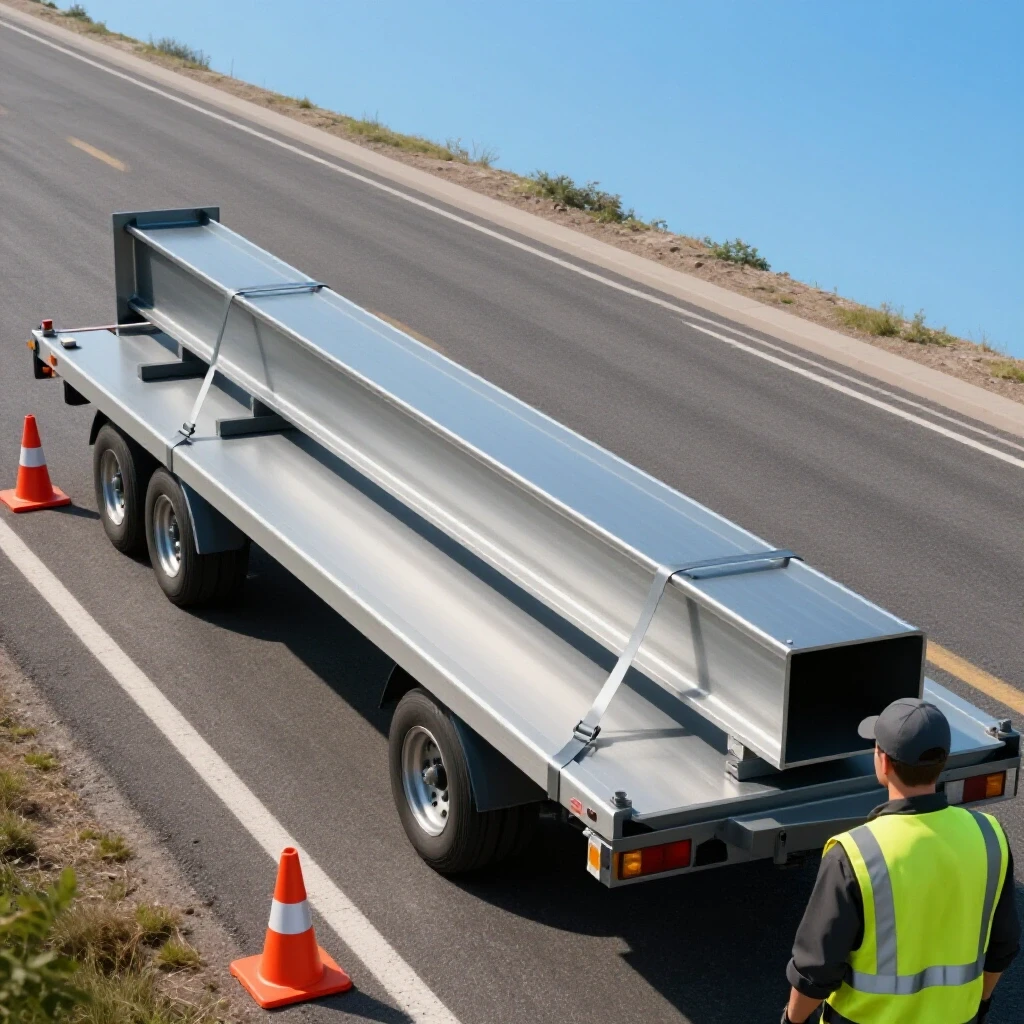
That experience taught me that material logistics is a core part of your fabrication job costing. If you are transitioning from a hobbyist to a side-hustle owner, you must stop viewing the trip to the steel yard as a “quick errand.” It is a high-risk, high-cost business operation. In this guide, I will break down the financial and physical realities of moving long metal profiles. We will look at how to protect your equipment, your cargo, and your bottom line.
Establishing a Shop Rate for Material Logistics
A shop rate is the total cost of running your business for one hour, including your desired profit. It covers everything from rent and electricity to the depreciation of your welder and your trailer.
Before you even hook up your trailer, you need to know what your time is worth. Most small fabrication shops operate with a shop rate between $65 and $120 per hour. If you spend two hours driving to pick up steel, you have “spent” $130 to $240 in labor and overhead. Many side-hustlers fail to include this in their bids. They only charge for the material and the welding time. This mistake leads to “low-margin traps” where you work hard but never seem to have extra cash in the bank. To avoid this, you must treat the transport of long stock as a billable phase of the project.
Calculating Your Hourly Overhead Burden
Overhead burden is the sum of all indirect costs required to keep your shop operational, regardless of whether you are actively welding.
To find this number, add up your monthly shop expenses. Include insurance, trailer registration, tool depreciation, and utilities. Divide that total by the number of hours you work each month. If your monthly expenses are $800 and you work 40 hours on your side-hustle, your overhead burden is $20 per hour. Even when you are driving your trailer to the steel supplier, that $20 per hour is being “spent.” Understanding this helps you realize why efficient hauling is a financial necessity, not just a safety concern.
The Economics of DIY Material Hauling
This involves comparing the cost of owning and operating a trailer against the flat delivery fees charged by commercial steel service centers.
Most steel yards charge a delivery fee ranging from $75 to $150. As a small shop owner, you might think you are saving money by doing it yourself. However, you must look at the “True Cost” of the trip. This includes fuel, wear and tear on your vehicle, and the amortized cost of your trailer. If your total DIY cost exceeds the supplier’s delivery fee, you are actually paying for the privilege of doing the work yourself. I generally recommend DIY hauling only if the material is needed immediately or if the delivery fee exceeds 15% of the total job’s profit margin.
Trailer Amortization and Maintenance Costs
Amortization is the process of spreading the cost of a large purchase, like a trailer, over its useful lifespan to understand its daily or hourly cost.
A quality 14-foot utility trailer might cost $3,500. If you expect it to last ten years, the annual depreciation is $350. When you add in tires, grease for the bearings, and deck boards, your trailer might cost you $1.50 for every day you own it. While that seems small, these costs add up. Tracking these numbers allows you to set a “trailer usage fee” in your fabrication job costing spreadsheets.
| Expense Category | Estimated Annual Cost | Impact on Shop Rate |
|---|---|---|
| Trailer Depreciation | $350 | $0.18 / hr |
| Maintenance (Tires/Grease) | $150 | $0.08 / hr |
| Insurance & Registration | $120 | $0.06 / hr |
| Tie-Down Hardware Replacement | $60 | $0.03 / hr |
| Total Logistics Overhead | $680 | $0.35 / hr |
Load Placement and Weight Balance for Long Profiles
Proper load placement ensures that the weight of the steel is distributed so the trailer remains stable at highway speeds.
When hauling long sticks of tube or channel, the “60/40 rule” is your best friend. You want 60% of the weight positioned in front of the trailer axle and 40% behind it. This creates “tongue weight,” which presses down on the hitch of your truck. If you place too much weight at the rear of the trailer, the tongue will lift, causing the trailer to sway violently. For long steel that extends past the end of the trailer, you may need to slide the entire bundle forward toward the truck to maintain this balance.
Managing Center of Gravity in Narrow Loads
The center of gravity is the point where the weight of your load is concentrated; keeping it low and centered prevents the trailer from tipping during turns.
Steel is incredibly dense. A small bundle of 2-inch square tubing can weigh several hundred pounds but take up very little space. Always center your load over the trailer’s main frame rails. Never stack long stock high on one side of the trailer. If the load is off-center, it puts uneven pressure on your tires and suspension. This can lead to a blowout or a structural failure of the trailer frame. I always use wooden “bolsters” (2×4 scraps) to create a flat, centered cradle for my steel bundles.
Essential Hardware for Securing Heavy Loads
Securing a load involves using mechanical devices to exert enough force on the steel so that it cannot move during braking, turning, or acceleration.
For most side-hustle fabricators, Grade 70 transport chains or heavy-duty ratchet straps with a 3,300-lb Working Load Limit (WLL) are the standard. Do not use the cheap, thin straps found at big-box hardware stores. Steel has a low friction coefficient, meaning it slides easily against wood or metal trailer decks. You need hardware that can “bite” into the load. I prefer using “over-center” binders for chains or high-leverage ratchets for straps.
Understanding Friction and Longitudinal Movement
Longitudinal movement refers to the tendency of long steel rods or tubes to slide forward or backward when you hit the brakes or accelerate.
Because steel is smooth, it can act like a spear if you stop suddenly. To prevent this, you should use a “header board” or a bulkhead at the front of your trailer. If your trailer doesn’t have one, you can use a “wrap-around” strap technique. Loop the strap around the front of the bundle before anchoring it to the trailer sides. This creates a physical basket that prevents the steel from sliding forward. This is a critical safety step that many hobbyists overlook until they see their material sliding toward their truck’s rear window.
- Always use at least two straps for any load under 10 feet.
- Use one additional strap for every 10 feet of length beyond that.
- Check your straps for frays or cuts before every trip; a damaged strap has zero rated strength.
- Use edge protectors (plastic or old fire hose) to prevent the sharp edges of the steel from cutting your straps.
Managing Material Overhang and Safety Visibility
Overhang is the portion of the steel that extends beyond the rear of the trailer deck, which requires special marking to alert other drivers.
Most states allow a certain amount of rear overhang, usually between three and four feet, before you need a permit. However, even a one-foot overhang can be dangerous in a parking lot. I always use a bright red or orange flag at the very end of the longest piece of steel. If you are hauling at night, a red light is often legally required. From a business perspective, a single “failure to mark” ticket can cost $150 to $500, which wipes out the profit from a small welding job.
Calculating the “Swing Radius” of Long Loads
The swing radius is the extra space the rear of your load occupies when you make a turn; the longer the overhang, the wider the swing.
If you have six feet of steel hanging off the back of a twelve-foot trailer, that tail will swing out wide when you turn a corner. It can easily clip a parked car or a signpost. When I am hauling 20-foot sticks on my 14-foot trailer, I take turns much wider than usual. I also include a “logistics risk” buffer in my pricing for jobs that require me to navigate tight urban areas with long loads.
Integrating Transport Costs into Your Fabrication Bids
This is the process of adding the expenses of material procurement and delivery into the final price you charge the customer.
To stay profitable, you should apply a “Material Markup” to the raw cost of the steel. This markup isn’t just “extra profit”—it covers the time you spent loading the trailer, the fuel used, and the risk of transport. A standard markup for small shops is 20% to 35%. If the steel costs $500, you should charge the customer $600 to $675 for that material. If the job requires a complex haul with significant overhang or heavy weight, I increase the markup to cover the extra stress on my equipment.
Tracking Consumables and Hidden Logistics Costs
Consumable tracking involves monitoring the wear and tear on items like tie-down straps, fuel, and trailer tires to ensure they are paid for by your projects.
Every time you use a ratchet strap, you are using up a portion of its life. If a set of four straps costs $100 and lasts for 50 trips, each trip costs you $2 in “strap depreciation.” While this seems like “over-accounting,” this level of detail is what separates a hobbyist from a professional shop owner. I use a simple spreadsheet to track my “burden factor” for every mile driven with the trailer.
- Fuel Surcharge: Calculate the difference in your truck’s MPG when towing.
- Strap/Chain Fund: Set aside $1 per trip for hardware replacement.
- Tire/Bearing Fund: Set aside $0.05 per mile for trailer maintenance.
- Admin Time: Charge 15 minutes of shop time for the paperwork and phone calls involved in ordering the steel.
Step-by-Step Loading Procedure for Maximum Safety
Following a consistent routine reduces the chance of a mistake that could lead to lost material or an accident.
- Inspect the Trailer: Check tire pressure and ensure the lights are working. A flat tire on a loaded trailer is a nightmare to change.
- Clean the Deck: Remove any debris or loose tools that could fly off or prevent the steel from sitting flat.
- Position the Steel: Place the heaviest pieces on the bottom. Ensure the 60/40 weight distribution is met.
- Apply Initial Tie-Downs: Secure the front and rear of the load. Use “cross-strapping” if the load is prone to side-to-side shifting.
- Add Edge Protection: Place guards under the straps where they touch sharp corners of the steel.
- The “Shakedown” Test: Pull on the straps with your full body weight. The trailer should move, but the steel should stay still.
- Final Markings: Attach your red flag or light to the end of the overhang.
- The Five-Mile Check: Stop after five miles of driving to re-tighten the straps. Steel often “settles” once you start moving.
Common Rookie Mistakes to Avoid
Even experienced fabricators can get complacent. Avoiding these common errors will save your equipment and your reputation.
One of the biggest mistakes is “under-strapping.” I have seen people try to hold down a 1,000-pound bundle of rebar with two thin bungee cords. Another mistake is ignoring the “working load limit” of the trailer itself. Just because the steel fits on the trailer doesn’t mean the axle can handle the weight. Always check the VIN plate on your trailer for the Gross Vehicle Weight Rating (GVWR). Subtract the weight of the trailer itself to find your actual carrying capacity.
- Mistake: Using old, sun-bleached straps. Result: The strap snaps under the tension of a sudden stop.
- Mistake: Forgetting to grease trailer bearings. Result: The hub overheats and the wheel falls off on the highway.
- Mistake: Loading steel over the side rails instead of the floor. Result: The rails bend or snap under the concentrated weight.
- Mistake: Not accounting for “Wind Lift.” Result: Long, flat plates can catch the wind and try to lift off the trailer at high speeds.
Useful Tools for Small Shop Logistics Management
To manage these logistics professionally, you should use digital tools that help you track costs and plan routes.
- QuickBooks or FreshBooks: Essential for tracking fuel expenses and trailer maintenance as tax-deductible business costs.
- Weight Distribution Calculators: Online tools where you input your trailer length and load weight to find the ideal placement.
- Tire Pressure Monitoring Systems (TPMS): Affordable aftermarket sensors that screw onto your trailer valves and alert you to leaks in real-time.
- Inventory Management Apps: Tools like Sortly can help you track what steel you have in stock so you can minimize the number of trips to the supplier.
- Digital Angle Finders: Useful for ensuring your trailer is sitting level once loaded, which indicates proper tongue weight.
Conclusion and Next Steps
Mastering the movement of long metal stock is as important as mastering the TIG torch. It is a fundamental skill for any fabrication business owner. By understanding your shop rate, tracking your hidden logistics costs, and following strict safety protocols, you protect your profitability.
Your next step is to audit your last three material pickups. Calculate how much time you spent, the fuel you used, and the wear on your equipment. Compare that to what you charged the customer. If you find you lost money on the haul, adjust your material markup for the next bid. Professionalism in the “boring” parts of the business—like hauling steel—is what allows you to eventually upgrade your shop and turn your side-hustle into a thriving enterprise.
FAQ: Hauling Long Steel for Small Shops
How do I calculate tongue weight without a professional scale? You can use a heavy-duty bathroom scale and a simple “2×4 lever” system. By placing the scale under one end of a beam and the trailer tongue on a pivot point in the middle, you can use basic math to determine the weight. Generally, 10% to 15% of the total loaded trailer weight should be on the tongue.
What is the “60/40 rule” for steel loading? This rule states that 60% of the load’s weight should be in the front half of the trailer (closer to the truck) and 40% in the rear. This ensures the trailer tracks straight and prevents the “fishtailing” that happens when the rear is too heavy.
Should I use straps or chains for smooth steel pipe? Chains are better for heavy, rough steel like I-beams, but they can slide on smooth pipe. For smooth surfaces, heavy-duty ratchet straps are often better because the webbing has more surface area contact. Always use “choker” wraps to prevent round stock from rolling.
How much overhang is safe on a 12-foot trailer? While legal limits vary, a general safety rule is to keep overhang to less than 1/3 of the total length of the material. If you have a 20-foot stick, at least 14 feet should be supported by the trailer bed. Anything more requires a longer trailer or a “truck bed extender.”
How do I price a delivery fee for a client? Start with your shop rate for the estimated time of the round trip. Add a “mileage rate” (the current IRS standard is a good baseline) to cover fuel and wear. Finally, add a small “risk premium” for very heavy or awkward loads.
How often should I replace my tie-down straps? Inspect them every time you use them. If you see any fraying, “fuzziness” from UV damage, or small nicks, throw them away immediately. In a professional shop, I recommend replacing all primary straps every 12 to 18 months regardless of appearance.
What is the impact of wind resistance on long loads? Long, flat items like sheet metal or wide-flange beams can act like wings. At 65 mph, wind can exert hundreds of pounds of upward or lateral force. Always use extra straps for “flat” loads and avoid hauling large plates vertically like a sail.
Can I haul 20-foot sticks on a 10-foot trailer? It is not recommended. With 10 feet of overhang, the “tail swing” is extremely dangerous, and the weight distribution will almost certainly be wrong. For 20-foot material, a 14-foot or 16-foot trailer is the minimum for safe, professional operation.
How does material weight affect trailer tire pressure? Trailer tires should almost always be inflated to the “Max Cold Pressure” listed on the sidewall when carrying heavy steel. Under-inflated tires flex too much under load, which causes heat buildup and leads to blowouts.
What is the “friction factor” in load security? Friction is the resistance to sliding. Steel-on-steel has very low friction. To increase safety, use wood dunnage (2x4s) between the trailer deck and the steel. The “bite” of the steel into the wood significantly increases the force required for the load to slide.
(This article was written by one of our staff writers, Michael Hargrove. Visit our Meet the Team page to learn more about the author and their expertise.)