How to Construct a Mobile Rolling Tool Bench Safely (Guide)
I remember standing in my garage ten years ago, looking at what was supposed to be a heavy-duty workstation. I had spent three days cutting steel and another two welding it together. On paper, the dimensions were spot on. But when I set it on the concrete floor, the back-left corner sat nearly half an inch in the air. Every time I leaned on it, the whole frame groaned and rocked. I had ignored the reality of metal behavior, specifically how heat moves steel. That project taught me that custom fabrication projects are won or lost in the layout and the sequence of the heat.
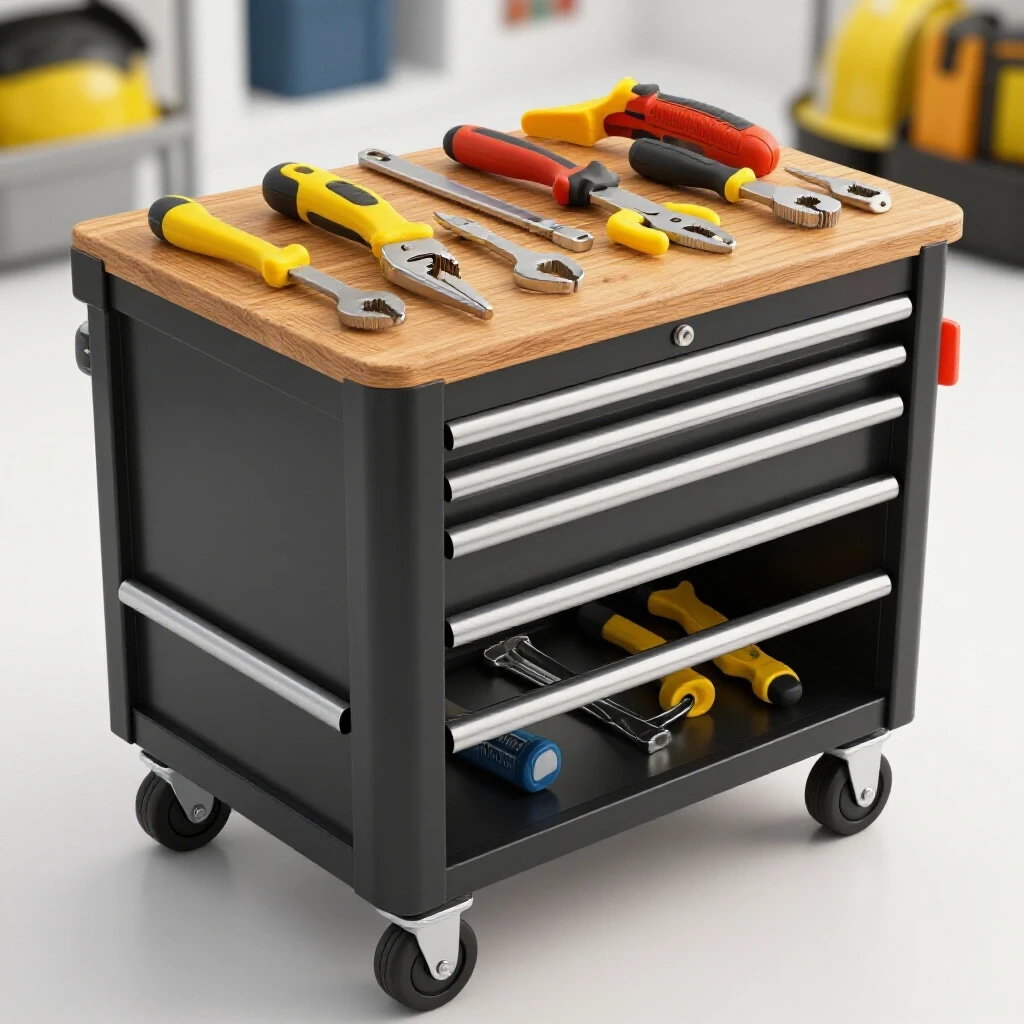
Building a mobile workstation that stays flat and square requires more than just a welder and a tape measure. It requires an understanding of how metal reacts to being cut and heated. If you have ever felt the frustration of a frame pulling out of square as it cools, you are not alone. It happens because steel expands when it gets hot and shrinks as it cools. If that shrinkage isn’t managed, it will warp your project every single time.
In this guide, I will break down the process of creating a stable, rolling steel base from the ground up. We will look at how to plan your cuts, how to set up workshop jigs and fixtures, and how to use a specific weld sequencing layout to keep your frame straight. My goal is to help you avoid the “rocking chair” effect and build something that lasts a lifetime.
The Foundation of Accuracy: Planning and Material Prep
Planning involves creating a detailed cut list and understanding how your tools affect the final dimensions of your steel. This stage prevents the “creeping error” where small mistakes in early cuts lead to a frame that is inches off by the end.
When I start a new build, I always begin with a cut list that accounts for the thickness of the metal and the width of the blade. This width is called the kerf. If you are using a 14-inch abrasive chop saw, your kerf might be 1/8 of an inch. If you make ten cuts without accounting for that 1/8 inch, your final assembly will be over an inch shorter than you intended. For custom fabrication projects, I aim for a dimensional tolerance of +/- 1/16th of an inch.
Calculating Kerf and Material Allowances
Kerf calculation is the practice of adding the width of your cutting tool’s path to your measurements to ensure the final piece is the correct length. It is the difference between a joint that fits tight and one that requires a massive weld bead to bridge a gap.
Different tools have different kerf values. A band saw has a much thinner kerf than an abrasive chop saw. When you are planning your metal layout tips, always measure the actual thickness of your blade first. I prefer using a cold saw or a band saw for my main frame members because they produce cleaner, more accurate square cuts with less heat.
| Cutting Tool Type | Average Kerf Width | Dimensional Accuracy |
|---|---|---|
| Abrasive Chop Saw | 3/32″ to 1/8″ | Moderate (+/- 1/16″) |
| Metal Band Saw | 0.025″ to 0.035″ | High (+/- 1/32″) |
| Plasma Cutter | 1/16″ to 1/8″ | Low (Requires grinding) |
| Oxy-Acetylene Torch | 1/8″ to 3/16″ | Low (Requires heavy grinding) |
| Cold Saw | 0.080″ to 0.100″ | Very High (+/- 0.010″) |
Selecting the Right Steel Profiles
Material selection refers to choosing the shape and thickness of the steel to handle the intended weight while remaining manageable for welding. This choice dictates the structural integrity of the entire build.
For a rolling shop bench, I typically recommend 2×2 inch square tubing with a wall thickness of 11-gauge (roughly 1/8 inch). It is thick enough to weld easily without burning through, yet rigid enough to support several hundred pounds of tools. If you go too thin, like 16-gauge, the metal will warp almost instantly under the heat of a welder. If you go too thick, the bench becomes unnecessarily heavy and difficult to move.
Setting the Stage: Workshop Jigs and Fixtures
A fixture is any device used to hold your workpieces in a fixed position during the assembly process. Using workshop jigs and fixtures is the only way to ensure that your 90-degree corners actually stay at 90 degrees once the sparks start flying.
I never trust my eyes to determine if a frame is square. Even a high-quality speed square has limits when you are dealing with a four-foot-long frame. Instead, I use a combination of heavy-duty magnets, F-clamps, and the “3-4-5 rule” to verify my layout. If you don’t have a dedicated welding table, you can build a simple jig on a flat concrete floor using scrap angle iron bolted down as stops.
The Importance of a Flat Reference Surface
A reference surface is a known flat plane, such as a cast-iron welding table or a leveled steel plate, used to ensure all components of a build lie in the same geometric plane. Without a flat surface, your bench will likely have a built-in twist.
If your garage floor is uneven, you can create a temporary leveling base using saw horses and heavy C-channel steel. I once built a 6-foot utility trailer on a sloped driveway by shimmying up a temporary ladder frame. It took two hours to level the jig, but it saved me twenty hours of trying to fix a crooked trailer later. Always spend the time to get your base level before you lay out your first piece of tubing.
Using Clamps and Squaring Tools Correctly
Clamping is the act of applying mechanical pressure to hold parts together, preventing them from moving due to the internal stresses created by welding heat. Proper clamping is one of the most effective metal warping solutions available to the home builder.
- Use at least two clamps per joint to prevent the metal from pivoting.
- Place clamps as close to the weld zone as possible without obstructing your torch.
- Use copper or aluminum backing bars behind your joints to act as heat sinks.
- Check for square after every single clamp is tightened, as the pressure itself can sometimes shift the metal.
The Science of the Tack: Securing the Frame
A tack weld is a small, temporary weld used to hold components in place before the final, structural welds are applied. Tacking allows you to “dry fit” the entire project and make adjustments before committing to a permanent bond.
In my early days, I would weld one full corner at a time. By the time I got to the fourth corner, the frame was so distorted I had to use a truck jack to force it back into shape. Now, I tack the entire frame together first. For 2-inch square tubing, I use four small tacks—one in the center of each side of the tube. These tacks should be about 3/16 of an inch long.
Dimensional Checks After Tacking
This is the process of measuring the diagonals of a rectangular frame to ensure it is perfectly square before the final welding begins. If the two diagonal measurements are equal, the frame is square.
Once your frame is tacked, measure from the top-left corner to the bottom-right corner. Then measure from the top-right to the bottom-left. If the measurements are within 1/16th of an inch, you are in good shape. If they are off by more than 1/8th of an inch, you need to break a few tacks, adjust the frame, and re-tack. It is much easier to grind away a small tack than it is to cut through a full structural weld.
Tack Spacing and Strength Benchmarks
The placement and size of your tacks determine how much the metal can move when you start the final weld sequencing layout. Too few tacks, and the frame will pull; too many, and you won’t be able to adjust it.
- Space tacks no more than 6 inches apart on long runs of angle iron.
- For square tubing, always tack the corners first, then the centers.
- Ensure tacks have enough penetration to hold the weight of the metal but are small enough to be easily ground off if a mistake is found.
- Always tack on the “outside” of a joint first to resist the inward pull of the cooling metal.
Controlling the Heat: Weld Sequencing Layout
Weld sequencing is the strategic order in which you apply welds to a structure to balance the heat input and minimize distortion. By jumping from one side of the frame to the other, you allow the metal to cool and contract evenly.
When metal cools, it acts like a powerful winch, pulling the pieces toward the side that was welded. If you weld the entire top of a frame, the ends will curl upward. To combat this, I use a “cross-pattern” or “star pattern” similar to how you tighten lug nuts on a car tire. This distributes the stress across the entire structure rather than concentrating it in one area.
Managing Angular Pull and Shrinkage
Angular pull is the tendency of a joint to close up or “fold” toward the side where the weld bead is deposited. This is caused by the longitudinal and transverse shrinkage of the weld metal as it transitions from a liquid to a solid.
To minimize this, I often “preset” my joints. If I know a weld will pull a piece of steel 2 degrees to the left, I will clamp it 2 degrees to the right before I start. However, for most shop projects, simply alternating your welds is enough. For every weld you do on the front of the bench, do the next one on the back. This balanced heating is one of the most effective metal warping solutions.
| Weld Sequence Step | Action | Purpose |
|---|---|---|
| Step 1 | Tack all four corners on the outside. | Locks the basic footprint in place. |
| Step 2 | Weld the top flat of Corner A. | Begins structural bonding. |
| Step 3 | Weld the top flat of Corner C (Diagonal). | Balances the pull from Corner A. |
| Step 4 | Weld the top flat of Corner B. | Completes the top horizontal plane. |
| Step 5 | Weld the top flat of Corner D (Diagonal). | Finalizes the top plane balance. |
| Step 6 | Flip frame and repeat for the bottom. | Counteracts the “curling” from the top welds. |
Heat Input and Travel Speed
Heat input refers to the amount of energy transferred to the metal per inch of weld. High heat and slow travel speeds lead to more expansion and, consequently, more warping.
I prefer to use a slightly higher voltage and a faster travel speed. This creates a narrower “Heat Affected Zone” (HAZ). The smaller the HAZ, the less the metal will distort. If you see the metal turning a deep blue or purple several inches away from your weld, you are moving too slowly or your heat is too high. Aim for a straw-colored or light blue tint near the bead for the best balance of penetration and distortion control.
Mobility and Safety: Casters and Load Distribution
A mobile bench is only as good as its wheels. Mobility in this context means the ability to move the bench easily while ensuring it remains rock-solid and stationary when the brakes are engaged.
Safety is a major concern when you put a heavy tool bench on wheels. If the center of gravity is too high, or the wheels are too small, the bench can tip over when hitting a small pebble or a crack in the floor. I always use casters with a weight rating at least 50% higher than the expected total weight of the bench. If the bench will weigh 500 pounds, I use casters rated for 750 pounds or more.
Mounting Caster Plates for Maximum Stability
Caster plates are flat steel mounting points welded to the bottom of the bench legs to provide a secure surface for bolting on wheels. They must be perfectly level to ensure all four wheels touch the ground simultaneously.
I recommend welding a 1/4-inch thick steel plate to the bottom of each leg. Do not weld the casters directly to the frame. Heat from welding can damage the bearings and the rubber or polyurethane wheels. Instead, drill and tap the plates or use through-bolts with nylon locking nuts. This allows you to replace a damaged caster easily in the future.
Reinforcing the Lower Frame
Lower reinforcement involves adding cross-members or a bottom shelf to the frame to prevent the legs from splaying outward under a heavy load. This is critical for maintaining the structural integrity of custom fabrication projects.
- Place a lower shelf or “stretchers” about 6 to 10 inches from the floor.
- Use gussets—triangular pieces of plate steel—in the corners where the legs meet the main frame.
- Ensure all lower cross-members are welded using the same sequencing rules to prevent the legs from pulling inward.
- If you plan to mount a vise, add extra bracing directly under the mounting point to transfer that force to the floor.
Final Straightening and Finishing Techniques
Post-weld straightening is the process of correcting any minor warps that occurred despite your best efforts during the welding phase. Even with a perfect sequence, some movement is inevitable.
If your bench has a slight rock, you can often “cold straight” it using a large sledgehammer or a hydraulic jack. For more stubborn warps, “flame shrinking” can be used. This involves heating a small spot on the side opposite the warp and then cooling it quickly with water. The cooling spot shrinks and pulls the metal back into alignment. Use this technique sparingly, as it can introduce internal stresses into the steel.
Deburring and Edge Preparation
Deburring is the removal of sharp edges, slag, and burrs left behind by cutting and welding. This is a vital safety step to prevent cuts and ensures a professional finish.
I use a flap disc on an angle grinder for this. A 40-grit flap disc is great for removing material quickly, while an 80-grit disc provides a smooth finish. Pay special attention to the corners of the table and the edges of the caster plates. Any sharp point is a hazard in a busy workshop.
Verifying the Final Build
Before I call a project finished, I run through a final checklist. This ensures the bench is safe to use and meets the original design goals.
- Check all four wheels for contact with the floor.
- Verify that the locking mechanisms on the casters hold the bench firmly.
- Inspect every weld for cracks or lack of fusion.
- Apply a coat of primer and paint to prevent rust, which can weaken the structure over time.
- Load the bench with its intended weight and check for any sagging or flexing in the frame.
Lessons from the Shop: A Case Study in Distortion
A few years ago, I built a 5-foot-long welding station. I was in a hurry and decided to weld all the top joints in one go because “it looked straight enough” in the clamps. By the time I finished, the long side of the frame had bowed upward by nearly 1/4 of an inch. The surface was no longer flat, making it useless for precision work.
I had to cut the welds, grind them clean, and start over. That mistake cost me four hours of labor and $30 in wasted gas and wire. The lesson was clear: you cannot outrun the physics of metal shrinkage. Since then, I have strictly followed a weld sequencing layout that involves welding no more than two inches at a time before moving to the opposite side of the project. This patience is what separates a hobbyist build from a professional-grade tool.
Frequently Asked Questions
Why does my frame pull out of square even when it is clamped tightly?
Clamps can only hold so much force. As weld metal cools, it shrinks with thousands of pounds of pressure. If your tacks are too weak or your clamps are too far from the joint, the metal will move. Using more robust workshop jigs and fixtures and alternating your weld sides will help counteract this force.
What is the best way to fix a “rocking” bench if the frame is already welded?
First, check if one of your casters is loose or sitting on a high spot on the floor. If the frame itself is twisted, you can use a shim between the caster plate and the frame to level it out. In extreme cases, you may need to cut one of the lower cross-members, force the frame level, and re-weld the member.
Should I use MIG, TIG, or Stick welding for this type of project?
MIG (Metal Inert Gas) welding is usually the best choice for these custom fabrication projects because it is fast and produces less overall heat than Stick welding. TIG (Tungsten Inert Gas) provides the most control but is much slower, which can actually lead to more warping because the heat is applied to the metal for a longer duration.
How do I ensure my cuts are perfectly square?
Always use a square to mark all four sides of your tubing before cutting. If you are using a chop saw, check the fence for squareness against the blade using a machinist’s square. Do not trust the built-in gauges on most saws; they are often inaccurate by a degree or two.
Can I use wood for the top of a metal tool bench?
Yes, many builders use a thick plywood or butcher block top. However, if you plan to do any welding or heavy grinding on the bench, a steel top (at least 3/16″ thick) is much safer and more durable. If you use wood, ensure it is bolted securely so it doesn’t shift during use.
How do I prevent the casters from vibrating loose?
Use “Nyloc” nuts or split-ring lock washers on all caster bolts. The vibrations from moving the bench over uneven floors or using power tools on the bench can easily back off standard nuts. Checking the tightness of these bolts every few months is a good safety habit.
What is the 3-4-5 rule for squaring?
This is a geometric trick where you measure 3 inches (or feet) along one side and 4 inches along the perpendicular side. If the diagonal distance between those two points is exactly 5 inches, the corner is a perfect 90-degree angle. This is much more accurate for large frames than a small hand square.
How thick should my caster mounting plates be?
I recommend at least 1/4-inch thick plate steel. Thinner material can flex or bend under the stress of the casters swiveling, especially if the bench is heavily loaded. A solid mounting plate also provides a better surface for a strong structural weld to the leg.
Is it better to weld or bolt the main frame?
Welding provides a more rigid, permanent structure that won’t loosen over time. Bolting is useful if you need to disassemble the bench for transport, but it requires much more precision in drilling and can develop “slop” or wobbling over years of heavy use.
How do I calculate the weight capacity of my bench?
The capacity is limited by the weakest link, which is usually the casters. Add up the rated capacity of all four casters and subtract 25% as a safety margin. Also, consider the “yield strength” of your steel; 11-gauge 2×2 tubing is incredibly strong, but a 5-foot span will sag if you put a 1,000-pound engine block in the dead center without a middle support leg.
(This article was written by one of our staff writers, Robert Kline. Visit our Meet the Team page to learn more about the author and their expertise.)