How to Safely Drill Holes Through Hardened Steel (Tutorial)
I remember the first time I tried to put a hole through a piece of leaf spring for a custom bracket. I was a few years into my self-taught journey, feeling confident because my beads were looking consistent and my layout work was sharp. I grabbed a standard high-speed steel (HSS) bit, cranked the drill press to a high speed, and pulled the lever. Within five seconds, there was a high-pitched scream, a puff of smoke, and the tip of my bit was glowing a dull orange. It wasn’t just ruined; it was melted.
That failure taught me that hardened metals don’t play by the same rules as mild steel. In the world of metalworking, whether you are tracking your weld travel speed tips or refining your precision layout, you eventually hit a wall when the material is harder than your tools. Mastering the mechanics of penetrating these tough surfaces requires a shift in mindset from “force” to “finesse.” It is about understanding the physical feedback the tool gives you and managing the heat that wants to destroy your edge.
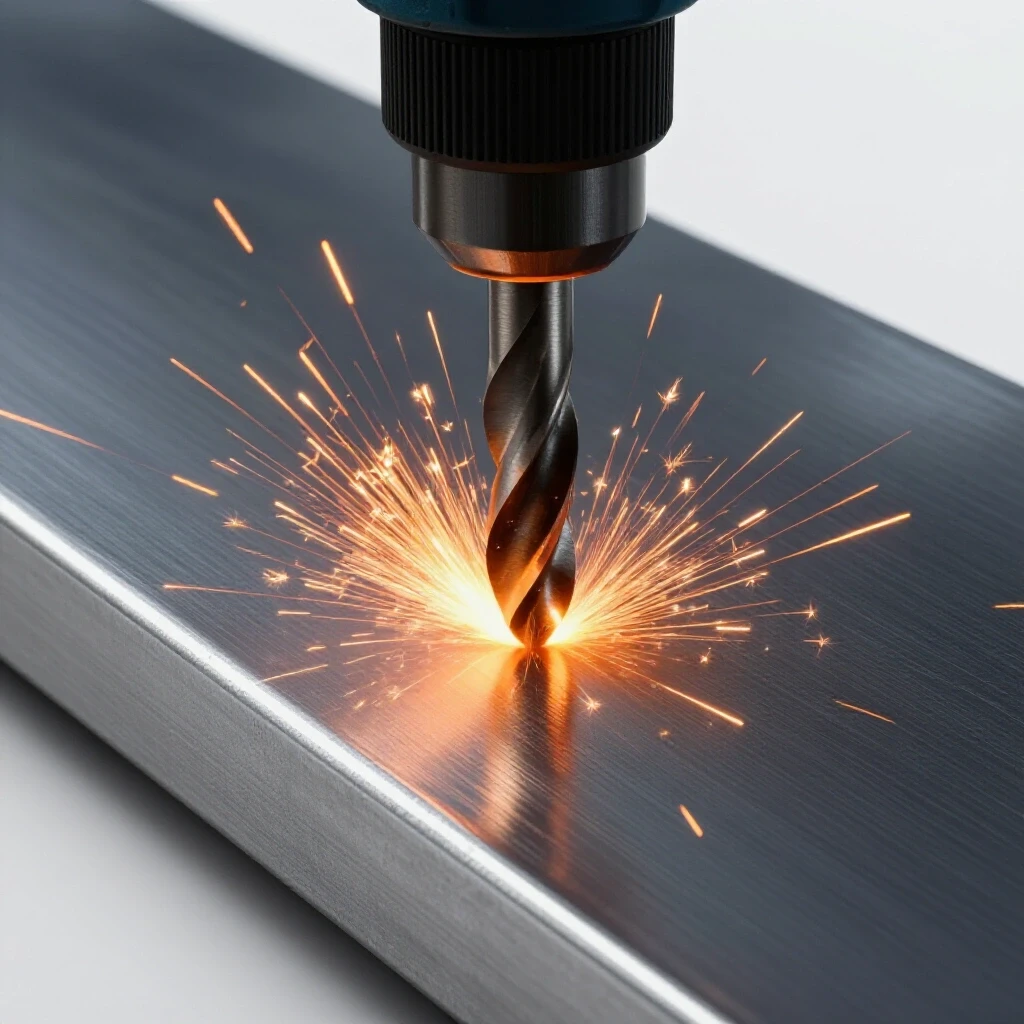
In this guide, we will break down the systematic approach to working with tempered alloys. We will focus on the physical cues, the tool parameters, and the structured practice needed to achieve professional results in your home shop. This isn’t about expensive industrial machines; it’s about building the hand-eye coordination and technical discipline that separates a hobbyist from a fabricator.
Establishing Stability through Body Mechanics and Workpiece Security
Setting up your space and body is the first step to success. Stability prevents bit breakage and ensures accuracy. We focus on clamping, stance, and visibility to create a controlled environment for high-resistance drilling. This foundation allows you to feel the vibrations of the cut and respond before a tool fails.
When you are working with high-resistance materials, any vibration is your enemy. If the workpiece moves even a fraction of a millimeter, it can snap a brittle carbide bit instantly. I always tell my students to treat the setup like they are prepping for a critical joint in a metal welding practice guide. Every clamp must be tight, and the material must be supported directly under the pressure point.
If you are using a drill press, ensure the table is locked and the vice is bolted down. If you are using a handheld drill—which I only recommend for thinner sections—your body positioning is everything. Stand with your feet shoulder-width apart, tuck your elbows into your ribs, and use your body weight to provide steady, vertical pressure. This “locked-in” stance helps you maintain a 90-degree angle, which is vital for preventing the bit from binding as it enters the material.
- Always use a machinist’s vice or heavy-duty C-clamps.
- Support the back of the material with a scrap piece of wood or mild steel to prevent “blowout” when the bit exits.
- Position your lighting so you can see the “chip flow” coming out of the hole.
- Keep your face clear of the direct line of the drill to avoid flying hot chips.
Selecting the Right Cutting Tools for Tempered Metals
Standard high-speed steel bits often fail on hardened surfaces. Understanding the difference between cobalt and carbide-tipped bits is essential. This section covers how to choose the right tool for the specific hardness of your workpiece. Choosing the wrong tool is the most common cause of technical plateaus in the shop.
You cannot cut something that is as hard as the tool you are using. Most hardened items, like knife blades or suspension parts, will laugh at a basic HSS bit. For these tasks, you need to step up to Cobalt (M42) or Tungsten Carbide. Cobalt bits are HSS with 5-8% cobalt added, which gives them much higher heat resistance. They are my “workhorse” for most intermediate-hardened projects.
Carbide bits are even harder but very brittle. Think of them like glass; they can cut through almost anything, but if you tilt the drill or drop the bit, it will shatter. In my own practice logs, I’ve noted that I save carbide for the absolute toughest alloys where cobalt fails. As you progress through your welding technique progression, you’ll find that having a dedicated set of “hard-metal” bits saves you hours of frustration and money in the long run.
| Bit Material | Best Use Case | Pros | Cons |
|---|---|---|---|
| High-Speed Steel (HSS) | Mild steel, aluminum, wood | Cheap, easy to sharpen | Fails instantly on hardened steel |
| Cobalt (M42) | Stainless steel, Grade 8 bolts | High heat resistance, durable | More expensive than HSS |
| Tungsten Carbide | Tool steel, spring steel, armor | Extreme hardness, stays sharp | Very brittle, requires rigid setup |
| Titanium Coated | General purpose | Reduces friction on soft metal | Coating wears off quickly on hard metal |
Calculating Rotational Speeds and Downward Pressure
Speed and pressure are the two most critical variables in mechanical drilling. High RPMs generate excessive heat, while too little pressure causes friction without cutting. We use specific formulas and charts to find the sweet spot for various bit diameters. Mastering these parameters is as crucial as mastering torch control in welding.
The biggest mistake I see beginners make is running the drill too fast. In hardened steel, heat is the primary killer of tools. If the bit spins too fast, it creates friction heat faster than the metal can dissipate it. This leads to “work hardening,” where the heat actually makes the steel even harder than it was when you started. Once a spot is work-hardened, even a brand-new bit will struggle to bite.
The rule of thumb for hardened alloys is “Low and Slow.” You want low RPMs and high, consistent downward pressure. You should see “chips,” not “dust.” If you see fine powder, you aren’t cutting; you are grinding. You need enough pressure to force the cutting edge of the bit into the material so it can peel away a sliver of metal. This is a physical skill that requires practice to feel the “bite” through the handle of the drill press.
- RPM Formula: (Cutting Speed x 4) / Diameter. For hardened steel, use a Cutting Speed (CS) of 20-30.
- Example: For a 1/4″ bit: (25 x 4) / 0.25 = 400 RPM.
- Pressure Metric: You should apply enough force to keep the bit engaged. If the “crunchy” sound stops, increase pressure or check the bit for dullness.
- Visual Cue: Look for long, curly ribbons of metal. This indicates the perfect balance of speed and feed.
The Role of Cutting Fluids and Heat Management
Heat is the enemy of tool longevity. Using the right lubricant reduces friction and carries heat away from the cutting edge. This section explains how to apply fluids effectively to prevent work-hardening and bit dulling. Proper lubrication is a non-negotiable step in achieving professional-grade results in any metalworking discipline.
When I was learning metal fabrication, I used to think any oil would do. I’ve tried motor oil, WD-40, and even 3-in-1 oil. While those are better than nothing, a dedicated sulfur-based cutting fluid makes a massive difference. These fluids are designed to stay stable at high temperatures and provide “extreme pressure” lubrication. This prevents the metal chips from welding themselves to the tip of your drill bit.
Application is just as important as the type of fluid. Don’t just put a drop at the start. You need to keep the interface wet. I like to create a small “dam” of putty or even a heavy grease ring around the hole location to hold a pool of cutting oil. As the bit works, it stays submerged, which pulls heat away from the cutting edge and into the fluid. This is similar to how you manage the puddle in welding; you are constantly monitoring and adjusting based on the thermal feedback of the material.
- Sulfur-based oils: Best for heavy-duty drilling in ferrous metals.
- Synthetic coolants: Good for high-speed work but less common in home shops.
- Application frequency: Add a fresh drop every 1/8 inch of depth.
- Smell and Smoke: A little smoke is normal, but if the oil is boiling away instantly, your RPM is too high.
Step-by-Step Execution: From Center Punch to Final Diameter
A systematic approach prevents errors and ensures hole precision. We move through marking, punching, and incremental drilling steps. This progression builds muscle memory and reduces the physical strain on your equipment. Following a structured sequence is the fastest way to overcome technique plateaus and achieve consistency.
Precision starts with the layout. Hardened steel is difficult to mark with a standard pencil. I use a carbide-tipped scriber to etch my center point. Once marked, you must use a heavy-duty center punch. In mild steel, a light tap is enough. In hardened steel, you need a solid strike to create a “dimple” that is deep enough to keep the drill bit from wandering. If the bit skims across the surface, it will dull the outer corners of the flutes before you even start the hole.
Once the dimple is set, I always start with a pilot hole. A small bit (usually 1/8″ or 3/32″) has a smaller “dead center” (the flat part at the very tip). This allows it to bite into the hardened surface more easily. After the pilot hole is through, you can step up to your final size. This “stepping up” method reduces the amount of torque required and keeps the heat localized to a smaller area, protecting your larger, more expensive bits.
- Marking: Use a scriber and layout fluid (Dykem) for high visibility.
- Punching: Use a spring-loaded or hammer-struck center punch. Ensure the dimple is centered.
- Pilot Hole: Drill a small hole at 500-600 RPM with heavy oil.
- Final Pass: Switch to the target size bit, drop the RPM to 200-300, and use steady pressure.
- Pecking: Every few seconds, lift the bit slightly to clear out chips and allow oil to flow into the bottom of the hole.
Troubleshooting Common Physical and Technical Hurdles
Even with the right tools, things can go wrong. Recognizing the signs of tool failure or material work-hardening allows you to pivot before damaging your workpiece. This section addresses the most common frustrations encountered during the drilling process and offers data-driven solutions. Understanding these “failure modes” is a key part of trade school practice drills.
The most common sound in a frustrated shop is the “screech.” That high-pitched metal-on-metal scream means the bit has lost its edge and is now just rubbing. If you hear this, stop immediately. If you keep going, you will create a “glazed” surface in the hole that is nearly impossible to penetrate. I’ve seen students ruin three bits in a row because they refused to stop and resharpen or replace the first one.
Another issue is the bit “grabbing” as it breaks through the back of the material. This usually happens because the pressure is too high at the very end of the stroke. As the bit starts to exit, it catches on the thin remaining “web” of metal. To prevent this, ease off the pressure slightly as you feel the drill start to break through. This is where your physical hand-eye coordination and “feel” for the machine become your greatest assets.
- Glazed Hole: If the metal looks shiny and the bit won’t bite, try a fresh carbide bit or a masonry bit sharpened to a metal-cutting angle (an old fabricator’s trick).
- Broken Bit: If a bit snaps inside the hole, do not try to drill it out with another bit. Use a punch to shatter the brittle carbide or an extractor if possible.
- Chatter: If the drill is vibrating wildly, your RPM is likely too high or your workpiece isn’t clamped tightly enough.
Practice Progression and Skill Logging
Building consistency in fabrication requires more than just reading; it requires structured practice and objective measurement. By tracking your successes and failures, you can identify patterns in your technique. This section provides a framework for logging your progress and setting realistic milestones for your shop time.
Just as you might track your bead consistency or weld travel speed metrics, you should keep a log of your drilling parameters. Note the material, the bit type, the RPM, and how the tool felt. Over time, you will develop an intuitive sense of what “right” looks and sounds like. I recommend starting with “Bead-on-Plate” style drills for your tools—take a scrap piece of hardened steel and practice drilling five identical holes.
Measure your progress by the condition of the bit after the fifth hole. Is it still sharp? Did the holes stay on center? How long did each hole take? This data-driven approach removes the guesswork and helps you move past the “frustrating plateau” phase. It turns a chore into a measurable skill that you can take pride in.
Practice Log Template
- Material Type: (e.g., Leaf Spring, File, Grade 8 Bolt)
- Bit Material: (HSS, Cobalt, or Carbide)
- Bit Diameter: (e.g., 3/8″)
- Target RPM: (Calculated)
- Lubricant Used: (e.g., Dark Cutting Oil)
- Physical Feedback: (Did it screech? Were the chips blue or silver?)
- Bit Condition Post-Drill: (Sharp, Slightly Dulled, or Burned)
Actionable Benchmarks for the Developing Fabricator
To help you gauge your progress, I’ve established these benchmarks based on vocational instruction research and my own shop data. These are not “perfect on day one” goals, but rather targets to aim for as you build your muscle memory.
- Beginner: Can successfully drill a 1/4″ hole through 1/4″ hardened steel without burning the bit, taking 2-3 minutes.
- Intermediate: Can drill multiple holes with consistent chip flow, maintaining the bit’s edge for at least 10 holes in tempered material.
- Advanced: Can identify work-hardening by sound alone and adjust feed/speed on the fly to compensate, achieving precision within 0.005″.
By focusing on these systematic steps—stability, tool selection, speed/pressure, and lubrication—you transform a difficult task into a repeatable process. Metalworking is a marathon, not a sprint. Every hole you drill correctly builds the mechanical empathy you need to tackle more complex fabrication projects. Keep your RPMs low, your pressure steady, and your practice logs detailed.
Frequently Asked Questions
Can I use a standard hand drill for this? While possible for small holes (under 1/8″), it is very difficult. Hand drills lack the rigidity and consistent pressure needed for hardened steel. The bit is likely to wander or snap. If you must use one, lean into the drill to provide steady pressure and use the lowest speed setting available.
What is the best way to tell if a bit is dull? Look at the “land” (the very edge of the flute). If it looks rounded or has a shiny reflection, it’s dull. A sharp bit will have a crisp, matte edge. Also, if you have to double your pressure to get the same amount of chips, the bit is failing.
Why are my metal chips turning blue? Blue chips mean the metal is reaching temperatures over 500°F. While some heat is normal, blue chips in hardened steel often mean you are on the verge of work-hardening the hole. Slow down your RPM and increase your cutting fluid application.
Is it better to use a pilot hole or just one big bit? Always use a pilot hole for hardened material. Large bits have a wide “chisel edge” at the center that doesn’t cut; it just smashes. A pilot hole removes the material where that chisel edge would be, allowing the larger bit’s cutting lips to do their job efficiently.
Can I sharpen cobalt bits at home? Yes, you can sharpen cobalt bits using a standard bench grinder or a dedicated sharpening tool. However, carbide bits require a diamond wheel because they are harder than standard grinding stones.
What should I do if the bit gets stuck? Stop the motor immediately. Do not try to force it through. Reverse the drill by hand if possible, or use a wrench on the chuck to back it out. Check for a “burr” or a chip wedged in the flute before continuing.
How do I know if my steel is “hardened” or just high-carbon? A simple “file test” works well. Try to cut the corner of the metal with a standard metal file. If the file bites and removes metal, it’s likely not fully hardened. If the file skates across the surface without leaving a mark, it is hardened.
Does stainless steel count as hardened steel? Stainless steel isn’t always “hard” in the traditional sense, but it “work-hardens” almost instantly. The drilling techniques are similar: low RPM, high pressure, and lots of lubrication are required to prevent the material from toughening up as you work.
What is the most important PPE for this task? Wrap-around eye protection is mandatory. Hardened steel chips are often razor-sharp and can come off the workpiece at high speeds. Because they are brittle, they can also shatter like glass.
How do I prevent the drill bit from “walking” at the start? A deep center punch is the only way. If the material is too hard for a standard punch, you can use a small carbide masonry bit to grind a tiny starting divot before switching to your metal-cutting bit.
(This article was written by one of our staff writers, Thomas Langley. Visit our Meet the Team page to learn more about the author and their expertise.)