Troubleshooting Spark Plug Issues on Generator Motors (Fix)
I’ve spent the last 15 years in the middle of workshop chaos, often standing over a piece of equipment that refuses to cooperate just as a deadline looms. There is a specific kind of frustration that sets in when you’re in the flow of a project—perhaps you’re midway through a complex structural weld or finishing a precision pass on a lathe—and your primary power source begins to sputter. When a portable generator starts hunting for RPMs or refuses to fire altogether, it isn’t just a mechanical failure; it’s a direct hit to your productivity.
In my experience as a millwright and diagnostic specialist, I’ve learned that we often look for the most expensive problem first. We worry about control boards or internal engine timing when, more often than not, the culprit is the humble interface between the ignition system and the combustion chamber. Identifying why a small engine is failing to maintain a consistent arc is a foundational skill for any fabricator. It requires a move away from guesswork and toward a systematic evaluation of the hardware that facilitates the combustion cycle.
Establishing a Systematic Diagnostic Framework
A systematic diagnostic framework is the process of isolating individual variables to determine why a machine is underperforming. In the context of small engine reliability, this involves moving from the most accessible components to the more complex internal systems. By following a set path of observation, we avoid replacing parts that are still functional.
When a generator fails to start or begins to misfire under the load of a heavy-duty grinder or welder, I start with a three-step approach: observation, isolation, and variable control. You first observe the symptoms—is it a “no-start” condition, or is the engine “missing” under load? Next, you isolate the component. In this guide, we are focusing on the critical link in the ignition chain. Finally, you control the variables by ensuring the component is cleaned, gapped, and seated correctly before testing the system again.
The Role of the Ignition Interface in Small Engines
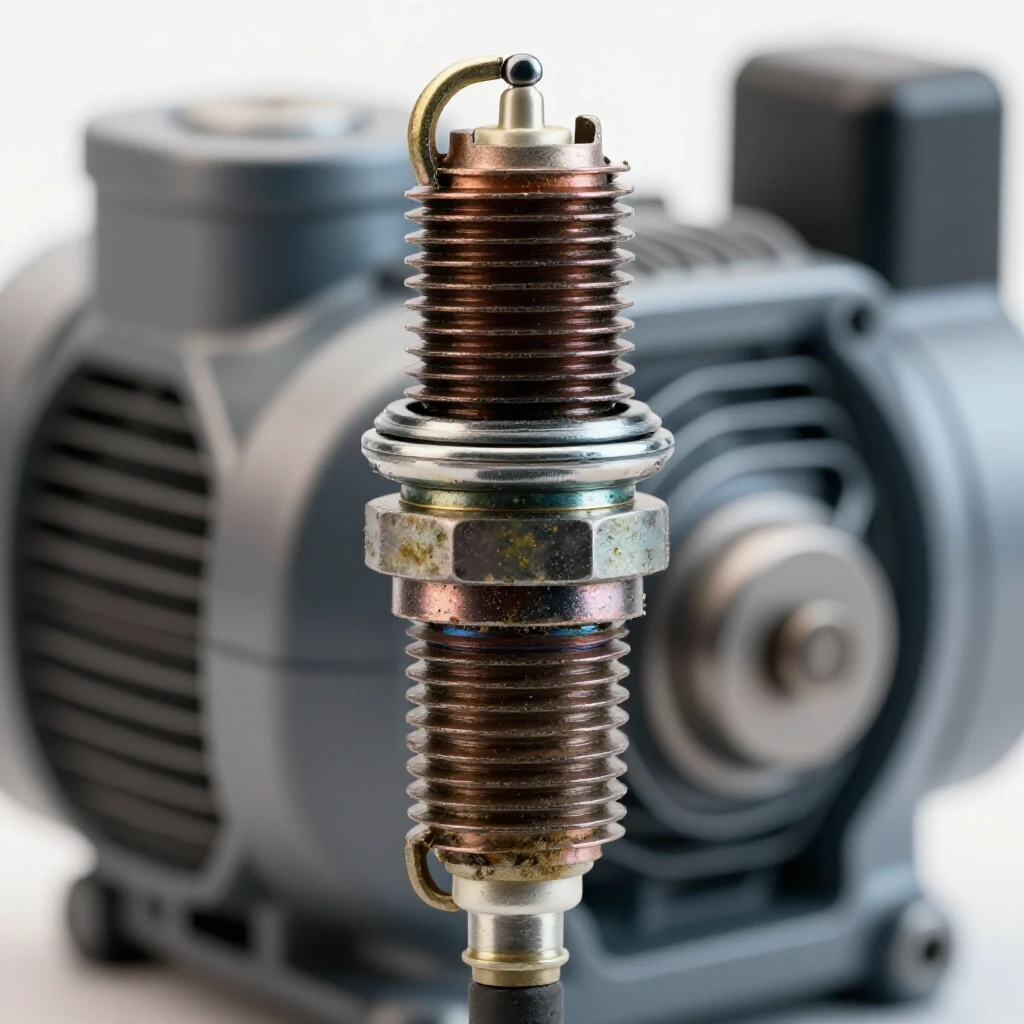
The ignition interface, commonly known as the spark plug, serves as the final gateway for electrical energy to enter the combustion chamber. It must withstand extreme thermal cycles and high-pressure environments while maintaining an airtight seal. Its primary job is to provide a consistent gap for electricity to jump, creating the heat necessary to ignite the fuel-air mixture.
Understanding the “why” behind this component is vital. The plug is essentially a window into the engine’s soul. Because it sits directly in the combustion path, it collects “data” in the form of deposits, color changes, and physical wear. For a fabricator, being able to read these signs is as important as reading a weld bead to diagnose porosity. If the gap is too wide, the voltage cannot jump it; if it’s too narrow, the spark is too weak to ignite the fuel efficiently.
Visual Indicators of Combustion Health
Visual indicators are the physical clues left on the porcelain and electrodes after the engine has been running. By examining the color, texture, and state of the deposits, a technician can determine if the engine is running too hot, too cold, or if there is a mechanical issue. This is the first step in any real-world repair log.
When I pull a plug from a stalled generator, I’m looking for a “light tan” or “grayish” color on the porcelain insulator. This tells me the engine is healthy. However, in a fabrication environment where generators might run at high loads for hours, we often see deviations.
Identifying Carbon Fouling and Its Impact
Carbon fouling occurs when dry, black, sooty deposits coat the tip of the electrode and the insulator nose. This layer of carbon is conductive, which means instead of the electricity jumping the gap to create a spark, it “leaks” down the side of the insulator to the metal shell. This results in a weak spark or a total misfire.
In my years of tracking tool performance, I’ve found that carbon fouling is often the result of extended idling. If you leave your generator running while you spend twenty minutes fitting a joint, the engine never reaches its optimal operating temperature. The carbon doesn’t burn off; it accumulates. For a fabricator, this means the machine might fail just when you strike your arc and need the most power.
Dealing with Wet Fouling in Portable Units
Wet fouling is characterized by a damp, oily, or fuel-soaked coating on the firing end of the plug. Unlike the dry soot of carbon fouling, wet fouling often indicates that the engine has been “flooded” or that there is an excess of unburned fuel in the cylinder. This prevents the electrical arc from forming entirely.
If I encounter a wet plug, my first move is to dry the electrodes thoroughly. In a shop setting, a quick blast of compressed air is effective, but you must be careful not to drive debris into the cylinder. Wet fouling is a common “electrical gremlin” that can be resolved without buying new parts, provided the ceramic insulator hasn’t been permanently compromised by the moisture.
The Mechanics of the Electrode Gap
The electrode gap is the precise distance between the center electrode and the ground electrode. This distance determines the “fatness” and heat of the spark, which directly influences how quickly and completely the fuel-air mixture ignites. A gap that is off by even 0.005 inches can cause noticeable vibration and power loss.
Most small generator engines require a gap between 0.024 and 0.032 inches. I always rely on a wire-type feeler gauge rather than a “coin-style” ramp gauge. Wire gauges are more accurate for used plugs because they can fit into the small depressions worn into the electrodes over time. If the gap is too large, the ignition coil may not be able to produce enough voltage to bridge the distance, especially under the high-pressure conditions of a heavy load.
| Condition | Observation | Probable Cause | Fix |
|---|---|---|---|
| Normal | Tan/Gray deposits | Proper heat range and fuel mix | None; clean and reinstall |
| Carbon Fouled | Dry, black soot | Low-temperature operation; idling | Clean or replace; run at higher load |
| Oil Fouled | Wet, black, oily | Excessive oil in fuel (2-stroke) | Clean plug; check fuel ratio |
| Overheated | Blistered white porcelain | Engine running too lean or hot | Check cooling fins; use colder plug |
| Bridged Gap | Debris between electrodes | Carbon or metallic particles | Remove debris; regap |
Systematic Removal and Inspection Procedures
Systematic removal is the disciplined process of extracting the ignition component without damaging the engine block or introducing contaminants into the cylinder. This involves cleaning the surrounding area, using the correct socket size, and applying the right amount of force. Failure to follow this process can lead to stripped threads, which is a nightmare for any millwright.
- Clear the Workspace: Use compressed air to blow away metal shavings, dust, or grease from the base of the plug. If you don’t do this, that debris will fall directly into the combustion chamber the moment the plug is removed.
- Use the Right Tool: Most small engines use a 5/8″ or 13/16″ deep-well socket. Ensure the socket is fully seated to avoid rounding off the hex head.
- Initial Break: Loosen the plug only one or two turns. Stop and blow air around it again to ensure no trapped grit is left.
- Inspection: Once removed, do not wipe it immediately. Look at the “as-is” state to diagnose the engine’s health.
Selecting the Correct Heat Range
Heat range refers to the ability of the ignition component to dissipate heat from the combustion chamber into the cylinder head. A “hot” plug has a longer insulator nose and retains more heat, while a “cold” plug has a shorter nose and sheds heat faster. Choosing the wrong range can lead to either fouling or engine-damaging pre-ignition.
In a fabrication shop, your generator might be running at 90% capacity for hours while you run a large MIG welder. In this scenario, the engine stays very hot. If you use a plug that is too “hot” for the application, the tip can become a glowing ember that ignites the fuel before the spark occurs (pre-ignition). Conversely, if you use a “cold” plug for light-duty tasks, it will foul quickly because it never gets hot enough to burn off deposits. Always stick to the manufacturer’s specified heat range unless you are a specialist adjusting for extreme environmental conditions.
Cleaning and Reconditioning Existing Components
Reconditioning is the act of restoring a used component to a functional state through mechanical or chemical cleaning. This is a vital skill when you are in the field and don’t have access to a replacement part. It involves removing deposits from the electrodes and insulator without damaging the delicate surfaces.
I often use a fine wire brush (stainless steel or brass) to gently scrub the electrodes. However, you must be extremely careful with the center porcelain. If you scratch the porcelain, you create microscopic tracks where carbon can hide, leading to future “flashover” issues. For stubborn deposits, a quick soak in a specialized cleaner or even a bit of brake cleaner can help, but ensure the plug is completely dry and free of residue before reinstallation.
- Metric to Remember: Never use a sandblaster-style cleaner if you can avoid it. The grit can stay trapped in the crevice between the insulator and the shell, eventually falling into your engine and scoring the cylinder walls.
- Mechanical Tolerance: After cleaning, always re-verify the gap. Scrubbing can slightly bend the ground electrode, changing your 0.030-inch setting to something unusable.
Final Installation and Torque Specifications
Final installation is the process of re-seating the component into the engine block to ensure a gas-tight seal and proper heat transfer. This requires hand-threading to prevent cross-threading and using a torque wrench to meet specific mechanical tolerances. Proper torque is the difference between a reliable machine and a blown-out cylinder head.
I cannot stress this enough: always start the threads by hand. If you feel any resistance in the first three turns, back it out and start over. Small engine heads are usually aluminum, and they strip incredibly easily. Once the plug is finger-tight, use a torque wrench. For a 14mm thread (the most common size), you are usually looking at 18 to 22 foot-pounds. If you don’t have a torque wrench, the general rule for a new plug with a crush washer is to tighten it 1/2 to 2/3 of a turn after it seats. For a used plug where the washer is already crushed, go only 1/12 to 1/8 of a turn.
Case Study: The Intermittent Sputter
I remember a project a few years back where we were on-site at a remote bridge repair. The generator would run the grinders perfectly, but as soon as we struck a welding arc, the engine would stumble and die. The crew thought it was a fuel pump issue.
I pulled the plug and found it was severely “gapped out.” The gap had eroded to nearly 0.045 inches. When the engine was under the light load of a grinder, the coil could still push enough voltage to jump the gap. But under the heavy load of the welder, the cylinder pressure increased significantly. Higher pressure makes it harder for electricity to jump a gap. By simply cleaning the plug and resetting the gap to 0.028 inches, we were back in production in ten minutes. It was a classic case of a mechanical tolerance issue being mistaken for a fuel system failure.
Actionable Maintenance Checklist
To keep your shop running smoothly and avoid the frustration of a dead generator, follow this maintenance log every 50 to 100 hours of operation:
- Visual Check: Remove the lead and check for cracks in the porcelain.
- Debris Removal: Blow out the plug well with compressed air.
- Gap Verification: Use a wire gauge to ensure the gap is within 0.002 inches of the manufacturer’s spec.
- Terminal Check: Ensure the top nut (where the wire connects) is tight. Some plugs have a screw-on cap that can vibrate loose.
- Thread Integrity: Apply a tiny amount of anti-seize to the threads, but keep it away from the first two threads to prevent it from entering the combustion chamber.
- Sealing: Ensure the crush washer is present and not flattened to the point of being useless.
Conclusion: Mastering the Small Details
In the world of fabrication, we are trained to look at the big picture—the structural integrity of a frame or the precision of a machined part. However, our ability to produce that work often hinges on the smallest components in our toolkit. Developing a systematic approach to diagnosing the health of your generator’s ignition system is a hallmark of an advanced fabricator.
By moving away from the “replace and hope” method and toward a data-driven “inspect and verify” process, you reduce downtime and save money. The next time your generator fails to provide the stable power you need for a clean weld, don’t reach for the carburetor tools first. Pull the plug, read the signs, and trust the physics of the gap.
Frequently Asked Questions
Why does my generator only run for a few minutes before the spark plug fouls?
This is often caused by running the engine with the choke partially closed or at very low loads. When the engine doesn’t reach its operating temperature, the fuel doesn’t burn completely, leaving carbon deposits. Ensure the choke is fully open once the engine warms up and try to run a load that keeps the engine working.
Can I use a wire brush to clean the electrodes?
Yes, a brass or stainless steel wire brush is excellent for removing dry carbon. Avoid using a heavy steel brush that could gouge the electrodes. Always blow the plug off with compressed air afterward to remove any broken wire bristles.
What happens if I gap the plug incorrectly?
If the gap is too small, the spark will be too weak to ignite the fuel-air mixture effectively, leading to poor fuel economy and power loss. If the gap is too large, the ignition coil might not have enough “push” to create a spark at all, especially under load, leading to misfires.
How do I know if the porcelain insulator is “blown”?
Look for “flashover” marks, which appear as thin, vertical black lines on the outside of the white porcelain. This indicates that electricity is traveling down the outside of the plug instead of through the center. If you see these lines or any physical cracks, the plug must be replaced.
Is anti-seize really necessary on the threads?
While debated, most millwrights prefer a very small amount of copper-based anti-seize on aluminum heads to prevent the plug from “welding” itself to the head over time. However, be aware that anti-seize acts as a lubricant, so you should reduce your torque values by about 10% to avoid over-tightening.
Why is the color of the porcelain so important?
The porcelain color acts as a thermometer for the combustion chamber. White suggests it’s running too hot (lean), black suggests it’s too cold or rich, and tan suggests it’s just right. It is the most reliable way to “see” inside the engine while it’s running.
Can a bad spark plug cause my generator to vibrate excessively?
Absolutely. A fouled or improperly gapped plug causes uneven combustion and misfires. This creates an imbalance in the engine’s cycle, which manifests as a heavy mechanical vibration that can eventually damage the generator’s mounting bolts or the tools plugged into it.
How often should I replace the plug instead of cleaning it?
As a rule of thumb, if the center electrode has become rounded rather than having sharp, flat edges, it’s time to replace it. Sharp edges allow electricity to jump the gap more easily. Most small engine plugs are inexpensive enough that replacement every 100-200 hours is a cheap insurance policy against downtime.
What is the difference between a “resistor” and a “non-resistor” plug?
Resistor plugs (often marked with an ‘R’) have an internal resistor to reduce radio frequency interference (RFI). While they are mostly for reducing noise in electronics, some modern generator ignition systems are designed specifically for the resistance they provide. Always use the specific model number recommended by the manufacturer.
Can I use a plug from my lawnmower in my generator?
Only if the part numbers match. Even if they look the same and have the same threads, the heat range or the “reach” (length of the threads) might be different. A plug that is too long can actually hit the piston, causing catastrophic engine failure.
(This article was written by one of our staff writers, Paul Whitaker. Visit our Meet the Team page to learn more about the author and their expertise.)