Are Budget Auto-Darkening Welding Helmets Durable? (Review)
When I started my first fabrication business sixteen years ago, I spent more time looking at my bank balance than my welding arc. I quickly realized that being a good fabricator wasn’t enough to keep the lights on. You have to be a disciplined accountant who happens to own a welder. Many side-hustlers focus on the big numbers like the price of a new MIG machine or the cost of a flatbed of steel. However, the true health of a small shop is often found in the smaller, recurring expenses and the longevity of everyday equipment.
One of the most common questions I get from hobbyists transitioning to paid work is whether they can rely on entry-level gear. Specifically, they want to know if lower-cost protective equipment can survive the daily grind of a working shop. If you are charging $80 an hour for your time, a piece of gear that fails in the middle of a job isn’t just a minor annoyance. It is a direct hit to your hourly rate and your reputation for meeting deadlines.
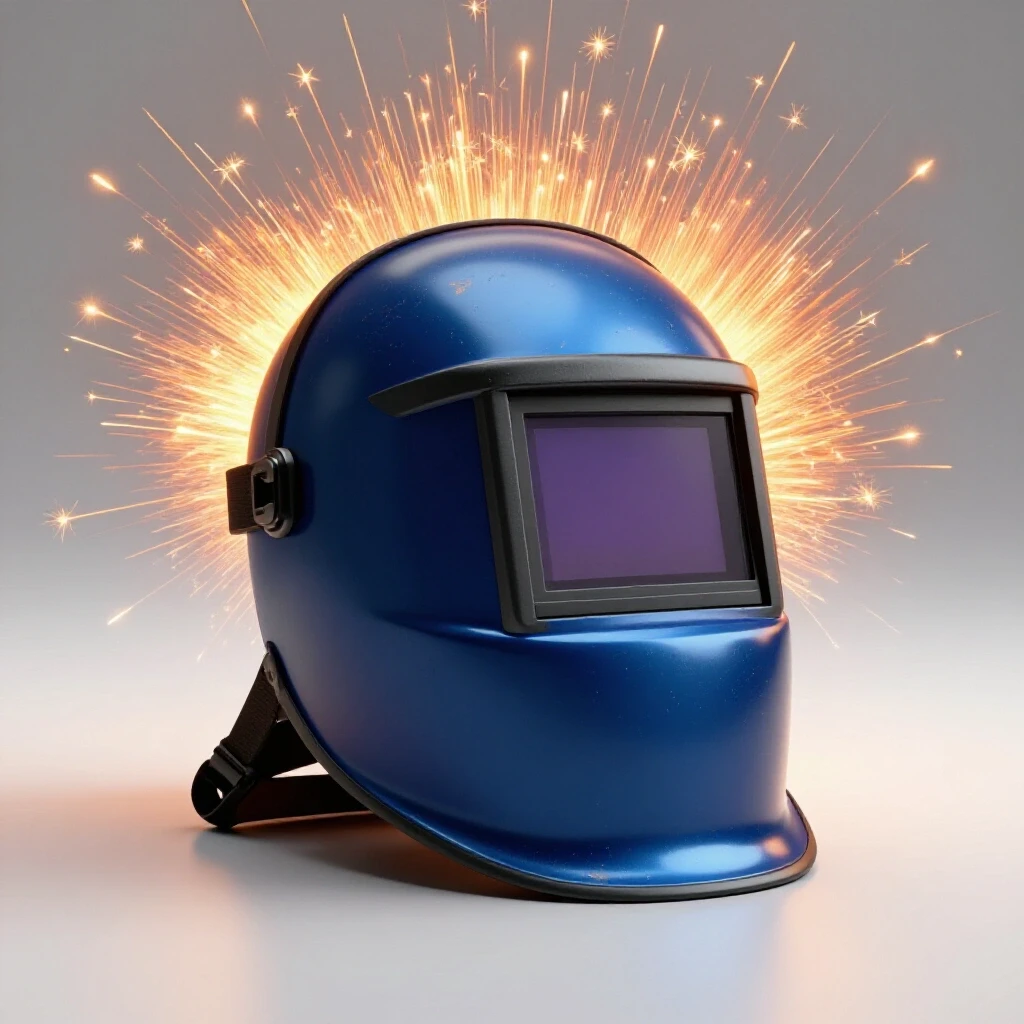
In this guide, we will look at the financial reality of using budget-friendly auto-darkening headgear. We will examine how long these tools actually last and how their durability affects your overall shop economics. By the end, you will have a clear framework for calculating your own shop rates and determining which investments will actually pay for themselves.
Determining Your True Shop Rate and Equipment Lifecycle
A shop rate is the total dollar amount you must charge per hour to cover all costs and make a profit. It includes your labor, utilities, rent, insurance, and the gradual wear and tear on every tool you own.
When you are working as a side-hustler, it is easy to forget about equipment lifecycles. You might buy a piece of gear for $100 and think of it as a one-time expense. In reality, that tool is a “consumable” that lasts for a specific number of projects. If a budget-friendly helmet lasts for two years of weekend work, its cost per hour is very low. If the sensors or hinges fail after three months of light TIG work, that tool has effectively doubled your overhead for those projects.
Building a profitable business requires you to look at “amortization.” This is just a fancy way of saying you spread the cost of a tool over its useful life. For a small shop, I recommend tracking every piece of gear that costs over $50. If you expect a piece of protective gear to last 500 hours of arc time, you need to account for that cost in every quote you send to a customer.
Why Your Hourly Rate Must Include Tool Replacement
Your hourly rate is not just your “take-home” pay; it is a fund that ensures your shop can keep operating tomorrow. If you don’t factor in the replacement cost of your gear, you are essentially paying your customers to work for them.
Most successful small fabrication shops aim for a shop rate between $65 and $120 per hour. This range covers the “hidden” costs that most hobbyists miss. For example, if you are using an affordable auto-darkening mask, you need to know if the plastic shell can handle being set down on a metal bench hundreds of times. If the lens retention clips are flimsy, you might find yourself buying a new unit sooner than expected. This premature replacement eats directly into your profit margin.
| Expense Category | Typical Side-Hustle Range | Impact on Profitability |
|---|---|---|
| Labor Rate | $30 – $50 / hour | Your personal income. |
| Overhead (Power, Rent) | $15 – $25 / hour | Fixed costs you pay every month. |
| Tool Depreciation | $5 – $10 / hour | Funds for replacing worn-out gear. |
| Consumables (Gas, Wire) | $10 – $15 / hour | Variable costs based on project size. |
| Total Shop Rate | $60 – $100 / hour | Minimum to stay sustainable. |
Assessing the Longevity of Entry-Level Protective Gear
Evaluating the physical endurance of affordable welding masks is about looking at the points of failure. In a small shop, gear isn’t usually destroyed by one big accident; it dies from a thousand small bumps and scrapes.
When we talk about the durability of these budget options, we are looking at three main areas: the headgear hinges, the sensor housing, and the lens cover retention system. For a hobbyist doing occasional MIG work on thin steel, these components don’t face much stress. However, once you start taking on side jobs, you might be flipping that hood up and down fifty times an hour. This is where the physical construction of budget gear is truly tested.
Hinge and Pivot Point Endurance
The most common failure point on an economical helmet is the plastic tensioning knob and the pivot hinge. In my experience, budget models often use softer plastics that can strip out if you tighten them too much. If the hinge fails, the helmet won’t stay up, which forces you to use one hand to hold it. This immediately kills your productivity.
When you are managing a small shop budget, you have to decide if a $60 helmet that might need a hinge repair in a year is better than a more expensive one. Interestingly, many side-hustlers find that as long as they are careful with the tension settings, these budget hinges can last through several hundred projects. The key is to avoid “over-tightening” to compensate for a loose fit.
Sensor and Lens Housing Resilience
The electronics in an auto-darkening unit are sensitive to vibration and heat. In a small-scale fabrication environment, you aren’t usually doing heavy industrial gouging, but you are doing a lot of tack welding. Tack welding is actually harder on sensors because they have to cycle on and off constantly.
Durability in this context means the sensors continue to trigger reliably even after the helmet has been dropped or exposed to workshop dust. I have tracked the performance of several entry-level units in my own shop. I found that the sensors themselves are surprisingly robust, often outlasting the plastic shell of the helmet. The real risk is the lens cover. If the cover isn’t seated tightly, grinding dust can get behind it and scratch the actual darkening filter, which is an unfixable type of wear.
Why Hidden Consumables Bleed Small Shop Profits
Many new shop owners struggle with “consumable burden.” This is the total cost of things that get used up while you work, such as welding gas, sandpaper, and clear lens covers.
If you are using a budget-friendly helmet, you might think you are saving money. However, if that specific model uses a non-standard size for the clear protective lenses, you might end up paying a premium for replacements. I always advise shop owners to look at the “long-term consumable cost” before buying any piece of equipment. A cheap helmet that requires $5 custom-shaped lenses is much more expensive over two years than a slightly pricier helmet that uses $1 standard rectangular lenses.
Formulating a Real Material Markup
To stay profitable, you shouldn’t just charge the customer what you paid for materials. You need to add a markup to cover the time spent sourcing parts and the “hidden” consumables like the wear on your helmet’s outer lens.
I typically recommend a 15% to 30% markup on all raw materials. This covers the “shop supplies” that are too small to track individually. For example, if you are welding a garden gate, you aren’t going to bill the customer for 1/10th of a clear lens cover. The markup handles that for you. This ensures that when your budget gear finally does wear out, you have already collected the funds to replace it.
- Standard Material Markup: 20% for basic projects.
- Small Job Surcharge: 30% for jobs under $200.
- Consumable Burden Factor: Add 5% to your total labor cost to cover gas and wire.
Building a Profitable Fabrication Quote with Equipment Depreciation
Pricing a job is where most side-hustlers fail. They look at the steel cost, guess how many hours it will take, and add a little extra for “luck.” This is a recipe for a hobby that costs you money instead of a business that makes it.
To create a realistic quote, you must account for the depreciation of your gear. Let’s say you use an affordable auto-darkening helmet that cost you $80. Based on my data, a typical budget unit in a side-hustle environment will last about 300 to 400 “work hours” before the shell or the electronics start to show significant wear. This means the helmet costs you about $0.20 to $0.25 for every hour you are in the shop. While that seems small, when you add up the depreciation for your welder, your grinder, and your saw, it can easily reach $5 to $10 per hour.
Step-by-Step Job Estimating Model
- Calculate Raw Material Cost: Include steel, hardware, and any specialized fasteners.
- Apply Material Markup: Multiply by 1.20 to cover sourcing and minor consumables.
- Estimate Labor Hours: Be honest. If it takes 4 hours, don’t quote 2.
- Apply Your Shop Rate: Multiply labor hours by your rate (e.g., $75/hr).
- Add the “Tool Wear” Factor: For small shops, I suggest adding a flat $10–$20 “set-up fee” to every job to cover the wear on items like your welding mask and hand tools.
Building on this, let’s look at a real-world scenario. If you are fabricating a custom bracket, your quote might look like this: * Steel: $40 * Markup (20%): $8 * Labor (2 hours @ $80/hr): $160 * Shop Supplies/Tool Wear: $15 * Total Quote: $223
If you leave out the markup and the tool wear, you lose $23 of profit. Over ten jobs, that is $230—enough to buy three new budget helmets or a significant upgrade for your shop.
Analyzing Post-Job Profits and Equipment Performance
The only way to know if your budget gear is truly “durable” is to track its performance over time. I use a simple spreadsheet to log every job I do. I record the date, the hours worked, and any issues I had with my tools.
If I notice that my budget welding mask is starting to feel loose or the sensors are flickering after only 50 hours of work, I know that my “depreciation” calculation was too low. This data-driven approach removes the guesswork. You stop wondering if the gear is “good enough” and start seeing exactly how much it costs you to own it.
Personal Project Cost Log Example
I once worked on a series of small furniture frames. I used a very inexpensive auto-darkening hood to see if it could handle the high-repetition tacking. After about 80 hours of work, the internal plastic clips that hold the lens in place became brittle from the heat and snapped.
Because I was tracking my costs, I saw that the helmet had cost me $1.00 per hour of use. For that specific project, it was still profitable. However, if I had been doing heavier work with more heat, that failure might have happened at 20 hours, making the tool a poor financial choice.
| Job Name | Hours Logged | Equipment Issues | Consumable Cost | Actual Profit |
|---|---|---|---|---|
| Table Base | 6 | None | $12 (Gas/Wire) | $320 |
| Repair Gate | 3 | Hinge slipped | $8 (Lens/Gas) | $140 |
| Custom Rack | 12 | Sensor flickered | $25 (Lens/Wire) | $680 |
Sourcing Strategies for Small Shop Efficiency
Knowing where and how to buy your gear is just as important as knowing how to use it. For a side-hustle, you don’t always need the most expensive option, but you do need the one that offers the best “cost-per-hour” ratio.
When sourcing budget-friendly protective gear, I look for models that have replaceable parts. If the manufacturer sells replacement headgear (the straps and hinges) separately, that is a huge win for durability. It means when the plastic hinge eventually wears out—which it will—you can spend $15 on a new headgear set instead of $70 on a whole new helmet.
Digital Tools for Tracking and Invoicing
To manage these costs without spending all night at a desk, I recommend using basic digital tools. You don’t need expensive enterprise software. 1. Wave or Square: Great for sending professional invoices and tracking payments. 2. Google Sheets: Perfect for your “Tool ROI” and “Consumable Tracking” logs. 3. Evernote or Keep: Use this to snap photos of receipts and note when you change a lens cover.
These tools help you maintain a professional image while keeping a tight grip on your shop’s financial health. When a customer sees a detailed, professional invoice, they are much less likely to haggle over your shop rate.
Practical Benchmarks for Side-Hustle Success
If you are just starting to move from hobbyist to side-hustler, use these benchmarks to gauge your progress. These are based on my 16 years of observing small shop economics.
- Equipment ROI Goal: A tool should pay for itself within the first 3 to 5 paid jobs.
- Consumable Ratio: Your spending on gas, wire, and lenses should stay below 15% of your total revenue.
- Maintenance Schedule: Spend 30 minutes every Sunday inspecting your gear. Tighten the hinges on your mask, clean the sensors, and check your lens covers. This simple habit can double the life of budget gear.
By treating your protective equipment as a business asset rather than just a “purchase,” you change your relationship with your shop’s finances. You stop worrying about the initial price tag and start focusing on the value the tool provides over its entire lifespan.
Conclusion: Making Smarter Operational Decisions
The durability of budget auto-darkening welding helmets is generally sufficient for the 35–55-year-old side-hustler who manages their workload carefully. These tools are not designed for 40-hour weeks of heavy industrial welding, but for the occasional MIG or TIG project, they offer a very respectable return on investment.
The key to making these tools work for your business is to factor their eventual failure into your shop rate. Don’t be surprised when a $70 helmet wears out after a year of solid side-work. Instead, be prepared. If you have been charging a proper shop rate and tracking your tool depreciation, you will have the cash sitting in your “equipment fund” to buy a replacement without it feeling like a financial blow.
Success in fabrication isn’t just about the quality of your welds; it’s about the accuracy of your math. Keep tracking your hours, keep marking up your materials, and keep a close eye on the physical condition of your gear. That is how you turn a hobby into a profitable, sustainable business.
Frequently Asked Questions
How long should I expect a budget auto-darkening helmet to last? In a side-hustle environment (5-10 hours of work per week), a budget helmet typically lasts between 18 and 24 months. The most common failures are the plastic hinges or the lens retention clips rather than the electronic sensors themselves.
Is it worth repairing a budget helmet if the hinge breaks? If you can find a replacement headgear set for under $20, it is worth the repair. However, if the shell itself is cracked or the sensor housing is loose, it is safer and more cost-effective to replace the entire unit and update your depreciation logs.
How do I factor the cost of my welding helmet into a job quote? Include it as part of your “Shop Supplies” or “Tool Wear” fee. I recommend adding $1 to $2 per labor hour to your quote specifically to cover the gradual wear and tear on your personal protective equipment.
Do budget helmets handle TIG welding as well as MIG? Low-amperage TIG can sometimes be a challenge for budget sensors. For durability, ensure the sensors are clean. If you find yourself doing a lot of TIG, you may need to replace your clear outer lenses more frequently to ensure the sensors can “see” the arc clearly.
What is the most common “hidden cost” of cheap welding gear? The most common hidden cost is the price of non-standard replacement lenses. Always check if a helmet uses standard 4×5 or 2×4.25 inch covers. If it requires proprietary shapes, your long-term consumable burden will be significantly higher.
Should I buy two budget helmets instead of one expensive one? For a side-hustle, having a “backup” budget helmet is often a smart business move. If your primary hood fails on a Saturday afternoon when you have a deadline, the $60 investment in a backup saves you from losing a day of billable labor.
How does workshop heat affect the durability of cheaper plastics? Budget helmets often use thinner or less heat-resistant plastics. If you are doing long, continuous welds on thick plate, the heat can cause the shell to warp slightly, which may compromise the lens seal. Stick to small-to-medium fabrication for the best results.
Can I use a budget helmet for grinding too? Many budget models have a “grind mode.” Using this feature is fine, but be aware that grinding sparks are very abrasive. If you don’t change your clear protective lens frequently, the “durability” of your visibility will drop quickly.
Does a budget helmet affect my insurance or shop safety ratings? As long as the helmet meets the required safety standards (like ANSI Z87.1), it is considered acceptable for shop use. From a business perspective, durability is a financial concern, while safety certification is a legal one. Always ensure the “budget” label doesn’t mean “unrated.”
What is the best way to track tool ROI for a one-man shop? Keep a simple log of the purchase price and the date. Every time you finish a job, note how many hours you used that tool. When the tool finally breaks, divide the price by the total hours. This gives you an exact “cost-per-hour” to use in future bidding.
(This article was written by one of our staff writers, Michael Hargrove. Visit our Meet the Team page to learn more about the author and their expertise.)