Budget vs Premium Welding Machines Comparison Guide (Review)
When I first transitioned from a weekend hobbyist to a professional fabricator, I made the mistake many of us make: I focused on the price tag of the equipment rather than the cost of the work it produced. I remember standing in my shop with a $400 welder that kept hitting its thermal overload limit halfway through a simple gate frame. I was losing twenty minutes every hour just waiting for the machine to cool down. In a side-hustle where your time is often your most limited resource, those twenty minutes were costing me more than the “savings” the cheap machine provided.
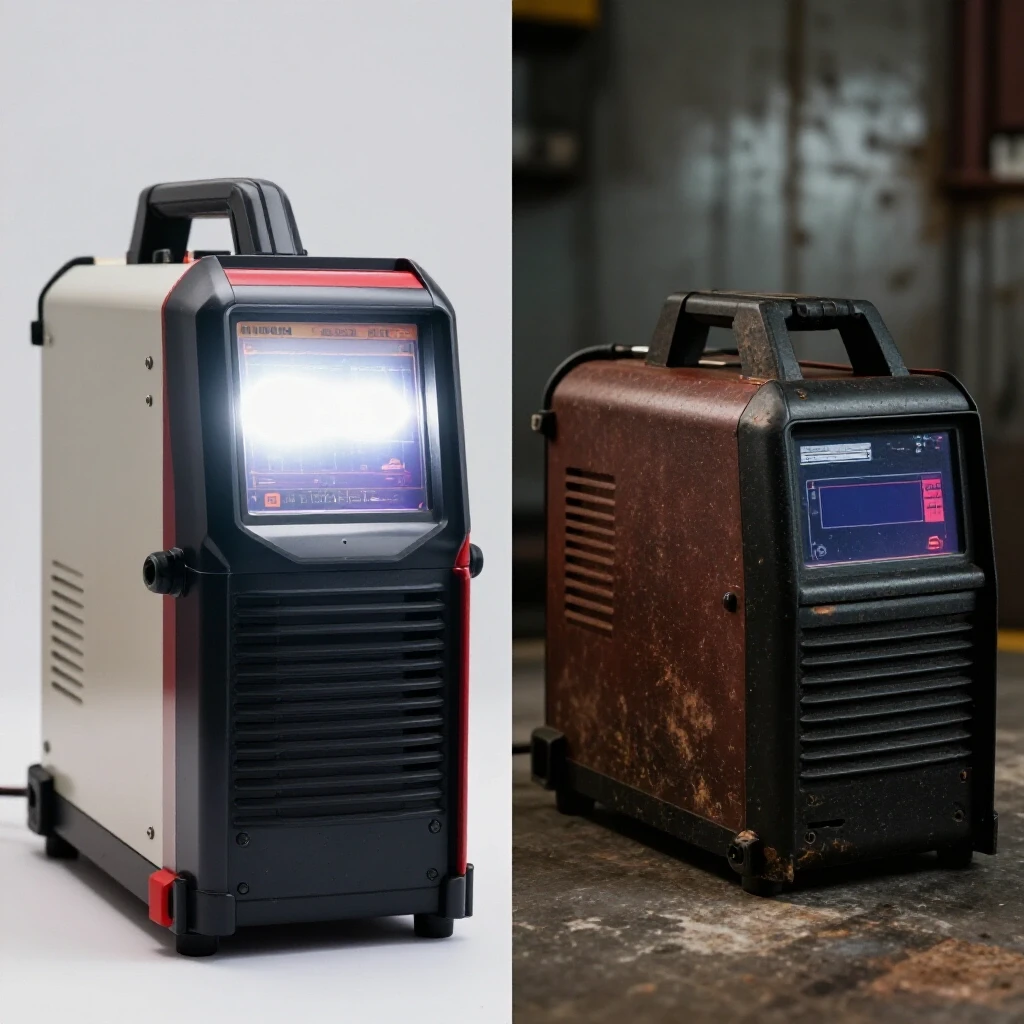
Choosing between entry-level and high-end welding equipment is not just a matter of brand preference. It is a fundamental business decision that dictates your shop’s hourly capacity and your long-term profit margins. For a small shop owner, every tool must earn its floor space. If a machine cannot handle the amperage required for thick mild steel or lacks the arc stability for clean aluminum work, it becomes a bottleneck. Understanding the financial mechanics of your workshop allows you to see equipment not as a purchase, but as an investment that must be recouped through billable hours.
Establishing the True Cost of Your Workshop Hour
A shop hourly rate is the total amount of money your business must generate per hour of active work to cover all expenses and provide a profit. It is the foundation of every quote you send to a client.
Many side-hustlers pick a number out of thin air, often around $40 or $50 an hour, because it feels like “good money” compared to a day job. However, this ignores the reality of overhead. Your shop rate must cover rent, electricity, insurance, and the gradual wearing out of your tools. If you are not factoring in these hidden costs, you are essentially paying your customers to let you work for them. A healthy shop rate for a small-scale fabricator typically ranges between $65 and $120 per hour, depending on your local market and the complexity of the work.
Understanding Overhead Allocation in Small Shops
Overhead allocation is the process of spreading your fixed costs across the hours you actually spend fabricating. It ensures that every job pays a small piece of your monthly bills.
To calculate this, you need to look at your annual fixed costs—things like shop insurance, software subscriptions for invoicing, and the base electricity bill. Divide that total by the number of billable hours you realistically expect to work in a year. If your annual overhead is $6,000 and you work 10 hours a week on your side-hustle (520 hours a year), your overhead burden is roughly $11.50 per hour. This must be added to your desired take-home pay and your equipment depreciation before you even consider the cost of materials.
Mapping Machinery Amortization and Life Cycles
Amortization is the practice of spreading the cost of an expensive tool over its expected useful life. This helps you understand how much each hour of use actually costs you in terms of “using up” the machine.
A budget machine might cost $600 but only last three years under heavy use. A premium machine might cost $2,800 but could easily last a decade. When you break these down, the premium machine often costs less per year of operation. More importantly, the premium machine usually offers a better duty cycle, meaning you spend more time welding and less time waiting. This increases your “up-time,” which is the only time you are actually making money.
| Machine Category | Initial Cost | Expected Life | Annual Cost | Hourly Cost (at 500 hrs/yr) |
|---|---|---|---|---|
| Budget Unit | $650 | 3 Years | $216 | $0.43 |
| Mid-Range Unit | $1,400 | 7 Years | $200 | $0.40 |
| Premium Unit | $2,900 | 12 Years | $241 | $0.48 |
Evaluating Equipment Performance and Shop Productivity
Performance metrics like amperage range and duty cycle are not just technical specs; they are the gears that drive your shop’s efficiency. A machine that struggles with arc stability on aluminum will force you to spend more time on post-weld cleanup, which eats into your profit.
When comparing machines, look at the measurable output. An entry-level machine might have a 20% duty cycle at its maximum amperage. This means in a ten-minute block, you can only weld for two minutes before the machine needs an eight-minute rest. A premium machine might offer a 60% or even 100% duty cycle. In a professional setting, the ability to keep the arc running is the difference between finishing a job in one afternoon or having it bleed into a second day.
Amperage Range and Material Versatility
Amperage range refers to the minimum and maximum electrical current a machine can produce. This determines the thickness of the metal you can successfully join.
A machine with a narrow amperage range limits the types of jobs you can take. If a client asks for a heavy-duty trailer repair requiring high heat, a budget machine may lack the “top end” power to get proper penetration. Conversely, if you are doing delicate artistic work on thin-gauge sheet metal, you need a machine that can turn down low enough to avoid blowing holes in the material. Premium machines often provide a much wider, more stable range, allowing one power source to handle everything from thin aluminum to thick structural steel.
The Impact of Arc Stability on Labor Costs
Arc stability is the consistency of the electrical arc during the welding process. A stable arc produces less spatter and a smoother bead, which directly impacts your bottom line.
Every minute you spend with a grinder removing weld spatter is a minute you are not being paid for. Budget machines often have “choppy” arcs that create significant mess, especially when working with CO2 shielding gas or lower-quality wire. Premium machines use advanced electronics to smooth out the power delivery. This results in “clean” welds that require minimal finishing. If a premium machine saves you 15 minutes of grinding on every four-hour job, it will pay for its price difference in labor savings alone within the first year of operation.
Managing Consumables and Hidden Operational Expenses
Consumables are the items you use up while working, such as welding wire, shielding gas, contact tips, and grinding discs. These are the most common “leaks” in a small shop’s budget.
I have seen many shop owners fail because they forgot to charge for the “invisible” items. A bottle of shielding gas can cost $50 to $80 to refill, and a spool of high-quality wire isn’t cheap. If you aren’t tracking these, you are losing 5% to 10% of your margin on every project. I recommend a “consumable burden factor,” which is a flat percentage added to every job to cover these small but frequent expenses.
Why Consumable Tracking Prevents Profit Bleed
Consumable tracking is the habit of recording exactly how much wire and gas you use for specific types of projects. This allows for more accurate future bidding.
- Gas Usage: Most small shops run at 15-25 cubic feet per hour (CFH). If you know your bottle size, you can calculate exactly how many hours of “trigger time” you get per tank.
- Wire Consumption: Weighing a spool before and after a large job can give you a “pounds-per-foot” estimate for different weld sizes.
- Small Parts: Contact tips and nozzles should be replaced regularly to maintain quality. Factor in one tip for every 10-20 hours of welding.
Formulating a Realistic Material Markup
Material markup is the percentage you add to the raw cost of metal and hardware to cover the time spent sourcing, transporting, and storing those items.
You should never sell material to a client at the price you paid for it. You had to drive to the steel yard, wait in line, load the truck, and perhaps even pay a delivery fee. A standard markup for small shops is 20% to 50%. This covers your “hidden” labor and the risk of material prices fluctuating between the time you quote a job and the time you buy the steel.
Bidding Strategies for Small Fabrication Shops
Accurate fabrication job costing is the difference between a thriving business and an expensive hobby. A quote should be a transparent breakdown of labor, materials, overhead, and profit.
When I started, I used to “guesstimate” how long a project would take. I was almost always wrong. Now, I break every project down into four phases: Preparation (cutting and cleaning), Fit-up (tacking and squaring), Welding (the actual arc time), and Finishing (grinding and painting). By estimating each phase separately, you create a much more realistic timeline.
Building a Custom Job Quote Template
A professional quote protects both you and the client. It sets clear expectations and ensures you are covered if the scope of the work changes.
- Labor Cost: (Estimated Hours x Shop Rate)
- Material Cost: (Raw Cost + 30% Markup)
- Consumable Burden: (Typically 5% to 10% of the Labor Cost)
- Subcontracting: (Powder coating or specialized machining costs, plus a 10-15% handling fee)
- Profit Margin: (A final 10-20% added to the total to allow for business growth)
Analyzing Post-Job Profits for Better Accuracy
Post-job reconciliation is the process of looking back at a finished project to see if your estimates matched reality. This is where you truly learn how to price your work.
Keep a simple log for every job. Record your estimated hours versus actual hours worked. If you consistently find that “Finishing” takes twice as long as you planned, you need to adjust your shop rate or your estimation formula. This data-driven approach removes the emotion from pricing and allows you to confidently tell a client why a project costs what it does.
Tracking Real-World ROI on Equipment Upgrades
A metal business ROI calculator doesn’t have to be a complex spreadsheet. It can be a simple comparison of how much more money you can make with a better machine versus the debt or cash outlay required to buy it.
Consider the “Portability Factor.” If you buy a premium, lightweight multiprocess welder, you might be able to take on mobile repair jobs that pay $150/hour instead of just shop-based work at $85/hour. If the machine costs $2,000 more than a heavy, stationary budget unit, you only need 30 hours of mobile work to cover that price gap. That is a very fast return on investment.
Case Study: The Cost of “Down-Time”
I once consulted for a shop that was using three budget-grade MIG welders. They were constantly in the repair shop. We calculated that the shop was losing $400 a month in lost labor while machines were being fixed or while workers waited for them to cool down.
We replaced the three budget units with two premium industrial machines. Even though the upfront cost was $5,000, the shop’s productivity increased by 25%. They were able to finish jobs faster and with fewer defects. The “payback period”—the time it took for the machines to pay for themselves through increased revenue—was only seven months. After that, the increased efficiency was pure profit.
Tools for Modern Workshop Management
Managing the financial side of a shop is easier today than it was a decade ago. There are several digital tools that can help you track every penny.
- QuickBooks or FreshBooks: Essential for professional invoicing and tracking deductible expenses like gas and wire.
- Evernote or Google Keep: Great for snapping photos of material receipts so you don’t lose them before tax season.
- Simple Spreadsheet (Excel/Sheets): Create a “Job Tracker” where you input your hours and material costs for every project.
- Square or PayPal: Allows you to take credit card payments on-site, which often helps close a sale with a new client.
Practical Benchmarks for Side-Hustle Success
To stay profitable, you need to hit certain benchmarks. These are not rules, but they are common indicators of a healthy small-scale fabrication business.
- Shop Rate: $65–$120 per hour.
- Material Markup: 1.3x to 1.5x of cost.
- Consumable Burden: 7% of total labor.
- Machine Life: Aim for a 5-year depreciation cycle on electronics.
- Profit Margin: 15% net profit after all expenses and your own “wage” are paid.
If your numbers are significantly lower than these, you are likely underpricing your services. Remember, your expertise in metalworking is valuable. Clients are paying for your ability to solve their problems, not just for the steel and the electricity.
Moving from a hobbyist mindset to a business mindset requires a shift in focus. You must stop looking at what a machine costs to buy and start looking at what it costs to own. A premium machine with high arc stability and a robust duty cycle might seem expensive today, but if it allows you to work faster and produce higher-quality results, it is the more economical choice in the long run. By mastering your shop math and tracking your consumables, you ensure that your side-hustle remains a profitable venture rather than a draining expense.
FAQ: Managing Workshop Economics and Equipment Choices
What is the biggest difference between a $500 welder and a $2,500 welder for a business?
The primary differences are duty cycle and arc stability. A $2,500 machine can often run at high amperage for much longer periods without overheating, which increases your hourly productivity. Additionally, premium machines have better internal electronics that produce a smoother arc, significantly reducing the time you spend grinding away weld spatter.
How do I know if I should charge by the hour or by the project?
For most fabrication work, it is best to provide a “flat-rate” project quote based on your hourly shop rate. This gives the customer a fixed price, which they prefer, but it allows you to keep the “efficiency bonus” if you finish the work faster than expected. Hourly billing is better for repair work where the total scope of the problem isn’t known until you start cutting.
Is it worth buying a machine that does both AC and DC welding?
If you plan to weld aluminum, yes. Aluminum requires AC (Alternating Current) to “clean” the oxide layer off the metal as you weld. If your side-hustle involves marine repair, automotive parts, or custom furniture, having AC capability is essential. Budget machines are often DC-only, which limits you to mild steel and stainless steel.
How do I factor in the cost of my shop’s electricity?
For most small shops, electricity is a relatively small part of the overhead compared to labor and materials. However, if you are running large machines for several hours a day, it adds up. A simple way to handle this is to include it in your general shop overhead. If your monthly bill is $150, and you work 40 hours a month, that’s $3.75 per hour of operation.
What is a “duty cycle” and why does it matter for my profit?
Duty cycle is the percentage of a ten-minute period that a welder can operate at a specific amperage without overheating. A 30% duty cycle means you can weld for 3 minutes and must rest for 7. If you are doing long structural welds, a low duty cycle will force you to stop frequently, effectively lowering your hourly earnings.
Should I buy new or used welding equipment when starting out?
New equipment is generally better for a side-hustle because it comes with a warranty and reliable performance. Used industrial machines can be great deals, but if they break down, you may struggle to find parts or a technician to fix them. For a business, reliability is more important than the initial savings of a used tool.
How much should I mark up the steel I buy for a client?
A standard markup is 30% to 50%. This isn’t just “extra profit”; it covers the time you spent driving to the supplier, the fuel for your truck, and the cost of storing the material in your shop. It also protects you if you accidentally mis-cut a piece and need to replace it at your own expense.
How do I calculate the depreciation of my welding machine?
Take the total cost of the machine (including tax and shipping) and divide it by its expected lifespan in years. For a high-quality machine, use 5 to 10 years. For a budget machine, use 2 to 3 years. That annual number is your depreciation expense, which you should use to help determine your hourly shop rate.
What are the most common “hidden” costs in a fabrication shop?
The most common hidden costs are consumables (gas, wire, tips), abrasives (grinding discs, sandpaper), and “shop supplies” like rags, cleaners, and marking pens. These can easily eat 10% of your profit if you don’t account for them in your quotes through a “consumable burden” fee.
How do I handle a job that takes much longer than I quoted?
If the delay is your fault (like a mistake or a slow pace), you usually have to “eat” the cost to maintain your reputation. However, if the client changed the design or the material was in worse condition than described, you should communicate the need for a “change order” and adjust the price accordingly. This is why a clear, written quote is vital.
(This article was written by one of our staff writers, Michael Hargrove. Visit our Meet the Team page to learn more about the author and their expertise.)