How to Replace Worn Drill Press Table Center Inserts (Fix)
When I first pulled the tarp off a 1948 Buffalo No. 18 drill press in a damp barn, the table looked like a battlefield. Decades of “oops” moments had turned the center area into a jagged landscape of overlapping drill scars. For a restorer, the table is the heart of the machine. If the central throat area is mangled, you lose the support needed for precision work. Restoring this specific area isn’t just about looks; it is about returning the tool to a state where it can safely support workpieces without them tipping into a hole.
Over the last 18 years, I have learned that vintage machinery restoration requires a blend of archaeology and engineering. You aren’t just fixing a tool; you are preserving a piece of industrial history. The cast iron used in these old machines is often superior to modern imports, but it is also brittle. One wrong move with a pry bar or a torch, and you can crack a casting that hasn’t been manufactured in sixty years. Patience is the most important tool in your drawer.
Assessing the Damage to Vintage Drill Press Tables
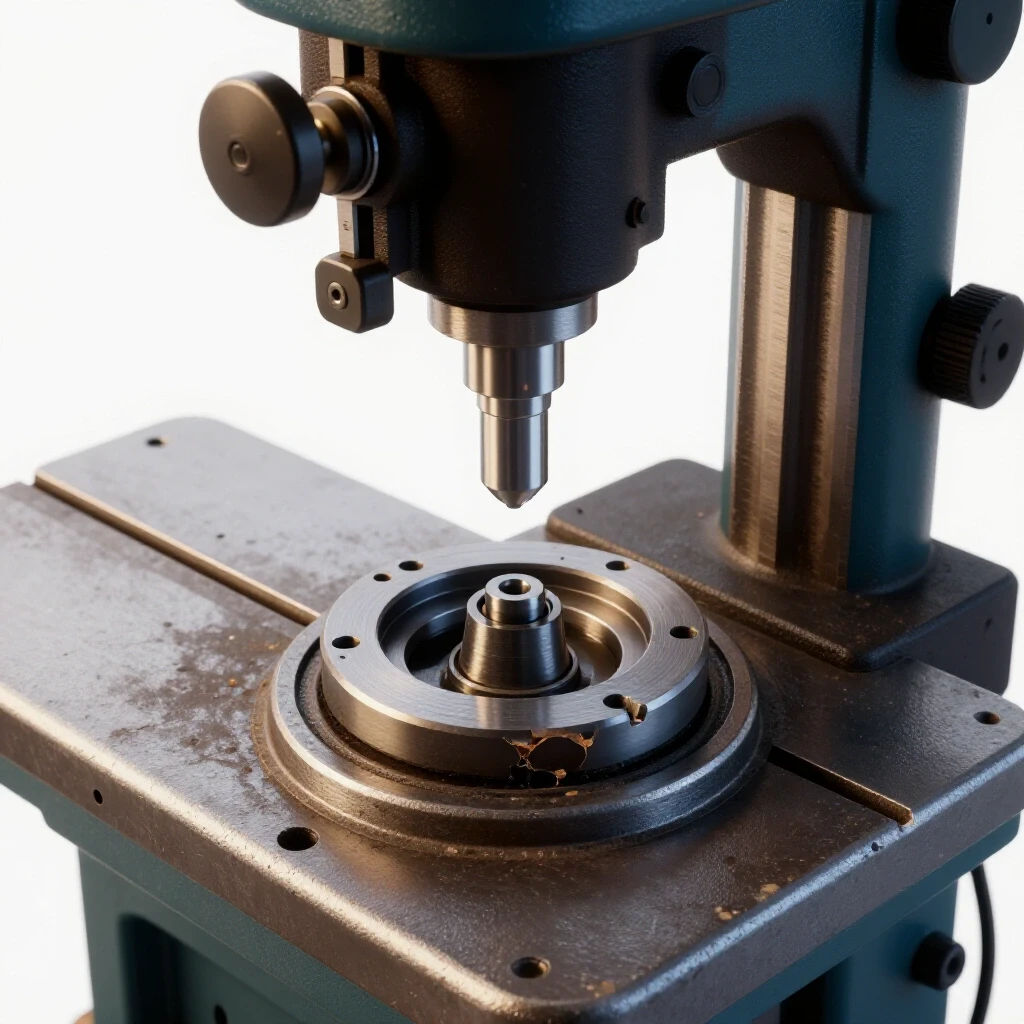
Evaluating the severity of wear, drill-through marks, and structural integrity of the central throat area before beginning restoration work.
Before you turn a single bolt, you must clean the table surface to see what you are actually dealing with. I start by using a dull paint scraper to remove the “shop crust”—that thick layer of dried oil, sawdust, and metal chips. Once the bare metal is visible, I look for the “woodpecker effect.” This is where a previous operator didn’t use a sacrificial backing board, resulting in dozens of holes drilled directly into the removable center piece or, worse, the main casting.
I check the recess where the insert sits. In many classic machines, this is a machined “step” in the cast iron. I use a straightedge across the table to see if the current insert is sitting proud or recessed. If the insert is missing entirely, I inspect the inner rim for cracks. Cast iron is strong in compression but weak in tension. If someone jammed a tapered bit into the hole and it seized, they might have hairline-fractured the seat. I use a magnifying glass and some light oil; if the oil disappears into a line, you have a crack that needs addressing before a new part is fitted.
Safely Disassembling Rusted Table Components
The systematic process of removing seized fasteners and clearing debris from the table’s center without damaging the original cast iron.
Disassembling a machine that has sat in a humid garage for twenty years is a lesson in restraint. The screws holding a table insert in place are often slotted, flat-head machine screws. Over time, galvanic corrosion—where two different metals “bond” together—makes these screws feel like they are welded in place. If you use a standard screwdriver and apply maximum force, you will almost certainly strip the slot.
I prefer a “soak and shock” method. First, I apply a high-quality penetrating oil. I avoid the generic sprays and go for something with a high solvency rating. I let it sit for at least 24 hours. If it doesn’t budge, I use a manual impact driver. This tool converts a hammer blow into a sharp, rotational force, which is much more effective at breaking the rust bond than steady pressure.
Common Challenges in Disassembly
- Cammed-out screw heads: If the slot is gone, I use a small Dremel bit to cut a new, deeper slot for a larger flat-head bit.
- Seized casting seats: If the insert is stuck, I never pry against the table’s finished surface. I use a brass drift from the underside to tap it out.
- Obsolete thread patterns: Many pre-war machines use non-standard threads. I always measure the pitch with a gauge before I assume I can find a replacement at the local hardware store.
Chemical Rust Removal for Precision Surfaces
Using specialized baths to strip oxidation from the table and its recess to ensure a perfectly flat seat for the new component.
Once the old insert is out, the table usually needs a deep clean. I avoid using heavy abrasives like wire wheels on a grinder because they can round off the sharp edges of the machined recess. Instead, I turn to chemical or electrochemical methods. Removing machinery rust requires a delicate touch to preserve the “skin” of the cast iron.
I often use an electrolysis bath for heavy castings. This involves a plastic tub, a manual battery charger, and a solution of water and washing soda (sodium carbonate). By connecting the table to the negative terminal and a piece of scrap steel to the positive, the rust is literally pulled off the table and deposited on the scrap. This process is “self-limiting,” meaning it won’t eat the good metal, only the oxidation.
Rust Removal Method Comparison
| Method | Best For | Pros | Cons |
|---|---|---|---|
| Electrolysis | Deep, heavy rust in crevices | Zero metal loss, very cheap | Requires DC power, messy |
| Evapo-Rust | Precision surfaces | Non-toxic, easy to use | Can be expensive for large parts |
| Wire Brushing | Rough exterior castings | Fast, immediate results | Can damage machined tolerances |
| Sand Blasting | Non-critical structural parts | Extremely fast | Too aggressive for table surfaces |
After the bath, the metal is “active” and will flash-rust within minutes. I dry it immediately with compressed air and apply a light coat of machine oil or paste wax. The recess where the new throat plate will sit must be perfectly clean; even a few thousandths of an inch of rust will prevent the new insert from sitting flush.
Selecting Materials for a Durable Table Throat
Choosing between various substrates like hardwoods, phenolic resins, or soft metals to balance durability with drill bit protection.
In my shop, I often restore tools to their original factory specifications, but sometimes a functional upgrade is better. The goal is to provide a surface that is softer than your drill bits but stiff enough to support the work.- Hardwoods (Maple or White Oak): These are excellent for general-purpose use. They are easy to machine and won’t damage a bit if you accidentally drill into them. However, they can swell with humidity, which might make them tight in the casting.
- Phenolic Sheet (Linen or Paper Base): This is my preferred material for a “forever” fix. Phenolic is incredibly stable, oil-resistant, and drills cleanly. It feels like a mix between plastic and wood and can be sanded to a very high tolerance.
- Soft Metals (Aluminum or Brass): If you are doing heavy metalwork, a soft metal insert provides the best support. It won’t shatter like cast iron if a bit catches, but it provides a rigid surface for high-pressure drilling.
Precision Measurement and Fabrication Techniques
Using calipers and depth gauges to determine exact dimensions for a custom-fit replacement that sits perfectly flush with the cast iron.
Precision is the difference between a “repair” and a “restoration.” To make a new insert, I start by measuring the diameter of the table’s hole with a pair of digital calipers. I take measurements at three different points to ensure the hole is still round. If it’s slightly oval from years of wear, I’ll have to hand-fit the new piece.
Next, I measure the depth of the “step” or flange where the insert rests. This is critical. If the insert is too thick, your workpiece will rock. If it’s too thin, the workpiece will dip as you apply pressure. I aim for a fit that is exactly flush or perhaps 0.001 to 0.002 inches proud (higher), which I can then sand down to perfection.
Fabrication Steps: 1. Rough Cut: Use a bandsaw to cut your material slightly larger (about 1/16″) than the final diameter. 2. Turning to Size: If you have a lathe, this is easy. If not, I mount the rough blank on a bolt, put it in the drill press itself, and use a file or sandpaper against the spinning edge to “turn” it down to the exact diameter. 3. Checking the Fit: The insert should drop into the hole with a “thunk” but have no side-to-side wiggle.
Why Seized Cast Iron Screws Crack Under Force
Understanding the relationship between thermal expansion and the brittle nature of old machinery castings.
One of the biggest mistakes I see beginners make is using a “cheater bar” on a stuck screw in a cast-iron table. Cast iron is full of carbon flakes which make it great for dampening vibration, but these flakes also act as internal stress risers. When you apply massive torque to a small area, the casting can’t deform; it simply snaps.
When a screw is seized, I use a propane torch to heat the area around the screw. The goal is to expand the table casting slightly while keeping the screw cool. This breaks the “rust weld” in the threads. I often apply a piece of paraffin wax to the threads while they are hot. The wax melts and is pulled into the threads by capillary action, providing lubrication where oils can’t reach.
Machinery Hand Scraping for Leveling the Throat
The art of removing microscopic amounts of metal to ensure the insert seat is perfectly flat and parallel to the spindle.
If the internal rim of the table is pitted or uneven, a new insert will never sit correctly. This is where machinery hand scraping comes in. Hand scraping is the process of using a flat, carbide-tipped tool to shave off high spots on a metal surface. It is a slow, meditative process that ensures high precision.
I use a “master flat” or a known straightedge coated with a thin layer of Prussian Blue (a high-visibility dye). I rub the straightedge against the insert seat. The blue dye transfers only to the high spots. I then use the scraper to remove those blue marks. I repeat this until the “points of contact” are evenly distributed around the rim. For a drill press table, I look for about 10–15 points per square inch (PPI). This ensures that when the insert is bolted down, it isn’t being distorted by an uneven base.
Final Fitting and Leveling the Work Surface
The final stages of installation where the insert is secured and checked for planarity against the rest of the drill press table.
After the insert is fabricated and the seat is prepped, it is time for the final fit. I clean both surfaces with denatured alcohol to remove any oil. If the insert is wood or phenolic, I might use a tiny amount of clear silicone or a light-duty adhesive to keep it from vibrating, though a well-fit insert should stay in place with its own fasteners.
If the original machine used screws to hold the insert, I make sure the new holes are countersunk perfectly. The screw heads must sit below the surface of the insert. Once installed, I use a dial indicator mounted in the drill press spindle. I sweep the indicator across the table and onto the new insert. My goal is to see less than 0.003 inches of deviation across the entire surface. If it’s high, I use a fine-grit sanding block to bring it down.
Classic Tool Alignment and Spindle Squaring
Ensuring the newly restored table surface is perfectly perpendicular to the drill’s path of travel for accurate holes.
A beautiful new table center is useless if the table isn’t square to the spindle. Over years of use, drill press tables can sag or the “tilt” mechanism can become misaligned. I use a “tramming” tool, which is essentially a bar held in the chuck with a dial indicator on the end.
By rotating the spindle by hand and checking the indicator at the front, back, left, and right of the table, I can see exactly how the table is tilted. If the table is low at the front, I check the column bracket for wear. Sometimes, a thin brass shim (0.001″ or 0.002″) between the table and its support arm is necessary to bring it back to a perfect 90-degree angle.
Long-Term Maintenance of Restored Surfaces
Strategies for preventing future corrosion and wear on newly installed table components and cast-iron surfaces.
Once the restoration is complete, the battle against rust continues. In a non-climate-controlled shop, cast iron acts like a sponge for moisture. I never leave a workpiece sitting on the table overnight, as moisture can get trapped between the two metal surfaces and cause “shadow rust.”
I use a high-quality paste wax (non-silicone) to seal the table. I apply it heavy, let it haze, and then buff it out. This creates a moisture barrier and makes the table “slick,” allowing workpieces to slide easily. For the insert itself, if it’s wood or phenolic, a quick wipe with the same wax keeps it from absorbing oils or swelling.
Restorer’s Checklist for Table Service
- Clear the Area: Remove all debris and old oil with a plastic scraper.
- Document: Take photos of the screw patterns and any markings on the original insert.
- Penetrate: Apply oil to fasteners and wait 24 hours.
- Clean the Bore: Use a brass brush to scrub the inner rim of the table casting.
- Measure Twice: Use calipers to verify the diameter and depth of the seat.
- Material Prep: Cut the replacement blank slightly oversize.
- Final Fit: Hand-sand or turn the blank until it fits with zero play.
- Level Check: Use a dial indicator to ensure the new surface is flush with the table.
- Protect: Apply a rust inhibitor or wax to all bare metal surfaces.
Lessons from the Bench: The “Ghost” of Past Repairs
During a restoration of a 1930s Delta “Slo-speed” drill press, I found that a previous owner had tried to fix a worn center by pouring lead into the hole. While creative, the lead had expanded and slightly warped the surrounding cast iron. It took me three days of careful scraping to get the seat flat again.
The lesson here is to always look for “hidden” repairs. Previous owners often used whatever was on hand—babbitt metal, epoxy, or even wood putty—to fill holes. These materials react differently to heat and chemicals than cast iron does. Always strip the area back to the original base metal so you know exactly what you are building upon.
The Value of Preservation
Restoring a drill press table isn’t just about making a hole-maker work again. It’s about the tactile satisfaction of a tool that moves smoothly and holds a tolerance. When you replace a scarred, “woodpeckered” center with a precision-fitted insert, you are honoring the craftsmanship of the original builders. You are ensuring that this 80-year-old piece of iron can continue to produce accurate work for another eighty years.
FAQ: Restoring Drill Press Table Centers
What is the best way to remove a center insert that is rusted shut? Start with a high-quality penetrating oil and let it soak for at least 24 hours. Use a brass drift and a hammer to tap the insert from the bottom side. The vibration often breaks the rust bond more effectively than steady prying. If it remains stuck, gentle heat from a propane torch around the perimeter of the table (not directly on the insert) can help expand the casting.
Can I use MDF for a replacement insert? You can, but I don’t recommend it for long-term use. MDF (Medium Density Fiberboard) absorbs moisture and oils very quickly, which causes it to swell and lose its flat profile. It also tends to “fuzz” when drilled. Hard maple or phenolic sheet are much more stable and durable choices for a machine tool environment.
How do I know if my table casting is cracked or just scratched? Clean the area thoroughly with a degreaser. Apply a light, thin oil (like WD-40) to the suspect area, then wipe it completely dry. Sprinkle some talcum powder or flour over the spot. If a crack exists, the oil trapped inside will seep out and stain the powder, revealing a clear line. Scratches will remain dry.
What should I do if the screw holes for the insert are stripped? Since you shouldn’t use oversized modern bolts that look out of place, the best fix is to use a thread repair kit (like a Helicoil) or to plug the hole with a steel rod, weld it (if you have the cast-iron welding skills), and re-tap it to the original thread pitch. Keeping the original screw size preserves the aesthetic and functional integrity of the machine.
Is it necessary to use a dial indicator to level the insert? While you can get “close enough” with a high-quality machinist’s square or a straightedge, a dial indicator is the only way to ensure the surface is truly flush to within 0.001 inches. For precision metalworking, this level of accuracy prevents the workpiece from tilting, which ensures your holes are perfectly vertical.
How do I prevent the new insert from spinning? A properly fitted insert should have a very close “slip fit.” If it still moves, check if your machine was designed with a “key” or a small locating screw. If not, you can drill and tap a small set screw into the side of the insert or use a tiny amount of non-permanent thread locker on the rim to provide just enough friction to keep it stationary.
What is “Prussian Blue” and why is it used in restoration? Prussian Blue is a non-drying pigment used to identify high spots on metal surfaces. When you rub a flat reference tool against a part, the blue transfers to the points that are “sticking up.” This allows the restorer to precisely scrape away only the metal that is preventing a flat fit.
Can I use an electrolysis bath on the entire drill press? You can use it on any cast iron or steel part that can fit in your tub. However, you must remove all brass, copper, and aluminum parts first, as the process can damage or destroy non-ferrous metals. Also, ensure the part is completely submerged to avoid a “tide line” of rust at the water’s surface.
Why is my drill press table “low” in the center? This is often “wear” from years of sliding heavy parts across the middle. If the table is dished, the insert seat might be lower than the outer edges. In this case, you may need to have the table surface ground by a machine shop or spend time hand-scraping the entire surface back to flat.
What is the best lubricant for the table’s tilt mechanism? I prefer a dry film lubricant or a high-quality paste wax. Wet oils and greases tend to attract metal chips and sawdust, which turn into an abrasive paste that wears out the cast iron over time. Wax provides protection without the mess.
(This article was written by one of our staff writers, Richard Beaumont. Visit our Meet the Team page to learn more about the author and their expertise.)