How to Build a Heavy Suspended Garage Storage Loft (DIY Plan)
When you spend your weekends reviving a 1942 South Bend lathe or a massive Buffalo Forge drill press, you quickly realize that floor space is your most precious resource. My shop, like many others, began to feel the squeeze as I brought home more “saves”—pieces of American industrial history that others saw as scrap. The challenge with restoring vintage machinery is that the parts are rarely light. A single cast-iron tailstock or a set of steady rests can weigh more than a modern consumer-grade tool. To keep my workspace clear for precision tasks like hand-scraping ways or pouring babbitt bearings, I had to look up.
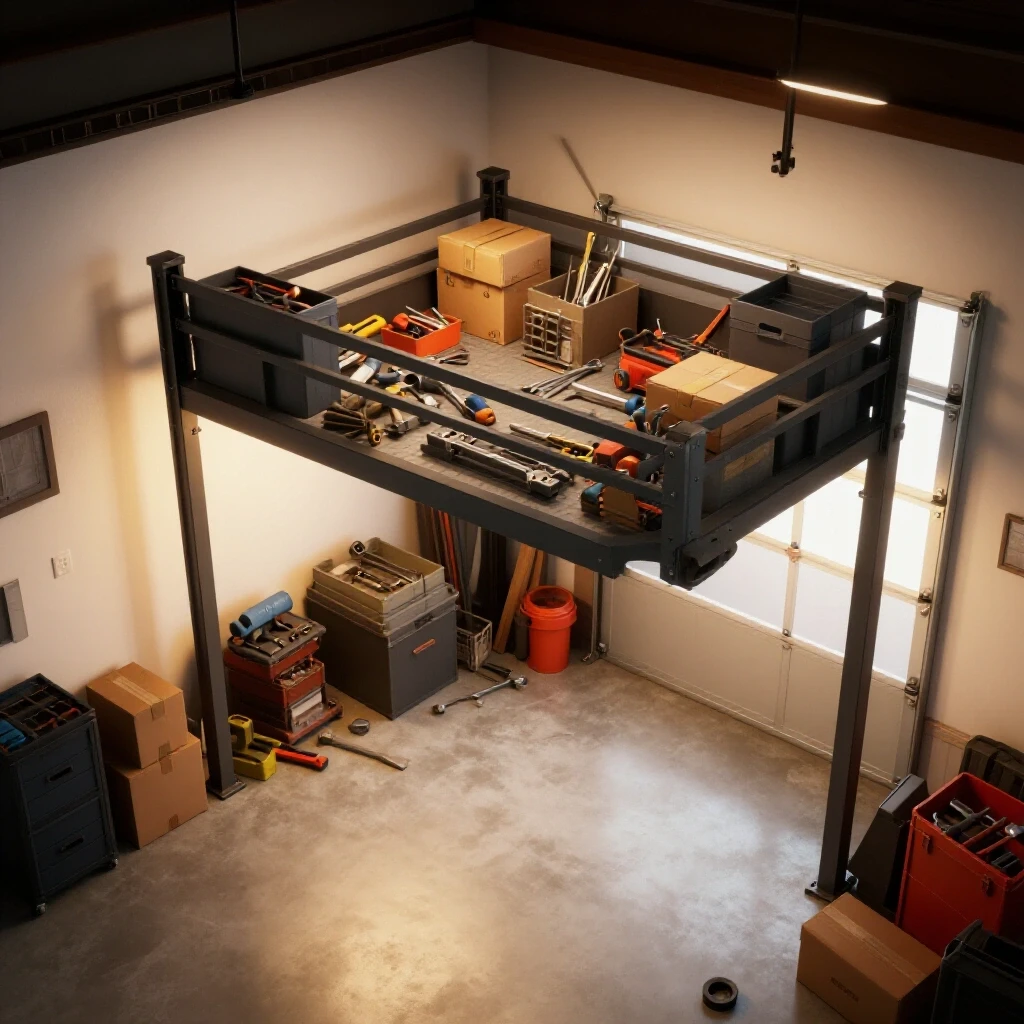
Building a heavy-duty overhead steel platform is a project that demands the same level of mechanical integrity we apply to a machine rebuild. We aren’t just storing cardboard boxes; we are hanging hundreds of pounds of dead-weight iron over our heads. This requires a systematic approach to material selection, structural fastening, and load distribution. Over the last 18 years, I have learned that “good enough” doesn’t exist when you are dealing with overhead suspension. If a weld fails or an anchor pulls, the cost isn’t just a broken tool; it is a safety catastrophe.
Assessing Structural Integrity for Heavy Metal Storage
Evaluating the load-bearing capacity of your garage infrastructure is the first step before any steel is cut or holes are drilled. You must understand how your ceiling joists or trusses will react to a concentrated static load of 500 pounds or more.
In the world of vintage machinery restoration, we often deal with “dead loads”—weights that do not move or vibrate. However, a suspended deck introduces a constant tension on your fasteners. Before I built my first steel rack, I spent hours mapping the grain and condition of my ceiling joists. If you find signs of dry rot or heavy checking in the wood, those points are non-starters for anchoring. We are looking for solid, healthy timber that can handle the shear and tension forces of a fully loaded steel frame.
| Factor | Machinery Restorer’s Consideration | Impact on Structural Safety |
|---|---|---|
| Static Load | Total weight of cast iron parts plus the steel frame itself. | Determines the diameter of threaded rods and anchor depth. |
| Anchor Point | The center of the ceiling joist or structural beam. | Prevents splitting of the wood and ensures maximum grip. |
| Steel Profile | Use of angle iron vs. C-channel for the main frame. | Affects the rigidity and “sag” of the storage deck under load. |
| Fastener Grade | Grade 5 or Grade 8 bolts only; never use hardware store carriage bolts. | Ensures the hardware won’t snap under sudden temperature changes. |
Selecting and Preparing Industrial Steel Sections
Choosing the right metal for your overhead frame involves balancing weight, cost, and rigidity. For a platform designed to hold heavy machine components, I prefer hot-rolled steel angle or C-channel over thin-walled square tubing.
When I am restoring classic cast iron, I look for density and stability. The same applies here. A 2-inch by 2-inch steel angle with a 1/4-inch thickness provides excellent resistance to bending. If you are sourcing this from a scrap yard—a common haunt for us restorers—you will likely encounter heavy surface corrosion. Removing machinery rust from these structural pieces is just as important as cleaning a lathe bed. Scale and pits can hide hairline cracks or thin spots that compromise the integrity of your welds.
Why Surface Preparation Matters for Structural Welding
Clean metal is the foundation of a safe weld. If you attempt to MIG or TIG weld over mill scale or rust, you will end up with porosity—tiny bubbles in the weld bead that act like perforations in a sheet of paper. I use a combination of wire wheels and flap discs on an angle grinder to bring the steel to a “near-white” finish. This is the same level of care I take when preparing a machine base for a fresh coat of oil-resistant enamel.
Rust Removal Method Trade-offs for Structural Steel
- Wire Wheel: Fast and effective for loose scale, but can “smear” rust into the pores of the metal.
- Flap Discs (60-80 Grit): Excellent for removing deep pits and preparing a flat surface for joining.
- Chemical Chelators (Evapo-Rust): Great for small brackets, but impractical for 8-foot lengths of angle iron.
- Electrolysis: Highly effective for complex shapes, though it requires a large tank and a 12V DC power supply.
Precision Drilling and Fastener Patterns for Suspension
In machine disassembly tips, we often talk about the importance of not forcing a stuck bolt. In fabrication, the focus shifts to ensuring that the bolts you install are perfectly aligned to prevent side-loading.
When you hang a frame from threaded rods, those rods must be perfectly vertical. If they are angled, they exert a prying force on the ceiling anchors. I use a drill press for every hole in the steel frame. Hand-drilling 1/2-inch holes through 1/4-inch steel is not only exhausting but also prone to “walking,” which ruins your alignment. Use a center punch, start with a 1/8-inch pilot bit, and use plenty of cutting fluid. This preserves your bits and ensures a clean, burr-free hole that won’t stress the fastener.
Dealing with Obsolete Fastener Patterns and Modern Substitutions
While many of the machines we restore use oddball threads—like the 1/2-12 or 12-24 patterns found on older American tools—your overhead storage should stick to modern, high-strength standards. I recommend 1/2-inch or 5/8-inch Grade 8 threaded rods. These provide a massive safety margin. When you are sourcing parts, avoid the zinc-plated “all-thread” found in big-box stores; look for B7-rated alloy steel rods from industrial suppliers. They are designed for high-pressure and high-heat environments, making them ideal for holding up your prized cast-iron collections.
Welding Sequences for a Rigid Deck Fabrication
Welding a large frame can introduce significant warping if you aren’t careful. Just as heat can distort a precision-ground machine table, it can twist your storage deck into a potato chip shape.
I follow a strict “stitch welding” sequence. Rather than running one long bead down a joint, I place small tacks at every corner to lock the geometry. Once the frame is square—checked with a machinist’s square—I lay down 2-inch beads, jumping from one corner of the frame to the opposite side. This allows the heat to dissipate evenly. If you are new to welding, remember that penetration is key. You want the weld pool to consume the base metal of both pieces, creating a single, monolithic structure.
Controlling Thermal Expansion and Contraction
- Tack Welding: Use heavy tacks every 6 inches before final passes.
- Cooling Time: Allow the joints to air-cool; never quench a structural weld with water, as this can make the steel brittle.
- Joint Design: Use lap joints or gussets for added surface area and strength at the corners.
Anchoring and Suspension Strategies for High-Mass Loads
The connection between your steel frame and the wooden joists is the most common point of failure. You are essentially asking a piece of steel to stay put in a material—wood—that expands and contracts with the seasons.
I use heavy-duty lag shields or through-bolts where possible. If you have access to the space above the garage, through-bolting with a large “fender washer” or a steel backing plate is the gold standard. This distributes the pulling force across the entire width of the joist. If you must use lag screws, ensure they are at least 4 inches long and driven into the exact center of the joist. A pilot hole is mandatory here; without it, the lag screw will act as a wedge and split the wood, destroying its holding power.
Load Distribution Metrics for Ceiling Joists
- Standard 2×8 Joist: Can typically handle a 50-75 lb point load safely in the center of a span.
- Suspended Frame Advantage: By using four or six suspension points, we distribute a 500 lb load so that each joist only “feels” a fraction of the weight.
- Safety Factor: Always aim for a 4:1 safety factor. If you plan to store 500 lbs, build the system to technically hold 2,000 lbs.
Leveling and Final Alignment of the Storage Surface
Once the frame is hung, it needs to be leveled. This isn’t just for aesthetics. If a heavy casting, like a 100-pound lathe bed, is sitting on a slanted surface, it will constantly exert a lateral force on the suspension rods.
I use a precision machinist’s level for this task. While a standard carpenter’s level is fine for a bookshelf, we are aiming for classic tool alignment tolerances. By adjusting the nuts on the threaded rods, you can “tram” the deck until it is perfectly horizontal in both axes. This ensures that the weight is distributed equally across all suspension points. It is the same patience required when leveling a lathe to ensure it doesn’t turn a taper.
The Importance of Surface Flatness
If your frame is twisted, the “decking” (usually heavy expanded metal or thick plywood) won’t sit flat. This creates “soft spots” where the weight isn’t supported by the steel. In machinery restoration, we use hand scraping to ensure two flat surfaces mate perfectly. While you don’t need to scrape your storage frame, you should ensure the mounting brackets are flush. If there is a gap, use steel shims—just as you would when aligning a motor to a headstock.
Case Study: Storing the Components of a 1930s Band Saw
A few years ago, I rescued a 20-inch cast-iron band saw. The wheels alone weighed 40 pounds each, and the table was a solid 90-pound slab of ribbed iron. During the restoration, I needed to clear my workbench to pour new babbitt bearings for the main drive shaft.
I moved the cleaned and primed castings to my overhead steel deck. Because I had built the deck with 2-inch C-channel and 5/8-inch rods, I didn’t see a hint of deflection. This allowed me to keep the parts organized and out of the way of the “swarf” and oil of the bearing work. Having a dedicated, high-strength space for “work in progress” parts prevents the clutter that often leads to lost fasteners or chipped castings.
Tracking Your Restoration Inventory
When parts go up on the loft, they can be forgotten. I use a simple inventory sheet to track my “rescues.”
- Part Name/Machine: (e.g., Tailstock, 13″ South Bend).
- Current State: (e.g., Stripped, primed, awaiting hand-scraping).
- Fastener Location: (e.g., Small parts in labeled bin #4).
- Weight Estimate: (Helps monitor the total load on the loft).
Maintaining Your Storage Infrastructure
Just like the machines we love, a storage structure requires periodic inspection. Every six months, I climb up and check the tension on the nuts. Vibrations from heavy machinery running nearby—like a large air compressor or a milling machine—can slowly back off fasteners over time.
I also look for any signs of “creep” in the ceiling joists. If you see the wood beginning to bow or if the threaded rods are no longer plumb, it’s time to reduce the load. Removing machinery rust from the suspension hardware is also vital if your garage is unheated. A light coat of paste wax or a “dry” lubricant can prevent the rods from seizing, ensuring you can always adjust them if the house settles.
Actionable Benchmarks for a Safe Build
- Minimum Steel Thickness: 3/16 inch for light loads; 1/4 inch for heavy machinery parts.
- Threaded Rod Diameter: 1/2 inch minimum (Grade B7 or Grade 8).
- Weld Bead Length: Minimum 1-inch beads every 3 inches for structural joints.
- Leveling Tolerance: Within 0.005 inches per foot for a stable deck.
Practical Next Steps for the Machine Restorer
If your shop is currently a sea of cast iron and you are tripping over vintage pulleys and motor mounts, start by measuring your ceiling height. You need enough clearance to walk under the deck without sacrifice, but enough space above it to slide in a heavy casting.
Start by sourcing your steel. Visit a local fabricator and ask for “drops”—leftover pieces of angle or channel. They are often sold by the pound and are perfect for this type of project. Once you have your materials, treat the build like a machine restoration: clean the metal, drill with precision, weld with care, and align with a machinist’s eye. The result will be a storage solution as rugged and reliable as the tools you spend your life reviving.
FAQ: Building Heavy Steel Overhead Storage
How do I know if my garage ceiling can handle the weight of cast iron parts? You must inspect the joists for size (e.g., 2×8 or 2×10) and span. A general rule for machinery restorers is to distribute the weight across as many joists as possible. If you are unsure, consult a structural chart for “allowable dead loads” in residential wood framing. Always err on the side of caution and keep the total load under 500-750 lbs for a standard DIY steel frame.
Can I use cable instead of threaded rods for suspension? While 1/4-inch or 3/8-inch steel cable has a high breaking strength, it is much harder to level and can “stretch” under long-term heavy loads. Threaded rods are preferred for machinery storage because they allow for micro-adjustments with a wrench, similar to how you would tram a mill head.
What is the best way to prevent the steel frame from rusting in a humid garage? After removing machinery rust and finishing your welds, prime the steel with a high-zinc cold galvanizing spray or a dedicated “chassis” paint. These coatings are designed for harsh environments and will prevent the “blooming” of rust that can eventually weaken your welds.
Should I weld the frame in place or on the ground? Always weld the main frame on a flat floor or a dedicated welding table. This ensures the structure is square and flat. Trying to weld overhead is difficult, dangerous, and often results in poor penetration. Once the frame is complete and cooled, lift it into position using a floor jack or a series of pulleys.
Is expanded metal better than plywood for the decking? For machinery restorers, heavy-gauge expanded metal (flattened) is superior. It doesn’t trap moisture against your cast iron parts, which prevents “shelf rust.” It also allows you to see what is on the rack from below and doesn’t collect as much dust and swarf as a solid wood surface.
How do I handle “stuck” nuts on my suspension rods if I need to adjust them later? Use the same techniques you use for machine disassembly. A 50/50 mix of ATF and acetone is an excellent penetrant. To prevent this issue entirely, apply a small amount of anti-seize to the threads during the initial assembly.
What is the “safety factor” and why is it 4:1? The safety factor accounts for imperfections in materials, welds, or wood grain. If your calculations say a rod can hold 1,000 lbs before snapping, you only load it to 250 lbs. This margin of safety is standard in industrial engineering and is crucial when you are working underneath heavy suspended loads.
How do I ensure my ceiling anchors don’t pull out? The key is depth and centering. A lag screw must penetrate the wood by at least 2.5 to 3 inches. If you miss the center of the joist, the wood can “blow out” the side, losing all its grip. Use a high-quality stud finder and verify the center by drilling a tiny 1/16-inch “scout hole” to feel the resistance of the wood.
(This article was written by one of our staff writers, Richard Beaumont. Visit our Meet the Team page to learn more about the author and their expertise.)