How to Restore a Vintage Mechanical Arbor Press (DIY Guide)
Walking into a damp scrap yard to find a 150-pound block of orange-tinted iron is a feeling most people wouldn’t understand. For those of us who spend our weekends elbow-deep in degreaser, that sight represents a mechanical puzzle waiting to be solved. I have spent nearly two decades pulling pre-war lathes and abandoned shop fixtures from the brink of the melting pot. There is a specific satisfaction in taking a manual arbor press—a tool that has likely sat seized and neglected for forty years—and returning it to a state where the ram glides with a finger’s touch. These tools were built in an era when “lifetime” meant the life of the machine, not the consumer.
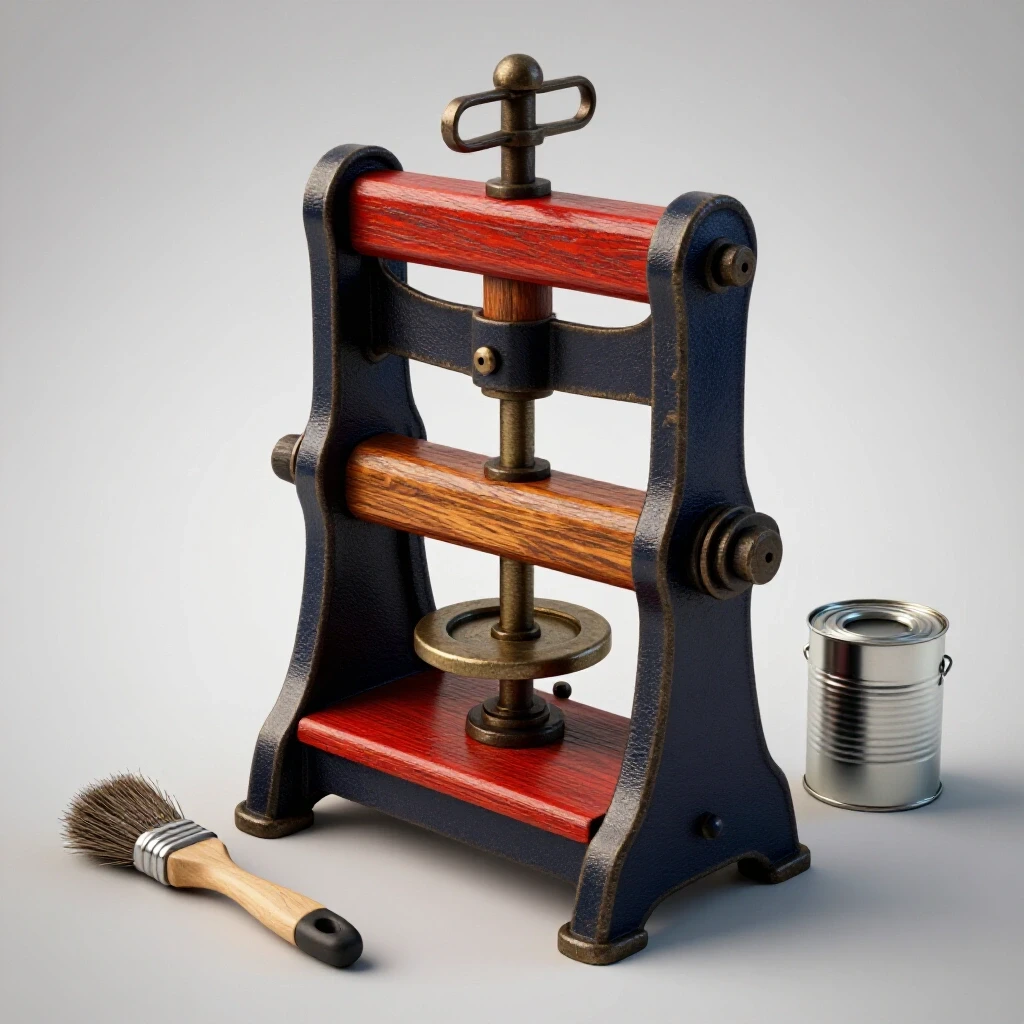
Restoring these heavy cast-iron stalwarts is not about a quick spray of paint. It is a methodical process of uncovering the original engineering intent. You are not just cleaning a tool; you are recalibrating a piece of history to factory tolerances. This requires a blend of chemical knowledge, mechanical patience, and an eye for precision that modern “disposable” tools simply don’t demand.
Navigating the Initial Evaluation of a Found Casting
Evaluating a vintage manual press involves a systematic check of the cast-iron frame for structural cracks, assessing the wear on the rack-and-pinion teeth, and determining if the ram is bent. This stage prevents wasting resources on a tool that cannot safely hold its rated pressure.
Before I even think about turning a wrench, I perform a “ring test” on the main frame. I tap the casting with a small brass hammer. A clear, bell-like ring suggests a solid, crack-free casting, while a dull “thud” often signals a hidden hairline fracture. In my 18 years of restoration, I’ve learned that a cracked frame is usually a dealbreaker. Cast iron is notoriously difficult to weld without specialized pre-heating equipment and nickel rods, and even then, the structural integrity for high-pressure tasks is compromised.
I also look closely at the rack—the notched part of the ram—and the pinion gear that drives it. If the teeth are rounded or “hooked,” the tool will slip under load. I check the ram for straightness by rolling it on a known flat surface, like a granite surface plate or a thick glass pane. Even a 0.005-inch bend can cause the ram to bind halfway through its stroke, making the tool more of a paperweight than a precision instrument.
Essential Assessment Checklist for Vintage Iron
- Frame Integrity: Check for cold shuts (casting flaws) or stress cracks around the throat.
- Ram Condition: Verify the rack teeth are not sheared or excessively thinned.
- Base Flatness: Ensure the “anvil” or base plate hasn’t been scarred by decades of off-center pressing.
- Hardware Check: Identify if the fasteners are standard or obsolete “bastard” threads from the early 20th century.
Strategies for Disassembling Seized Iron Components
Disassembling a decades-old tool requires patience to overcome galvanic corrosion where steel fasteners meet cast iron. Using heat, vibration, and specialized penetrants allows for the removal of taper pins and set screws without snapping the brittle vintage hardware or damaging the main casting.
One of the most common hurdles I face is the seized taper pin. These are smooth, slightly conical pins used to lock handles to shafts. If you hit them from the wrong side, you only wedge them tighter. I use a digital caliper to measure both ends of the pin; the smaller diameter is the side you must strike. Interestingly, I’ve found that a 50/50 mix of Automatic Transmission Fluid (ATF) and acetone outperforms almost every commercial “bolt buster” on the market for penetrating deep into these rusted joints.
When a part refuses to budge, I employ a “thermal release plan.” Cast iron and steel expand at different rates. By gently heating the casting around a seized shaft with a propane torch—never getting it red hot, just enough to sizzle a drop of water—the hole expands slightly more than the steel shaft inside it. This creates a microscopic window for the penetrant to “wick” into the joint. I once spent three days on a single 1930s press handle, alternating between heat and ice-cold water cycles, before the rust finally gave up its grip.
Comparison of Seized Part Release Methods
| Method | Best For | Risk Level | Success Rate |
|---|---|---|---|
| Penetrating Oil (ATF/Acetone) | General rust, tight threads | Low | High (requires 24-48 hrs) |
| Thermal Expansion (Heat) | Heavily seized shafts, pins | Medium (can crack iron) | Very High |
| Vibration (Air Hammer) | Breaking rust seals | High (can mushroom parts) | Medium |
| Manual Impact | Taper pins, set screws | Medium | High (if direction is correct) |
Removing Heavy Rust Without Damaging Base Metal
Chemical rust removal focuses on lifting oxidation through chelation or electrolysis rather than aggressive grinding. These methods preserve the original machining marks and dimensions of the ram and frame, which is critical for maintaining the tight tolerances needed for precise metalworking tasks.
I generally avoid “sandblasting” vintage machinery. The abrasive grit can find its way into internal oil passages and act like sandpaper once the machine is back in use. Instead, I prefer an electrolysis bath. I submerge the iron in a solution of water and washing soda (sodium carbonate), using a 12V DC power supply. The part is connected to the negative terminal, while a piece of scrap steel (the anode) is connected to the positive.
The process is fascinating to watch. Over 12 to 24 hours, the electricity literally pulls the oxygen away from the rust, turning the red oxide into a soft black sludge that wipes off with a scotch-brite pad. This method is “self-limiting,” meaning it won’t eat away the healthy metal. This is vital for the ram of the press, where maintaining a diameter within 0.001–0.002 inches of the bore is the difference between a precision tool and a sloppy one.
Rust Removal Technique Trade-offs
- Electrolysis: Best for complex castings. Requires a tub and power source. Very safe for base metal.
- Evaporative Chelators (e.g., Evapo-Rust): Non-toxic and easy. Great for smaller parts like handles and gears. Can be expensive for large frames.
- Wire Wheeling: Fast for flat surfaces. Risk of rounding off sharp edges or “polishing” the rust into the metal.
- Acid Dipping (Vinegar/Citric): Cheap but aggressive. Can cause “hydrogen embrittlement” in high-carbon steel parts like the rack.
Restoring the Ram and Pinion Gear Mechanics
Servicing the internal mechanics involves inspecting the rack teeth and the pinion gear for chips or uneven wear patterns. Restoring these parts often requires cleaning out decades of hardened grease and occasionally filing burrs to ensure the ram moves smoothly through its full stroke.
The “heartbeat” of a manual press is the interaction between the pinion gear (the small gear attached to the handle) and the rack (the teeth on the ram). In many older machines, I find that “backlash”—the amount of free play before the teeth engage—has become excessive. This is often due to the pinion shaft’s bushings wearing out. If the shaft can wiggle in its hole, the gears won’t mesh at the proper depth.
Building on this, I often find “burrs” on the edges of the rack teeth. These are small curls of metal pushed out by years of heavy pressure. I use a fine needle file to gently dress these edges. You aren’t trying to reshape the tooth, just removing the interference. A common mistake I see is people over-lubricating these gears with heavy grease. In a dusty shop, grease turns into a grinding paste. I prefer a “dry” molybdenum lubricant or a very light coat of way oil that doesn’t attract grit.
Precision Benchmarks for Mechanical Parts
- Pinion Shaft Clearance: Aim for 0.001 to 0.003 inches of play in the bushings.
- Rack Parallelism: The rack should be parallel to the back of the ram within 0.002 inches over its length.
- Tooth Engagement: At least 75% of the tooth width should make contact with the pinion.
Precision Alignment and Hand Scraping Techniques
Precision alignment ensures the ram travels perfectly perpendicular to the base plate for accurate pressing operations. This process often involves checking for “slop” or backlash in the movement and potentially hand-scraping the internal ways to achieve a consistent fit across the entire travel distance.
When a press is “loose,” the ram will tilt as you apply pressure. To fix this, we look at the “ways”—the sliding surfaces inside the frame. If the ways are worn unevenly (usually in the middle of the stroke), the ram will be tight at the top and bottom but wobbly in the center. This is where the art of hand scraping comes in. I use a carbide-tipped scraper to remove microscopic amounts of metal from the “high spots.”
I apply a thin layer of “Engineer’s Blue” (a non-drying pigment) to the ram and slide it through the frame. The blue transfers to the high spots on the internal ways. I then scrape those blue areas away and repeat the process. My goal is to achieve a density of 10–20 Points Per Inch (PPI). This creates a surface that holds a thin film of oil, preventing “stiction” (the jerky movement when you first pull the handle) and ensuring the ram stays perfectly square to the base.
The Scraping Process Steps
- Clean and Stone: Remove any raised nicks with a fine Arkansas stone.
- Blueing: Apply a thin, translucent layer of Prussian Blue to the reference surface.
- Marking: Cycle the parts to reveal contact points.
- Scraping: Use a pulling or pushing stroke to remove metal only from the marked spots.
- Verification: Check squareness using a precision machinist’s square and a dial indicator.
Sourcing Obsolete Fasteners and Fabricating Legacy Parts
Locating replacement components for pre-war machinery often requires searching for obsolete thread patterns or fabricating new pins and bushings from scratch. Since many vintage manufacturers are long defunct, the restorer must rely on historical thread databases and custom machining to maintain the tool’s original specifications.
One of the biggest frustrations in my 18 years of work is finding a bolt with a thread pitch that no longer exists. Before the 1940s, “standards” were often suggestions. I keep a comprehensive thread pitch gauge and a set of calipers handy at all times. If I find a stripped hole with an obsolete 12-24 or a non-standard fine thread, I have two choices: hunt for a “New Old Stock” fastener on auction sites or turn a new one on the lathe.
For pins and small shafts, I often use “Drill Rod” (O1 tool steel). It comes in precise diameters and can be hardened if necessary. If the original handle is missing—a common issue with barn-find tools—I look at old catalogs to find the correct proportions. A handle that is too long can encourage a user to over-torque the press, potentially snapping the cast-iron frame. I always aim for a length that matches the original mechanical advantage intended by the engineers.
Inventory and Documentation Framework
- Parts Map: Photograph every stage of disassembly. I use a digital tablet to annotate photos with measurements.
- Hardware Sorting: Use a “muffin tin” or magnetic tray, labeling each compartment with the part’s original location.
- Thread Database: Cross-reference measurements with the “Machinery’s Handbook” to identify if a thread is a standard UNC/UNF or a defunct pattern.
- Lubrication Log: Note which parts require high-pressure grease versus those needing 20-weight non-detergent machine oil.
Final Finishing and Long-Term Preservation
The final stage of restoration involves protecting the cast iron from future oxidation while ensuring the mechanical movements remain fluid. Applying a durable, oil-resistant finish and establishing a regular maintenance schedule preserves the restorer’s hard work for future generations.
I’m often asked if I use “rattle can” spray paint. While modern paints are convenient, they often dissolve the moment a bit of oil or solvent touches them. For a machine that will see real shop use, I prefer a two-part epoxy or a high-quality machinery enamel. I choose colors that reflect the era—usually a deep “machine tool gray” or a muted forest green.
Before the final assembly, I ensure all “oil holes” are clear. Many vintage presses have small Gits-style flip-top oilers or simple holes leading to the pinion shaft. I use a piece of wire to poke through any hardened, 50-year-old grease. For the final lubrication, I use a dedicated “Way Oil” (ISO 68). This oil contains “tackifiers” that help it stick to vertical surfaces, ensuring the ram stays lubricated throughout its entire travel without dripping all over the work table.
Actionable Maintenance Benchmarks
- Daily Use: Wipe down the ram with an oily rag to prevent palm-sweat corrosion.
- Monthly: Check the pinion shaft for lateral play; tighten set screws.
- Yearly: Flush the rack teeth with a mild solvent and re-apply fresh lubricant.
- Precision Check: Every two years, use a dial indicator to ensure the ram hasn’t developed “slop” in the ways.
Frequently Asked Questions
How do I know if a vintage press is made of cast iron or cast steel? Most manual presses from the early-to-mid 20th century are “Grey Cast Iron.” You can tell by looking at a non-painted area; cast iron has a dull, greyish look and produces a fine black dust when filed. Cast steel is shinier and produces long, curly chips when machined or filed. Cast iron is more brittle and prone to cracking under shock loads.
Is it safe to use a torch to remove a seized handle? Yes, but you must be careful. Cast iron can crack from “thermal shock” if heated or cooled too rapidly. Use a propane or MAPP gas torch to apply even, gentle heat. Avoid oxygen-acetylene unless you are very experienced, as it can easily get the metal hot enough to change its crystalline structure or melt it.
What is the best way to fix a “sloppy” ram that wiggles? If the press has “gibs” (adjustable metal strips on the side of the ram), you can simply tighten the gib screws to take up the slack. If it doesn’t have gibs, you may need to “shim” the ways with thin brass stock or hand-scrape the surfaces to bring them back into alignment.
Can I use WD-40 as a permanent lubricant for the gears? No. WD-40 is a “Water Displacer” and a light solvent, not a long-term lubricant. It evaporates quickly and leaves behind a sticky residue. Use a dedicated machine oil (like ISO 68) or a light, high-pressure gear grease that won’t attract excessive shop dust.
How do I remove the “mushrooms” on the top of a ram? If a previous owner hit the top of the ram with a steel hammer, the edges may have flared out (mushroomed). This will prevent the ram from retracting into the frame. Carefully file these flared edges down until they are flush with the rest of the ram’s body.
Why is my press “notching” or jumping when I pull the handle? This usually indicates a broken or chipped tooth on the pinion gear or the rack. It could also be a piece of debris or a “burr” stuck in the gear teeth. Clean the teeth thoroughly with a wire brush and inspect each one for damage.
Should I paint the sliding surfaces of the ram? Never. Paint on the sliding surfaces will peel off, gum up the mechanism, and destroy the precision fit. These surfaces should be kept as bare, polished metal and protected from rust with a thin film of machine oil.
What is the difference between a “taper pin” and a “straight pin”? A taper pin is slightly cone-shaped and is designed to be wedged into a hole for a very tight, vibration-resistant fit. A straight pin (or dowel pin) has a constant diameter. Taper pins must always be driven out from the small end.
How do I restore a heavily scarred base plate (anvil)? If the base plate is deeply pitted or scarred, it can be “resurfaced” on a milling machine or a surface grinder. For a DIY approach, you can draw-file the surface to remove high spots, ensuring it remains flat enough to support your workpieces squarely.
Where can I find manuals for a company that went out of business in 1950? The best resources are online archives like “VintageMachinery.org” or “Old專MachinePress.com.” Many enthusiasts scan and upload original catalogs and parts diagrams. You can also look for “Sears Roebuck” or “Montgomery Ward” catalogs if the tool was sold under a department store brand.
Is it worth restoring a press with a bent ram? It depends on the severity. A slight bend can sometimes be straightened using another, larger press (the irony isn’t lost on us). However, if the rack teeth are also distorted from the bend, it is often more cost-effective to use the frame for parts and find another candidate for restoration.
What is “stiction” and how do I stop it? Stiction is “static friction.” It’s that “jump” you feel when trying to move the handle slightly. It happens when the oil film breaks down and metal touches metal. Hand-scraping the surfaces to create “oil pockets” or using a high-quality way oil with tackifiers will usually eliminate this problem.
(This article was written by one of our staff writers, Richard Beaumont. Visit our Meet the Team page to learn more about the author and their expertise.)