How to Safely Transport a 3000 Lb Mill on a Trailer (Guide)
I remember standing in a cold warehouse ten years ago, staring at a 3,000-pound vertical mill that I had just bought for my growing side business. It was a beautiful piece of cast iron, but it was also a massive liability if I couldn’t get it back to my shop safely. At that moment, I wasn’t just a fabricator; I was a logistics manager and a risk assessor. For those of us moving from hobby work to a professional side-hustle, these moments are the true tests of our business logic. If I dropped that machine, my investment would vanish before it ever cut a single chip. If I spent too much on the move, my payback period would stretch into years instead of months.
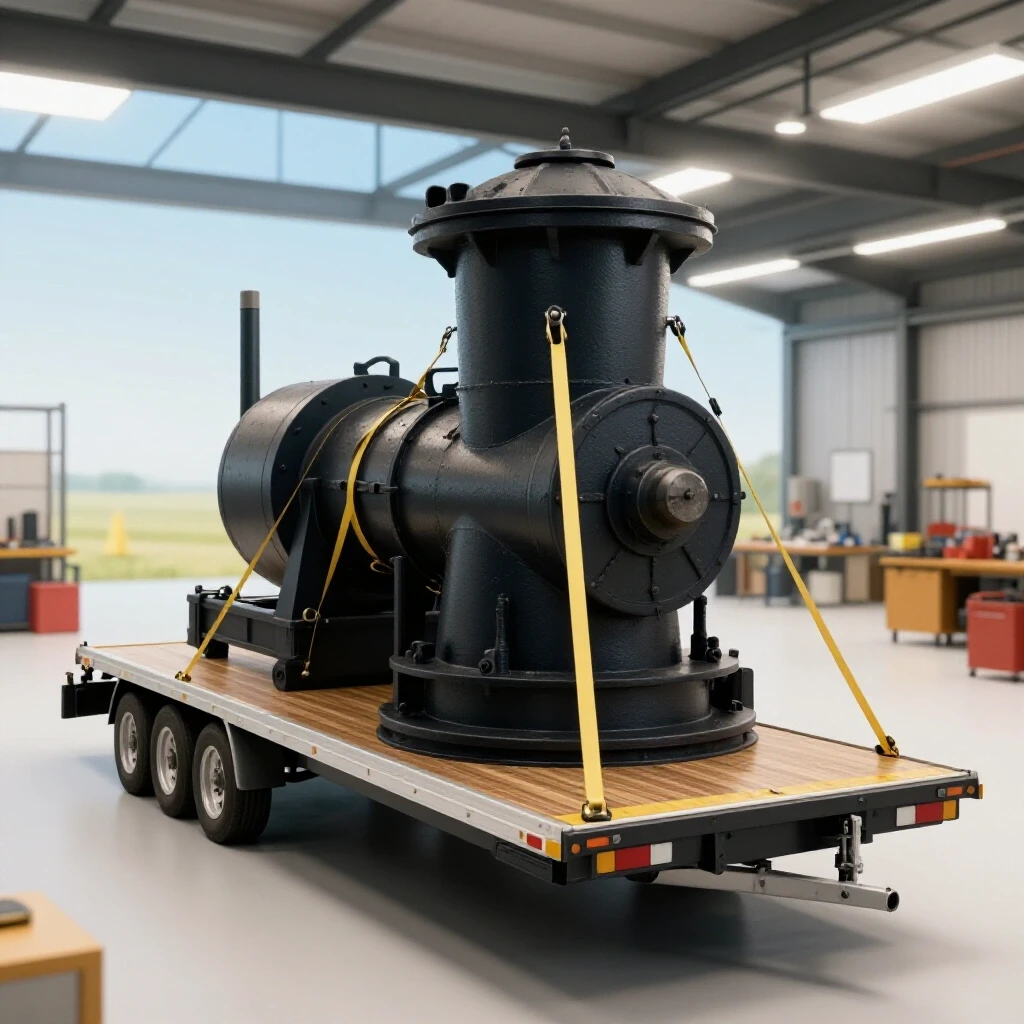
Every major equipment acquisition starts with a logistical challenge that directly impacts your bottom line. Moving a heavy machine tool is not just about physical labor. It is about protecting the capital you have worked hard to save. In this guide, I will walk you through the financial and physical realities of relocating a 1.5-ton machine. We will look at trailer specs, tie-down physics, and how these costs factor into your overall shop rate and ROI.
Evaluating Trailer Capacity and Net Payload for Heavy Machinery
Trailer capacity refers to the maximum weight a trailer is designed to carry safely, including the weight of the trailer itself and the cargo. Understanding these limits is the first step in preventing equipment damage and ensuring your business assets arrive in working condition.
When you look at a trailer, you will see a Gross Vehicle Weight Rating (GVWR). This is the total weight the axles can support. A common mistake I see side-hustlers make is assuming a 3,500-pound capacity trailer can carry a 3,000-pound mill. This is incorrect. You must subtract the weight of the trailer itself from the GVWR to find your “Net Payload.” A standard utility trailer often weighs 1,000 to 1,200 pounds. If you put a 3,000-pound mill on a 3,500-pound GVWR trailer, you are overloading the axles by 700 pounds or more. This leads to blown tires, bent axles, and a potential total loss of your machine.
For a 1.5-ton load, I always recommend a tandem-axle trailer with a GVWR of at least 7,000 pounds. This provides two 3,500-pound axles, giving you a massive safety buffer. In my experience, the extra $50 in rental fees for a heavy-duty trailer is the cheapest insurance policy you will ever buy. It ensures that the trailer’s suspension can handle the concentrated weight of a small-footprint machine like a mill.
- Verify the GVWR on the trailer’s VIN plate.
- Check the load rating of the tires specifically.
- Ensure the trailer has functioning electric or surge brakes.
- Confirm the hitch ball and receiver match the trailer’s weight class.
| Trailer Type | Typical GVWR | Empty Weight | Safe Net Payload |
|---|---|---|---|
| Single Axle Utility | 3,500 lbs | 1,100 lbs | 2,400 lbs (Too Low) |
| Tandem Axle Utility | 7,000 lbs | 1,800 lbs | 5,200 lbs (Ideal) |
| Car Hauler | 10,000 lbs | 2,500 lbs | 7,500 lbs (Excellent) |
Mastering Weight Distribution and Center of Gravity
Weight distribution is the strategic placement of cargo to ensure the trailer remains stable and the tow vehicle maintains traction and steering control. Proper placement prevents the dangerous swaying that can cause a driver to lose control at highway speeds.
A milling machine is a “top-heavy” load. Most of its 3,000 pounds is concentrated in the head and ram, which sit high above the table. When you place this on a trailer, the center of gravity is much higher than a flat load of steel plate. I learned early on that you must place the machine directly over the axles, slightly forward toward the tongue. About 60 percent of the total weight should be in the front half of the trailer.
If you place the mill too far back, the trailer will “fishtail” or sway. This is a common cause of accidents for small shop owners who are used to hauling light loads. Use a tape measure to find the center point between your tandem axles and place the center of the machine’s base about 6 to 12 inches forward of that mark. This ensures enough “tongue weight” to keep the tow vehicle’s rear tires planted without lifting the front tires.
- Lower the mill head as far as possible to drop the center of gravity.
- Center the table and lock all gibs and brakes before loading.
- Use a heavy-duty truck; a half-ton pickup is the bare minimum for this weight.
- Test the tongue weight by observing the “squat” of the tow vehicle.
Securing the Load with Industrial Grade Tie-Downs
Securing a load involves using mechanical tensioning devices to prevent any movement of the cargo during transport. This is critical because a 3,000-pound machine carries immense kinetic energy that can snap weak restraints during a sudden stop.
I never use nylon ratchet straps from a big-box store for a machine of this size. Those straps are often rated for 1,000 pounds of “working load limit” (WLL), but they stretch and can be cut by the sharp corners of a cast-iron base. Instead, I use Grade 70 transport chains and binders. If you must use straps, they should be 2-inch or 4-inch wide industrial polyester straps with a WLL that exceeds the weight of the machine by at least a 2-to-1 margin.
When securing the mill, you need at least four points of contact pulling in opposite directions. Think of it as an “X” pattern. Two chains pulling forward and down, and two chains pulling backward and down. This prevents the machine from sliding forward during braking or backward during acceleration. Interestingly, many fabricators forget that the machine can also “walk” or bounce. I always add a fifth strap over the top of the base to provide downward pressure.
- Use Grade 70 “Transport” chain (usually gold-colored).
- Check for the WLL stamp on every hook and link.
- Protect the machine’s precision surfaces with carpet or rubber pads under the chains.
- Stop and check the tension after the first five miles of driving.
Calculating the True Cost of Equipment Acquisition
Equipment acquisition cost is the total amount spent to get a tool into your shop and ready for production, including the purchase price, transport, and consumables used for setup. This figure is the foundation for your machine’s depreciation and your eventual shop rate.
When I bought my first heavy mill, I paid $2,500 for the machine. However, the “business cost” was much higher. I had to factor in the trailer rental, the fuel for a 200-mile round trip, and the cost of new Grade 70 chains. I also spent a full Saturday on the move, which meant eight hours of “lost opportunity” where I wasn’t doing paid fabrication work. If my shop rate was $75 an hour, that move cost me an additional $600 in labor value.
By the time the mill was bolted to my floor, my actual investment was closer to $3,400. If you don’t track these hidden costs, you will underestimate how much you need to charge for your services to break even. This is where many side-hustlers fail; they see the $2,500 price tag and think they are profitable, while their bank account tells a different story because they ignored the overhead of the move.
- Track every receipt for fuel, rentals, and hardware.
- Assign a dollar value to your time spent during the transport.
- Add these costs to the machine’s “basis” for tax depreciation.
- Calculate the “Payback Period” based on the total acquisition cost.
| Expense Category | Estimated Cost | Impact on ROI |
|---|---|---|
| Purchase Price | $2,500 | Primary Investment |
| Trailer Rental | $85 | Direct Overhead |
| Fuel & Tolls | $110 | Operating Expense |
| Chains & Binders | $160 | Capital Equipment |
| Your Labor (8 hrs @ $75) | $600 | Opportunity Cost |
| Total Basis | $3,455 | True Starting Point |
Integrating Machine Costs into Your Fabrication Job Costing
Fabrication job costing is the method of determining the total expense of a specific project, including materials, labor, and a portion of your shop’s overhead. Accurate costing ensures that every job contributes to paying off your equipment and generating profit.
Once that 3,000-pound mill is in your shop, it needs to pay for itself. I use a “Machine Hourly Rate” to ensure this happens. This is different from your personal labor rate. The machine rate covers electricity, tooling wear, and the amortization of the purchase price. For a mill of this size, I usually calculate a 5-year depreciation cycle. If the total cost was $3,455, and I expect to use it 500 hours a year, the machine itself costs me about $1.38 per hour just to sit there.
When you add in the “consumable burden”—things like coolant, end mills, and way oil—your small metal shop pricing starts to look more professional. I often see hobbyists charge $40 an hour because it “feels like a lot of money.” But once you factor in the $1.38 for the machine, $5 for consumables, $10 for shop rent/utilities, and your own $50 labor rate, you realize that $40 is actually losing you money.
- Divide the total acquisition cost by the expected hours of use over five years.
- Add a 15-20 percent markup on materials to cover sourcing and handling.
- Track welding consumable usage and machining fluids per project.
- Use a digital spreadsheet to log “Machine Time” vs. “Bench Time.”
Establishing a Profitable Shop Rate for Side-Hustlers
A shop rate is the hourly fee you charge customers to cover all business expenses and provide a net profit. It is the most critical number in your business, as it dictates whether your side-hustle is a job or a charity.
For most side-hustle metalworking businesses in the 35-55 age bracket, the goal is to transition from “making cool stuff” to “running a profitable shop.” Based on my analysis of regional fabrication shop rates, a healthy range for a small shop with a heavy mill and welding capabilities is $65 to $120 per hour. If you are below $65, you are likely not covering your hidden overhead, such as machine depreciation and the high cost of transport equipment.
Building on this, you must be transparent with yourself about your “efficiency factor.” When you are first learning a new machine, a job might take you four hours that a pro shop would do in two. You cannot always bill for your learning curve. However, you must bill for the value of the finished part. I suggest starting with a “base rate” that covers your bills and slowly increasing it as your speed and equipment capabilities grow.
- Calculate your “Nut”: the monthly cost to keep the lights on.
- Include a “Tool Fund” in your hourly rate for future upgrades.
- Compare your rates to local competitors, but don’t race to the bottom.
- Account for “Non-Billable” time like quoting, cleaning, and maintenance.
Why Hidden Consumables Bleed Small Shop Profits
Consumable tracking is the practice of monitoring the use of items that are “used up” during production, such as drill bits, sanding discs, and shielding gas. These small costs often go unnoticed but can represent 10-15 percent of a project’s total cost.
When I moved that 3,000-pound mill, I didn’t just need the machine; I needed the tooling to make it work. A single set of quality end mills can cost $200. If you break a $30 cutter on a $100 job, you just lost 30 percent of your gross revenue. This is the “hidden bleed” that kills small shops. I recommend adding a “Consumable Burden Factor” to every quote—usually a flat 10 percent of the labor cost.
Interestingly, the way you transport and maintain your machine also affects consumable life. A mill that was jarred or dropped during a move might have spindle run-out, which will break carbide tools prematurely. By investing in a safe, smooth transport process, you are actually protecting your future consumable budget. It is all connected.
- Keep a log of how many parts you get out of a single sanding disc or end mill.
- Buy common items like flap discs and coolant in bulk to lower the per-unit cost.
- Factor in the cost of “Shop Rags and Cleaners” which add up over a month.
- Review your consumable spending every quarter to adjust your markups.
Strategies for Sourcing Metal and Improving Margins
Material sourcing involves finding the best prices and quality for raw metals to maximize the profit margin on a fabricated part. Better sourcing allows you to be more competitive on price without sacrificing your own take-home pay.
As a side-hustler, you likely don’t have the volume to get “tier one” pricing from the big steel service centers. However, you can still be smart. When I have a job that requires a specific plate, I always check the “remnant” or “drops” section of the local supplier. Buying drops can save you 50 percent or more on material costs. Since you now have a 3,000-pound mill, you can handle larger, heavier pieces of material that hobbyists can’t, giving you a competitive edge in the local market.
I also recommend a standard material markup of at least 20 to 30 percent. If a piece of steel costs you $100, you should bill the customer $130. This covers the time you spent driving to the steel yard, the fuel for your truck, and the risk of a mistake during fabrication. If you bill at cost, you are essentially working for free during the procurement phase.
- Build a relationship with one or two local metal suppliers.
- Ask for “quantity breaks” even if you are only buying a few lengths.
- Charge a “cutting fee” if you have to process long bars into smaller pieces.
- Keep an inventory of common sizes to avoid “emergency” trips to the supplier.
Analyzing Post-Job Profits to Refine Future Bids
Post-job reconciliation is the process of comparing your initial quote to the actual time and money spent on a project. This feedback loop is the only way to ensure your shop rate and material markups are accurate.
After you finish your first few jobs on your new mill, sit down with the numbers. Did the job take six hours when you quoted four? Did you use more gas or tooling than expected? I once bid a job for a set of custom brackets. I thought it would be a simple milling task. However, I didn’t account for the setup time—clamping the parts and squaring the vise. I ended up making about $15 an hour on that job.
As a result of that failure, I changed how I quote. I now include a “Setup Fee” for every machining job. This covers the 30 to 60 minutes it takes to get the machine ready before the first chip is even cut. By analyzing your wins and losses, you turn your side-hustle into a data-driven business that can eventually fund more equipment upgrades or even a full-time transition.
- Use a simple timer app to track actual “spindle time” versus “bench time.”
- Compare your estimated material cost to the actual invoice from the supplier.
- Note any “surprises” like hard spots in the metal that ruined a cutter.
- Adjust your next quote based on these real-world findings.
Building a Sustainable Business Around Heavy Equipment
Owning a 3,000-pound mill puts you in a different class of fabricator. You can take on heavier, more precise work that commands a higher shop rate. But this advantage only exists if you manage the economics as carefully as you manage the machine. From the moment you winch that mill onto a tandem-axle trailer, you are making financial decisions that will echo through every job you quote.
By focusing on safe transport, accurate shop rates, and meticulous consumable tracking, you remove the anxiety of the “side-hustle struggle.” You move from guessing to knowing. This professional approach allows you to grow your shop at a pace that is both profitable and sustainable.
- Prioritize safety and equipment integrity during every move.
- Master the “Shop Math” of overhead and depreciation.
- Value your labor and expertise at a professional market rate.
- Continuously refine your bidding process using actual project data.
Frequently Asked Questions
What is the best way to lift a 3,000 lb mill onto a trailer?
The safest method for a side-hustler is using a heavy-duty forklift or a gantry crane. If those aren’t available, many people use a “drop-deck” trailer that lowers to the ground, allowing you to roll the machine on with pipes or a heavy-duty pallet jack. Never attempt to lift this much weight with a standard engine hoist or “cherry picker,” as they are not designed for the side-loading or the height required.
Can I use a 1/2-ton truck to tow a 3,000 lb mill?
Yes, but you must be careful. A 3,000 lb mill plus a 2,000 lb tandem trailer equals 5,000 lbs. Most modern 1/2-ton trucks can tow this, but the “payload” in the truck bed and the “tongue weight” are the limiting factors. Ensure your hitch is rated for at least 6,000 lbs and your truck’s rear suspension isn’t bottoming out.
How do I stop the mill from tipping over on the trailer?
Lower the knee of the mill all the way down and rotate the head upside down if possible. This lowers the center of gravity significantly. Use four chains pulling in an “X” pattern to the corners of the trailer. This creates a wide “footprint” of tension that prevents the machine from tipping during sharp turns or sudden maneuvers.
Why is Grade 70 chain recommended over ratchet straps?
Grade 70 chain is designed for transport and does not stretch. Nylon straps can stretch up to 10 percent under load, which allows the machine to “bounce” and potentially loosen the restraints. Additionally, the sharp cast-iron edges of a mill can easily cut through polyester webbing, whereas chain is impervious to such damage.
How do I calculate the “payback period” for a new machine?
Take the total acquisition cost (purchase price + transport + setup) and divide it by your expected monthly profit from that specific machine. For example, if the mill cost $3,500 and it helps you earn an extra $500 in profit per month, your payback period is seven months.
What is a “Consumable Burden” and why does it matter?
This is the cost of items that are used up during a job, like coolant, end mills, and electricity. If you don’t track these, they eat into your hourly profit. Most shops add a 10-15 percent “burden” to their labor rate to cover these invisible expenses.
Should I buy a new or used mill for a side-hustle?
Used mills, like an older Bridgeport, offer much better ROI because they have already gone through their steepest depreciation. You can often buy a 3,000 lb used mill for $2,000 to $4,000, whereas a new one of similar quality could cost $15,000 or more. The lower entry cost makes it much easier to achieve profitability quickly.
How much should I mark up the metal I buy for customers?
A standard markup is 20 to 50 percent. This covers your time spent sourcing the material, the cost of gas to pick it up, and the “carrying cost” of holding inventory. If a customer complains, remind them that you are providing the convenience of having the right material on hand and ready to cut.
Is it worth it to buy my own trailer for moving machinery?
Unless you move machines once a month, it is usually more cost-effective to rent a high-quality tandem-axle trailer for $80 a day. This saves you the costs of registration, insurance, tire maintenance, and storage space.
How do I know if my shop rate is too high?
If you are winning about 50 to 70 percent of the jobs you quote, your rate is likely in the “sweet spot.” If you win 100 percent of your quotes, your rate is too low. If you win less than 20 percent, you are either too expensive for your market or your quoting process is not aligning with the value you provide.
(This article was written by one of our staff writers, Michael Hargrove. Visit our Meet the Team page to learn more about the author and their expertise.)