Oxy-Acetylene Torch Safe Setup Guide for Beginners (Steps)
In my 17 years as a maintenance machinist, I have seen that the most dangerous moment in a shop is not when the sparks are flying, but during the initial assembly of high-pressure gas systems. Many fabricators spend weeks researching the best inverter welders or debating the merits of various metal lathe comparison guides, yet they treat their gas delivery setup as an afterthought. Choosing and assembling a gas-fueled thermal system requires the same eye for mechanical tolerances that you would use when checking spindle runout on a precision lathe.
I have performed countless teardowns on both premium and budget regulators. I have seen how a poorly machined valve seat or a thin, stamped-steel diaphragm can lead to “regulator creep,” where the delivery pressure rises uncontrollably. When you are dealing with oxygen at 2,000 PSI and acetylene which is unstable above 15 PSI, the build quality of your hardware is your primary safety net. This guide focuses on the mechanical integrity and sequential assembly steps needed to establish a stable workstation before you ever consider striking an arc or a flame.
Evaluating Cylinder Stability and Cart Construction
A secure workstation begins with the physical foundation of your gas cylinders. These tanks are heavy, high-pressure vessels that act like rockets if a valve is sheared off. Assessing the structural dampening and rigidity of your cylinder storage system is as critical as evaluating cast iron dampening specs on a milling machine.
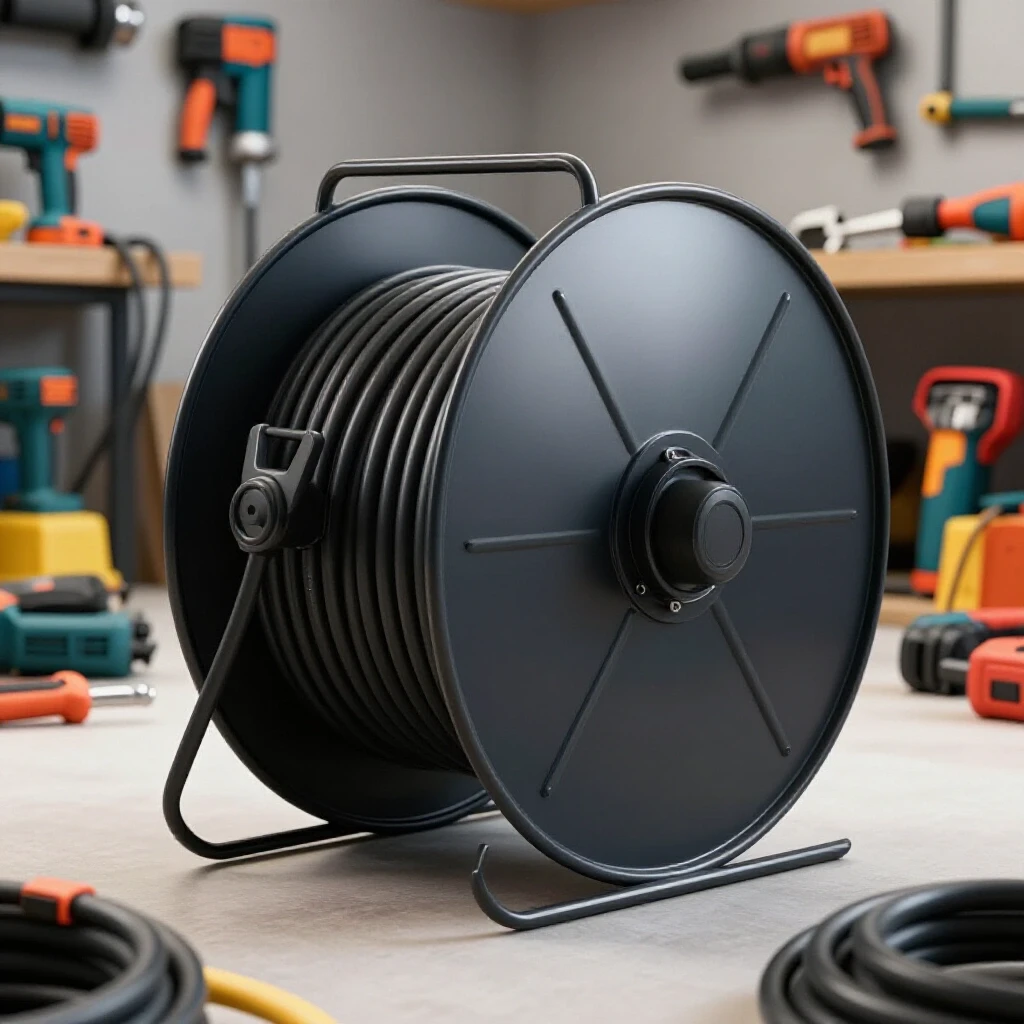
Cylinders must be immobilized in an upright position. I prefer heavy-gauge steel carts with wide wheelbases to prevent tipping. In my shop, I look for carts with integrated safety chains or solid steel straps. A flimsy cart made of thin-walled tubing will flex under the weight of a full “K” size oxygen cylinder, which can weigh over 150 pounds. This flex puts unnecessary stress on the regulator connections and increases the risk of a tip-over during transport across a shop floor.
Assessing the Rigidity of Mobile Cylinder Carts
A high-quality cart should be constructed from heavy-wall square tubing or thick angle iron rather than thin sheet steel. Look for a low center of gravity and wheels with high-quality bearings. Inexpensive carts often use plastic wheels with sleeve bearings that fail under the 200-plus pound load of a dual-tank setup.
When I evaluate a cart, I check the weld penetration at the base plate. If the base plate is thin, it will bow over time, causing the cylinders to lean and putting tension on the manifold. A solid cart ensures that the gas delivery system remains aligned, much like how a rigid bedway maintains accuracy in machine tool reviews. If the cart is unstable, the entire system is a hazard.
Securing Tanks for Long-Term Stability
Once the cylinders are on the cart, they must be lashed to the frame. I avoid using nylon straps that can degrade or melt; instead, I use high-tensile steel chains. The chains should be tight enough that the cylinders cannot rattle or shift when the cart is moved.
In a stationary setup, I prefer wall-mounted brackets bolted directly into the building’s structural studs. This eliminates the risk of accidental knocks from moving machinery. Whether mobile or stationary, the goal is zero movement. A shifting cylinder can snap a regulator stem, leading to an immediate and violent release of high-pressure gas.
Assessing Regulator Build Quality and Internal Mechanisms
The regulator is the heart of your gas delivery system, responsible for dropping tank pressure down to a usable working level. When choosing workshop machinery, we often look at motor horsepower; with regulators, we look at the forging quality and the diaphragm material.
I always recommend heavy-duty brass forgings over lightweight aluminum or zinc-die-cast bodies. Brass is non-sparking and handles the thermal shock of high-pressure gas expansion much better than cheaper alloys. Internally, the “seat” is the most critical component. It must be machined to a high degree of flatness to ensure a gas-tight seal when the torch is closed. Just as you would measure total indicated runout (TIR) on a spindle, a regulator’s ability to hold a set pressure without “creeping” is a measure of its mechanical precision.
Single-Stage versus Two-Stage Regulator Designs
Single-stage regulators drop the pressure in one step. As the tank empties, the delivery pressure will naturally drift, requiring frequent adjustment. These are common in budget kits, but for a professional setup, they are a compromise in consistency.
Two-stage regulators use two separate internal diaphragms to drop the pressure in two steps. This provides a much more stable delivery pressure regardless of how much gas is left in the cylinder. While more expensive, the internal mechanical complexity of a two-stage unit justifies the cost for those who value precision. I have found that two-stage units generally have longer lifespans because the internal springs and diaphragms are not worked as hard as those in single-stage models.
Material Selection for Diaphragms and Gauges
The diaphragm is the flexible membrane that moves to regulate gas flow. In premium regulators, these are often made of reinforced EPDM or high-grade stainless steel. Cheaper models use thin rubber that can dry out and crack over time, leading to internal leaks.
The gauges themselves should have clear, easy-to-read faces and be protected by rubber boots. In my maintenance experience, a gauge that has been dropped or bumped can lose its calibration. I look for gauges with a “blow-out back,” which is a safety feature that directs the internal components away from the operator if the gauge tube ruptures.
| Feature | Premium Regulator (Industrial) | Budget Regulator (Consumer) |
|---|---|---|
| Body Material | Forged Brass | Cast Aluminum/Zinc Alloy |
| Stage Design | Two-Stage (Constant Pressure) | Single-Stage (Drifting Pressure) |
| Diaphragm | Stainless Steel or Reinforced EPDM | Thin Neoprene or Rubber |
| Gauge Accuracy | +/- 1.5% Full Scale | +/- 3% to 5% Full Scale |
| Seat Material | High-Performance Polymer (Kel-F) | Standard Plastic |
Hose and Flashback Arrestor Integration
Hoses are the arteries of your system, and they are often the most neglected component. When choosing workshop machinery, you wouldn’t use undersized wiring for a high-torque motor, and you shouldn’t use low-grade hoses for flammable gases.
Hoses are color-coded: green for oxygen and red for fuel gas (acetylene). They also have different thread directions to prevent accidental cross-connection. Oxygen fittings use standard right-hand threads, while fuel fittings use left-hand threads, usually identified by a notch cut into the brass nut. This is a simple but effective mechanical “poka-yoke” (error-proofing) design.
Understanding Hose Grades and Construction
Not all red and green hoses are the same. Grade R is the most common and is intended for acetylene only. If you ever plan to use other fuel gases like propane or propylene, you must use Grade T hoses. Grade T has an oil-resistant liner that won’t degrade when exposed to alternative fuels.
In my shop, I only buy Grade T. It costs a bit more, but the versatility and safety margin are worth it. I also check the reinforcement braid. A high-quality hose will have a dense synthetic braid that prevents kinking and provides a high burst pressure rating. I have seen cheap hoses develop “bubbles” or outer cover separation after only a few months of use in a busy shop.
The Role of Flashback Arrestors and Check Valves
Flashback arrestors are non-negotiable safety devices. A flashback occurs when the flame travels back through the torch and into the hoses. An arrestor contains a sintered stainless steel filter that cools the flame and stops it from reaching the regulators or cylinders.
I install arrestors at both the regulator end and the torch handle end. While some argue that this is redundant, I prefer the “belt and suspenders” approach. Check valves, which only allow gas to flow in one direction, are often built into arrestors. However, a check valve alone will not stop a flame. You need the sintered metal element of a true arrestor to quench a flashback.
Sequential Assembly of Gas Delivery Components
Assembling the system requires a methodical approach. I treat this process with the same care as I would when aligning a lathe tailstock. Every thread must be clean, and every connection must be seated perfectly to prevent leaks.
Before attaching anything, I inspect the cylinder valves. I look for oil, grease, or dirt on the oxygen valve. This is critical: oxygen under pressure can react violently with petroleum-based products. If I see any oil on an oxygen fitting, I stop and clean it with an approved, non-oil-based solvent.
The “Cracking” Procedure for Cylinder Valves
Before attaching the regulators, I “crack” the cylinder valves. This involves standing to the side and opening the valve very slightly for a fraction of a second, then closing it immediately. This blows out any dust or debris that might be lodged in the valve seat.
If you don’t crack the valves, that debris will be blown directly into your regulator’s sensitive internal filter or seat. I have seen brand-new regulators ruined because a tiny grain of sand from a construction site was blown into the diaphragm seat, preventing it from closing fully. Always blow out the valves first.
Attaching Regulators and Hoses
When I attach the regulators, I start them by hand to ensure they aren’t cross-threaded. The oxygen regulator uses a CGA-540 connection, while the acetylene regulator typically uses a CGA-510 (for large tanks) or CGA-200 (for small tanks). Use a dedicated wrench that fits the brass nuts perfectly; using pliers or a pipe wrench will mar the brass and eventually round off the corners.
- Hand-tighten the regulator nut onto the cylinder valve.
- Use a wrench to snug it down firmly, but do not over-torque. Brass is soft.
- Ensure the regulator adjustment knob is fully backed out (turned counter-clockwise) so there is no pressure on the diaphragm when the tank is opened.
- Attach the hoses to the regulator outlets, noting the left-hand threads on the red hose.
- Connect the other end of the hoses to the torch handle, ensuring the flashback arrestors are in the correct orientation (flow arrows pointing toward the torch).
Verifying Connection Integrity and Leak Detection
Once the system is physically assembled, it must be tested for leaks. This is the most important step for beginners. A small leak in an acetylene line can lead to an explosive buildup in a closed shop, and a leak in an oxygen line can make nearby materials much more flammable.
I use a dedicated, non-detergent leak detection solution or a simple mix of Ivory soap and water. Never use a soap that contains ammonia or oils, as these can react with the brass or the oxygen. I apply the solution to every single joint: the cylinder valve-to-regulator connection, the regulator-to-hose connection, and the hose-to-torch connection.
Performing the Pressure Drop Test
Beyond the soapy water test, I perform a pressure drop test for a more comprehensive check. This tests the integrity of the internal seals and the entire hose length.
- Close the torch valves.
- Open the cylinder valves to pressurize the system.
- Set the regulators to a low working pressure (e.g., 10 PSI for oxygen, 5 PSI for acetylene).
- Close the cylinder valves tightly.
- Observe the gauges for 5 to 10 minutes.
If the needles on the gauges drop, you have a leak somewhere in the system. If the needle stays rock-steady, the system is sealed. This test is more sensitive than soapy water because it can detect very slow leaks inside the regulator or through the hose walls.
Identifying and Fixing Common Leak Points
If you find a leak at a threaded connection, do not just keep tightening it. Over-tightening can deform the brass seat. Instead, take the connection apart and inspect the mating surfaces. I often find a small burr or a piece of grit is the culprit.
Never use Teflon tape or pipe dope on these connections. The brass-to-brass “bullnose” or “gland” fittings are designed to seal on a machined taper. Adding tape can actually prevent the taper from seating correctly and can introduce debris into the gas stream. If a fitting won’t seal when clean and snug, it likely has a mechanical defect and should be replaced.
Calibrating Initial Pressure Settings for System Stability
With the system leak-tested, the final step is setting the delivery pressures. This is where many beginners get confused by the marketing hype of “universal” settings. In reality, pressure settings depend entirely on the size of the tip you are using.
However, for the setup phase, we are looking to establish a stable baseline. Acetylene has a hard physical limit: it becomes unstable and can decompose explosively if pressurized above 15 PSI in its gaseous state. Most beginners should never need to set their acetylene regulator above 5 to 7 PSI for standard tasks.
Understanding the Regulator Adjustment Process
To set the pressure, you must have gas flowing. Setting pressure against a closed torch valve is called “static pressure,” and it will always drop slightly once you open the torch (this is called “dynamic pressure”).
- Ensure the torch valves are closed.
- Slowly open the oxygen cylinder valve all the way. (Note: Oxygen valves are back-seating; they must be fully open to seal the stem).
- Slowly open the acetylene cylinder valve about 3/4 of a turn. (This allows for quick shut-off in an emergency).
- Open the oxygen valve on the torch handle slightly.
- Turn the oxygen regulator adjustment knob clockwise until the gauge reaches your desired pressure.
- Close the torch valve.
- Repeat the process for the acetylene side.
Establishing a Safe Working Environment
Once the pressures are set, I take one last look at the workspace. The hoses should be coiled neatly to prevent tripping, and the cylinders should be far enough away from the work area that they won’t be showered with sparks.
I also check that my regulators are not “creeping.” After closing the torch valves, I watch the delivery pressure gauges for a minute. If the needle continues to climb after the flow has stopped, the internal regulator seat is leaking. This is a sign of a faulty or dirty regulator that needs maintenance. Just as I wouldn’t run a lathe with a loose chuck, I won’t use a regulator that can’t hold a steady pressure.
Troubleshooting Mechanical Mismatches in Setup
Sometimes, even with the best research, you might encounter parts that don’t fit. This is common when mixing different brands or older equipment with new tanks. Understanding the mechanical standards helps you navigate these hurdles without resorting to dangerous “hacks.”
For example, if your regulator doesn’t fit your acetylene tank, you likely have a mismatch between CGA-510 and CGA-300 valves. These are different standards for different tank sizes and gas types. Never try to force a fitting or use an adapter unless it is an industry-standard brass fitting designed for that specific purpose. In my experience, the safest route is to exchange the tank or the regulator so they match natively.
Inspecting Torch Handle Internal Seals
The torch handle itself has internal O-rings where the tip or cutting attachment connects. These are often overlooked during the initial setup. I always inspect these O-rings for cracks or flat spots.
If these O-rings fail, oxygen and fuel can mix inside the handle before they reach the tip, which can cause a “pop” or a backfire. A small amount of silicone-based, oxygen-safe lubricant can help these O-rings seal and last longer, but ensure it is specifically labeled as safe for oxygen service. Petroleum jelly or standard grease is strictly forbidden.
Maintaining the Sintered Filters
Most high-quality torch handles and regulators have small sintered metal filters at the inlet ports. These are your last line of defense against microscopic debris. During my annual maintenance checks, I often find these filters partially clogged with pipe scale from old cylinders.
If you notice that you can’t reach your desired pressure even when the tank is full, check these filters. They are usually inexpensive to replace and can save your regulators from expensive internal damage. It is this level of attention to mechanical detail that separates a safe, professional setup from a hazardous one.
Frequently Asked Questions
Can I use the same regulator for oxygen and nitrogen? While the threads might occasionally match or can be adapted, I never recommend it. Regulators are cleaned and lubricated for specific gases. Using an oxygen regulator for other gases can introduce contaminants that make it unsafe for oxygen use later.
Why is my acetylene gauge marked with a red line at 15 PSI? Acetylene is dissolved in acetone inside the cylinder to keep it stable. When it is in a gaseous state in your hoses, it becomes chemically unstable if compressed above 15 PSI. Exceeding this limit can cause the gas to decompose and explode without a spark.
What is the difference between Grade R and Grade T hoses? Grade R is for acetylene only and will be damaged by other fuel gases like propane. Grade T is a universal hose that can handle acetylene, propane, propylene, and natural gas. I always recommend Grade T for its versatility and superior oil resistance.
Do I really need flashback arrestors if I have check valves? Yes. Check valves only stop the reverse flow of gas; they do not stop a flame. A flashback arrestor contains a sintered element that actually extinguishes the flame. You need both functions for a safe setup.
How often should I leak-test my connections? You should perform a soapy water test every time you connect a regulator to a new cylinder. I also recommend a pressure drop test at the start of every work session to ensure the hoses haven’t developed leaks overnight.
Why do I need to “crack” the cylinder valve before attaching the regulator? This blows out any dust or debris that has collected in the valve opening. If this debris enters the regulator, it can damage the sensitive internal seat and cause the regulator to fail or leak.
What should I do if I find oil on my oxygen regulator? Do not use it. High-pressure oxygen can cause oil and grease to ignite spontaneously. Clean the fitting thoroughly with an approved, non-hydrocarbon cleaner, or take it to a professional for cleaning.
Is it okay to use Teflon tape on the regulator threads? No. The fittings used in gas delivery are designed to seal on the machined brass tapers (metal-to-metal). Teflon tape can interfere with this seal and can break off, sending bits of plastic into the regulator’s internal valves.
Why does my delivery pressure drop when I open the torch? This is known as “pressure drop” or “droop.” It happens because the gas is now flowing. You should always set your final working pressure while the gas is flowing through the torch to ensure you have the correct dynamic pressure.
How can I tell if my regulator is “creeping”? Close the torch valves and watch the delivery pressure gauge. If the needle slowly continues to rise after the flow has stopped, the internal valve seat is not closing fully. This is “creep,” and the regulator needs to be repaired or replaced.
Should I fully open the acetylene cylinder valve? No. Open the acetylene valve only 1/2 to 3/4 of a turn. This ensures that you can close it very quickly in the event of an emergency. The oxygen valve, however, should be opened fully to engage its back-seal.
What is a “back-seating” valve? High-pressure oxygen valves are designed with two seals. One seals the gas when the valve is closed, and another seals the valve stem when it is fully open. This prevents gas from leaking out around the handle while you are using it.
By following these mechanical assembly steps and focusing on the quality of your components, you can build a gas delivery system that is as reliable and precise as any other machine tool in your shop. Taking the time to understand the metallurgy of your regulators and the structural requirements of your cylinder storage is the hallmark of a professional fabricator. These pre-use steps ensure that when you finally do move on to operation, your equipment will perform exactly as intended.
(This article was written by one of our staff writers, Steven Brooks. Visit our Meet the Team page to learn more about the author and their expertise.)