Comparing Batch Processing vs One-Piece Workflow (DIY Guide)
I remember the morning I nearly tripped over a stack of thirty identical side plates for a trailer project. My shop was a sea of half-finished steel. I had spent four hours at the bandsaw, another three at the drill press, and I was looking at two days of welding ahead. The floor space was gone, my back ached from moving the same heavy parts five times, and I realized I was working hard but not moving fast. This is the moment every fabricator faces when scaling a shop. You realize that your old way of doing things—finishing one big pile before moving to the next—might actually be what is holding you back.
When I started my journey twenty years ago, I thought efficiency meant staying at one machine until the job was done. I would cut every piece, then grind every piece, then weld every piece. Over time, as I integrated CNC plasma systems and more complex tools, I saw that this “pile-up” method created massive bottlenecks. My workshop felt smaller than it was because of all the “work in progress” taking up square footage. To grow, I had to rethink how material moved through my space.
Mapping the Path of Metal: How Material Travel Dictates Shop Speed
Material travel is the total distance a piece of steel moves from the moment it enters your shop as raw stock until it leaves as a finished product. Reducing this distance is the foundation of an advanced workshop layout.
In a small-scale fabrication environment, every foot matters. If you have to carry a 50-pound plate twenty feet between the plasma table and the welding bench, and you do that fifty times a day, you are moving 2,500 pounds over a thousand feet. That is wasted energy and time. By mapping your floor, you can see where the “loops” and “backtracking” happen. I recommend literally drawing your shop floor on a piece of paper and using a colored pen to trace the path of a single part. If the lines look like a bowl of spaghetti, your layout is costing you money.
Building a linear flow means placing your machines in the order they are used. Raw material storage should be near the entry. The primary cutting station, like a CNC plasma table setup, should be the next stop. From there, parts should move to deburring, then to assembly or welding, and finally to finishing or shipping. This straight-line approach prevents the “traffic jams” that happen when you are trying to move a new sheet of steel past a welding table where you are already working.
Grouping Identical Tasks vs. Continuous Movement: Which Fits Your Shop?
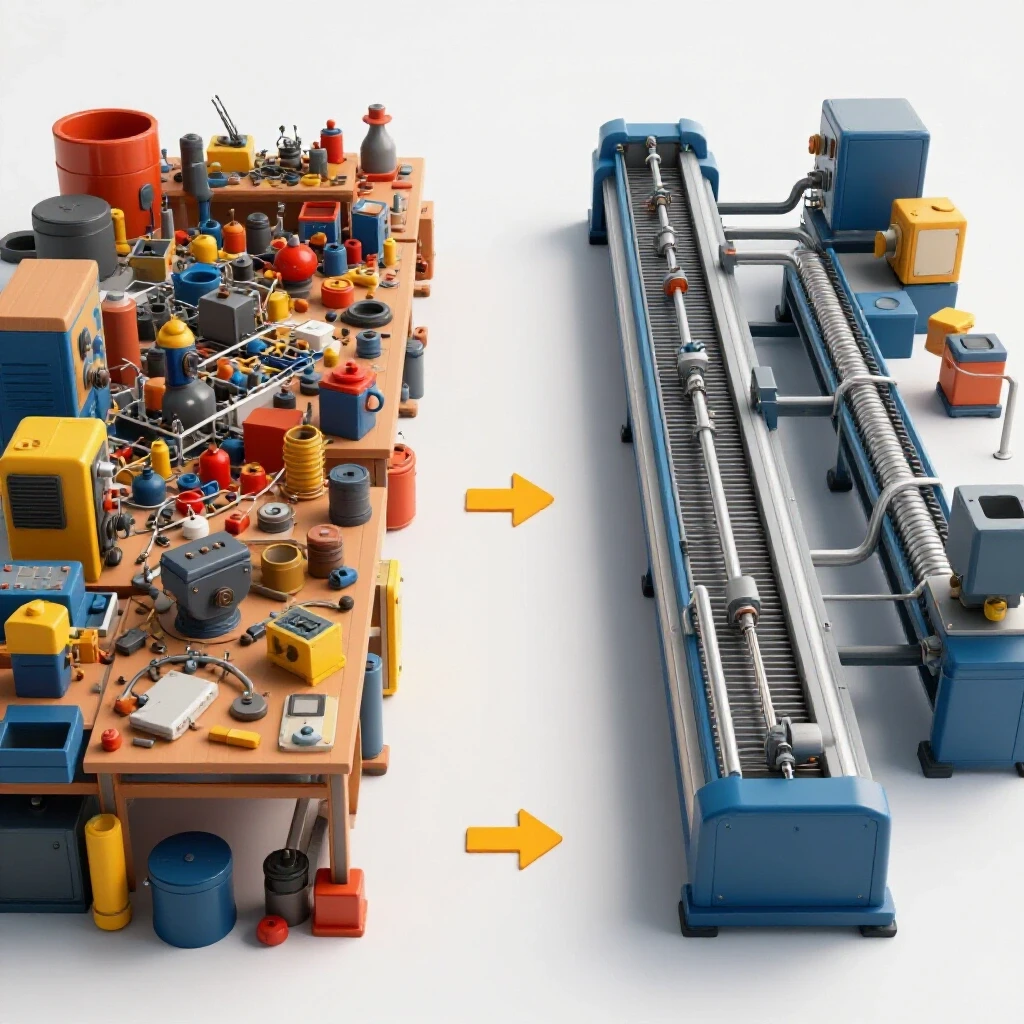
This decision involves choosing between finishing a whole pile of parts at one station before moving on, or moving a single part through every station from start to finish. Each has a place depending on your project.
When you group tasks, you save on setup time. If you set your drill press depth once and drill fifty holes, you are faster than if you reset that machine fifty times. However, this creates a “bulk” problem. You need a place to store those fifty parts while they wait for the next step. In a home-based shop, floor space is usually your most limited resource. If your shop is buried in piles of parts, you lose the ability to move freely, which slows down every other task.
The alternative is moving one piece through the entire process. This sounds slower because you are switching tools more often, but it reveals problems immediately. If your drill hole is off by a sixteenth of an inch, you find out at the welding bench on part number one, not part number fifty. For advanced shop owners, a hybrid approach is often best. Use your CNC machinery to handle the “bulk” work of cutting, but keep your assembly area clear so parts move through the welding and grinding phases without sitting on the floor for a week.
| Feature | Grouping Tasks (Batch) | Continuous Flow (One-Piece) |
|---|---|---|
| Setup Time | Low (Set it once) | High (Frequent changes) |
| Floor Space Needs | High (Storage for piles) | Low (Parts keep moving) |
| Error Detection | Late (Found at the end) | Immediate (Found on part one) |
| Tool Wear | Consistent | Varied |
| Best For | Simple, identical parts | Complex, custom assemblies |
Powering the Evolution: Managing 3-Phase Loads in a Home Setting
Moving to professional-grade machinery often requires 3-phase power, which is rarely found in residential garages. A 3-phase power converter is the bridge that allows you to run industrial mills, lathes, and heavy-duty welders on standard single-phase household current.
Most of us start with static converters because they are cheap, but they only provide about two-thirds of a motor’s rated power. This is a trap. If you are trying to scale your fabrication shop, you need a rotary phase converter or a Variable Frequency Drive (VFD). A rotary converter uses a “idler motor” to create the third leg of power, providing 100% of the machine’s capability. I’ve found that for a shop with multiple machines, a single large rotary converter is often more cost-effective than buying a VFD for every individual tool.
When installing these systems, you must balance the voltage. If one “leg” of the power is significantly higher than the others, it can overheat your motors. I always tell folks to use a multimeter to check the balance under load. The National Electrical Code (NEC) has specific requirements for grounding and wire sizing for these converters. Don’t cut corners here; a poorly wired shop is a fire hazard and can lead to expensive equipment failure. Aim for a voltage balance within 5% across all three legs to ensure your CNC motors and spindle drives live a long life.
Breathing Room: Designing High-Volume Filtration for Metal Dust and Fumes
As you increase your output, the amount of dust and fumes in the air grows exponentially. High-volume clean air filtration is not a luxury; it is a requirement for staying in the shop for eight hours a day without getting sick.
A standard shop vac or a small ceiling-mounted air cleaner won’t cut it once you integrate a CNC plasma table or heavy grinding stations. You need a system that can handle the Cubic Feet per Minute (CFM) required to pull fine particles out of the air before they settle. For a typical 20×24 foot shop, you should aim for an air exchange rate that cleans the entire volume of the room every 5 to 10 minutes. This usually means a system capable of 1,500 to 2,000 CFM.
Dust collection duct design is just as important as the fan itself. Every bend in a pipe creates “static pressure loss,” which reduces the suction at the tool. Use smooth-walled metal ducts instead of flexible ribbed hoses whenever possible. Keep your runs short and use 45-degree elbows instead of 90-degree turns. If you are running a plasma table, a water table is the most effective way to trap smoke at the source, but you still need a dedicated exhaust fan to pull the remaining fine particulates out of the building.
- Grinding Station: Requires 500–800 CFM for effective capture.
- CNC Plasma Table: Requires 1,000+ CFM if using a dry downdraft table.
- Welding Fumes: Best handled with a localized “snorkel” arm at 300–500 CFM.
From Manual to Automated: Setting Up Your First CNC Plasma System
Integrating a CNC plasma table into a manual workflow is the biggest leap an advanced hobbyist can make. It transforms you from a guy with a torch into a micro-manufacturer.
The learning curve isn’t just about the machine; it’s about the software. You have to move from “thinking in steel” to “thinking in CAD/CAM.” Computer-Aided Design (CAD) is where you draw the part, and Computer-Aided Manufacturing (CAM) is where you tell the machine how to cut it. I spent weeks struggling with “lead-ins” and “kerf compensation” when I first started. Kerf is the width of the material the plasma torch removes. If you don’t account for it, your parts will all be a sixteenth of an inch too small.
When setting up the gantry, precision is everything. A table that isn’t perfectly level will cause the torch height control to hunt up and down, leading to poor cut quality. I use a machinist’s level and take measurements at all four corners and the center. Also, consider the “slop” in your drive system. Stepper motors are common in DIY setups and are great for the price, but they can lose their position if the torch hits a piece of tip-up scrap. Servo motors are more expensive because they have “closed-loop” feedback—they always know exactly where they are—but for most home-based shops, a well-tuned stepper system is more than enough.
Why Back-and-Forth Foot Traffic Kills Shop Throughput
Every time you walk across the shop to find a tool or check a measurement, you are in “non-value-added” time. In a professional workflow, we want to minimize this “travel waste.”
I once tracked my steps during a single project using a fitness watch. I walked three miles inside a 600-square-foot shop in one day. Most of that was walking back to the tool chest for a different wrench or moving to the other side of the shop to use the belt sander. To fix this, I moved to a “cell” layout. A cell is a small area where all the tools for a specific task are within arm’s reach.
My welding cell, for example, has the welder, the clamps, the chipping hammer, and a small dedicated grinder all in one spot. I don’t have to leave that 4×4 foot area to finish a weldment. By creating these “work zones,” you reduce the mental fatigue of constantly switching gears. It also keeps your shop cleaner because the mess from one process (like grinding) stays in one area and doesn’t migrate onto your clean assembly table.
Balancing the Load: Electrical Assessments for Scaling Up
Before you add that new 5hp compressor or a 50-amp plasma cutter, you must understand your shop’s electrical capacity. Most residential sub-panels are 60 to 100 amps, which can be eaten up quickly.
Scaling a fabrication shop requires a careful look at “simultaneous load.” You might have a 50-amp plasma cutter, but are you also running a 20-amp air compressor and a 10-amp dust collector at the same time? If so, you are right at the limit of a 100-amp service once you factor in lights and fans. I recommend a “load log.” Spend a day noting which tools run at the same time.
If you find you are constantly tripping breakers, it’s time to look at your phase balancing and circuit distribution. I moved my high-draw tools to their own dedicated circuits and installed a larger sub-panel specifically for the shop. It was an upfront cost of about $1,200, but it saved me from the frustration of a machine shutting down in the middle of an expensive cut. Using a smart phase-angle controller can also help manage the “inrush current” when large motors start up, preventing those annoying light flickers and voltage drops.
Scaling Without the Stress: Software and System Commissioning
Once the machines are in place and the power is wired, the final step is “commissioning” the system. This is the process of testing everything to ensure it works as a cohesive unit.
Don’t just turn on the CNC and start cutting a customer’s project. Run “dry runs” without the torch firing to check for mechanical interference. Use modern cloud-based shop management tools to track your time and materials. Even for a one-man shop, knowing exactly how much gas and steel you used on a job is the only way to know if you are actually making a profit or just paying for an expensive hobby.
I use a simple spreadsheet to track machine hours and maintenance intervals. For example, my plasma consumables get checked every 500 pierces, and my compressor gets drained every day. This systematic approach prevents the “emergency repairs” that happen right when you have a deadline. It’s about moving from a reactive mindset—fixing things when they break—to a proactive one.
Workflow Optimization Tips for the Growing Shop
- Zoning: Group your “dirty” tools (grinders, saws) away from “clean” areas (welding, electronics).
- Shadow Boards: Hang your most-used tools on the wall right where you use them. If a tool is missing, the “shadow” tells you immediately.
- Mobile Bases: Put everything on heavy-duty casters. Being able to rearrange your shop in ten minutes to accommodate a 20-foot stick of pipe is a game changer.
- Vertical Storage: Use your wall space for metal drops and jigs. Keeping the floor clear is the best way to improve safety and flow.
- Point-of-Use Air: Run hard air lines with drops at every workstation so you aren’t tripping over hoses.
Tracking Success: The Shop Efficiency Matrix
To know if your changes are working, you need to measure them. I use a simple matrix to compare my shop’s performance before and after a layout change.
| Metric | Before Optimization | After Optimization | Goal |
|---|---|---|---|
| Travel Distance per Part | 120 Feet | 45 Feet | Under 30 Feet |
| Setup Time (Average) | 45 Minutes | 15 Minutes | Under 10 Minutes |
| Scrap Rate | 8% | 3% | Under 2% |
| Parts Produced per Week | 20 Units | 45 Units | 60 Units |
By tracking these numbers, you take the guesswork out of your shop evolution. You can see that moving the bandsaw six feet closer to the rack actually saved you three hours a month. That is the data-driven approach that separates a professional operation from a hobbyist setup.
Final Steps for Your Workshop Evolution
The transition from a hobby space to a semi-professional fabrication shop is a marathon, not a sprint. It requires a shift in how you view your time and your space. Start by clearing the floor. If you haven’t used a piece of equipment or a scrap of metal in two years, get rid of it. Space is your most valuable tool.
Next, focus on your material flow. Move your machines into a logical sequence, even if it feels cramped at first. Address your power and air quality needs before they become a health or safety issue. Finally, embrace the learning curve of CNC technology. It will be frustrating at first, but the ability to produce repeatable, high-quality parts is what will allow you to scale.
Your shop should work for you, not the other way around. By applying these systematic principles, you can reduce the physical toll on your body and the mental stress of a cluttered workspace. The goal is a shop where the work flows naturally from one station to the next, leaving you with more time to focus on the craft itself.
Frequently Asked Questions
How do I decide if I should finish all my cuts at once or move one part at a time? It depends on your setup time. If your saw takes ten minutes to square up, cut everything at once. If you are using a CNC plasma table where the setup is mostly digital, you can afford to cut smaller batches or even single parts to keep the flow moving and avoid cluttering your floor.
Is a rotary phase converter better than a VFD for a home shop? A rotary converter is best if you want to power multiple machines from one source. A VFD is excellent for a single machine because it also gives you speed control. For a scaling shop, a large rotary converter is usually the more flexible and robust choice.
How much CFM do I really need for my dust collector? For metalworking, you need higher velocity than woodworking to move heavy chips and fine dust. Aim for at least 1,000 CFM at the tool for a CNC plasma table and 500-800 CFM for a dedicated grinding station.
What is the most common mistake when setting up a CNC plasma table? Ignoring the air quality. Moisture in your air lines will ruin your plasma consumables in minutes and cause poor cut quality. Invest in a high-quality air dryer or a multi-stage filtration system before you fire up the torch.
How can I improve my shop layout if I have very limited space? Put everything on wheels. Mobile bases allow you to “nest” your machines against the wall when not in use and pull them into a linear flow only when you need them.
What is “static pressure” and why does it matter for my shop vacuum? Static pressure is the resistance the air faces as it moves through your ducts. Long hoses, small diameters, and sharp turns increase this resistance, making your fan work harder and pull less air. Use large, smooth pipes to keep your suction high.
Do I really need 3-phase power for a small fabrication shop? You don’t need it, but it opens the door to much higher-quality, used industrial machinery that is often cheaper and more durable than new single-phase “hobbyist” tools.
How do I account for the “kerf” on my CNC cuts? Most CAM software has a setting for “tool compensation.” You measure the width of the cut your plasma torch makes (the kerf) and enter that value. The software then automatically offsets the path of the torch to ensure your part comes out the correct size.
What is the best way to manage welding fumes in a garage? Source capture is king. Use a fume extraction arm that sits right over your work area. Exhausting the air outside is the most effective, but if you must recirculate it, use a HEPA-rated filter designed for metal fumes.
How often should I maintain my CNC gantry? Check your belt tension and lubricate your rails weekly if you are running the machine daily. Dust and grit are the enemies of precision; a quick wipe-down at the end of every day will save you hours of troubleshooting later.
Can I run a 3-phase converter on a standard 200-amp home service? Yes, easily. Just ensure your converter is sized correctly for the motors you plan to start. A 10hp rotary converter will typically pull about 30-40 amps from your single-phase panel under full load.
What is the “one-piece flow” benefit for a solo fabricator? It prevents “batch errors.” If you weld a part incorrectly, you find out immediately on the first one, rather than finishing twenty parts and realizing they are all scrap. It also keeps your workbench clear of clutter.
(This article was written by one of our staff writers, Edward Sinclair. Visit our Meet the Team page to learn more about the author and their expertise.)