How to Build a Custom Metal Drill Bit Index Cabinet (Plan)
In my 18 years of restoring pre-war lathes and heavy-duty drill presses, I have learned that the most frustrating part of a machine rescue isn’t the seized spindle or the cracked casting. It is the three hours spent hunting for a specific #29 wire gauge bit needed to tap a hole for an obsolete 8-32 thread. When you are elbow-deep in a vintage machinery restoration, your workspace often becomes a battlefield of discarded fasteners and rusted components. To bring a classic machine back to its factory tolerances, you need more than just patience; you need a systematic way to house your precision cutting tools.
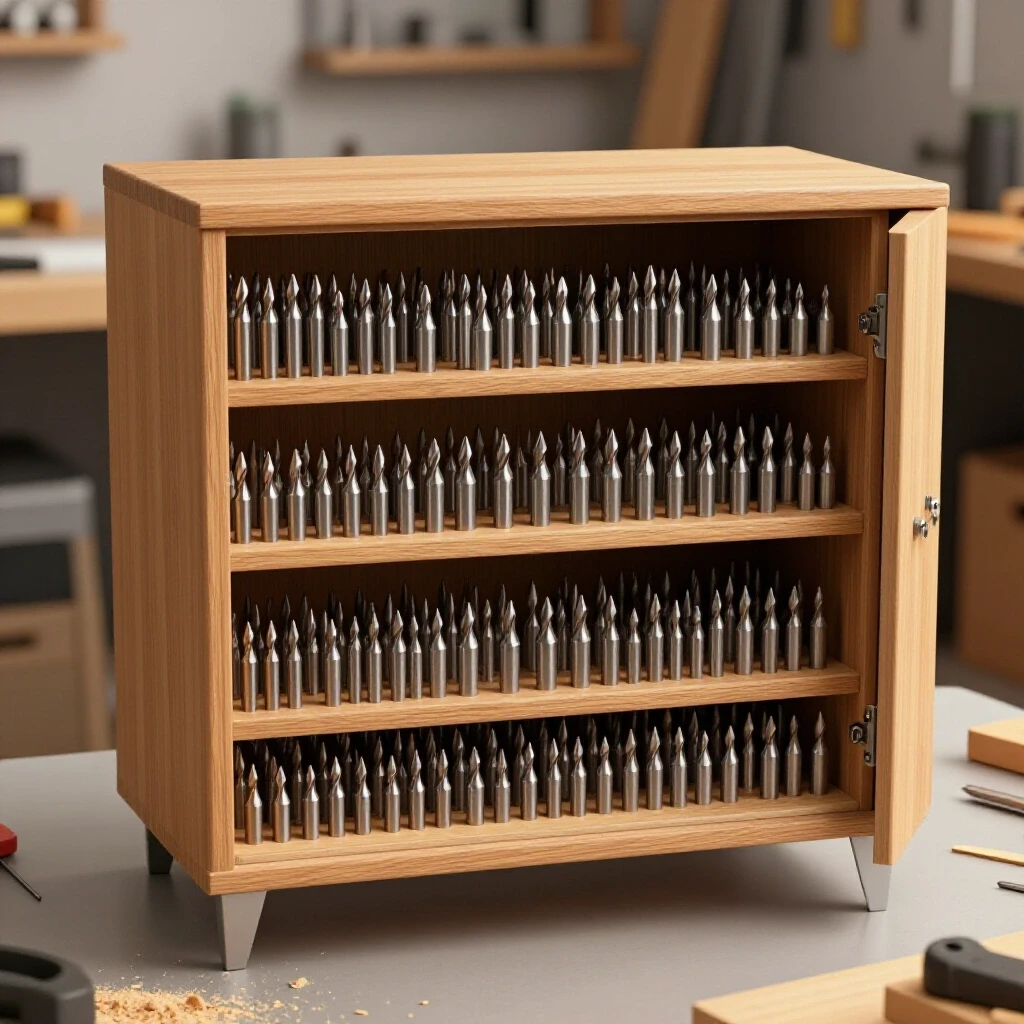
Building a dedicated sheet-metal housing for your drill bits is a rite of passage for any restorer. It is a project that mirrors the challenges of restoring classic cast iron: it requires precise layout, an understanding of material thickness, and the use of mechanical fastening techniques that have stood the test of time. Whether you are working on a 1940s South Bend lathe or a salvaged Buffalo Forge drill press, having a custom-built, all-metal storage solution ensures your bits remain sharp and organized by size.
Establishing the Structural Foundation for Heavy Tool Storage
Creating a durable housing for cutting tools requires a deep understanding of how sheet steel behaves under stress and weight. A full set of fractional, letter, and number bits can weigh upwards of fifteen pounds. This weight, concentrated in a small area, will cause thin-gauge metal to sag or warp over time, leading to misaligned rows and stuck drawers.
In my shop, I always start by evaluating the structural requirements of the project. For a wall-mounted or bench-top unit, I recommend cold-rolled steel between 16 and 18 gauge. This thickness provides the rigidity needed to support the weight of high-speed steel (HSS) bits while remaining workable on manual shop equipment. If you are using salvaged metal from an old machine guard or cabinet, your first step is removing machinery rust to reveal the true state of the base metal.
| Material Gauge | Thickness (Inches) | Recommended Use | Weight Capacity |
|---|---|---|---|
| 22 Gauge | 0.0299″ | Light internal dividers | Low |
| 20 Gauge | 0.0359″ | Small bit tiers | Moderate |
| 18 Gauge | 0.0478″ | Standard cabinet walls | High |
| 16 Gauge | 0.0598″ | Heavy-duty base/backplate | Very High |
Mastering the Layout for Three-Tiered Bit Organization
Effective layout is the difference between a functional tool and a frustrating scrap of metal. When planning the internal rows for fractional, letter, and number bits, you must account for the “swing” of the bits as they sit in their tiers. If the rows are too close together, your fingers won’t be able to grasp the smaller bits located behind the larger ones.
I prefer a tiered design where each row is stepped slightly higher than the one in front of it. This mimics the classic industrial indexes but allows for customization based on the specific bits you use most often. For a comprehensive set, you will need three distinct sections. The fractional section typically covers 1/16″ to 1/2″ in 64th increments. The letter section covers A through Z, and the number section covers 1 through 60.
When scribing your lines onto the steel, use a high-contrast layout fluid like Dykem Blue. This allows you to see your marks clearly when using a carbide scriber. I calculate the hole spacing by taking the bit diameter and adding a clearance of 0.015″ to 0.020″. This ensures the bit slides in easily but doesn’t lean excessively, which can make the labels hard to read.
Why Seized Cast Iron Tools Complicate Fabrication Plans
Before you can even begin cutting your steel, you must ensure your fabrication tools are in top condition. Many of us rely on vintage shears and box-and-pan brakes that we’ve rescued from scrap yards. If your brake has a seized hinge or a misaligned clamping bar, your folds will be “soft” or out of square.
I once spent a week restoring a 1930s Pexto shear that had been left in a damp basement. The blade was held fast by decades of oxidized grease and flash rust. To free it, I used a 50/50 mix of acetone and automatic transmission fluid, applying heat gently with a propane torch to the outer casting. You must be careful with heat on old cast iron; if you get it too hot too fast, you risk a structural crack that is nearly impossible to repair. Once the tool is moving, you can use classic tool alignment techniques, such as checking for parallelism with a dial indicator, to ensure it will cut your new cabinet pieces accurately.
Removing Machinery Rust from Raw Stock and Donor Sheets
If you are a budget-conscious restorer, you are likely using steel that has seen better days. Restoring classic cast iron often involves the same chemical processes we use for sheet metal preparation. You cannot paint or weld over rust and expect a professional result.
For large, flat sheets of steel, I find that an electrolysis bath is often too cumbersome. Instead, I use modern water-based chelators or a phosphoric acid-based prep. These chemicals convert the iron oxide into a stable phosphate coating.
- Mechanical Cleaning: Use a wire wheel or a flap disc to remove loose scale.
- Chemical Stripping: Apply the rust remover and keep the surface wet for the duration specified by the manufacturer.
- Neutralization: Rinse with water and immediately dry the metal to prevent “flash” rusting.
- Surface Prep: Wipe the metal down with denatured alcohol before layout.
Precision Drilling and Hole Sizing for Tool Accuracy
The heart of the project is drilling the holes that will hold your bits. This is where many restorers run into trouble. If you drill a hole exactly at 0.250″ for a 1/4″ bit, the bit will likely bind due to small burrs or slight variations in the bit’s shank.
I use a step-drilling approach. Start with a small center drill to ensure the hole doesn’t wander. Then, use a bit that is roughly 1/64″ larger than the bit intended for that slot. For the number and letter bits, refer to a decimal equivalent chart. For example, a #29 bit is 0.1360″. I would drill that hole with a #28 bit (0.1405″) to provide just enough clearance.
During this process, I often think back to my first lathe restoration. I had to rebuild several sleeve bearings, and the tolerances were so tight—within 0.001 inch—that I learned the value of checking every measurement twice. Applying that same discipline to a storage cabinet ensures that your #60 bit doesn’t fall through a hole meant for a #50.
Folding the Cabinet Shell Using Manual Brakes
Once your holes are drilled and the sheet is cut to size, it is time to move to the folding phase. This is where your layout math is tested. You must account for the “bend allowance,” which is the amount of metal consumed by the radius of the bend. For 18-gauge steel, a 90-degree bend usually requires adding about half the thickness of the metal to your dimensions.
I use a manual box-and-pan brake for this. The “fingers” of the brake allow you to make multiple folds on a single piece of metal to create a box shape. If your brake is a vintage model, check the backlash in the adjustment screws. Just like the lead screw on a lathe, any play here will result in a fold that isn’t perfectly square. Aim for a tight, crisp corner. If the bend looks “rounded,” your clamping pressure is likely too low or your nose bar is worn.
Mechanical Fastening: Riveting vs. Spot Welding
In the world of vintage machinery restoration, we often avoid modern shortcuts. While a MIG welder is fast, it can create heat distortion in thin sheet metal. For an authentic, industrial look that matches a 1950s workshop, I prefer using solid rivets or high-quality pop rivets for the assembly.
Solid steel rivets require a bit more skill—you need a bucking bar and a pneumatic rivet set or a heavy hammer—but they provide a permanent, vibration-resistant bond. If you are joining the tiered bit rows to the main cabinet body, rivets allow for a small amount of movement during the assembly process, which can be helpful if your folds are a fraction of a degree off.
- Clamp the parts: Use Cleco fasteners or small C-clamps to hold the tiers in place.
- Match-drill the holes: Drill through both pieces at once to ensure perfect alignment.
- Deburr: Always remove the small metal “donuts” between the layers to ensure a flush fit.
- Set the fastener: If using solid rivets, ensure the “shop head” is fully formed and tight against the metal.
Installing Hinges and Drawer Slides for Smooth Operation
A custom bit organizer can be a simple open-faced rack, but a closed cabinet protects your tools from shop dust and moisture. If you choose to add a door, hinge alignment is critical. I prefer using a piano hinge (continuous hinge) for the full length of the cabinet. It distributes the weight of the door evenly and prevents sagging.
When installing hinges on thin metal, I avoid using self-tapping screws. They tend to vibrate loose over time. Instead, I use small machine screws (like 6-32 or 8-32) with nyloc nuts on the back. This mirrors the way classic tool cabinets were built before the era of planned obsolescence. If you are restoring an old machine, you might even have a stash of vintage fasteners that would fit the aesthetic perfectly.
Permanent Labeling Systems for the Shop Environment
There is nothing worse than a bit index where the sizes have rubbed off. In a busy shop, your hands are often covered in oil, grease, or solvent. Paper labels will peel, and permanent markers will fade.
For a truly professional finish, I use a set of metal stamps to indent the size directly into the steel tier above each hole. This takes time and a steady hand, but it is permanent. If the metal is too hard to stamp easily, another option is to use an engraver.
- Stamping Tip: Place a heavy steel block behind the tier when stamping to prevent the sheet metal from deforming.
- Visibility: After stamping, you can wipe a bit of dark paint into the indentations and wipe the surface clean. The paint stays in the grooves, making the numbers pop.
Protecting the Finished Cabinet from Corrosion
Once the fabrication is complete, you must protect your work. A raw steel cabinet will rust in a matter of days in a humid shop. I prefer a traditional machinery gray paint to match the lathes and mills I restore.
Before painting, the metal must be perfectly clean. Use a wax and grease remover. I apply a high-quality zinc-chromate primer, followed by two coats of oil-based enamel. This creates a hard, durable shell that resists chips and chemicals. If you want to go the extra mile, you can apply a thin coat of paste wax to the internal tiers to help the bits slide in and out smoothly.
Case Study: Restoring a 1946 Drill Press and Building its Companion Index
Last year, I rescued a Delta 17-inch drill press that had been sitting in an open-sided shed for twenty years. The table was a solid mass of orange scale, and the quill was frozen solid. After a month of soaking the head casting in a penetrant and carefully using a hydraulic press to free the spindle, I realized I had no place to put the specialized bits this machine deserved.
I built a tiered index using 16-gauge steel salvaged from an old electrical panel. By using the same “Machinery Gray” paint on both the drill press and the bit cabinet, the two pieces now look like a factory-matched set. The cabinet is bolted directly to the side of the drill press column, putting every bit I need within arm’s reach. This setup has saved me countless hours and prevented the loss of several expensive cobalt bits.
Troubleshooting Common Fabrication Errors
Even with 18 years of experience, things can go wrong. Sheet metal can be unforgiving. If you find that your tiers are slanted, it is usually because the holes on the side panels were not drilled in a perfectly mirrored layout.
If a fold is in the wrong place, do not try to “un-bend” it and bend it again. This work-hardens the steel and will likely lead to a crack. It is better to start that piece over. This is why I always buy 20% more material than I think I need. It provides a “frustration buffer” for when the shop gods are not smiling on your project.
Final Alignment and Precision Checks
Before you call the project finished, perform a final check of the bit fitment. Some larger bits may have slightly flared shanks if they have spun in a chuck in the past. You may need to slightly enlarge a few holes with a reamer.
Check that the cabinet sits level on your bench or hangs square on the wall. Use a precision machinist’s level if you want to be truly meticulous. A cabinet that is out of plumb might cause the bits to lean or vibrate against each other when heavy machinery is running nearby.
Frequently Asked Questions
Why should I use steel instead of aluminum for a bit organizer? Steel is more durable and matches the thermal expansion rates of your HSS bits better. It also provides a more “period-correct” look for a workshop filled with vintage cast iron machinery. Aluminum can also react with certain cutting oils over long periods.
How do I prevent the drill bits from rusting while they are in the cabinet? I recommend keeping a small VCI (Vapor Corrosion Inhibitor) emitter inside the cabinet if it has a door. Alternatively, a light wipe of camellia oil or a dedicated tool protectant on the bits will keep them rust-free without leaving a sticky residue.
What is the best way to cut the sheet metal if I don’t have a large power shear? A pair of high-quality aviation snips can work for thinner gauges, but for 16 or 18 gauge, a manual throatless shear (like a Beverly shear) is the best tool. It allows for curved or straight cuts without distorting the metal.
Can I use a spot welder instead of rivets? Yes, if you have access to a spot welder, it is a great way to join the tiers. However, ensure the metal is perfectly clean and the pressure is set correctly to avoid “blown” holes in the sheet metal.
How do I calculate the spacing for 60 different number bits? I suggest breaking the number bits into two or three rows. Grouping them (e.g., 1-20, 21-40, 41-60) makes the cabinet more compact and easier to navigate. Allow at least 1/2 inch of vertical space between the tips of one row and the base of the next.
What should I do if my vintage brake won’t hold the metal tightly? Check the eccentric adjustments on the ends of the brake. Over years of use, these can wear or slip. You may need to disassemble the clamping mechanism, clean out old grease, and re-adjust the “over-center” pressure.
Is it worth the effort to make a cabinet for letter bits? Absolutely. Letter bits are often used for specialized tapping operations in machinery restoration. Having them organized prevents you from accidentally using a “close-enough” fractional bit that might ruin a vintage thread.
How thick should the internal tiers be? I find that 18-gauge steel is perfect for the tiers. It is thick enough to hold its shape after drilling dozens of holes but thin enough to bend easily into the required “Z” or “L” shapes.
How do I handle bits larger than 1/2 inch? For large silver and deming bits (with 1/2″ shanks), I recommend a separate, deeper drawer or a heavier-duty rack made from 14-gauge steel, as the weight increases significantly.
What is the best way to deburr the holes? A dedicated hand deburring tool with a swivel blade is the fastest and cleanest way. It removes the sharp edge without enlarging the hole or leaving unsightly scratches on the surface of your new cabinet.
(This article was written by one of our staff writers, Richard Beaumont. Visit our Meet the Team page to learn more about the author and their expertise.)