How to Set Up Safe Exhaust Ventilation for Welding (Guide)
When I set up my first garage shop in 2013, I had a strict $2,000 budget and a lot of ambition. Like many of you, I spent weeks obsessing over which welder to buy and which grinders would last the longest. I tracked every penny in a spreadsheet, but I made one critical error that nearly ended my hobby before it began: I treated air quality as an afterthought. I figured a propped-open garage door and a cheap box fan would be enough to handle the smoke. I was wrong. Within an hour of practicing my first beads, the air was thick, my head was throbbing, and my wife was complaining about the smell drifting into the house.
Setting up a functional fabrication space isn’t just about the tools that join metal together; it is about managing the environment where that work happens. For a beginner, the technical jargon around air movement can feel overwhelming. You hear terms like CFM, static pressure, and capture zones, and it is easy to fall into analysis paralysis. You want to be safe, but you don’t want to spend $1,500 on a professional extractor when your welder only cost $500. The good news is that you can build a highly effective system using basic components if you understand how air actually behaves in a small space.
My approach to workshop planning is rooted in my time as an industrial maintenance technician. I value structured record-keeping and data-backed decisions. In this guide, we are going to break down how to move air away from your face without breaking the bank. We will look at the math of airflow, the hardware you actually need, and how to layout your shop so you aren’t fighting your own equipment.
Understanding the Dynamics of Air Movement in Small Shops
Air movement in a workshop is the process of creating a controlled path for contaminants to travel from your welding arc to the outside world. It involves using fans to create pressure differences that pull “dirty” air into a duct and push it out of the building. Success depends on catching the fumes at the source before they have a chance to rise and disperse into your general breathing zone.
In a confined garage, air doesn’t just disappear because a window is open. You have to actively direct it. Think of air like water flowing through a pipe; any bend in the ducting or restriction in the fan creates “friction” or static pressure. For a budget-conscious beginner, the goal is to minimize this friction so your fan can work at its maximum capacity. If you don’t plan the route, you end up with a noisy fan that moves almost no air.
When I first started, I didn’t realize that heat plays a massive role. Welding fumes are hot, which means they want to rise. If your extraction point is too far away, the “thermal plume” of the smoke will bypass your fan entirely. You need a system that captures air within 6 to 12 inches of the arc to be truly effective.
Workshop Air Exchange Benchmarks
| Shop Size (Sq Ft) | Recommended CFM (Cubic Feet/Min) | Typical Fan Size | Ideal Duct Diameter |
|---|---|---|---|
| 100 – 200 (Single Car) | 200 – 400 | 6-inch Inline | 6 inches |
| 200 – 400 (Double Car) | 400 – 600 | 8-inch Inline | 8 inches |
| 400+ (Large Shop) | 800+ | Industrial Blower | 10+ inches |
Budgeting for Air Management in Your First Shop
Allocating funds for air management is as vital as buying the welder itself. A functional air management strategy typically requires about 10% to 15% of your total initial startup budget to ensure you aren’t just recirculating dirty air while you work. This prevents the “buy it twice” syndrome where a cheap, ineffective fan is eventually replaced by a proper setup.
When you are drafting your workshop budget, it is tempting to put every dollar into a higher-end machine. However, a $1,000 welder is useless if you can’t stand to be in the room with it for more than ten minutes. I recommend a “Safety First” allocation. If your total budget is $3,000, you should be looking to spend roughly $300 to $450 on your extraction components. This includes the fan, ducting, and the mounting hardware.
I keep a detailed log of every tool’s cost-to-utility ratio. In my experience, the fan is the one area where you shouldn’t go for the absolute cheapest option at the hardware store. Standard “bathroom” fans or cheap “booster” fans aren’t designed to handle the static pressure of long duct runs. You need an inline duct fan, which provides a much better balance of power and noise for the price.
Tooling-to-Machine Cost Ratios for Beginners
- Welding Machine: 40% of budget.
- Safety Gear (Helmet, Gloves, Jacket): 15% of budget.
- Air Extraction & Ventilation: 15% of budget.
- Metal Prep (Grinders, Clamps): 20% of budget.
- Consumables & Scrap Metal: 10% of budget.
Essential Components of a DIY Extraction System
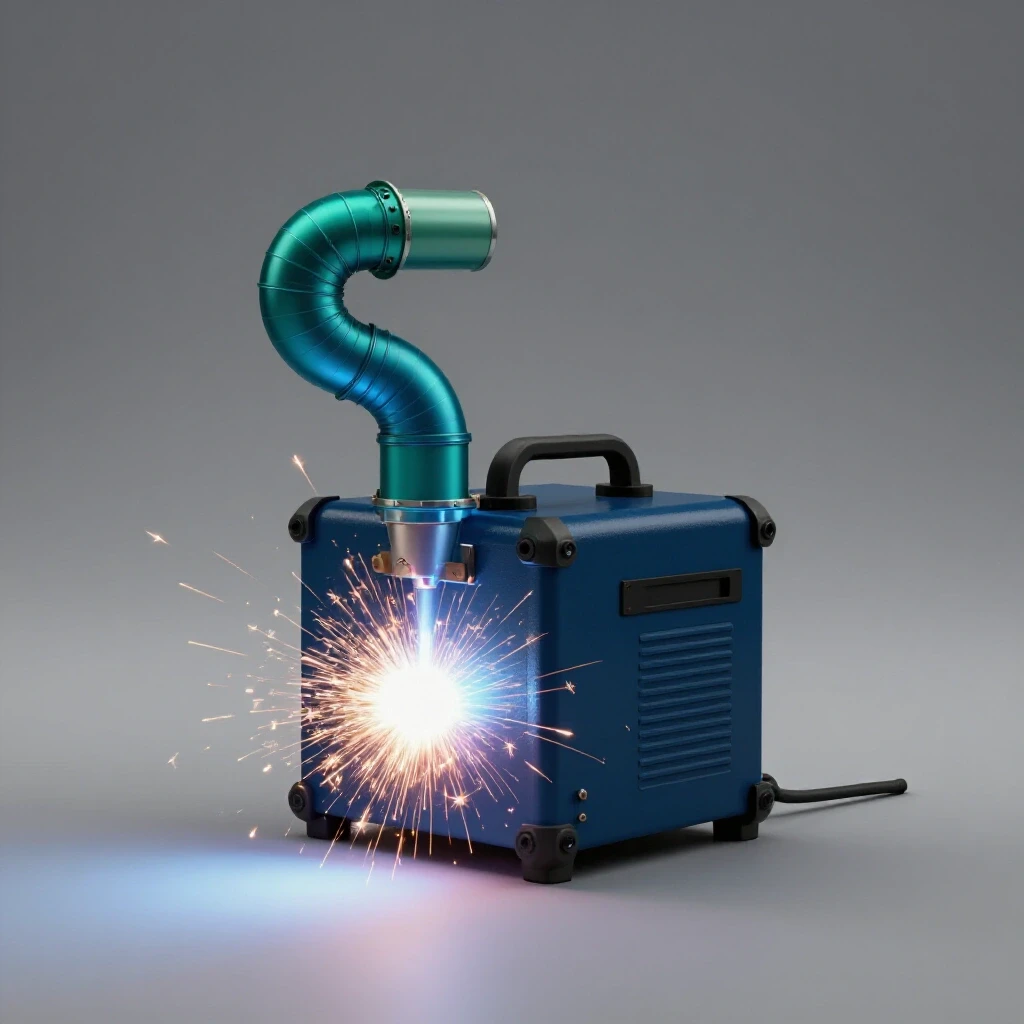
A basic home setup consists of an intake (hood or arm), ducting (flexible or rigid), an inline fan (the heart of the system), and an exhaust port. Choosing the right diameter and fan strength determines if the system actually works or just makes noise. These components work together to create a “negative pressure” zone at your workbench.
The fan is your primary investment. Look for an “Inline Duct Fan” with a High-Efficiency Particulate Air (HEPA) rating or simply a high CFM rating. For most 20×20 foot garages, a 6-inch fan rated at 400 CFM is the sweet spot. It is powerful enough to pull smoke through six to eight feet of ducting but quiet enough that you can still hear your welder’s arc, which is important for learning the “sizzle” of a good weld.
Ducting is the next piece of the puzzle. You have two main choices: flexible foil ducting or rigid semi-rigid aluminum. Flexible ducting is easier to install and move around, but the ridges inside create a lot of turbulence, which slows down the air. Rigid ducting is much more efficient but harder to reconfigure. For a beginner, I usually suggest a mix: rigid pipe for the long runs and a short piece of high-quality flex hose for the “business end” that moves with you.
Component Checklist for a $250 Setup
- 6-inch Inline Duct Fan (400+ CFM): The primary mover of air.
- 10-foot Flexible Aluminum Ducting: To connect the fan to the outside.
- Worm Gear Clamps: To ensure airtight seals at all connections.
- Magnetic Base or Articulated Arm: To hold the intake hood near the weld.
- Exterior Vent Cap: To prevent rain and pests from entering the duct.
- Speed Controller: To adjust the fan’s noise and power level.
Designing Your Layout: The Capture Zone Principle
Layout planning involves placing your welding bench where air can be naturally drawn away from you. This includes considering the “capture zone,” which is the small area near the arc where the suction is strong enough to grab fumes before they disperse. If your intake is three feet away from your torch, it might as well be in the next room.
The most effective layout uses “source capture.” This means the air is sucked up the moment it leaves the metal. In my shop, I use a movable intake hood. I’ve found that for a standard 400 CFM fan, the effective capture zone is about 8 to 10 inches. If I move the hood further away, the smoke begins to wander. When you are arranging your starter metal workshop layout, place your welding table near an exterior wall to keep the exhaust duct as short and straight as possible.
Another layout factor is the “make-up air” source. For every cubic foot of air you suck out of the garage, a cubic foot of fresh air has to come in. If you seal your garage completely and turn on a powerful fan, the fan will struggle and the air won’t move. I always crack a window or door on the opposite side of the shop from my exhaust. This creates a “cross-draft” that pushes fresh air past my back and carries the fumes away from my face into the extractor.
Effective Clearance and Positioning Benchmarks
- Intake Distance: 6 – 12 inches from the weld arc.
- Duct Radius: Avoid bends sharper than 90 degrees.
- Exhaust Height: At least 5 feet off the ground to prevent re-entry.
- Workbench Height: 34 – 38 inches for ergonomic comfort and visibility.
Building a Low-Cost Extraction Arm
An extraction arm is a movable duct that stays where you put it, allowing you to reposition the suction as you move around a project. For a budget shop, you don’t need a $1,000 industrial arm; you can build a functional version using a “stay-put” hose or a simple boom arm made from scrap wood or metal tubing. This is a project that actually helps you practice your fabrication skills while improving your shop.
In my second shop iteration, I built a boom arm using a 5-foot section of 1-inch square tubing. I mounted it to the wall with a simple hinge and used zip ties to secure a 6-inch flexible duct along its length. At the end of the duct, I attached a “reducer” (a funnel-shaped metal fitting) to act as the hood. This allowed me to swing the suction right over my welding table and push it out of the way when I was done.
The key to a DIY arm is the “hood” shape. A wide, flat hood captures air from a larger area than a plain round pipe. You can buy a “galvanized floor register” or a “range hood insert” at a home improvement store for under $20 and adapt it to your ducting. This simple addition significantly increases the efficiency of your fan by focusing the suction where it matters most.
Integrating Downdraft Surfaces into Your Workbench
A downdraft table uses a perforated surface to pull smoke downward, away from the operator’s face. For a budget shop, this can be a simple box built into a standard workbench connected to a high-volume blower or shop vacuum system. This is particularly effective for small parts or when you are doing a lot of grinding and sanding.
When I was refining my compact garage fabrication space, I realized that grinding dust was just as much of a problem as welding smoke. I modified a section of my steel table by drilling a grid of 1/2-inch holes in a 12×12 inch area. Underneath, I welded a sealed sheet-metal box with a 4-inch port. When I connect my extractor to that port, the sparks and fine dust are pulled straight down into the ducting.
The limitation of a downdraft setup is that it fights the natural tendency of hot welding smoke to rise. To make it work for welding, you need a much higher CFM than you would for a side-mounted hood. If you are on a strict budget, I recommend starting with an overhead or side-intake system first, as they are more “forgiving” of lower-powered fans.
Comparison: Side Intake vs. Downdraft
| Feature | Side/Overhead Intake | Downdraft Table |
|---|---|---|
| Best For | General welding, large parts | Grinding, small parts, plasma cutting |
| Airflow Efficiency | High (works with rising heat) | Moderate (fights rising heat) |
| Build Complexity | Low (mostly ducting) | High (requires table modification) |
| Cost | $150 – $300 | $300 – $500 |
Managing Power and Noise in a Residential Space
Adding fans increases the electrical load on your garage circuits. Most entry-level welders pull 15-20 amps, so running a high-powered exhaust fan on the same circuit can trip breakers, requiring a dedicated power strategy for your air management tools. This is a common rookie mistake that can lead to a lot of frustration during a project.
I always recommend mapping out your garage circuits before you start buying tools. Most modern 120V household circuits are rated for 15 or 20 amps. A 6-inch inline fan usually draws about 1 to 2 amps. While that sounds small, if your welder is already pushing the limit of the breaker, that extra 2 amps will trip it every time you strike an arc. If possible, run a dedicated extension cord from a different circuit (like the one for your kitchen or laundry room) to power your ventilation system.
Noise is another factor often overlooked. A high-speed fan in a small garage can reach 70-80 decibels. Over several hours, this causes “listener fatigue,” which leads to mistakes. Look for fans with “mixed-flow” designs, which are generally quieter than traditional centrifugal blowers. I also use rubber “vibration dampeners” or simple bungee cords to hang my fan from the ceiling joists. This prevents the vibration from echoing through the structure of the house.
Workshop Electrical Setup Checklist
- Identify Breakers: Label which outlets are on which 15A/20A circuits.
- Calculate Load: (Welder Amps + Fan Amps + Lights Amps) < Circuit Rating.
- Use Heavy-Gauge Cords: Use 12-gauge cords for any tool drawing over 10 amps.
- Test for Voltage Drop: Ensure your lights don’t dim excessively when the arc starts.
- Install a Power Strip: Use a high-quality strip with a built-in breaker for small accessories.
Testing and Maintaining Your Airflow System
A ventilation system is not a “set it and forget it” tool. Over time, the inside of your ducts will coat with fine metallic dust and soot, which increases friction and reduces airflow. Furthermore, if you use any kind of filter, it will eventually clog and strain your fan motor. Regular maintenance ensures your air stays clear and your equipment lasts.
To test your system, I recommend using a simple “smoke pencil” or even a stick of incense. Hold it near your welding table with the fan running and watch how the smoke moves. If the smoke lazily wanders around before being sucked in, your capture zone is too small or your fan is underpowered. You want to see a crisp, deliberate “pull” into the intake hood. I do this test once a month to make sure no leaks have developed in my ducting.
Cleaning is the less glamorous side of shop ownership. Every six months, I disconnect my flexible ducting and take it outside to shake out the accumulated dust. If you are using a permanent rigid pipe, you can tap on the sides while the fan is running to help move settled dust along. Keeping the fan blades clean is also vital; a thin layer of grime on the blades can reduce efficiency by up to 20% and cause the fan to become unbalanced and noisy.
Maintenance Schedule for Shop Ventilation
- Monthly: Visual inspection of duct connections and “smoke test” for suction.
- Quarterly: Clean the intake hood and check fan mounting hardware for tightness.
- Bi-Annually: Deep clean of fan blades and internal duct surfaces.
- Annually: Inspect exterior vent cap for obstructions (bird nests, lint, etc.).
Practical Steps to Get Started Today
Setting up your first shop is a journey of incremental improvements. You don’t need a perfect, lab-grade cleanroom on day one. You need a system that is better than nothing and that grows with your skills. Start by identifying your “primary welding zone” and measuring the distance to the nearest window or exterior wall. This measurement dictates how much ducting you need to buy.
Next, look at your budget and pick a fan that fits. If you can only afford a $60 fan right now, buy it, but plan to upgrade it in a year. Use the 30% rule for your safety and air management gear. Record your costs in a simple log so you can track your total investment. This data is incredibly helpful when you decide to upgrade or sell your equipment later.
Finally, don’t let the fear of a “non-professional” setup stop you from being safe. A $200 DIY extractor is infinitely better than a $0 “hold your breath” strategy. Focus on the fundamentals: get the intake close to the arc, keep the ducting short, and make sure you have fresh air coming in. If you do those three things, you will have a functional, capable metalworking area that you can enjoy for years to come.
Frequently Asked Questions
Can I just use a shop vacuum for welding fume extraction? While a shop vacuum has high suction, it has very low “volume” (CFM). It is designed to pull heavy debris through a small hose, not to move large amounts of air. Using a shop vac for fumes is usually ineffective because the capture zone is tiny, and the vacuum motor is extremely loud and not rated for continuous use.
How far should my exhaust vent be from my intake window? You should aim for at least 10 feet of separation between where the dirty air leaves the shop and where the fresh air enters. If they are too close, you will simply pull the fumes you just exhausted back into the workshop, creating a loop of contaminated air.
Do I need a filter in my DIY setup? If you are exhausting directly outside in a residential area, a basic spark-arresting screen is usually enough. However, if you are worried about staining your siding or if you have close neighbors, an inline HEPA filter can be added. Just be aware that filters significantly increase static pressure, so you will need a more powerful fan.
What is the best duct material for a budget shop? For most beginners, 6-inch semi-rigid aluminum ducting is the best balance. It is more durable than thin foil “dryer” venting but cheaper and easier to install than professional galvanized steel pipe. It holds its shape well, which helps maintain airflow.
Can I vent my welding fumes into my attic or crawlspace? No. You should always vent directly to the outside. Venting into an attic or crawlspace allows metallic dust and soot to accumulate in your home’s structure, which can create a fire hazard and lead to long-term air quality issues inside the living areas of your house.
How do I know if my fan is powerful enough? A good rule of thumb is the “clear air” test. After a one-minute weld, the visible smoke in your immediate area should be gone within 10 to 15 seconds. If the haze lingers, you either need a higher CFM fan or you need to move your intake closer to the work.
Does the type of welding change my ventilation needs? Yes. Stick welding (SMAW) and Flux-Core welding (FCAW) produce significantly more smoke and fumes than MIG (GMAW) or TIG (GTAW) welding. If you plan on doing a lot of Flux-Core or Stick welding, you should aim for the higher end of the recommended CFM range.
Is it safe to use PVC pipe for my extraction ducts? PVC is generally discouraged for welding extraction because sparks can melt or ignite the plastic. Additionally, PVC can build up a static charge that attracts metallic dust, potentially leading to a flash fire inside the duct. Stick to metal ducting whenever possible.
How can I reduce the noise of my extraction fan? The best way to reduce noise is to mount the fan as close to the exit point as possible and use insulated ducting or “mufflers” specifically designed for inline fans. Hanging the fan with rubber straps instead of bolting it directly to a wall also prevents the “drum effect” of the wall vibrating.
What should I do if I can’t cut a hole in my garage wall? If you are renting or can’t modify the structure, you can build a “window insert.” Cut a piece of plywood to fit your window opening, cut a hole in the plywood for your duct, and mount your vent cap there. This allows you to have a proper exhaust system that can be removed in minutes.
(This article was written by one of our staff writers, Michael Thompson. Visit our Meet the Team page to learn more about the author and their expertise.)